Film Color vs Game Color
Learning about rendering involves a lot of test renders and a good application for organizing and comparing them. I am using DaVinci Resolve, which I will also use to edit and color grade the final movie.
When moving assets between applications, proper color management will ensure that a display in one application will match the display in any other application throughout the workflow, all the way to the final device that presents the finished work. At least, that is the idea.
My background is in post-production, so I have a decent working knowledge of DaVinci Resolve, and enough knowledge of color management to correctly import footage, alter it, and export it. But, moving between Unreal Engine, other 3D applications, and Resolve is more complex. So, I had to wade back into the swamp of contradictory, confusing information found on the internet about color management.
This 7-minute video explains some of the background on color management and why these conversions are required. The video focuses on Substance Painter, but the core ideas can be broadly applied, including with Unreal Engine. It also introduces the ACES framework and ACEScg. I really recommend watching this.
There is also a description of the problem in The Visual Effects Guide to DaVinci Resolve 18:
"Color management is a critical part of the visual effects workflow, and the requirements for compositing are slightly different than editing or color grading."
"Digital film cameras apply a very pronounced gamma curve to clips to achieve a higher dynamic range. To a much lesser extent, every HD video clip, Photoshop document, or web graphic has a nonlinear gamma value based on either an sRGB or Rec 709 2.4 color profile.
The problem with using nonlinear gamma curves is that compositing operations expect images to have linear gamma, not modified gamma values. Why? Because the math used in almost every compositing operation works more predictably assuming images have linear gamma."
They refer to "compositing," but the same applies to VFX in general, and Unreal Engine. These applications use a linear gamma curve. However, your monitor and your editing or color grading software (generally) use a nonlinear gamma curve.
The DaVinci Resolve guide refers to "linear gamma" and "nonlinear gamma," but many guides will refer to linear vs. gamma, taking "gamma" to always mean non-linear. For example, this guide on color in Unreal Engine refers to color space and color encoding, and says that color encoding can be linear or gamma. The Substance Painter video I linked to above refers to color space and a "transfer function," or gamma curve.
I'm not sure what terminology is correct. However, when setting up color management in Resolve, there is the option to set color space and gamma separately, and the "Linear" option is found in the gamma dropdown.
I bring this up for an additional reason, which is to explain that most applications don't refer to color space and gamma separately, they simply refer to color space. This is also true in Resolve, assuming "Use separate color space and gamma" is unselected. Any color space you choose in this mode will include a gamma curve.
For example, there is the color space option "ACEScg." If you select this, and then select the option to "Use separate color space and gamma," ACEScg will split into two dropdowns: ACES (AP1) and Linear. This tells us that the color space for ACEScg is technically ACES AP1, and the gamma curve is linear.

This option is useful for getting more information about a certain color space, but I normally leave it unchecked, and just select ACEScg.
In general, the three key settings for color management are input color space, working color space, and output color space. Throughout the digital content creation pipeline, any application dealing with color information will need to know:
- Input color space: what is the color space of the assets brought into the software?
- Working color space: when I alter an asset in the software, what color space is used for the math of that operation?
- Output color space: when I export an asset, or display it on a monitor, what color space do I use?
On this project, I am exporting image sequences from Unreal Engine and viewing them in Resolve. So, I need to tell UE what output color space to use for the exports and tell Resolve to use that as the input color space. Since I am also color grading, I need to tell Resolve what working color space to use. The working color space in Resolve is referred to as the "timeline color space." While we're at it, let's also tell UE what output color space to use for my monitors, so the viewports in UE and Resolve will be consistent.
Out of Unreal Engine...
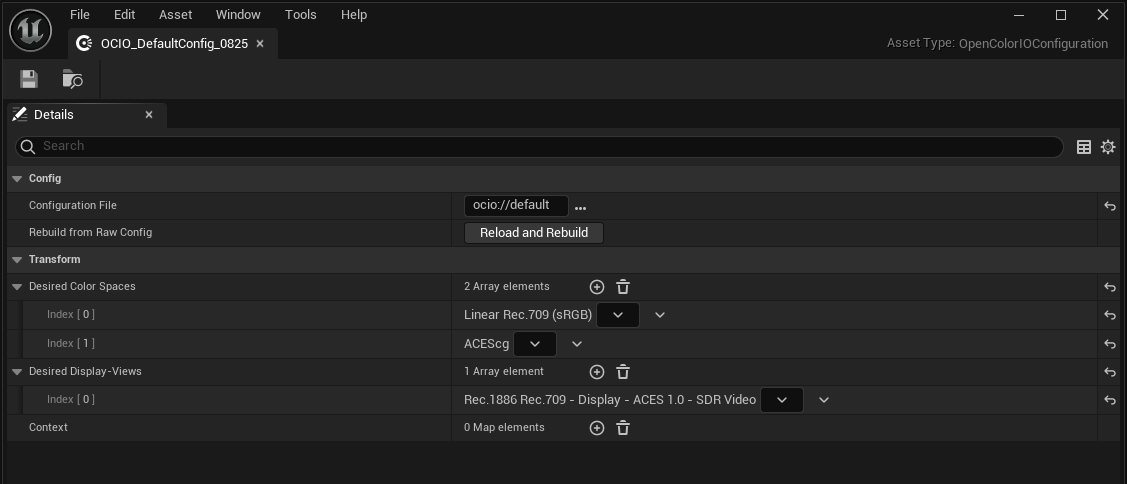
In Unreal Engine, this is all done in OpenColorIO Configuration assets.
To sum it up, inside the OCIO Configuration asset, you will specify some "Desired Color Spaces" and "Desired Display-Views." You can add any number you wish from the options available. The color spaces you add to the OCIO Config asset will be the color spaces you can convert between whenever you use this particular asset.
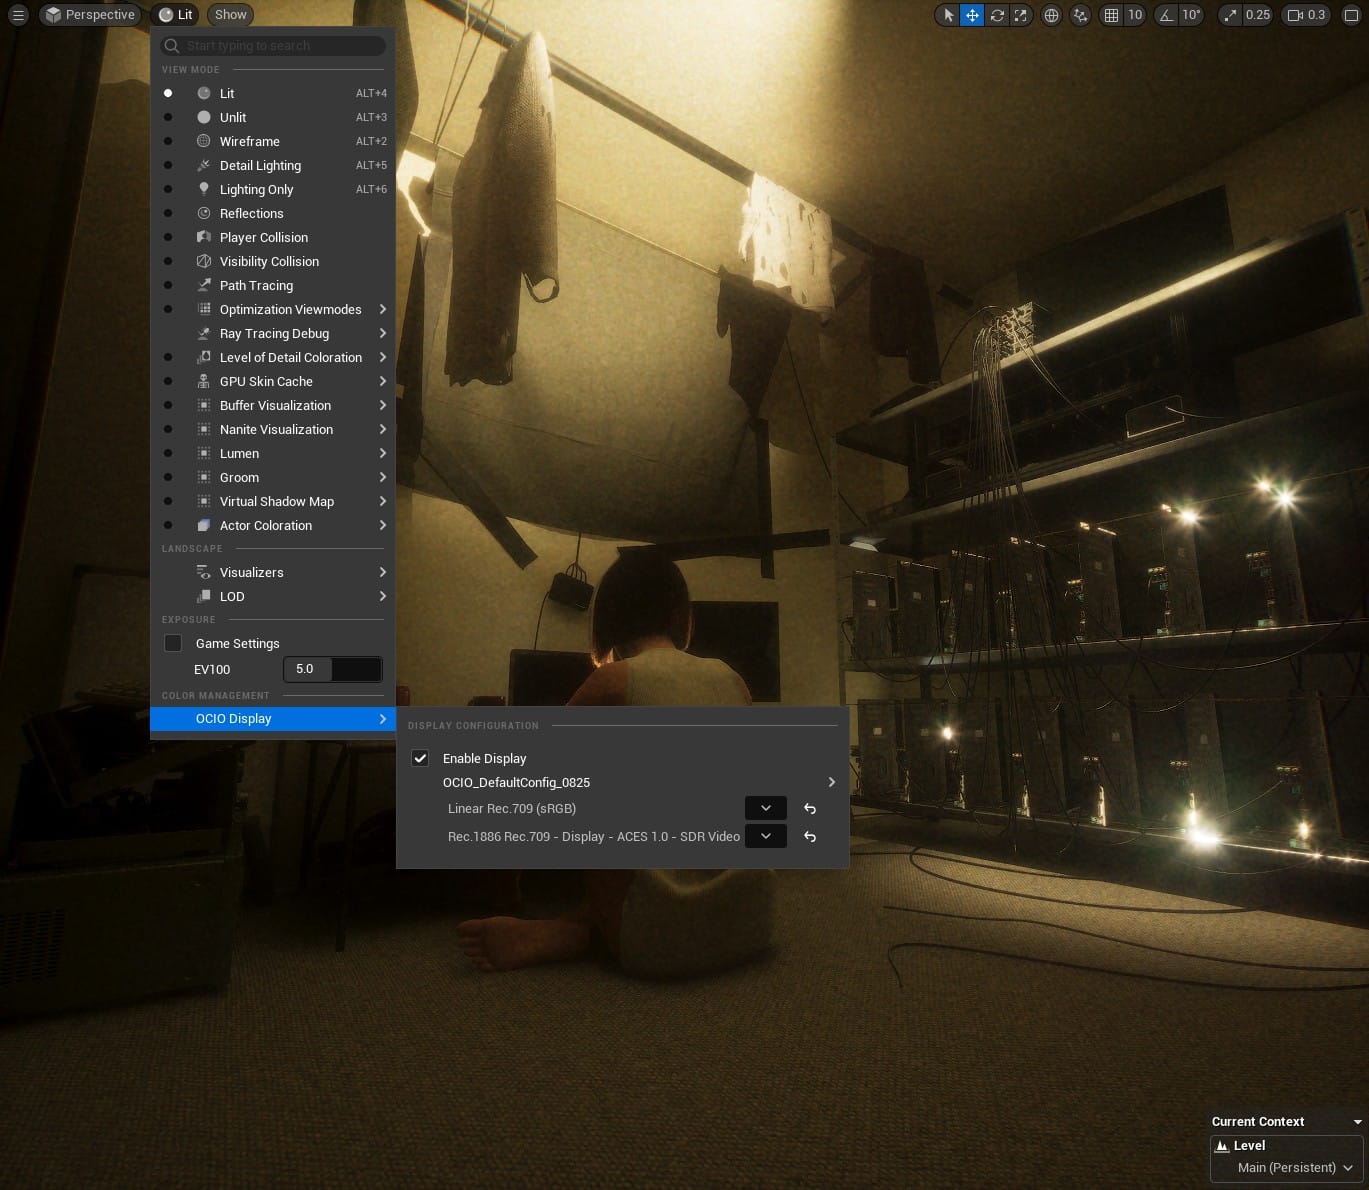
The steps for using this config asset in your viewport are simple:
- In your viewport, click the View Mode dropdown (where you select Lit, Unlit, etc.).
- Go down to OCIO Display.
- Check Enable Display.
- Select your OCIO Configuration asset.
- In the first dropdown, select your working color space.
- In the second dropdown, select your display color space.
Using your OCIO Config asset with the Movie Render Queue is essentially the same process. Movie Render Queue also has a menu for adding OCIO Config assets. The key difference is that you convert from your working color space to your export color space, instead of your display color space.
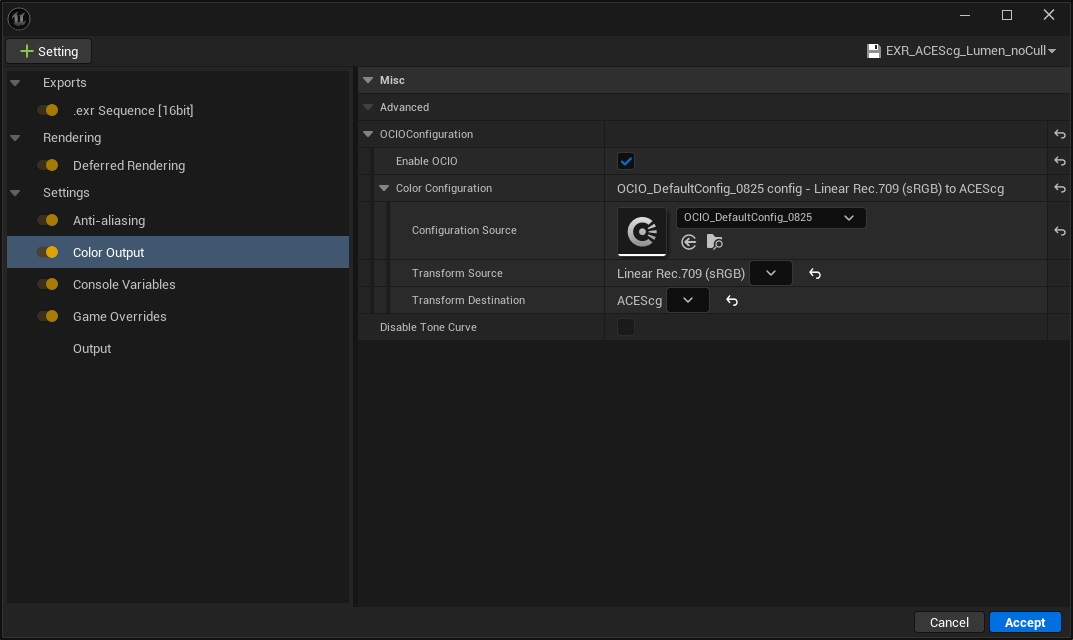
My specific color space settings might not apply to your project (and might change over time), so I won't bother to share each one. But, to summarize:
The default working color space in Unreal Engine is linear sRGB/Rec 709. When setting up an OCIO Config asset, you will generally be converting from this color space.
For the display view conversion, assuming you are using a standard computer monitor, you will again use sRGB or Rec 709, but these are the "Display" versions, which means they have nonlinear gamma.
The output color space will generally be ACEScg.
There is the option to change the working color space in Unreal Engine. So, you could set it to ACEScg, and then you wouldn't have to convert when exporting. But, working in ACEScg has other implications, like how textures are imported by UE, so I haven't messed with this option yet.
...and Into Resolve
In DaVinci Resolve, there are two ways to color manage: in the project settings, or in the nodes you apply on the color grading page.
Many people use nodes, because it allows more flexibility in how you convert between color spaces, and when. This is a video by Cullen Kelly that gives a primer on color management in Resolve, and also explains how to color manage with nodes.
When I finally start color grading this movie for the final output, I will probably use nodes as well. But, for now, since I am mostly using Resolve to organize and view lots of test renders, I set up color management in the project settings. One benefit of this method is that the color transforms are applied project-wide, including in the media import window, so I can quickly import an image sequence and view it in the proper color space.
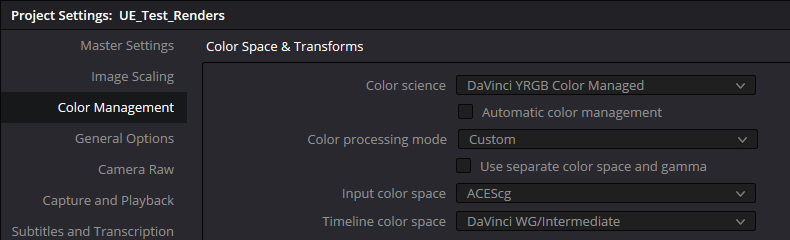
In the project settings in Resolve, under Color Management > Color Space & Transforms, you can choose a Color Science. This is the framework that will be used for converting between your input, working (timeline), and output color spaces. Since the UE output color space, and therefore your Resolve import color space, is generally going to be ACEScg, most guides for UE -> Resolve color management will recommend using the ACES color science.
That works, but you can also use DaVinci YRGB Color Managed. I use it because I am planning to color grade in DaVinci Wide Gamut. Why? Because I learned Resolve first, and I learned to use DaVinci WG/Intermediate. I think either option is fine.