Animating (Meta)Humans
My goal is to make realistic-looking humans in Unreal Engine, and animation is crucial. When it comes to avoiding the uncanny valley, I think movement is the least forgiving.
Humans have deep-seated expectations for how human bodies and faces move, and we quickly pick up on abnormalities. Since these intuitions about human movement are subconscious, we can easily see when an animation is wrong, but creating one from scratch is difficult. The best option is to simply copy actual human movement.
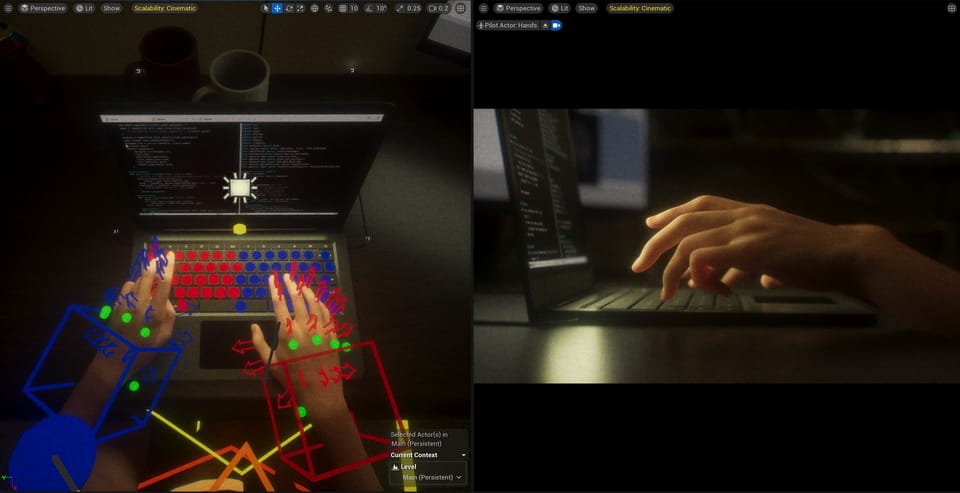
I don't have any motion capture gear, so I have been animating using reference videos and manual key framing. I am also experimenting with MetaHuman Animator (MHA).
My basic workflow is to shoot a reference video on my iPhone, from roughly the same angle as the shot I envision for the movie, and import that into Unreal Engine. Then, I add the reference video to Sequencer so that it plays in sync with my animation. This process is slightly complicated, so I will cover it below.
But first... for information on the basics of Sequencer and animation, the UE 5 Beginner Tutorial from Bad Decisions Studio has two videos:
- Unreal Engine 5 Beginner Tutorial Part 17: Animation & Sequencer Basics
- Unreal Engine 5 Beginner Tutorial Part 18: Animation & Sequencer Advanced
When a MetaHuman is added to a Level Sequence, the control rigs for the face and body are immediately usable. On the body control rig, there are FK - IK switches for the arms, legs, spine and neck. This video from Doodley has an explanation of FK vs IK animation and when each are useful:
The rigs, particularly the face rig, are intricate and take time to get used to. The only way is to dive in, try to pose or animate your MetaHuman, and get a feel for it.
Originally, my vision for "virtual filmmaking" was that I would animate an entire scene and then shoot that scene from whatever camera angle I wanted. But, because keyframing these animations is so time consuming, I changed tack to animating only for a particular shot. So far, it seems more efficient to animate only what is visible through the lens, rather than animating an entire human for an entire scene and picking my shots afterwards.
Of course, this method requires that I have all of my shots planned. For this project, the storyboards were finished a while ago, when I was still planning to shoot a traditional live-action movie. So, I pick my reference videos directly from the storyboards.
I am a totally amateur animator, so it is hard to say I have any particular technique. I just try to make my animation look like the reference video.
Reference Videos in Unreal Engine
As for setting up a video reference in Sequencer, here is a brief guide from the Unreal Engine YouTube:
This is a viable method, but I had an issue with it. The guide suggests dragging your reference video file directly into Unreal Engine, and that any media type should work. While this is technically possible, I had problems with playing certain media types in Sequencer. I don't think all video codecs will play smoothly in UE. I have found that image sequences always play smoothly, so I recommend this guide from Zero To Animator:
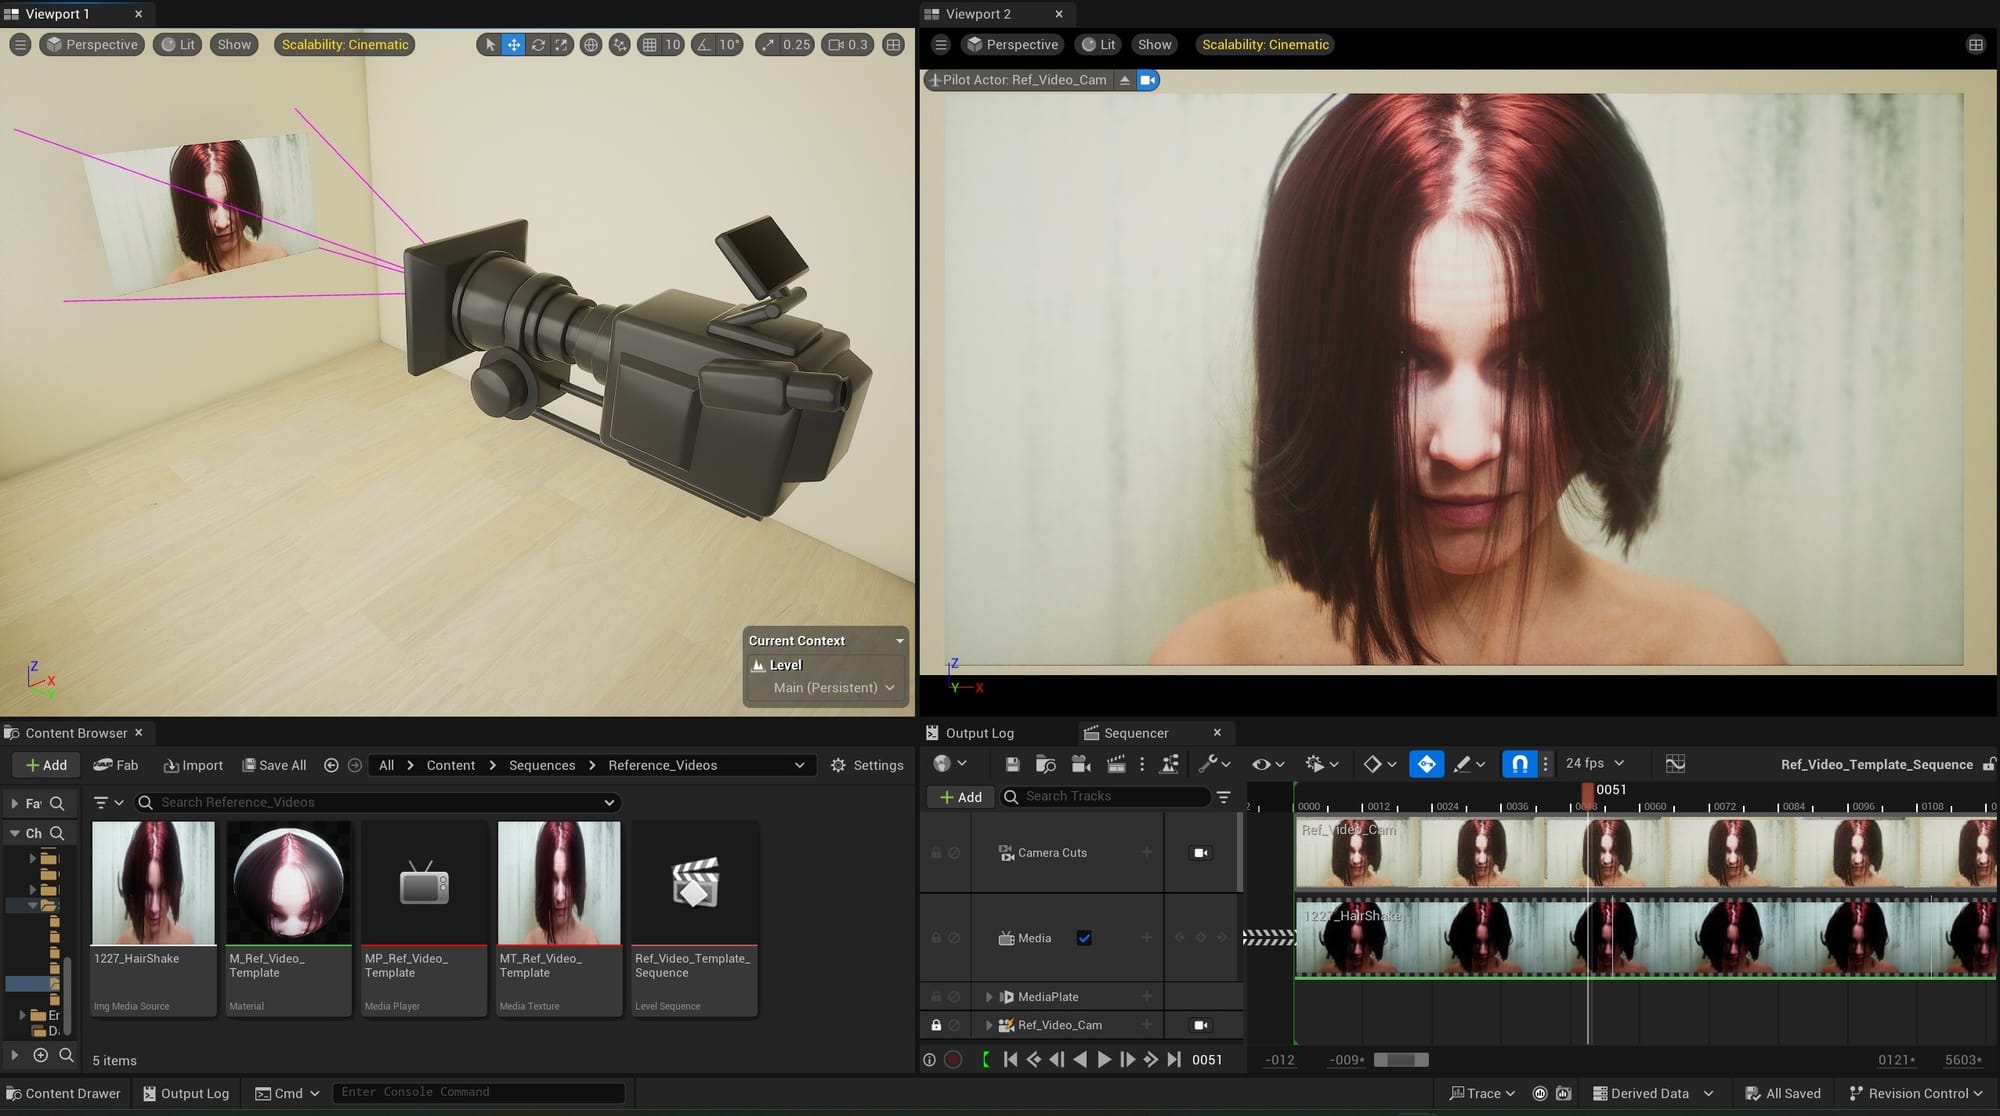
Watch this video for the full explanation, but here is a high-level summary of what to do. I would recommend creating a template sequence. Then, you can duplicate this sequence any time you do a new animation, and simply swap out the reference video.
First, you will need an image sequence for your reference video. In my case, I recorded a video on my iPhone and used DaVinci Resolve to create a JPEG image sequence.
The Zero to Animator video above covers the following:
- Adding an image sequence to your UE project.
- Creating an Img Media Source asset for that image sequence.
- Creating the additional assets necessary to display the Img Media Source on a "screen."
- Adding that media playback to a Level Sequence.
There is one thing they do not cover in this video. Around the 5:15 mark, they right click the media track in Sequencer and go to Properties. Then, they assign a Media Texture. Above Media Texture is another setting called Media Source. If you switch this Media Source to a different image sequence, you can immediately view that image sequence, without needing to redo all the steps.
So, after following the above video to create your template sequence, the steps for setting up any new reference video would be:
- Add a new image sequence to your project and create the Img Media Source asset.
- Duplicate the template sequence.
- In the new sequence, right click the Media track, go to Properties, and change the Media Source to the new Img Media Source asset.
From there, you may have to drag and adjust the length of the Media track in your sequence, depending on the length of your reference video.
This is the best method I have found, so far, for quickly adding new reference videos to UE and setting them up for animating.
MetaHuman Animator
For MetaHuman face animations, MetaHuman Animator is a great tool. Using an iPhone, you can capture a human performance and translate it into MetaHuman animation data. Here is the guide from the Unreal Engine YouTube:
This video is all you need for getting started with MHA. But, I had one issue that is not covered by this video: blending the neck and body movements captured by MHA with the body rig's movements.
MetaHuman Animator generates neck and body movement data in addition to the facial-feature data. But, with MetaHumans, the neck and body are controlled by the body rig. To use the MHA-generated neck and body movement along with the face animation, the data from MHA needs to be baked onto the face control rig and the body control rig.
This causes a problem. If your MetaHuman body rig already has animation keyframes, they will be overwritten when you bake the MHA-animation. Even if you are planning to animate the body after baking the MHA animation, you will still need a way to blend these two animations together.
There are a variety of guides for solving this problem, but the simplest solution I have found involves using additive animation layers. This is covered in a video by Goblination:
Here is an overview of what is going on in this tutorial. First, they export two Animation Sequences from MetaHuman Animator. One Animation Sequence includes head movement and one does not.
They use two MetaHumans, which they call "From" and "To," but I will simply call A and B. MetaHuman A could be a fresh MetaHuman with no animation, or a MetaHuman with body animation that we want to blend with the MHA animation. MetaHuman B is a duplicate of MetaHuman A.
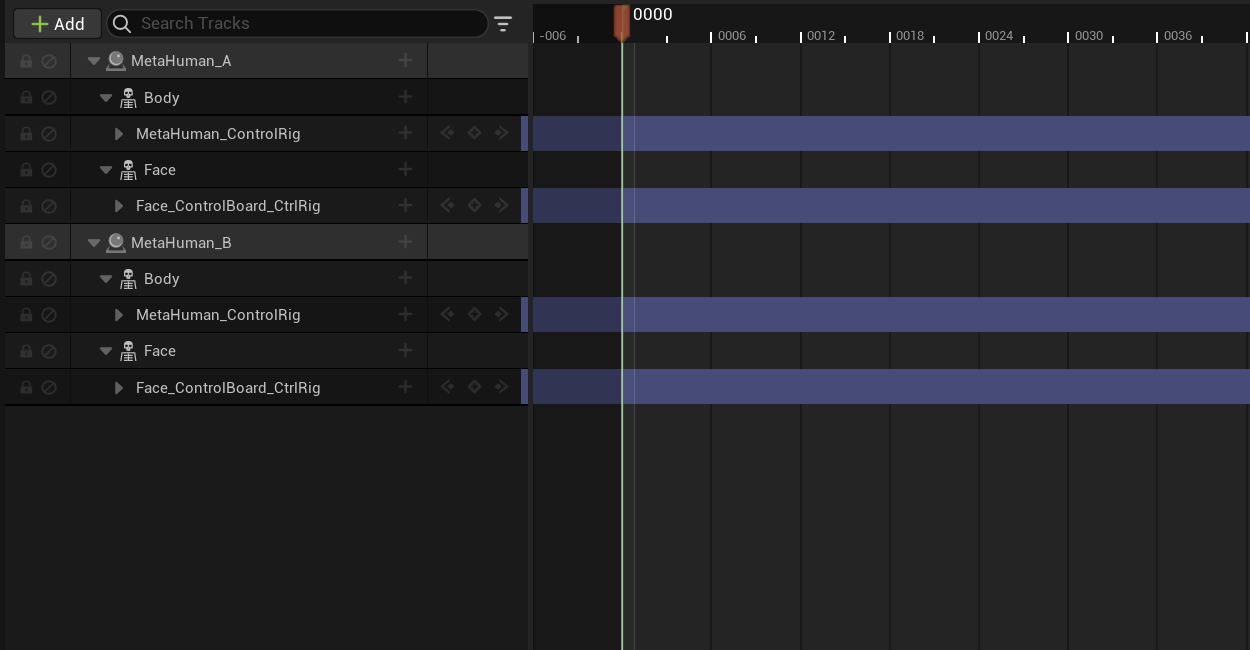
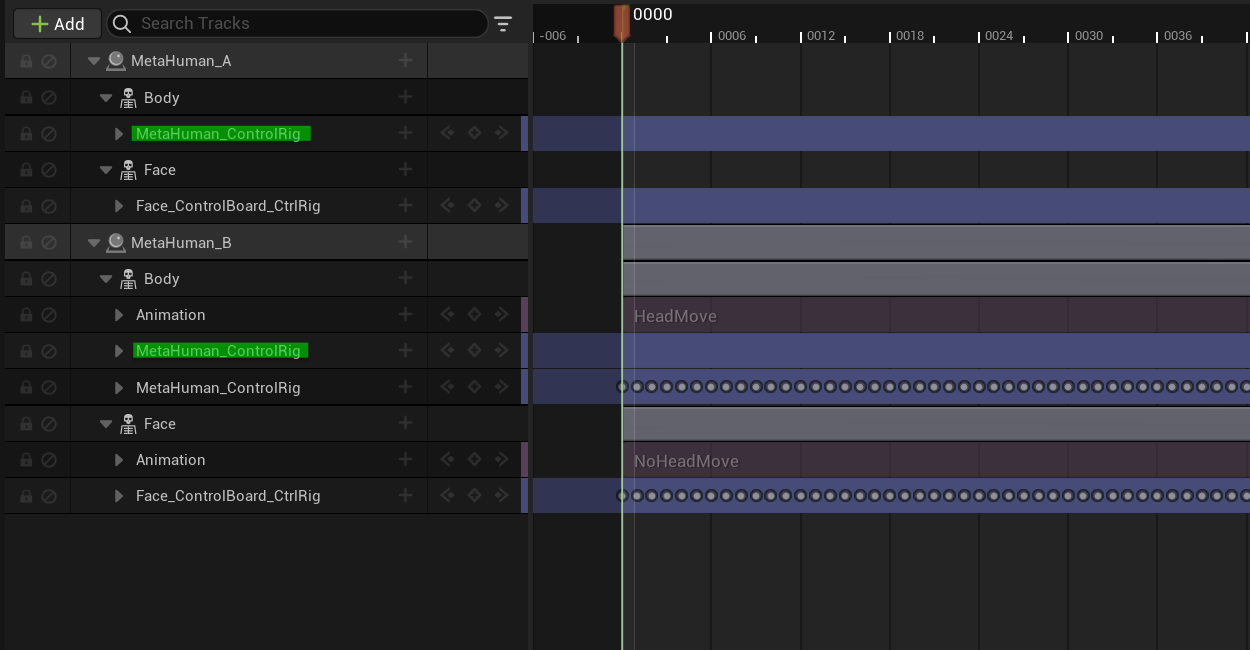
On MetaHuman B, they bake the Animation Sequence with no head movement to the face rig, and the Animation Sequence with head movement to the body rig. Then, they copy the body rig from MetaHuman A and paste it onto MetaHuman B. MetaHuman B now has two body control rigs: one with the MHA animation baked onto it, and the one copied from MetaHuman A.
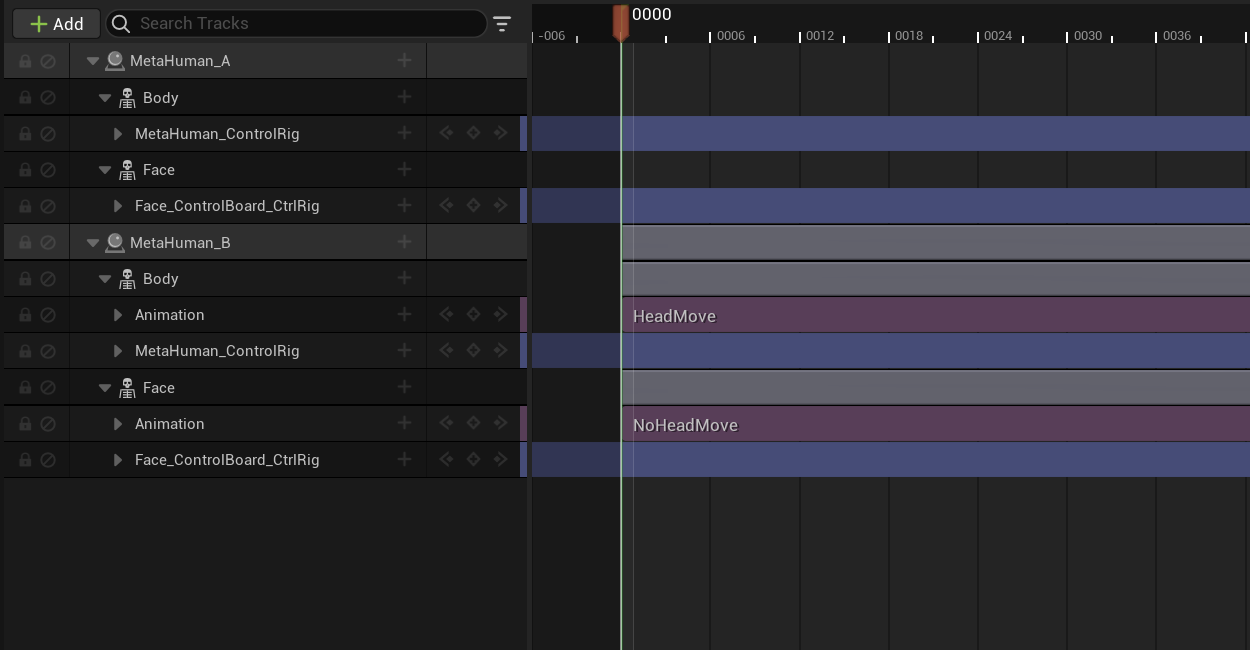
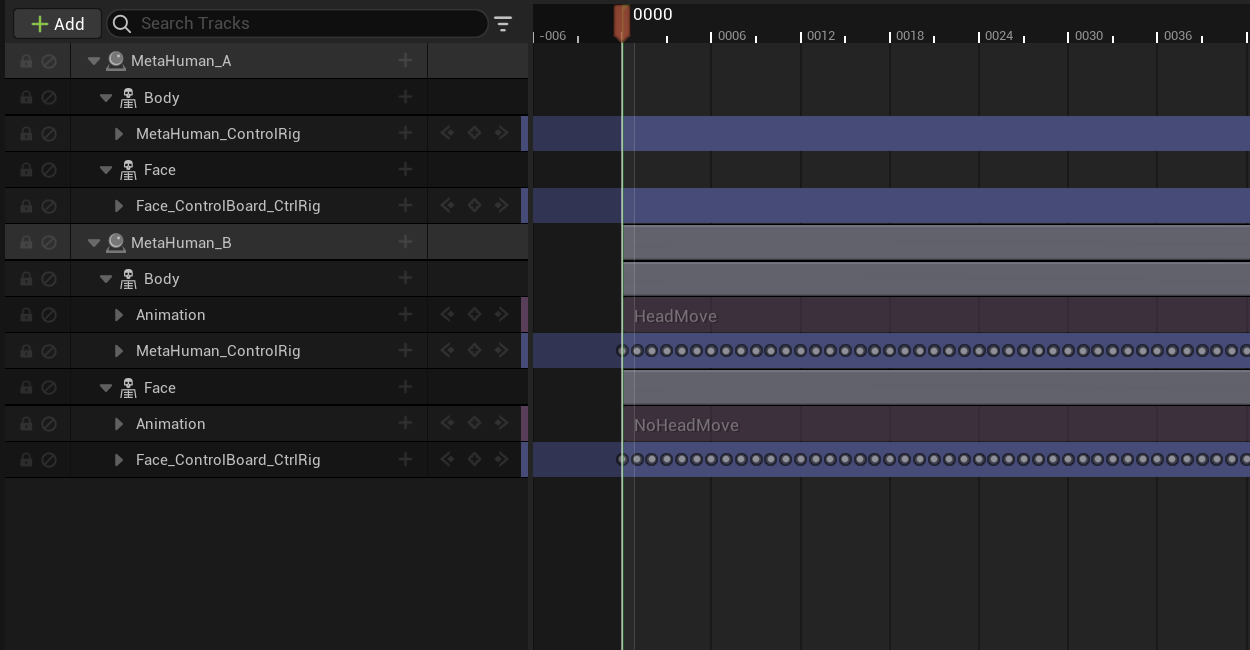
Two Animation Sequences added, and baked.
The goal is to take only the necessary neck and body movement from the baked body rig and add it to the body rig copied from MetaHuman A. They do this by adding an additive layer to the body rig copied from MetaHuman A. Then, they copy the neck and body keyframes from the baked body rig and paste them into the additive layer.
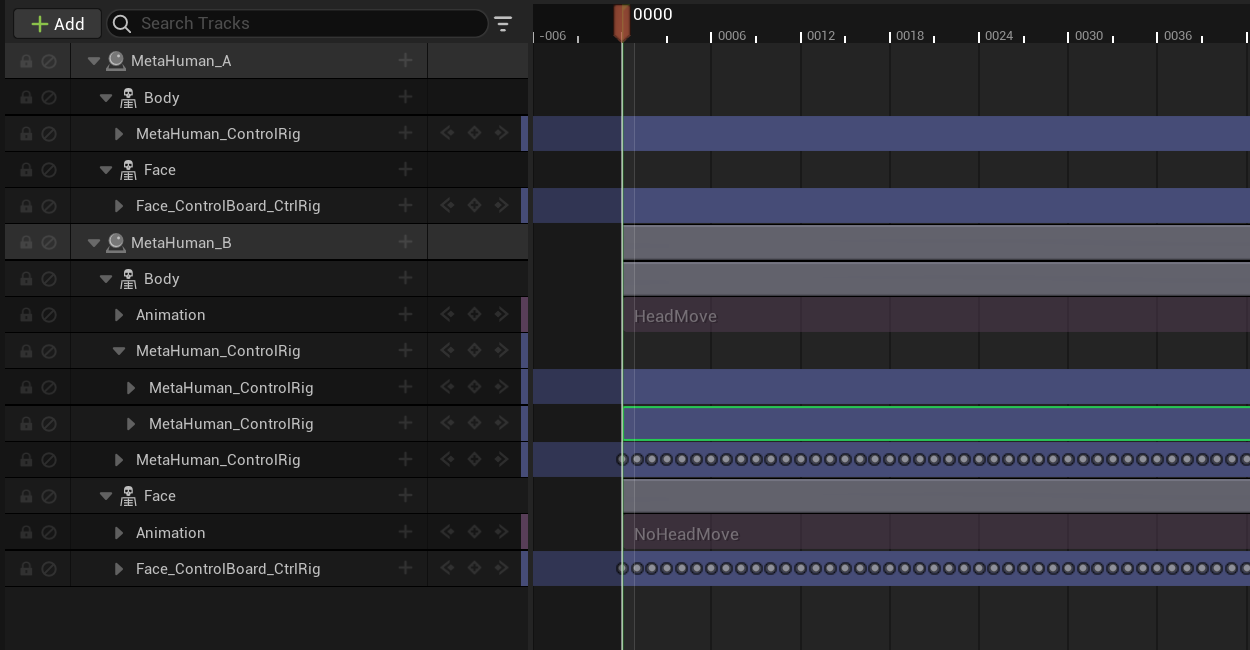
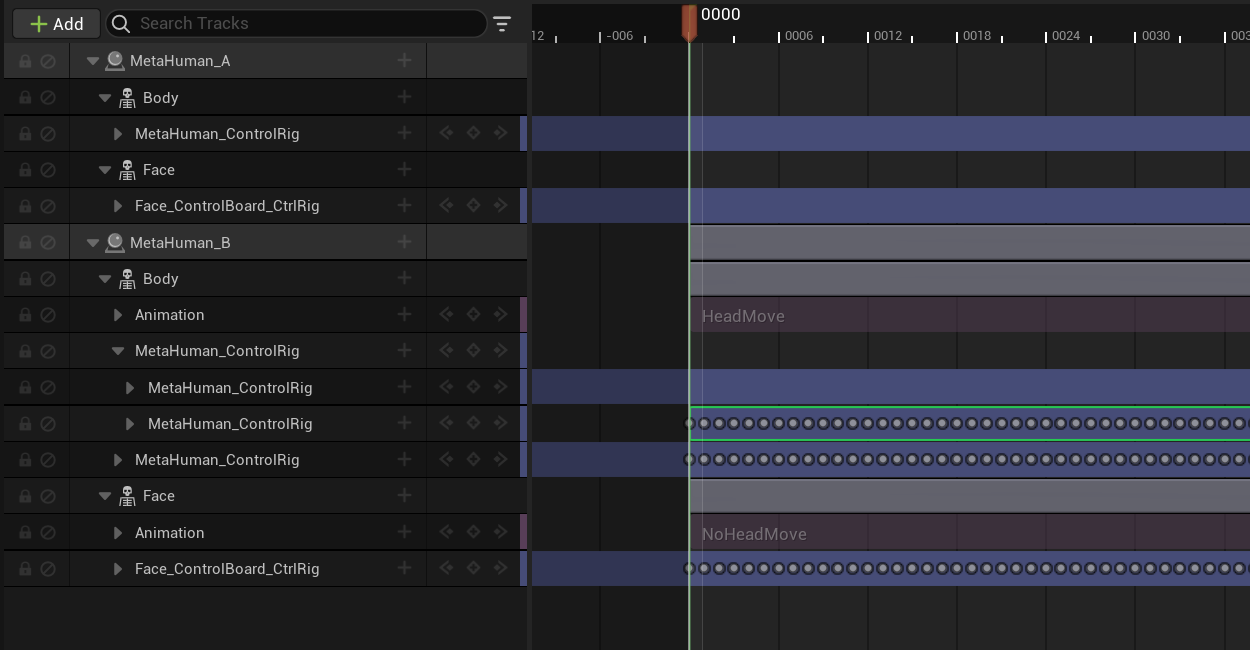
Additive layer on the copied body rig. Then, key frames from the baked body rig copied in.
MetaHuman B now has all the body animation from MetaHuman A, plus the neck and body movement captured by MHA blended into it.
MetaHuman Animator works best if the MetaHuman is modeled to match the actor doing the performance. In my case, I am the actor and neither of my movie's characters resemble me. So, the animations I get out of MHA are not great. Generally, I end up starting from scratch and using a reference video.
Still, MHA is an impressive tool and certainly worth learning. If I had better capture technology available to me, I would be investing more time into perfecting a mocap workflow.
Here are examples of animations I have done so far, all with reference videos and manual keyframing. I did these for practice, and they are unrelated to the movie project:
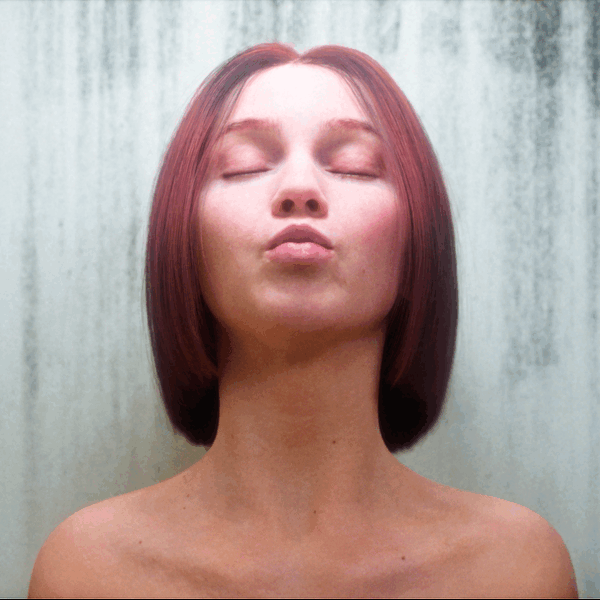
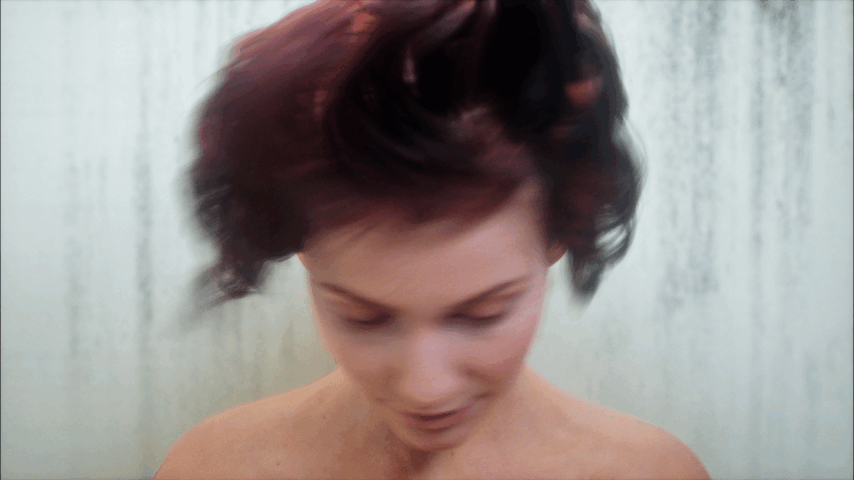

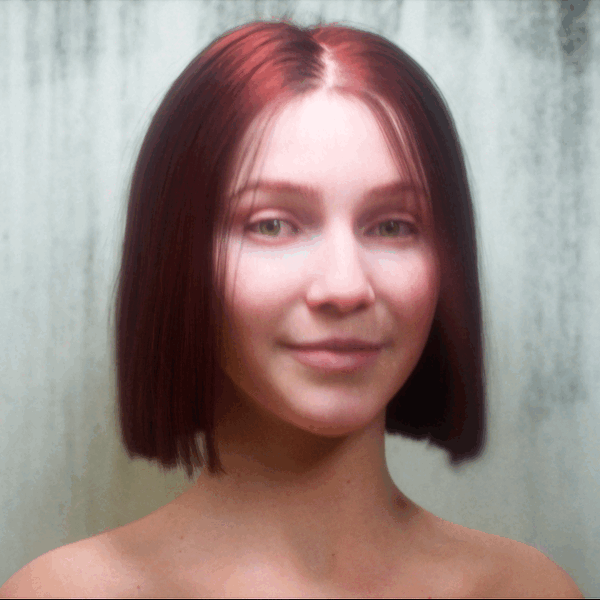
Even these short clips took me a considerable amount of time. I still have tons to learn. My only advice would be to keep it simple. Try to achieve your desired result by adjusting as few controls as possible. If the animation looks off, first see if you can fix it by reducing keyframes, rather than adding more tweaks.
Human motion is complex, and I am still wrapping my head around it. I have noticed that there are subtle movements that might be imperceptible frame-to-frame, but are noticeable when jumping 5 or 10 frames at a time. That is worth keeping in mind, when you are stepping through your reference video.
Also: the hair in those clips is not animated at all. The hair was simulated by Unreal Engine. The groom physics required lots of experimentation, which is another story...