Virtual Exposure
When I started setting up cameras and lights in Unreal Engine, my main question was, how does exposure work? How does it work in the viewport I use when editing my scene, and how does it work in the actual camera view I use for the final render?
As far as the basics of lighting in Unreal Engine, I found this guide by Luc Delamare helpful:
The Bad Decisions Studio UE 5 Beginner Tutorial also has a chapter on lighting:
This tutorial from Epic Games goes more in depth with post process volumes (PPVs):
I used Unreal Engine to do some rudimentary previs for this movie, so I knew that UE's cameras could be configured to mimic real-world camera properties, like sensor size, focal length, aperture, etc. These settings made sense to me, but the light intensity settings did not. It's easy enough to grab the sliders and feel your way to a good look, but I want my art direction to fit into some kind of comprehensible framework. So, the plan was to make UE's light and exposure settings match physical reality as closely as possible. Setting this up involved learning the broad strokes of how Unreal Engine calculates the brightness of the pixels it renders. More on that down the page.
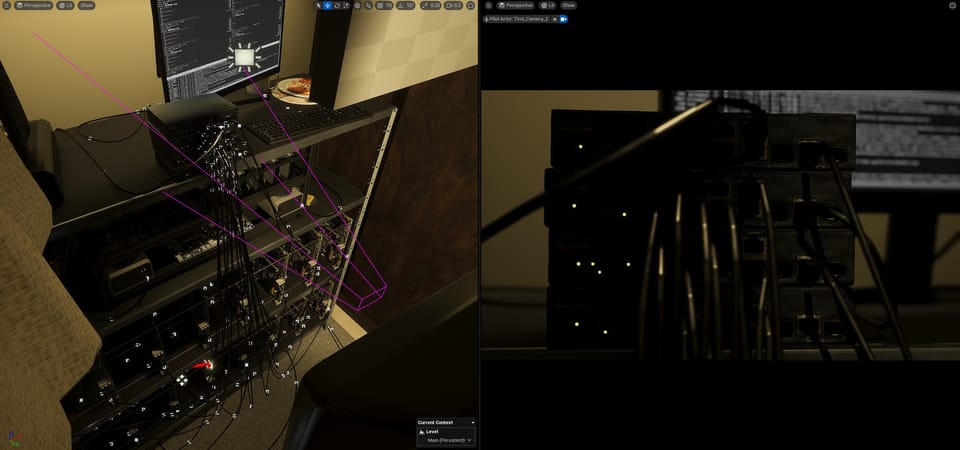
First, I wanted to create two viewing setups: a neutral, working setup for editing the scene and animating, and the stylized camera setup for renders, with specific exposure values and camera effects. To set this up, I had to dig into how project settings, PPV settings, and camera settings interact in Unreal Engine.
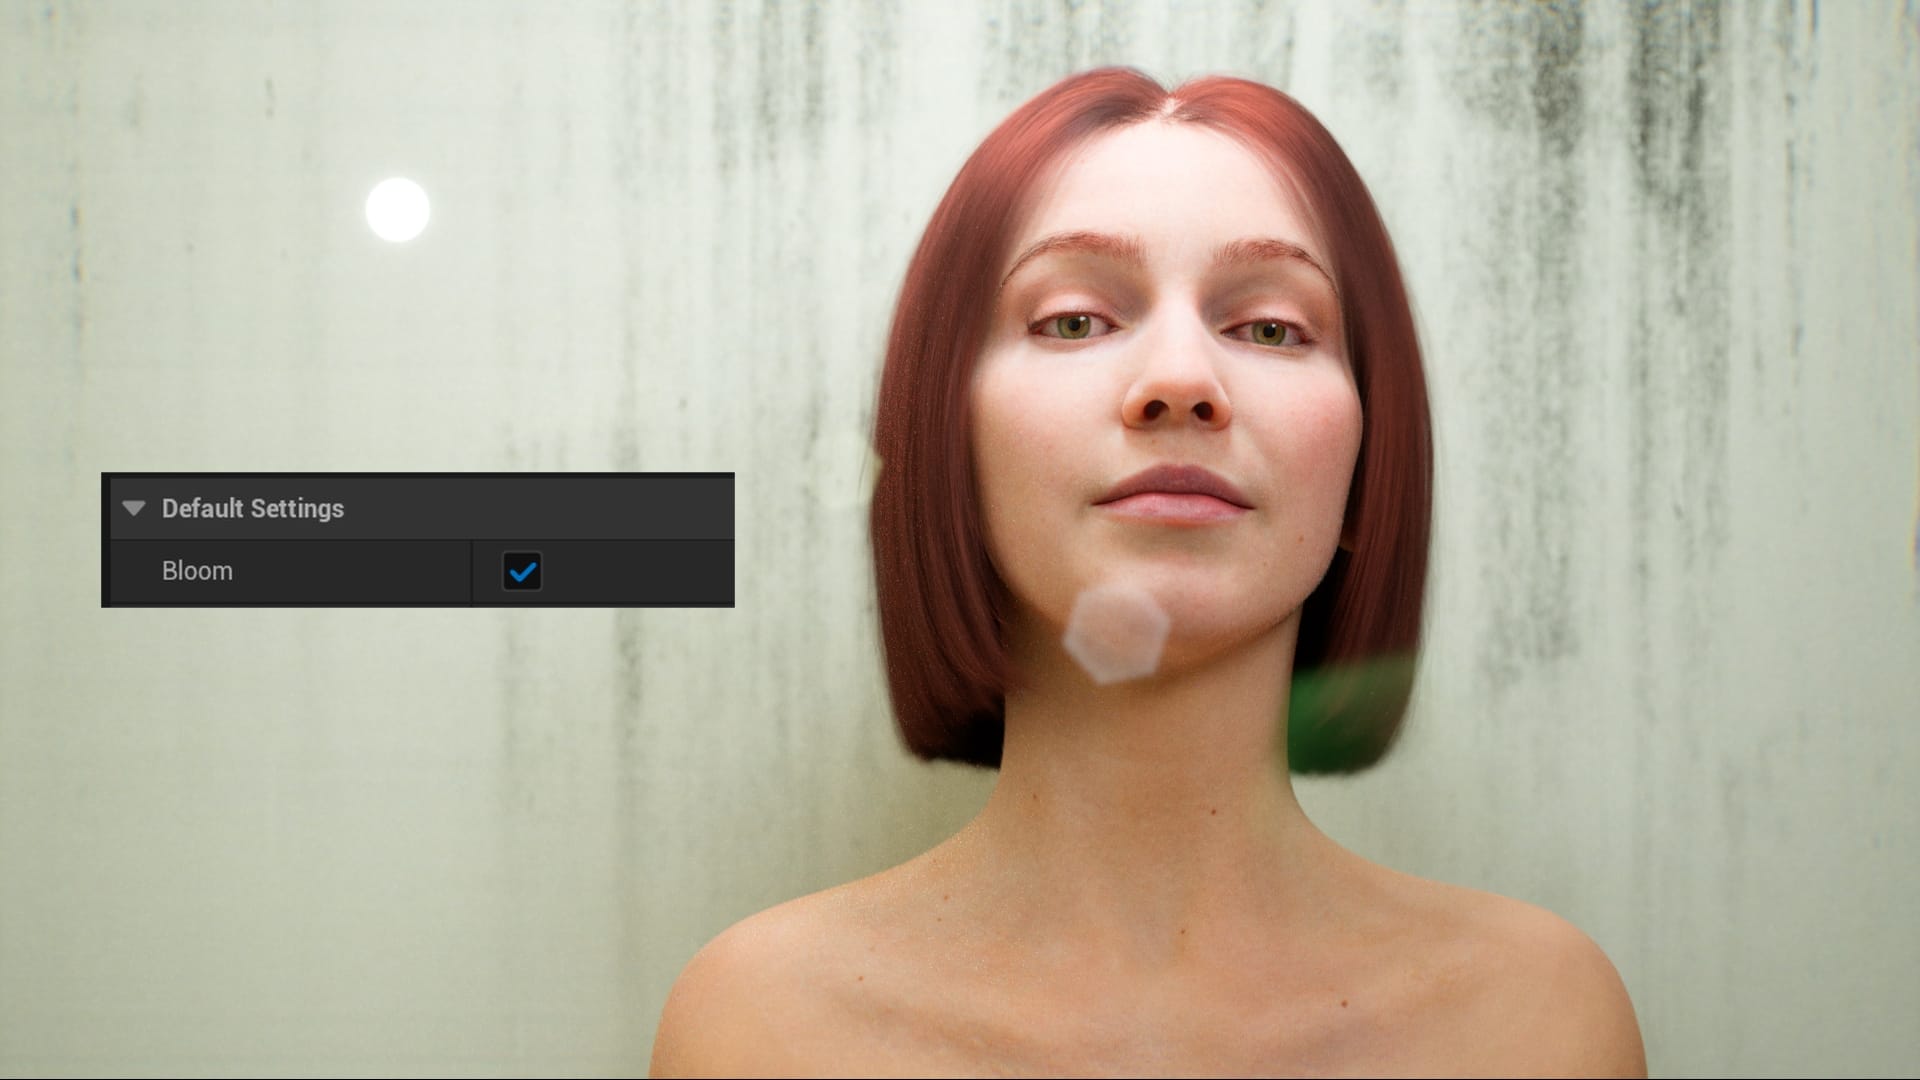
The simple hierarchy is that project settings get overwritten by PPV settings, which get overwritten by camera settings. For example, if I turn on Bloom in the project settings, my viewport will have a bloom effect. If I then place a PPV and set its bloom intensity setting to 0, the effect will disappear. If I then place a camera, set the viewport to the camera's view, and set the camera's bloom intensity to 1 (or any positive number), the effect will reappear.
You can place multiple PPVs in a scene, and they will overwrite each other based on their Priority setting. PPVs set to a higher priority number will overwrite PPVs with a lower priority number. But, regardless of their priority setting, PPVs will always overwrite project settings and will always be overwritten by the settings of the camera you are using to view your scene.
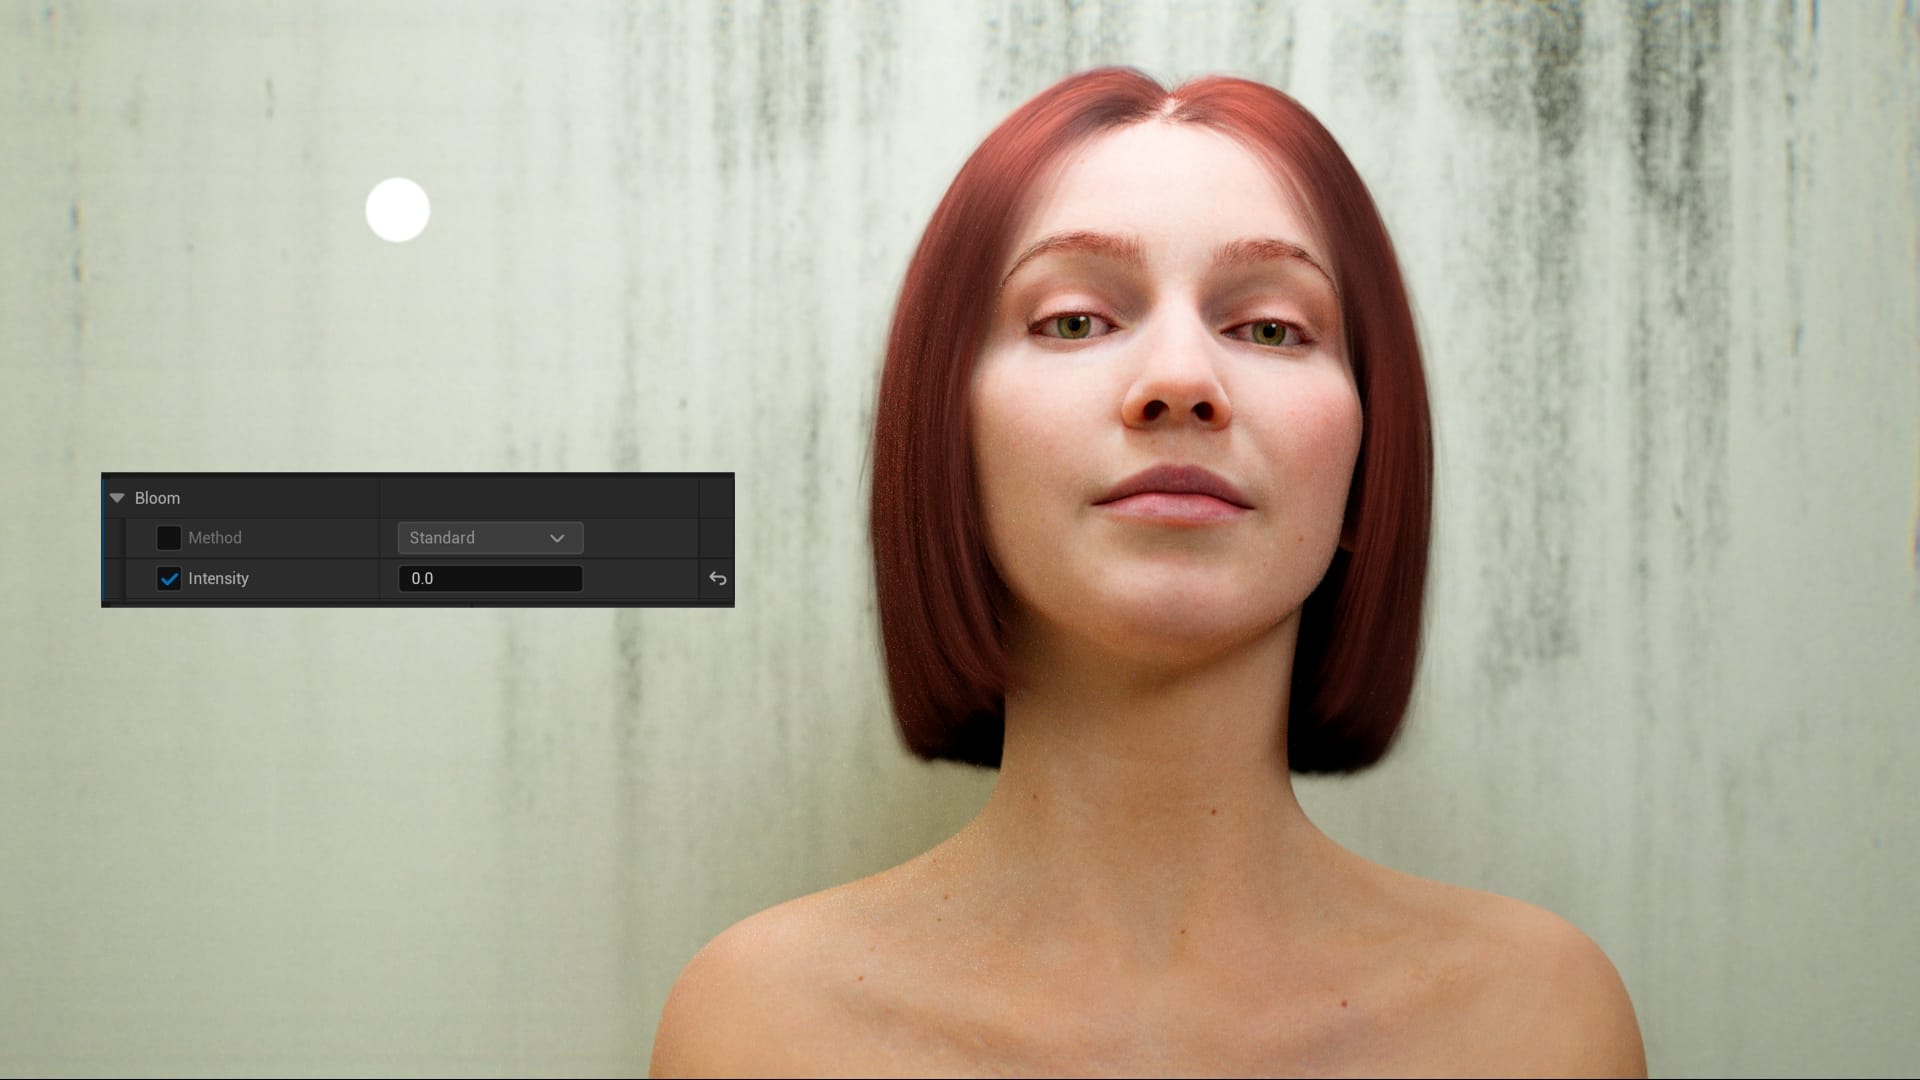
One key factor is that, in order for a PPV or camera setting to overwrite a lower-priority setting, the setting itself needs to be activated. To use the bloom example above, after enabling Bloom in the project settings, I activated the bloom Intensity setting in a PPV, and set the intensity to 0, removing the effect. Then, if I simply deactivate the Intensity setting in the PPV, the bloom effect from the project settings returns, even though the PPV still has bloom intensity set to 0.

This means that, even if you add a new PPV with a higher priority to the scene, or view the scene through a camera, as long as you don't activate a particular setting on that asset, the lower priority settings will still affect your viewport.
With all of that in mind, what is the simplest way to get my neutral viewing setup and my stylized camera setup, while using real-world light and exposure properties?
First of all, under Project Settings > Rendering > Default Settings, there are some check boxes that might be worth undoing. Depending on the template used to create your project, some of these might be enabled by default. If you don't need to see bloom, motion blur, lens flares, or auto-exposure in your working viewport, I would recommend confirming that they are disabled in the project settings. You can use the PPV or camera settings to overwrite and disable them, but I prefer not to leave a setting enabled just to disable it elsewhere, unless there is a reason.
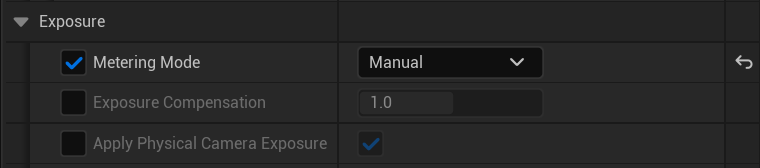
Next, I place a PPV with Infinite Extent (Unbound) checked, so it affects the whole scene. Since I'm not using Auto Exposure, I only need to focus on the first three exposure settings in the PPV:
- Metering Mode
- Exposure Compensation
- Apply Physical Camera Exposure
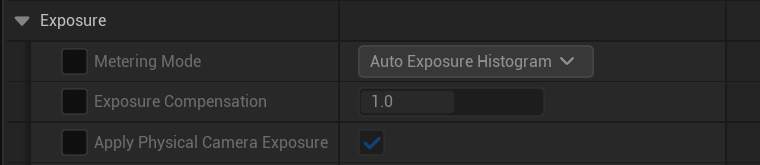
I enable Metering Mode and set it to Manual. This setting adds the physical camera values to the exposure calculation, which will drastically lower the viewport's exposure. When you switch to Manual, if the lights in your scene are at default intensity values, the viewport will probably go black.
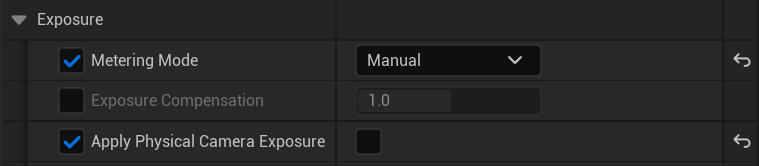
Two rows below the Metering Mode setting is Apply Physical Camera Exposure. If you activate this setting and disable it, the physical camera settings are again removed from the exposure calculation, and the lights should pop back on.
What are these settings doing? This page from the UE documentation has a good explanation of the exposure settings:
It also reveals three equations that are used to calculate exposure and pixel brightness in Unreal Engine. The first one is:
B = Exposure * L
The brightness (B) of a rendered pixel has two factors: the luminance (L) and the Exposure value. The luminance is the light reflected by that point in the scene.
The Exposure value is calculated as follows:
Exposure = 1/(2^(EV100 + Exposure Compensation))
We can ignore the math, and just talk about the inputs. We see here that the exposure value is determined by the EV100 and Exposure Compensation values. We met Exposure Compensation above. It is the second of the three exposure settings in the PPV.
EV100 is calculated as follows:
EV100 = log2(Aperture^2 / Shutter Speed * 100/ISO)
This has three inputs: aperture, shutter speed, and ISO.
These are the physical camera settings that we enabled above by switching to the manual metering mode. If Metering Mode is not set to Manual, or if Apply Physical Camera Exposure is disabled, these physical camera settings do not apply, and EV100 is 0 in the Exposure calculation.
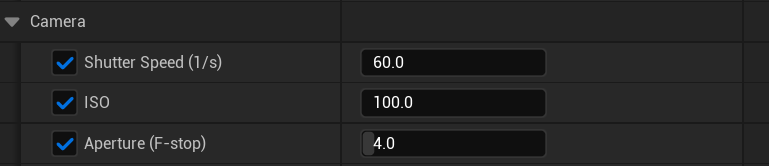
The physical camera settings in the PPV can be found under the Camera section.
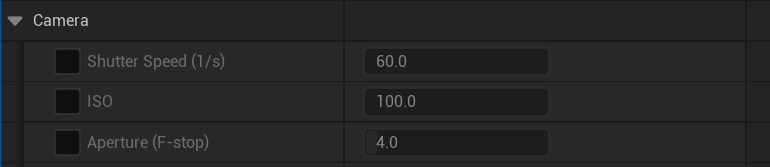
To sum it up, working in the PPV, with these exposure settings:
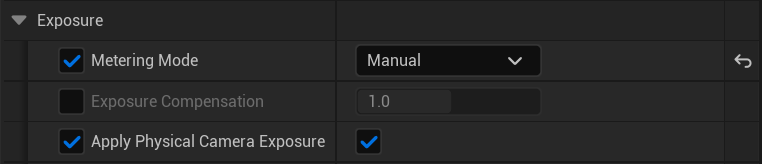
You can activate the camera settings and use them to control the exposure of your scene:
You can also activate Exposure Compensation and use that to brighten or darken your scene.
If you are using real world light intensities, you shouldn't need much exposure compensation. You can try setting a Directional Light's intensity to 75,000, or Rect/Point/Spot lights' intensity to 1,000 - 3,000. Then, you can play around with the aperture, ISO, and shutter speed to see how they affect the scene's brightness.
For more details, Arthur Tasquin wrote an article on lighting and how the camera's settings affect your exposure, in both Unreal Engine and the real world.
But, I generally don't use the camera settings in the PPV. I use them in the cinema camera actor that creates my stylized look for the final render. On a camera actor's settings, under Post Process > Camera, you can find shutter speed, ISO, and aperture. Interestingly, the aperture setting in this section doesn't seem to do anything. When using a camera actor in UE, aperture is adjusted by the "Current Aperture" setting, under Current Camera Settings, near the top. When you adjust Current Aperture, you'll see the depth of field change along with your exposure.

As long as we don't activate Metering Mode in the camera settings, the Manual setting from our PPV will still apply. But, I like to activate Exposure Compensation on the camera and set it to 0. This way, any exposure compensation I do on the PPV won't affect the camera. I also set Bloom and other visual effects in the camera settings. Another option is to drop an additional PPV into the scene and enable the visual effects there. That way you can turn them off and on without affecting your exposure PPV or camera settings.
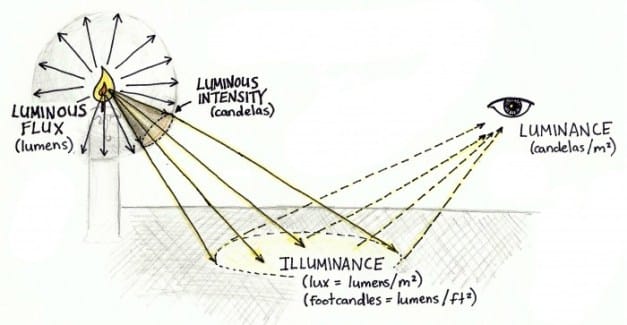
There is one remaining choice to make, which is the lights' intensity unit. This option is available on Rect, Spot, and Point lights. Arthur Tasquin's article above touches on intensity units, and Unreal Engine's documentation covers them as well. The default intensity unit can be set in the project settings under Rendering > Default Settings. Because lumens is the unit used on many real-world lights, it might be the most intuitive. If you are interested in how lumens (the light emitted from a source) translates into lux (the light hitting a location) you can use a calculator like this one.
This page helped me solidify my understanding of lumens, lux, and candelas:
But, to be clear, I don't get this technical when lighting a scene. In practice, I use manual metering and physical camera settings, and my light intensity values are in the same ballpark as real-world lights, but when choosing specific values, I adjust the light and camera settings based on feel and the look I am aiming for. The virtual lights I place in a scene do not emulate any particular real-world light, and I am not breaking out the lumen-to-lux calculator and using the Pixel Inspector in Unreal Engine to make sure my exposures are 100% physically accurate.
So why learn this? I think this kind of background knowledge is useful when deciding how to set up your workflow. It also makes troubleshooting easier. And, because I can't resist a good rabbit hole.