Hero Asset, Part 2
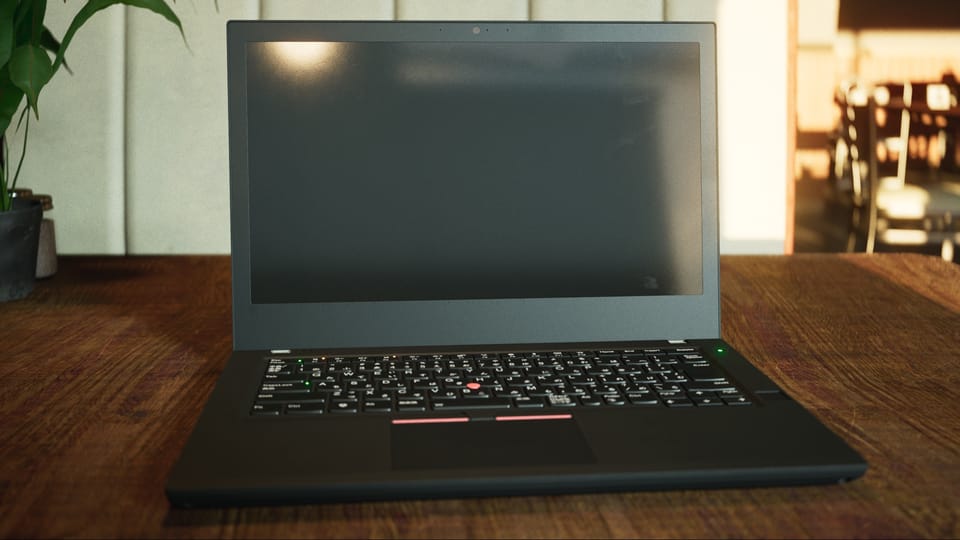
Modeling in 3D isn't easy, but it is a simple concept. Points in 3D space make up edges and faces, which come together into a 3D shape. I think that almost anyone, regardless of their background, could watch a video of someone modeling in Blender and describe what they see: this is someone sculpting a face, or a laptop computer, or whatever.
The way 2D texture maps enhance a 3D object is less intuitive. A previous article, Pixel Shading, has a number of resources that explain how shaders, often with the help of texture maps, not only give 3D meshes their color, but enhance their shape. In physically based rendering (PBR) pipelines, there are a slew of texture types that can be used to add realistic detail to a surface. Substance Painter is an application commonly used for creating and blending these textures.
I used an official Adobe tutorial for learning the basics of Substance Painter (SP):
This guide is a few years old, so some minor bits don't match the most recent version of SP, but it's a good introduction.
Materials and Texture Sets
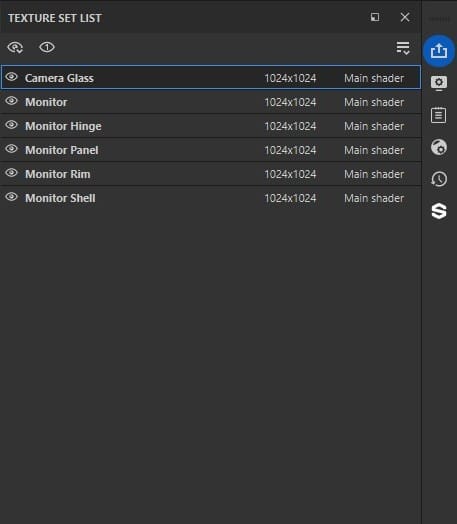
One thing I had to consider before sending an FBX from Blender to Substance Painter was how to set up my materials. Each Material in Blender becomes a Texture Set in Substance. Texture Sets are covered in the guide above. Substance treats them as separate entities, each with their own texture maps (color, roughness, normal, etc.).
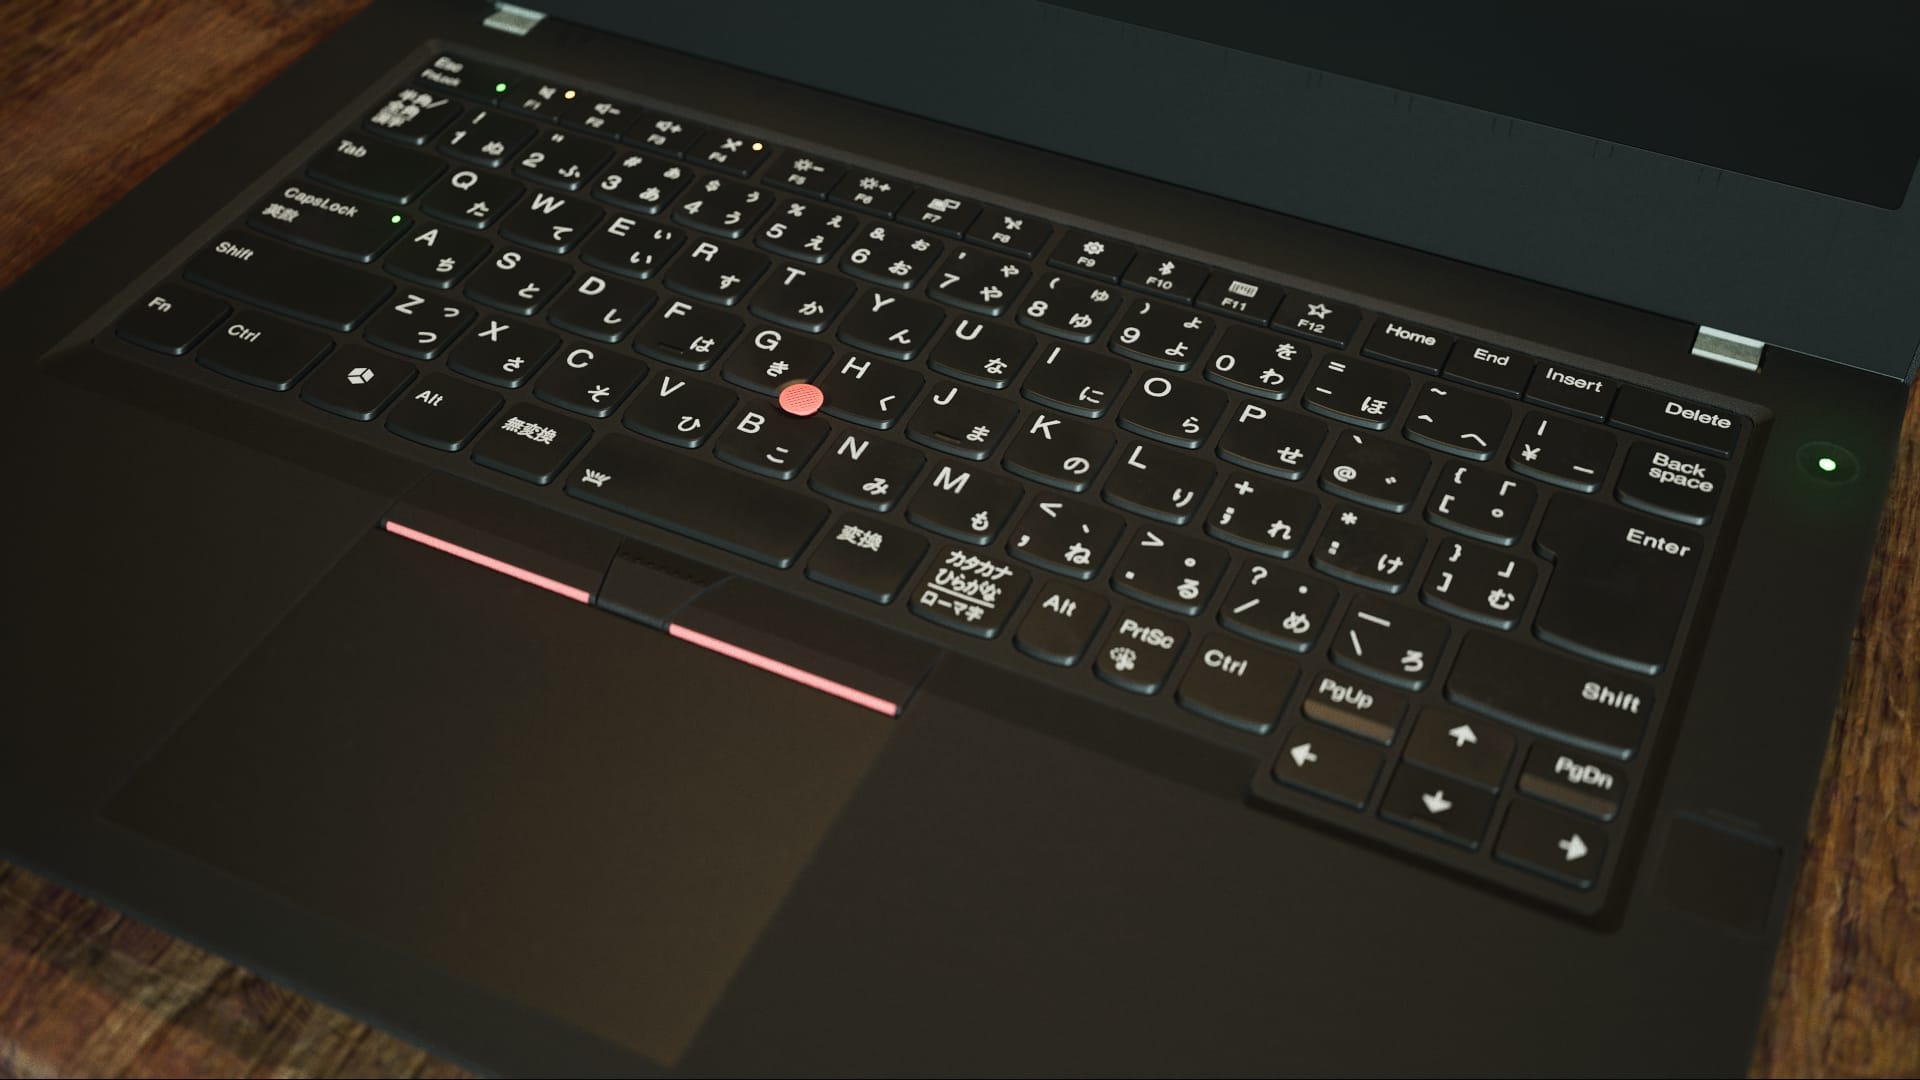
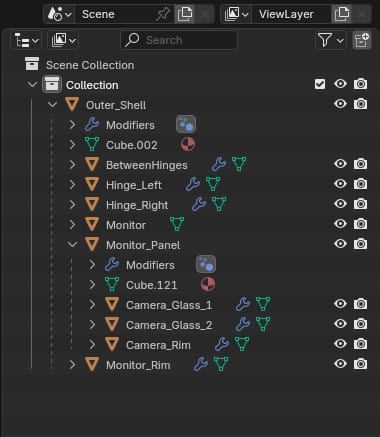
My decision was to create a separate material for every visually distinct portion of the mesh. This meant that some small parts of the mesh (like the monitor hinges) got their own material, and I ended up with a lot of materials (19 total). I felt this was simpler. Another strategy would have been to assign multiple mesh components the same material and then use Geometry Masks in Substance to isolate them when applying color and detail. The geometry masks in SP were defined by the mesh objects from my Blender project.
For example, the monitor portion of the laptop has a few different types of plastic, some shinier and some rougher, as well as the light metallic hinge pieces. I gave each of these components a different material, which means they each ended up with their own texture set in Substance:
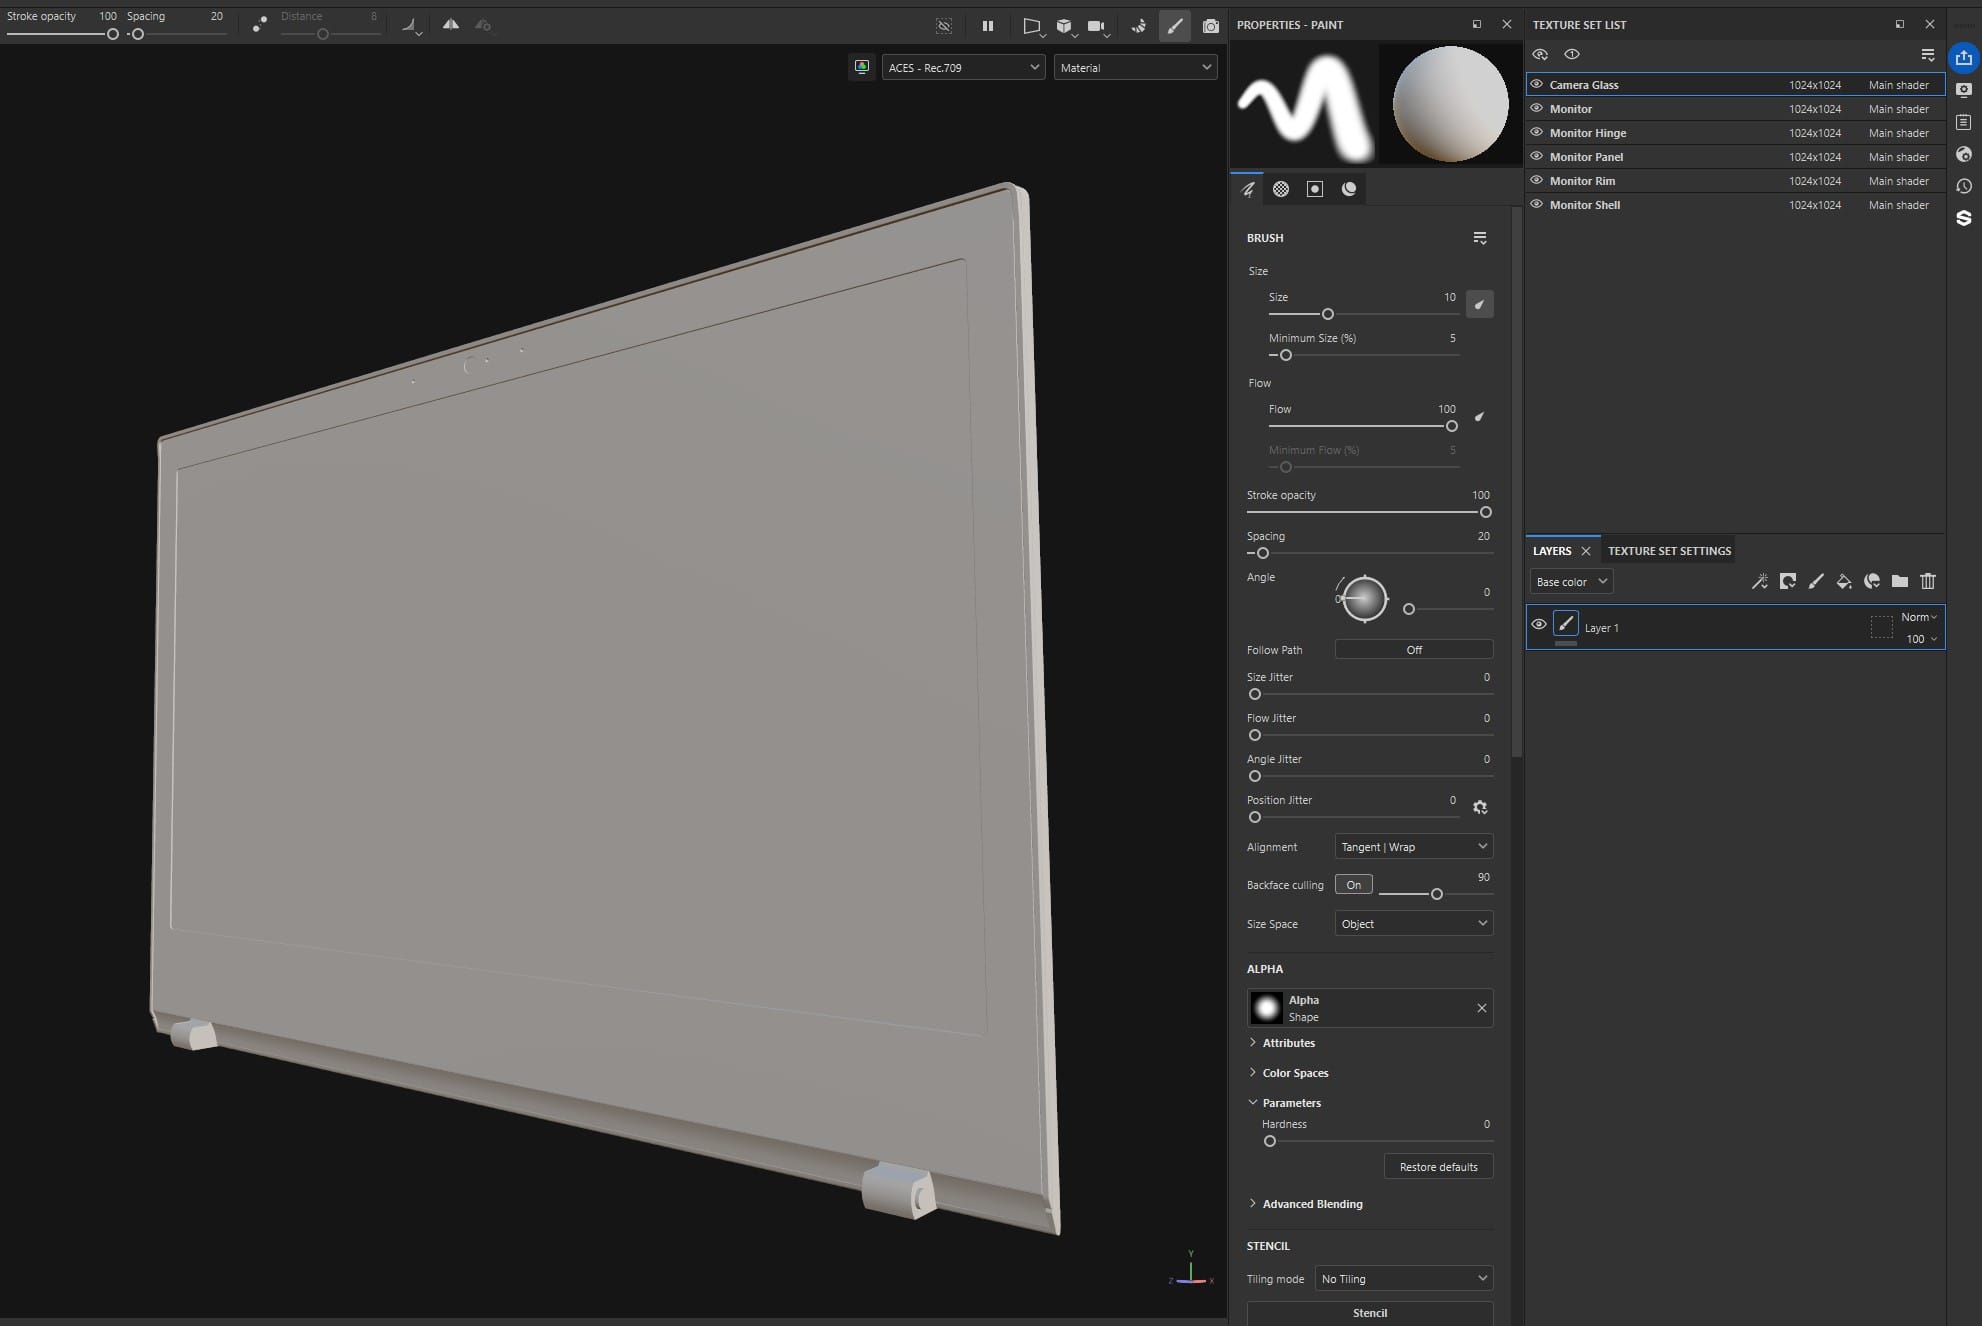
If I had given them all one material in Blender, say I called it "Monitor," this would have meant that the rough matte plastic of the monitor shell, the shiny plastic of the monitor itself, and the off-white metal of the hinges all share the same color map, roughness map, metallic map, etc. Without geometry masks, detailing the individual components would be difficult. A fill layer added to give the monitor a black surface would color the hinges as well. But, since each of these components is a separate object in the Blender project, and that data transfers to Substance Painter through the FBX, I could use those object names to mask the components and apply certain layers only to the appropriate mesh.
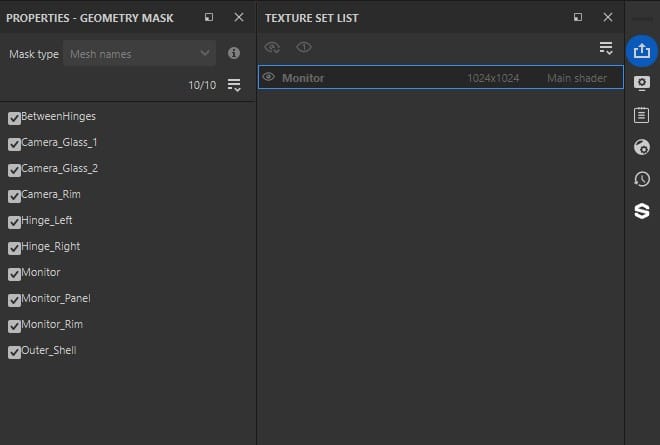
Left: Mesh objects in Blender. Right: Geometry masks in Substance.
Depending on the project, using fewer texture sets along with geometry masks could be a better strategy. However, it also means that more parts of the mesh share the same UV space, reducing their texture resolution (unless you use UDIMs, something I haven't experimented with yet). I covered UV maps and texture resolution in more detail here.
Layer Blending
After finishing the introduction videos, I still hadn't wrapped my head around one crucial aspect of working in Substance Painter: the blending modes. Similar to Photoshop, Substance uses layers, and there are a number of ways to blend them together (Multiply, Linear Dodge, Screen, etc.) But, in Substance, each layer affects multiple texture maps, and a different blend mode can be set for each texture map. The dropdown to change which texture map you are adjusting is here:
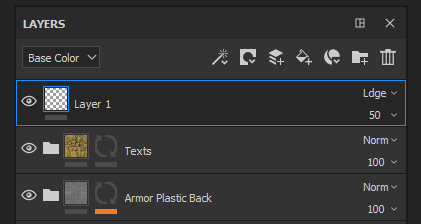
Notice how when they change from Base Color to Roughness, the blend mode on the top layer changes from "Ldge" to "Norm," and the opacity setting changes from 50 to 100.
Color Management
A word to the wise: when working between Substance Painter and Unreal Engine, get your color management in order. With OCIO config files, it isn't too difficult. This is covered in an earlier piece as well as in this highly recommended guide:
- Substance 3D Painter & ACES - 01 - Color Space Fundamentals
- Substance 3D Painter & ACES - 02 - OCIO & ACEScg in Painter
Borrowing Techniques
This video was also an important resource for me:
It's just fifty-seven straight minutes of a YouTuber, Javad Rajabzade, creating a realistic rubber material in Substance Painter. There is no explanation, so I had to pause a lot and rewatch different sections to figure out what he was doing. I stole a lot of tricks from this!
Some highlights:
- 03:50 - 12:45: He creates a layer group called Surface and builds a few layers to add base-level grain and imperfections.
- 21:35 - 33:45: He adds multiple layers to create scratches and holes of various sizes, then at 30:50 uses a combination of filters to emphasize the upper edges of the imperfections.
- 39:50 - 54:00: Techniques for adding fingerprints and dust.
Unreal Engine Test Scene
With proper color management, the viewports in Substance Painter and Unreal Engine should be a near match, but I still recommend exporting textures early and often to check them in UE. At the start, I did my checks in the sparse environment I built for this movie.
Eventually, I created a different scene for the screenshots featured in this article. For that, I followed this video by Luc Delamare:
It's geared towards beginners, but I still picked up some new knowledge. His YouTube channel only has a handful of videos so far, but they're worth watching.
A Simple Rig
Before taking the screenshots for this piece, I wanted to rig the laptop for animation. This involved creating a "skeleton" for the computer, binding each "bone" to certain parts of the mesh, and creating controls for moving those bones around.
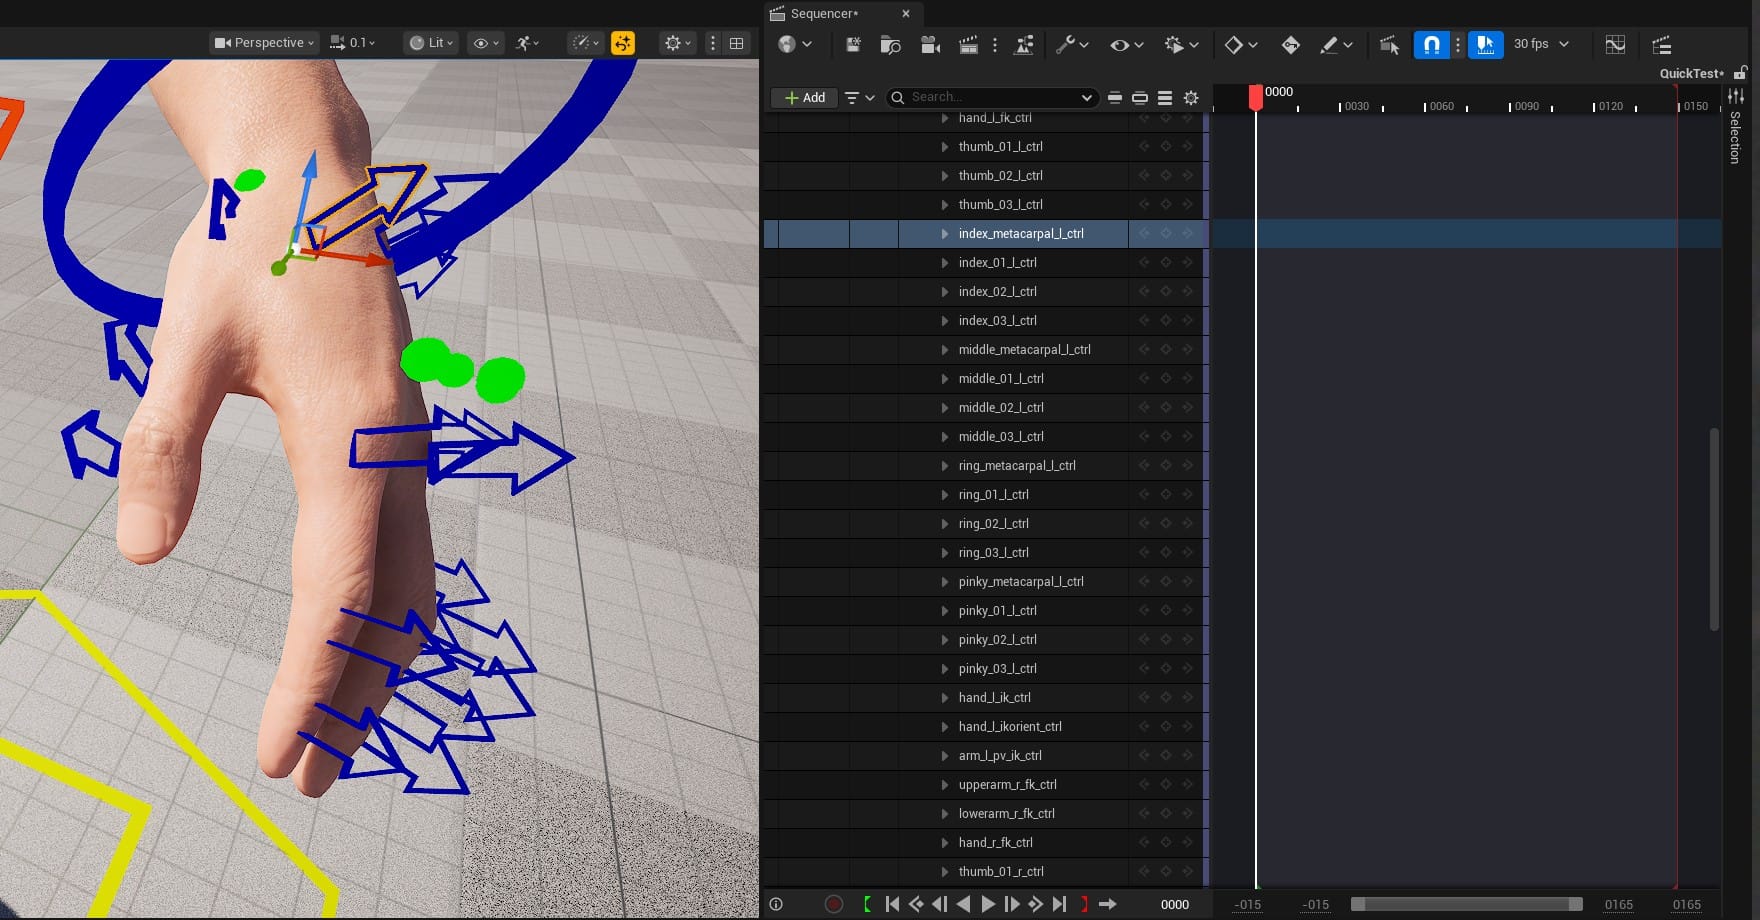
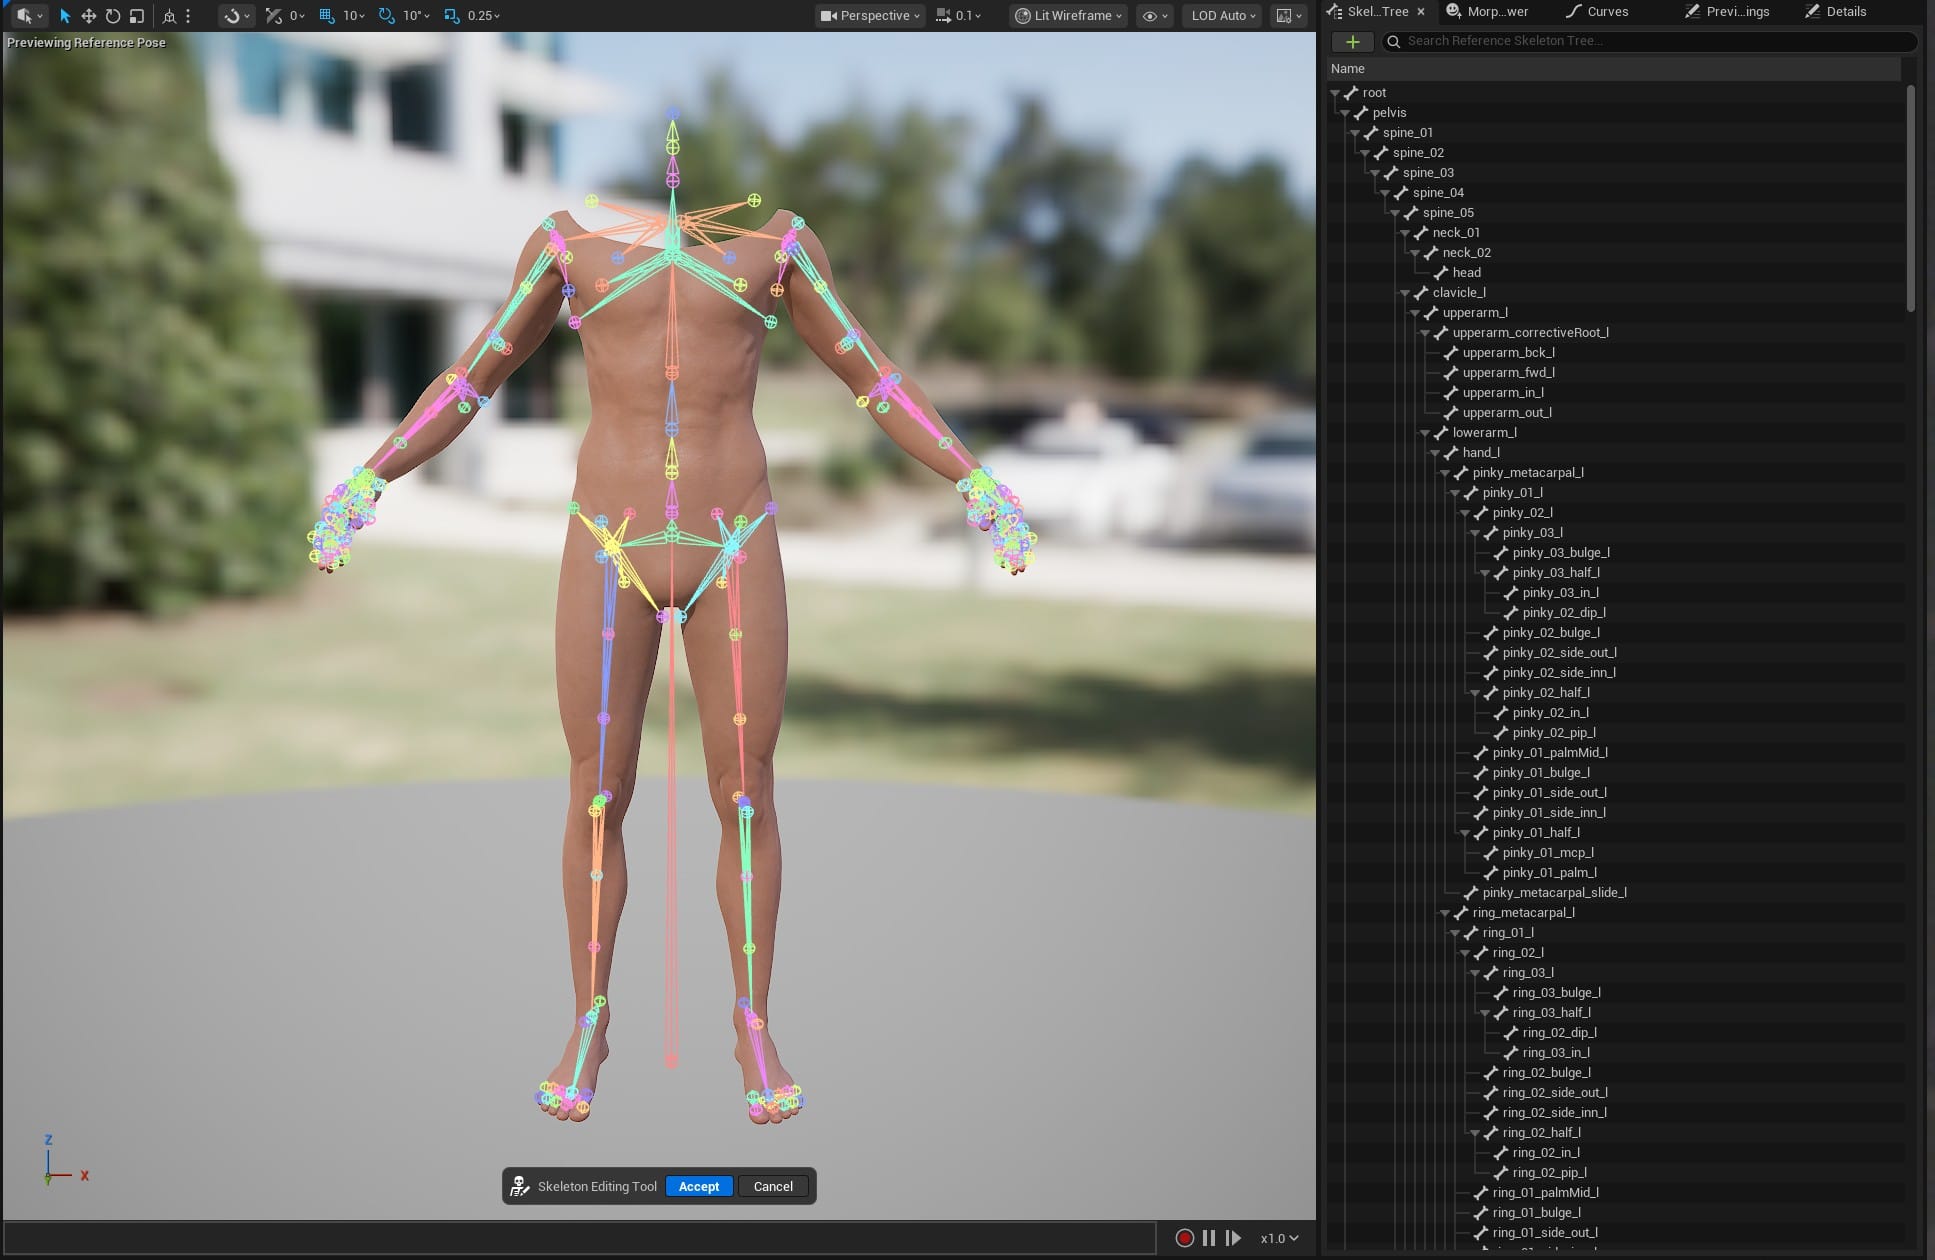
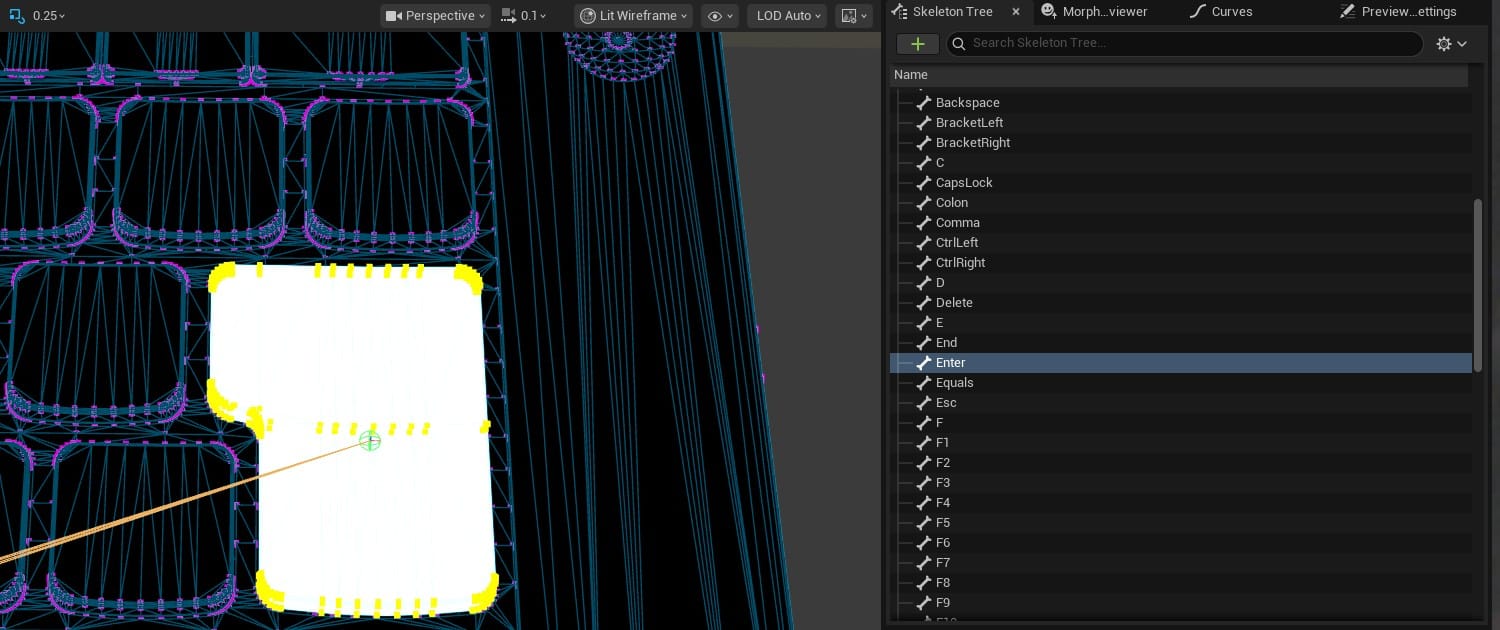
Rigging is a deep subject, and building a rig for a complex character requires technical skill and artistry. For example, the MetaHuman body skeleton has 342 bones. In these screenshots I have selected two bones in the left hand, "index_metacarpal" and "index_01." The bones are invisible objects, existing only to drive the movement of certain vertices.
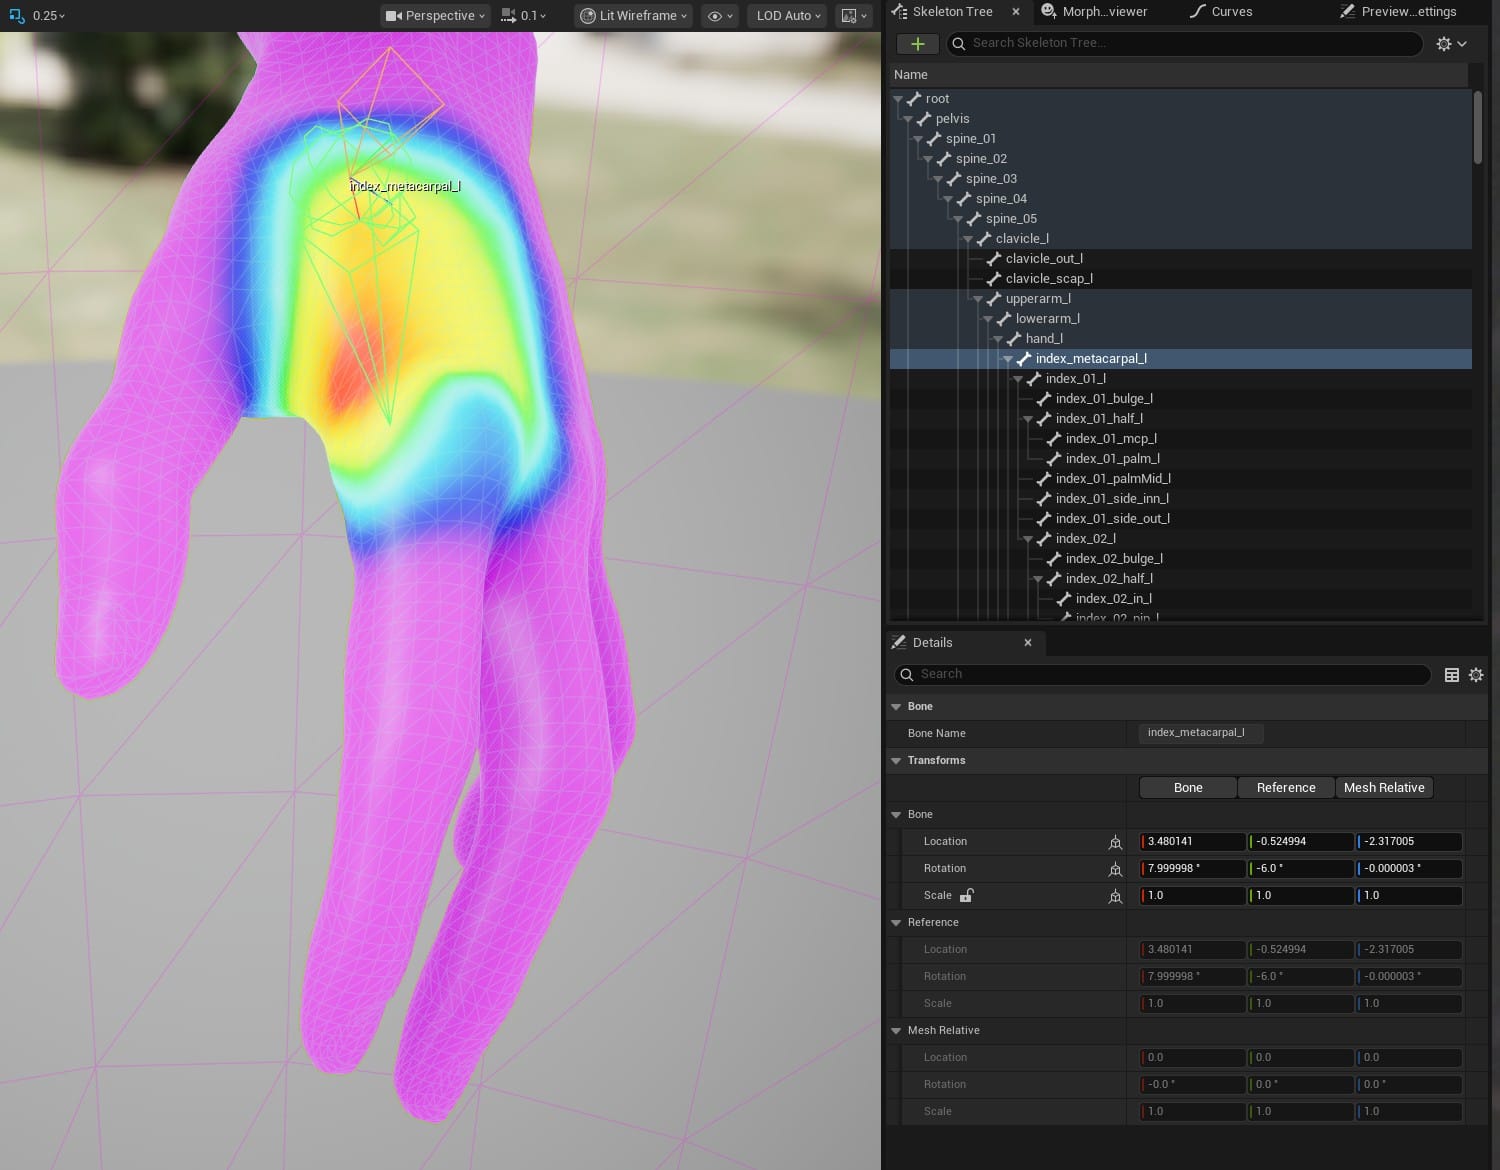
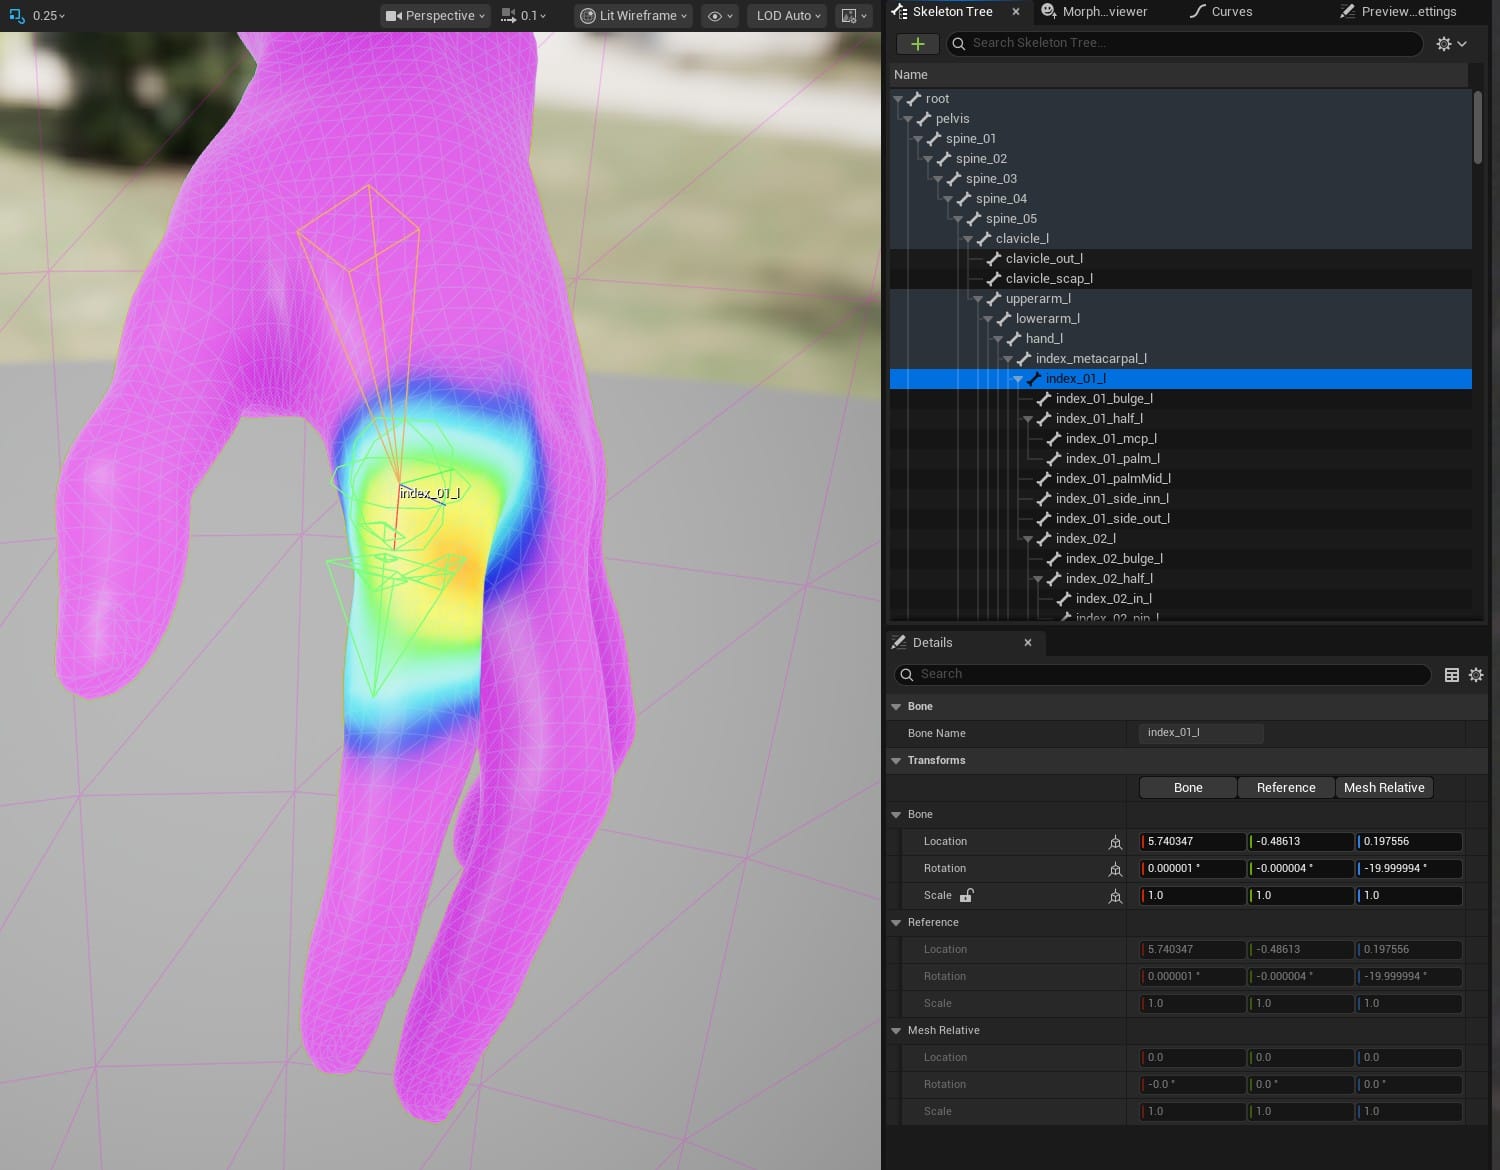
A simplified explanation is that the colored weight map shows which vertices each bone has influence over, and how much. Vertices in the orange to red regions are influenced more, approaching 100%, and vertices in the blue regions are influenced less, approaching 0%. This means that if index_metacarpal were rotated 45 degrees, the vertices in the redder regions would also rotate close to 45 degrees, and the vertices in the blue regions would rotate a much smaller amount. Notice that the colored regions for these two bones overlap. A vertex can be influenced by any number of bones, but those bones' combined influence on that vertex can never exceed 100%.
For the MetaHuman body, the controls to move the hand bones look like this:
Blending the influence of all these bones across the entire mesh and constraining the rig controls so that the character can be efficiently animated takes a lot of skill. Fortunately for me, the animation I need for my laptop is much simpler than a humanoid character.
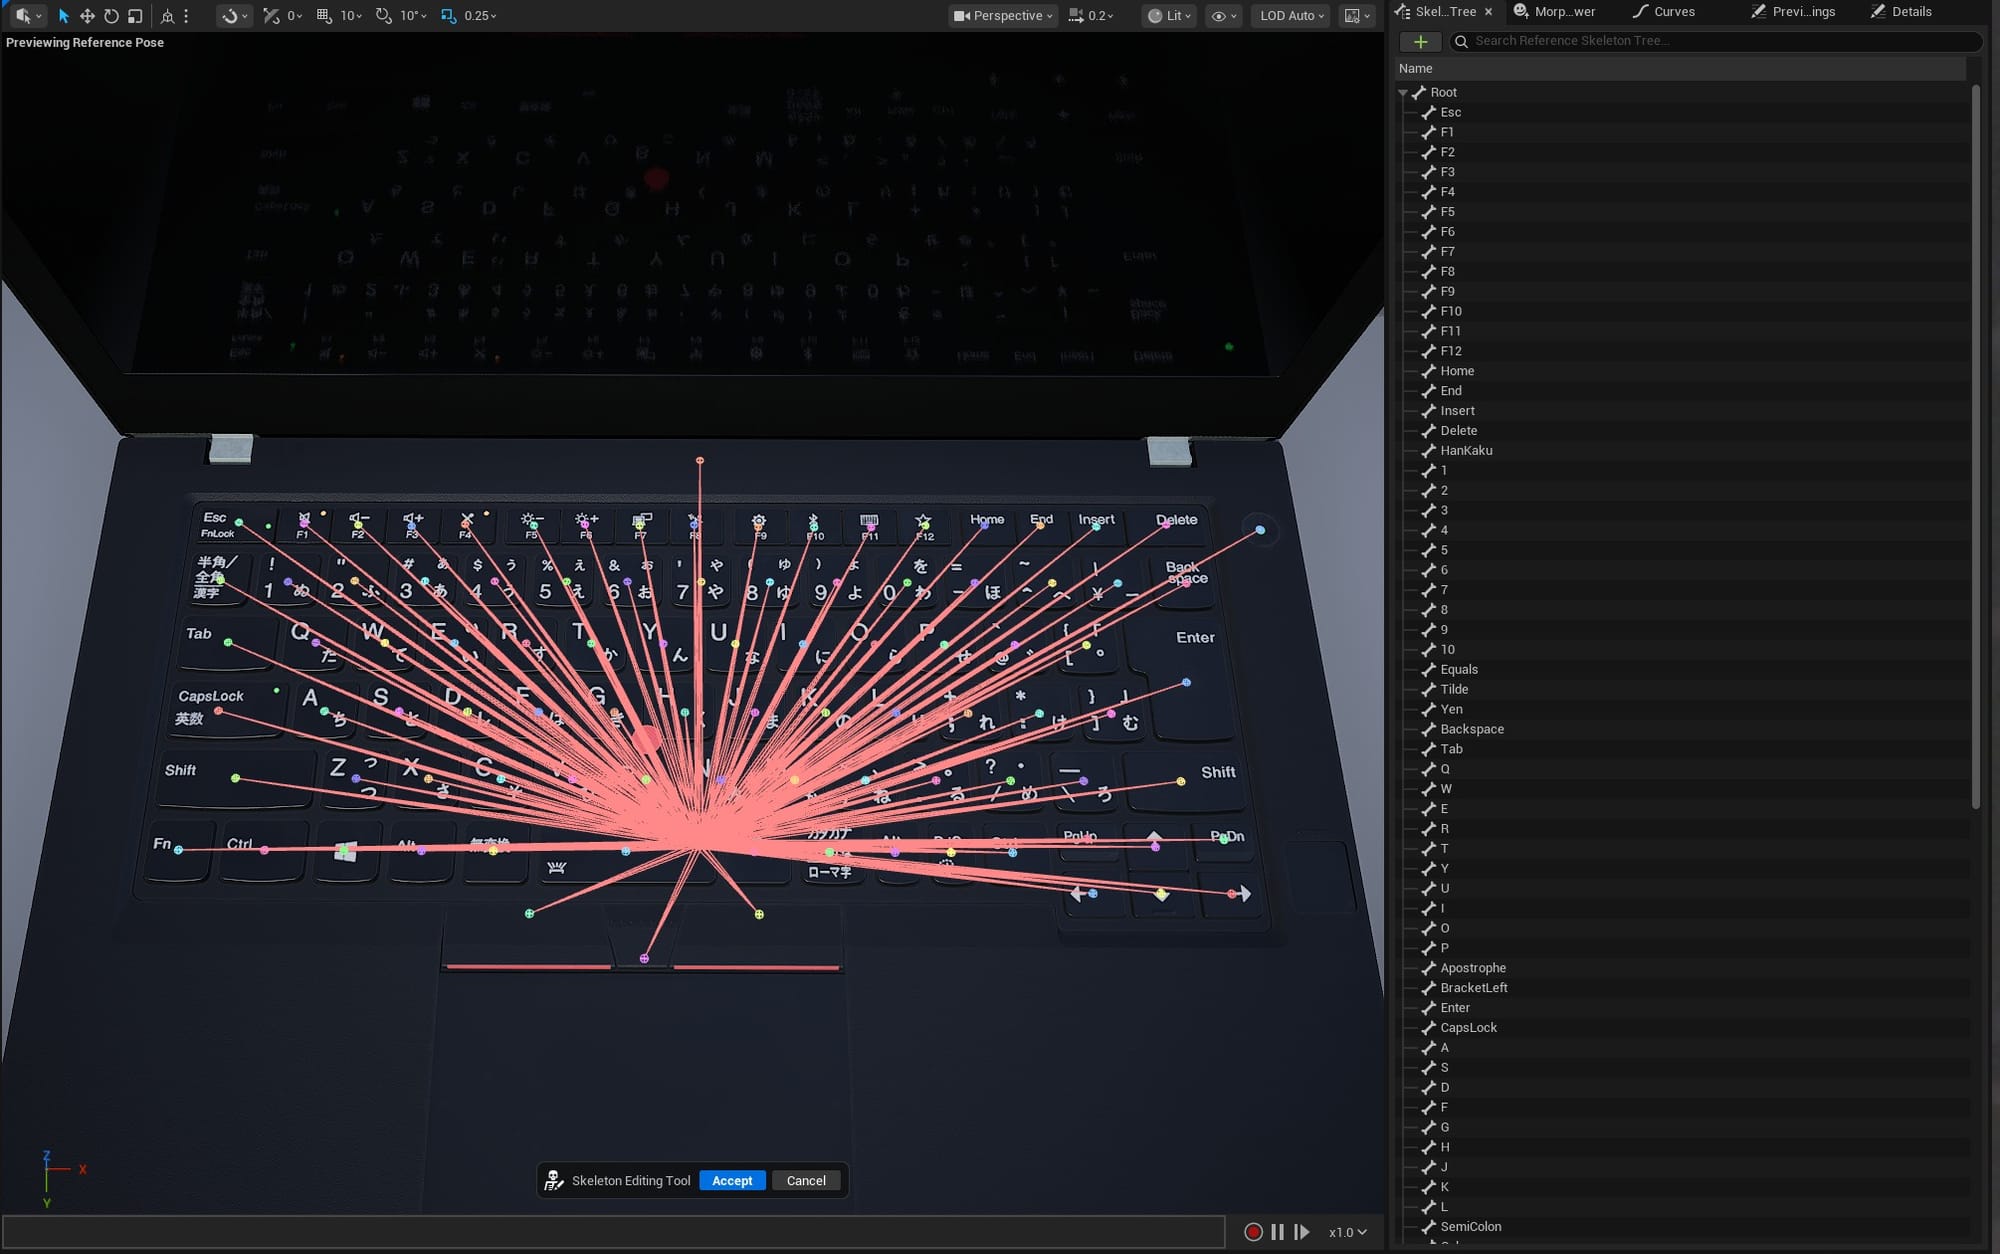
Left: The MetaHuman skeleton hierarchy. Right: This laptop's skeleton hierarchy.
There are 89 keys, a power button, three mouse buttons, and a monitor, each with a single bone that has 100% influence over their respective vertices. This is the weight map for the bone influencing the spacebar:
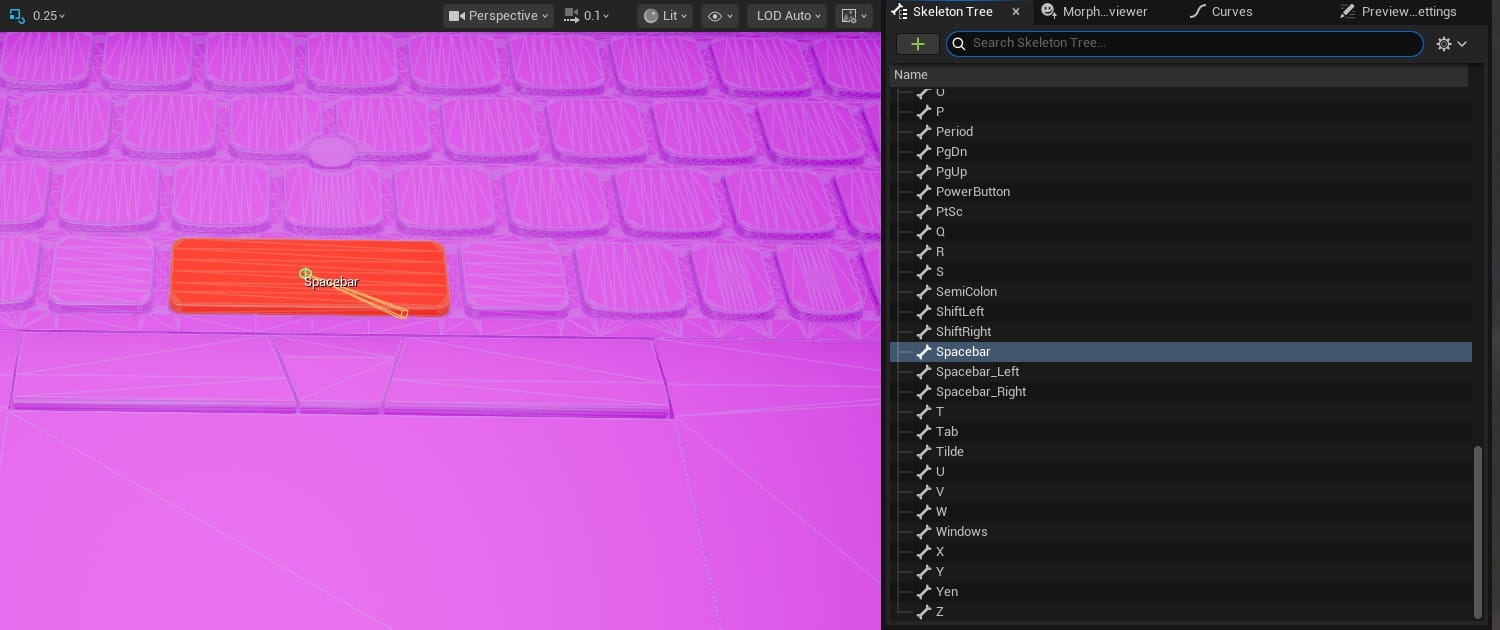
When I move the bone for the spacebar up and down, all of the spacebar's vertices move exactly that amount.
In a humanoid character, the skeleton has a hierarchy, with certain bones influencing the movement of others. For this computer rig, all the bones move independently, so building the skeleton was easy. All bones connect to the root bone, and nothing else. There are many guides, like this one, for creating a skeleton with the Skeletal Mesh Editor in UE.
And, since I didn't have to worry about blending weights between multiple bones, setting the weights was a simple process: Select a bone, select one vertex on the corresponding key, click "Flood" to get the rest of them, and "Add 1.0" to give all those vertices a weight of 1 (meaning 100%).
To create the rig controls, I first looked at the new Modular Control Rig feature in Unreal Engine, but decided it was probably overkill for this particular project. The documentation focuses on assembling a humanoid rig, and the pre-built modules make that look easy. But, it was less clear to me how to build a simple rig from scratch. I still don't grasp how bones, connectors, sockets, and modules all work together.
The documentation for the standard node-based control rig made a lot more sense to me, and the Quick-Start Guide was plenty. With a simple pair of nodes for each bone, I had all the controls I needed. In the details panel I could change their shape and color, and set limits on their movement. For example, I set each key bone to only move on the Z axis between 0 and -0.148, a simple down-up key press motion.
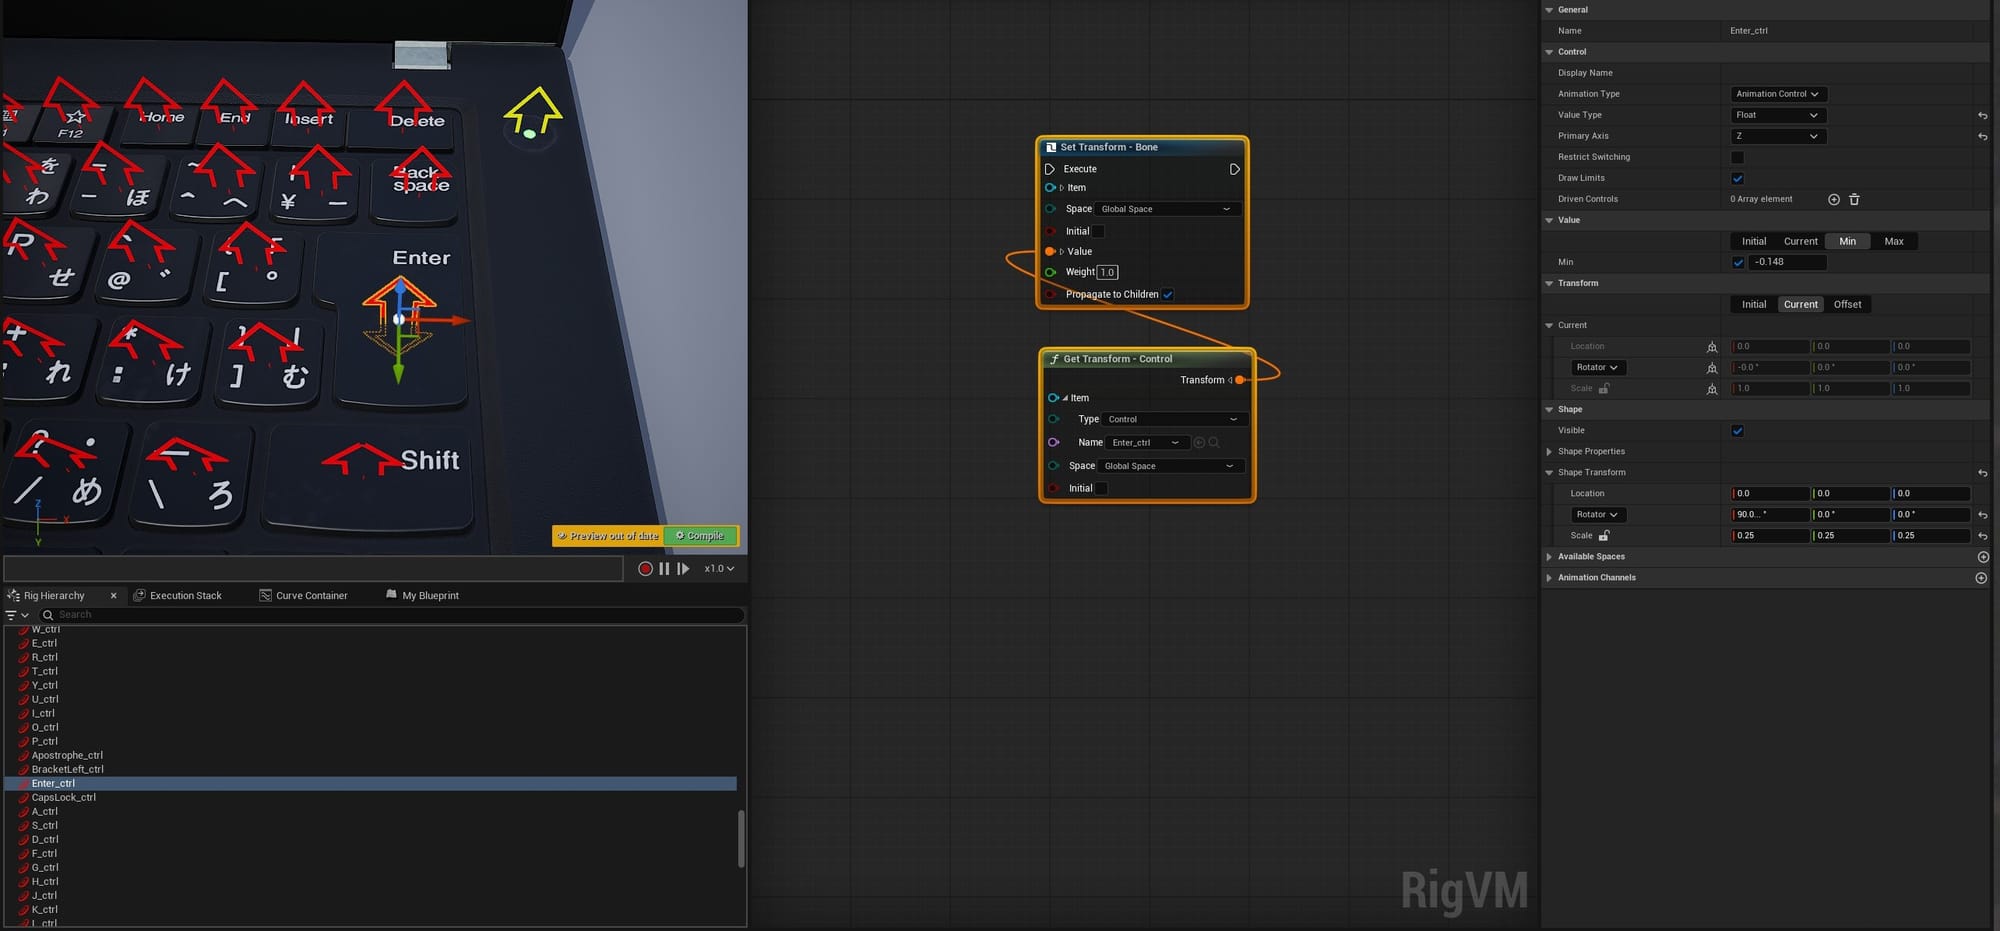
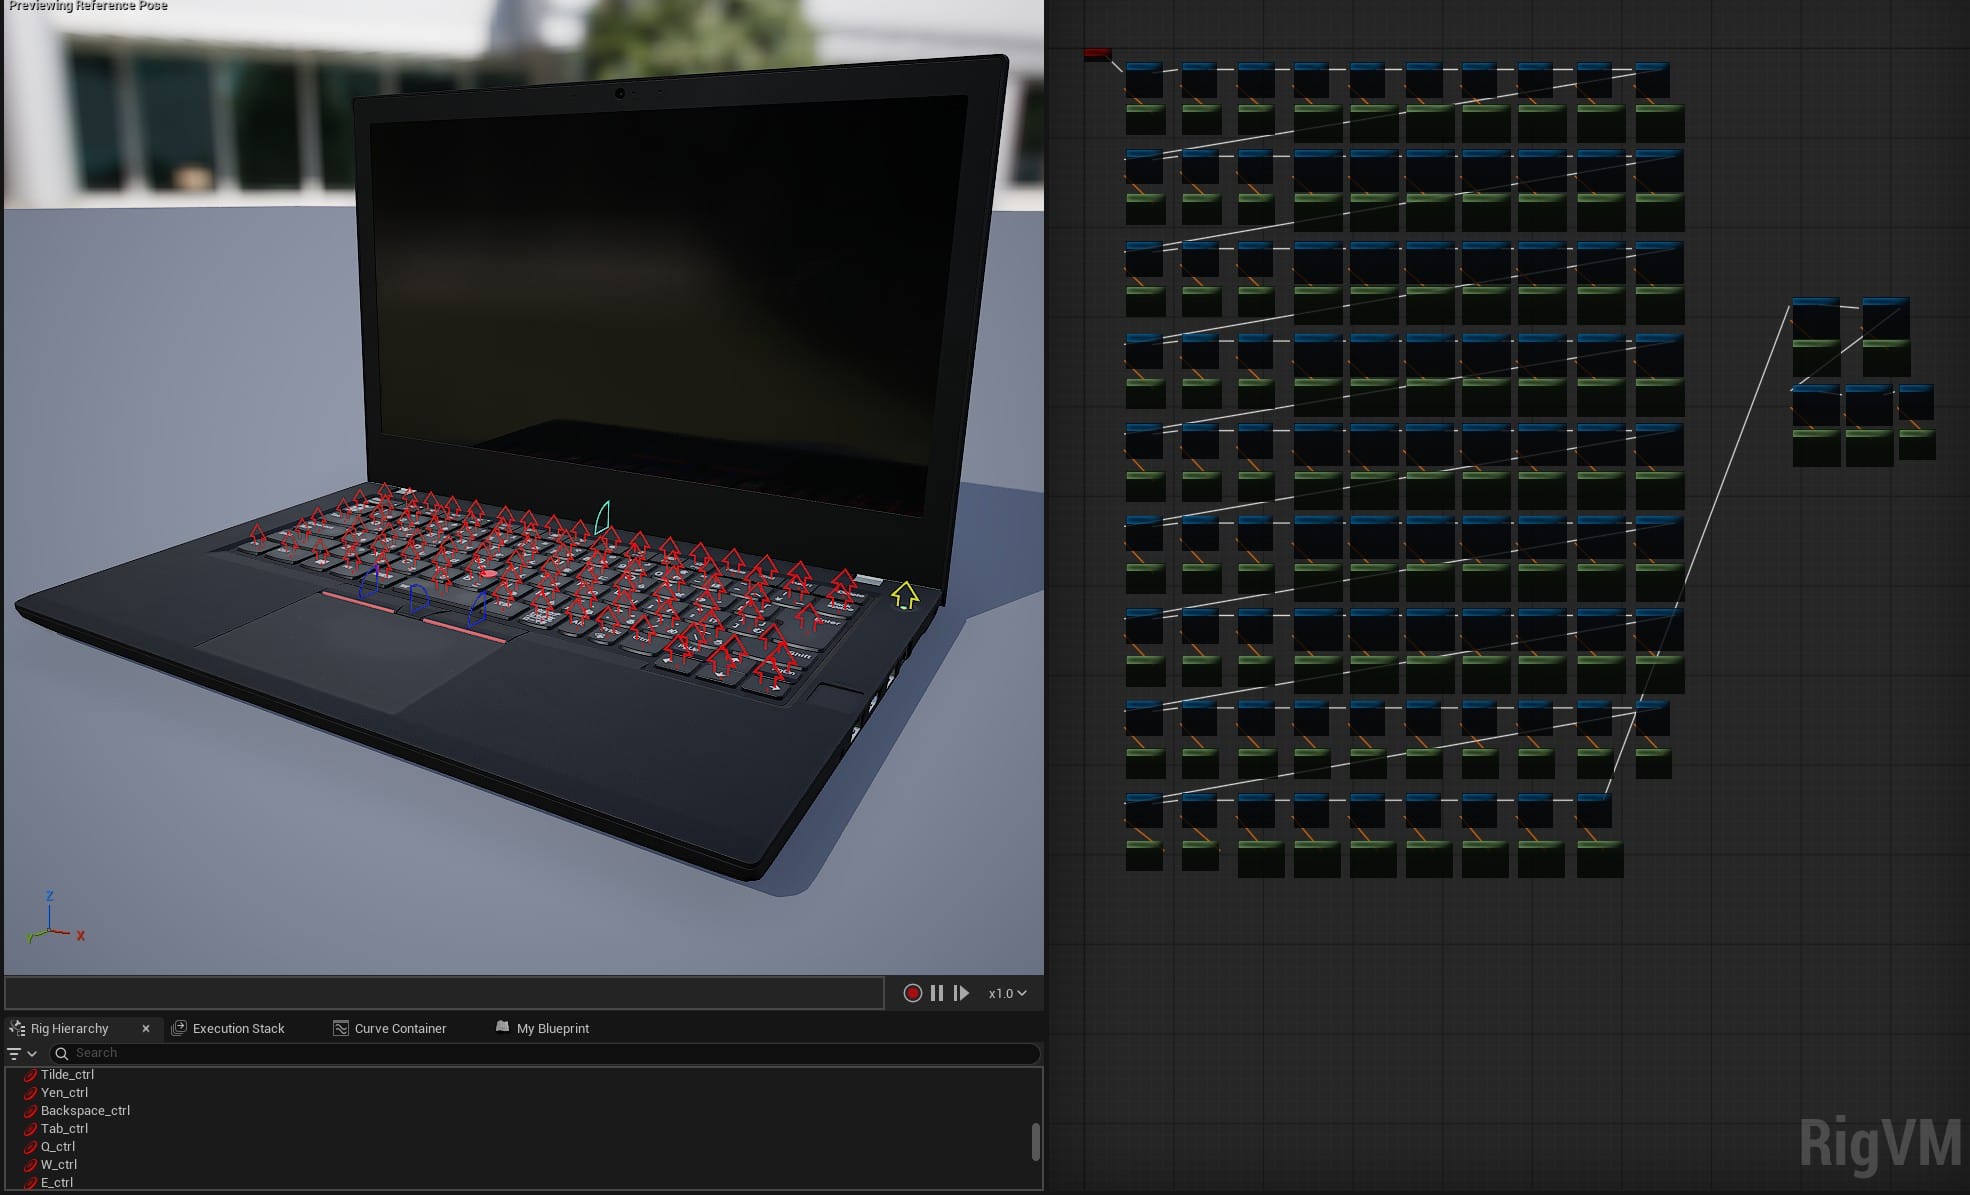
The monitor and mouse buttons have rotator controls, limited in a similar way. This is a shot of all the controls and the repetitive tree of nodes that created them:
Substrate?
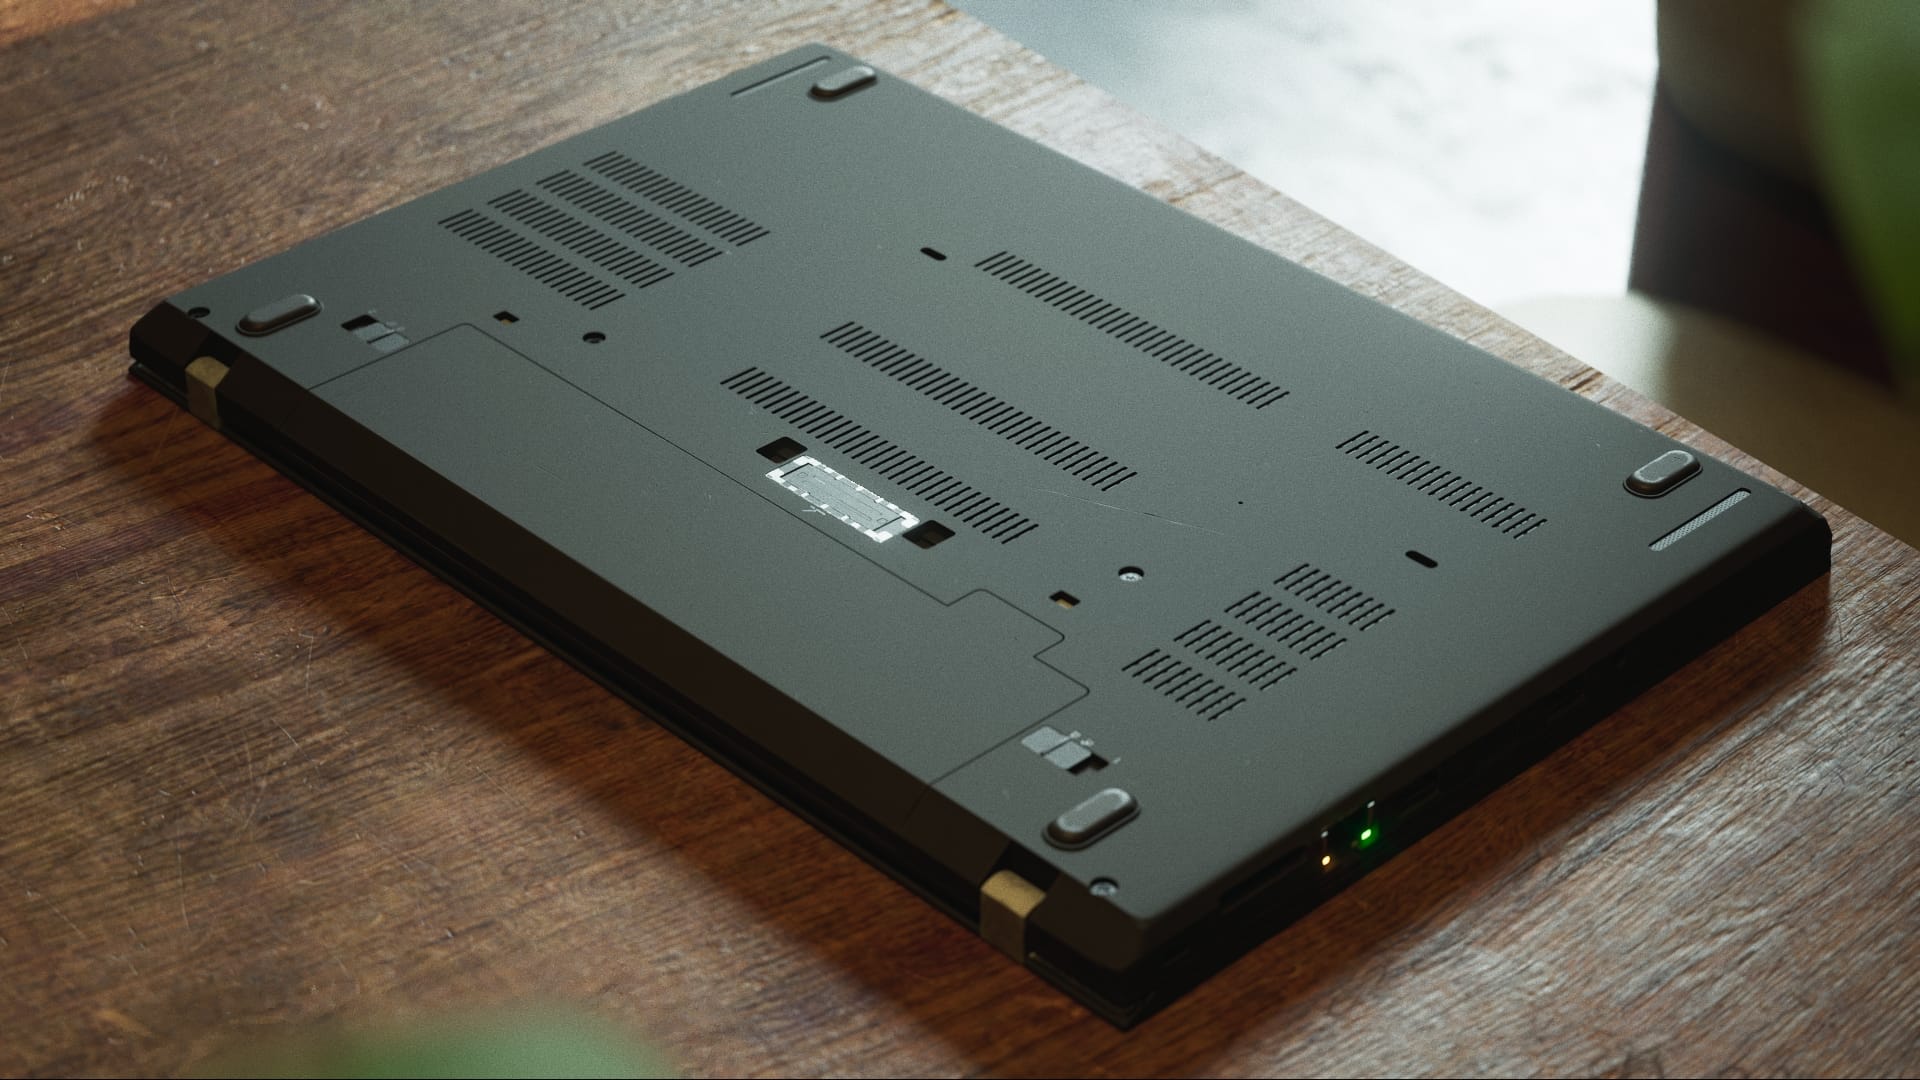
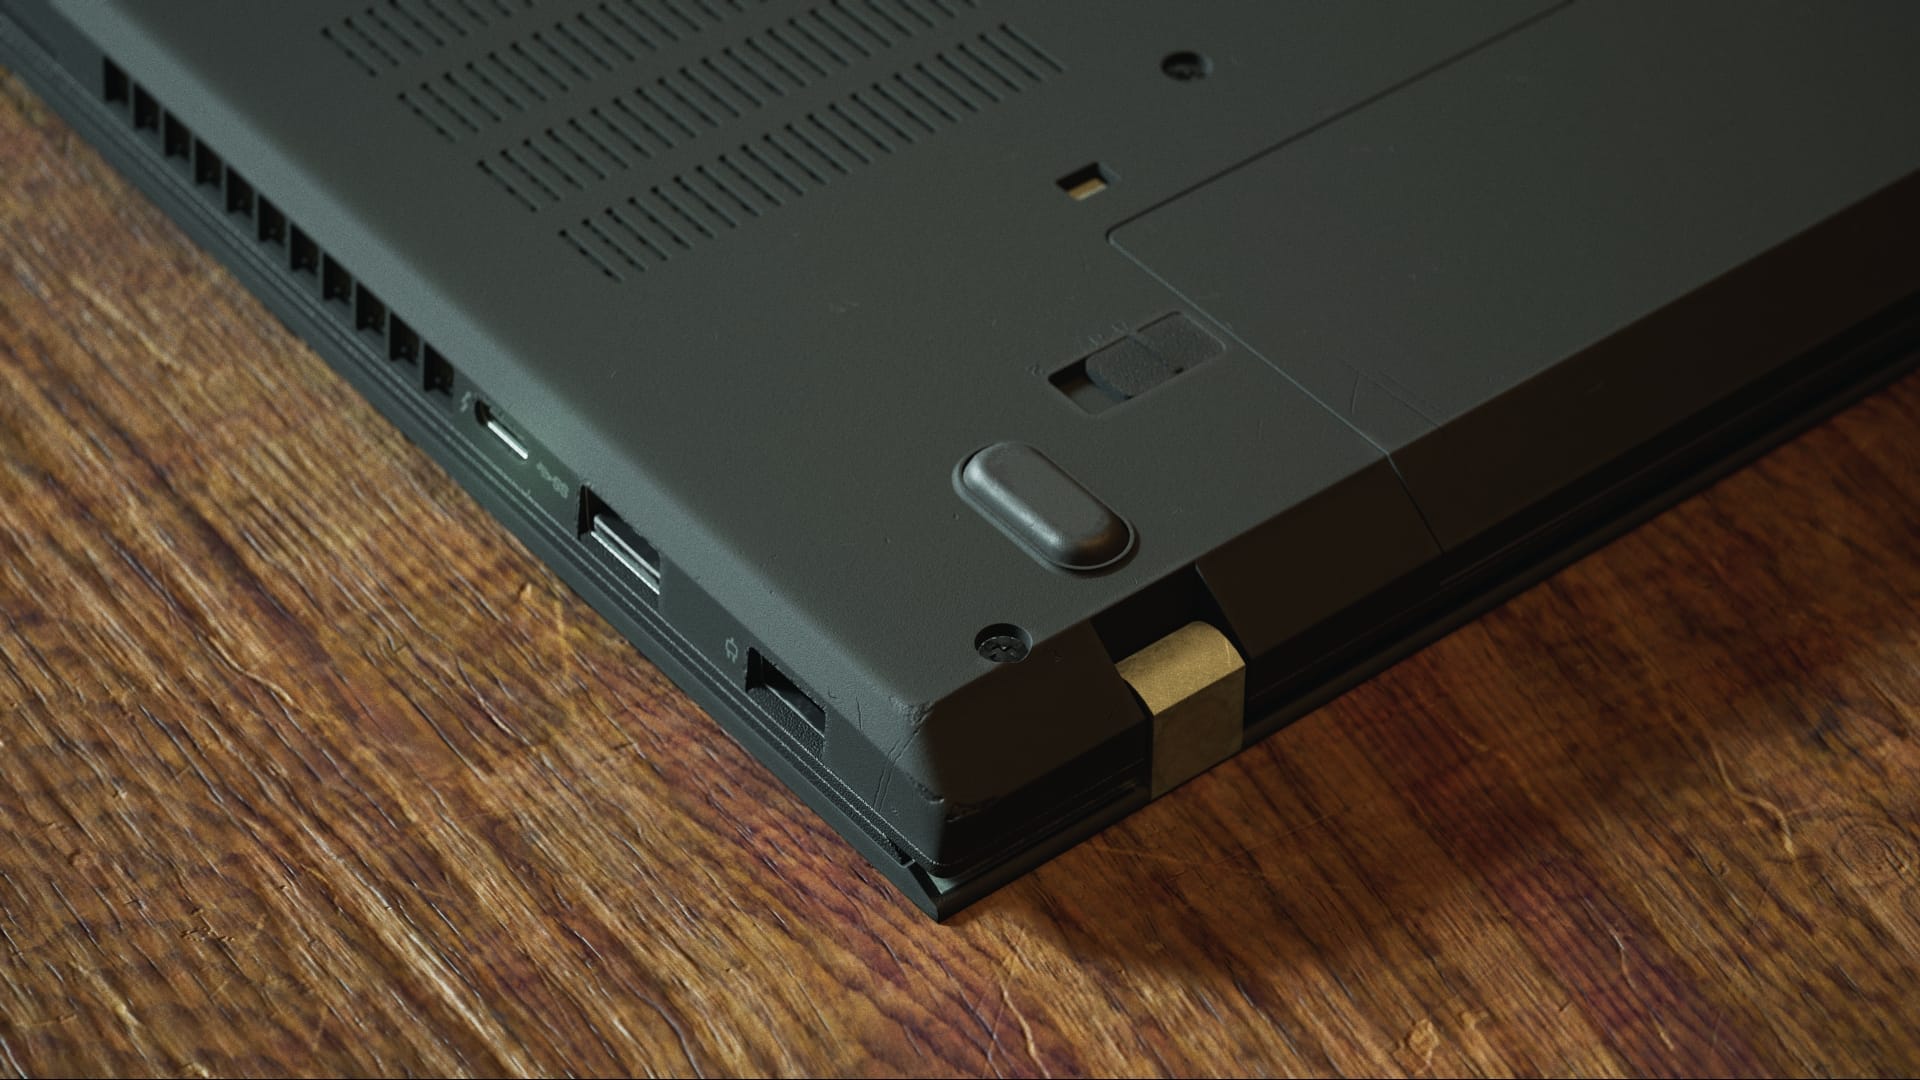
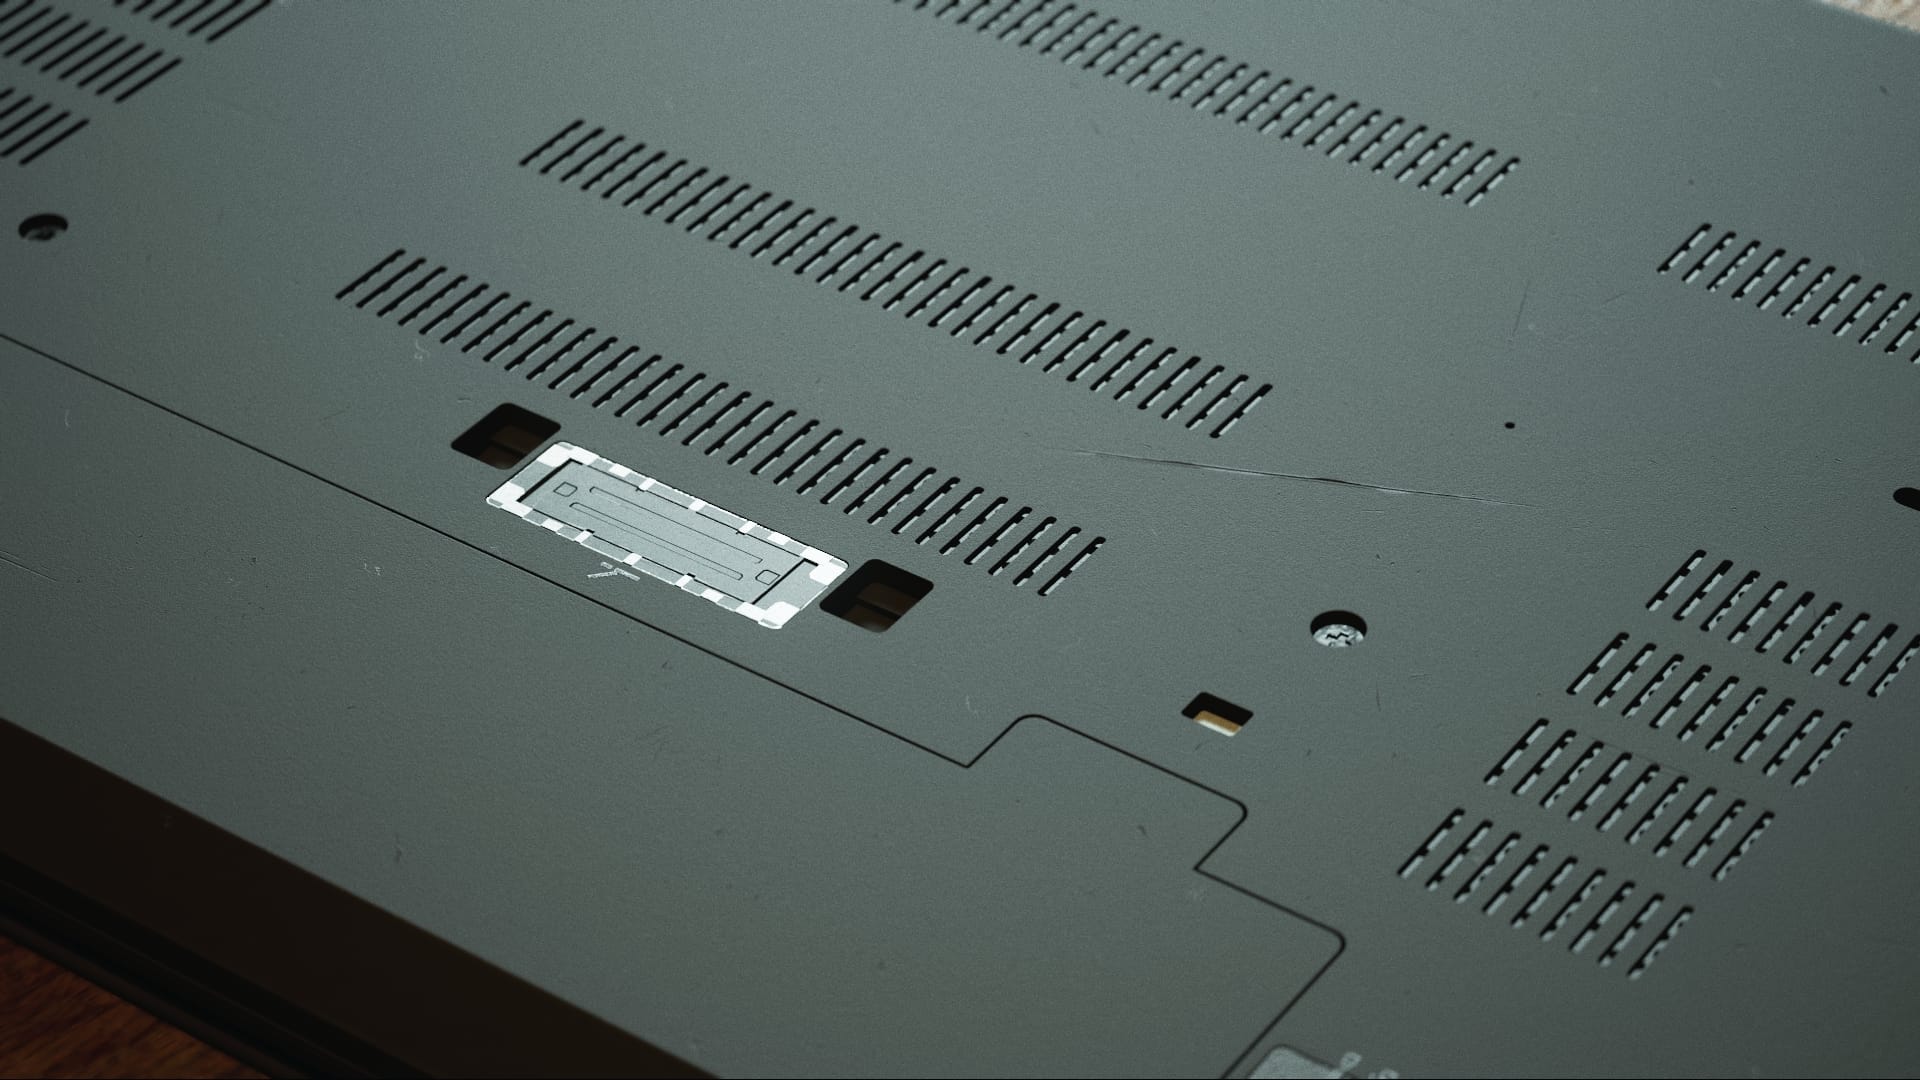
There are a couple of visual details I didn't add to this version of the laptop. The soft outer plastic on the base and monitor has tiny metallic flecks that are small enough to be nearly invisible, except when they catch the light. Whenever I tried making specks that tiny in Substance Painter, they would lose their sparkle. I also have yet to add realistic dust. I think both of these might be solvable with the relatively new Substrate system in Unreal Engine, so I might tackle this in the future.
For now, I've spent more than enough time on this asset, far more than I originally planned. I think I made it unnecessarily high poly (274k tris for a laptop computer, I don't know what happened), but overall I am happy with it. I'll try shooting some actual scenes with it and see how it does.