Sub·Object Beta Test
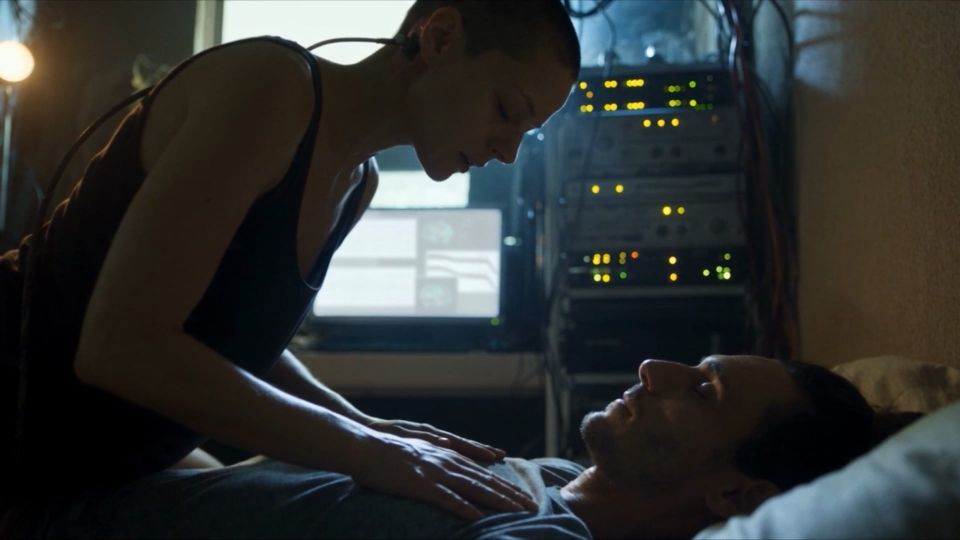
The last few entries covered my struggle to transfer my work from the 3D realm into the gen-AI realm. When prompting generative image and video models, I had trouble re-purposing the apartment set, MetaHumans, and storyboards that I had created in Unreal Engine. I ended my last entry with the conclusion that if I were to make this movie with AI, I would have to redesign the characters, the locations, and the shot composition from the ground up, playing to the strengths of AI tools.
Another theme of those previous entries is my debate between two workflows for AI movie making. To summarize, when using the most powerful video generation models, namely Seedance, there are two general options:
- Provide the model with the key ingredients (images of the scene's location, characters, and props) and describe the desired shot with text, or...
- Provide the model with a start frame and/or end frame, and describe only the action that takes place between those frames.
A condensed form of these two prompting strategies could look like this:
Strategy 1:
Reference Images:
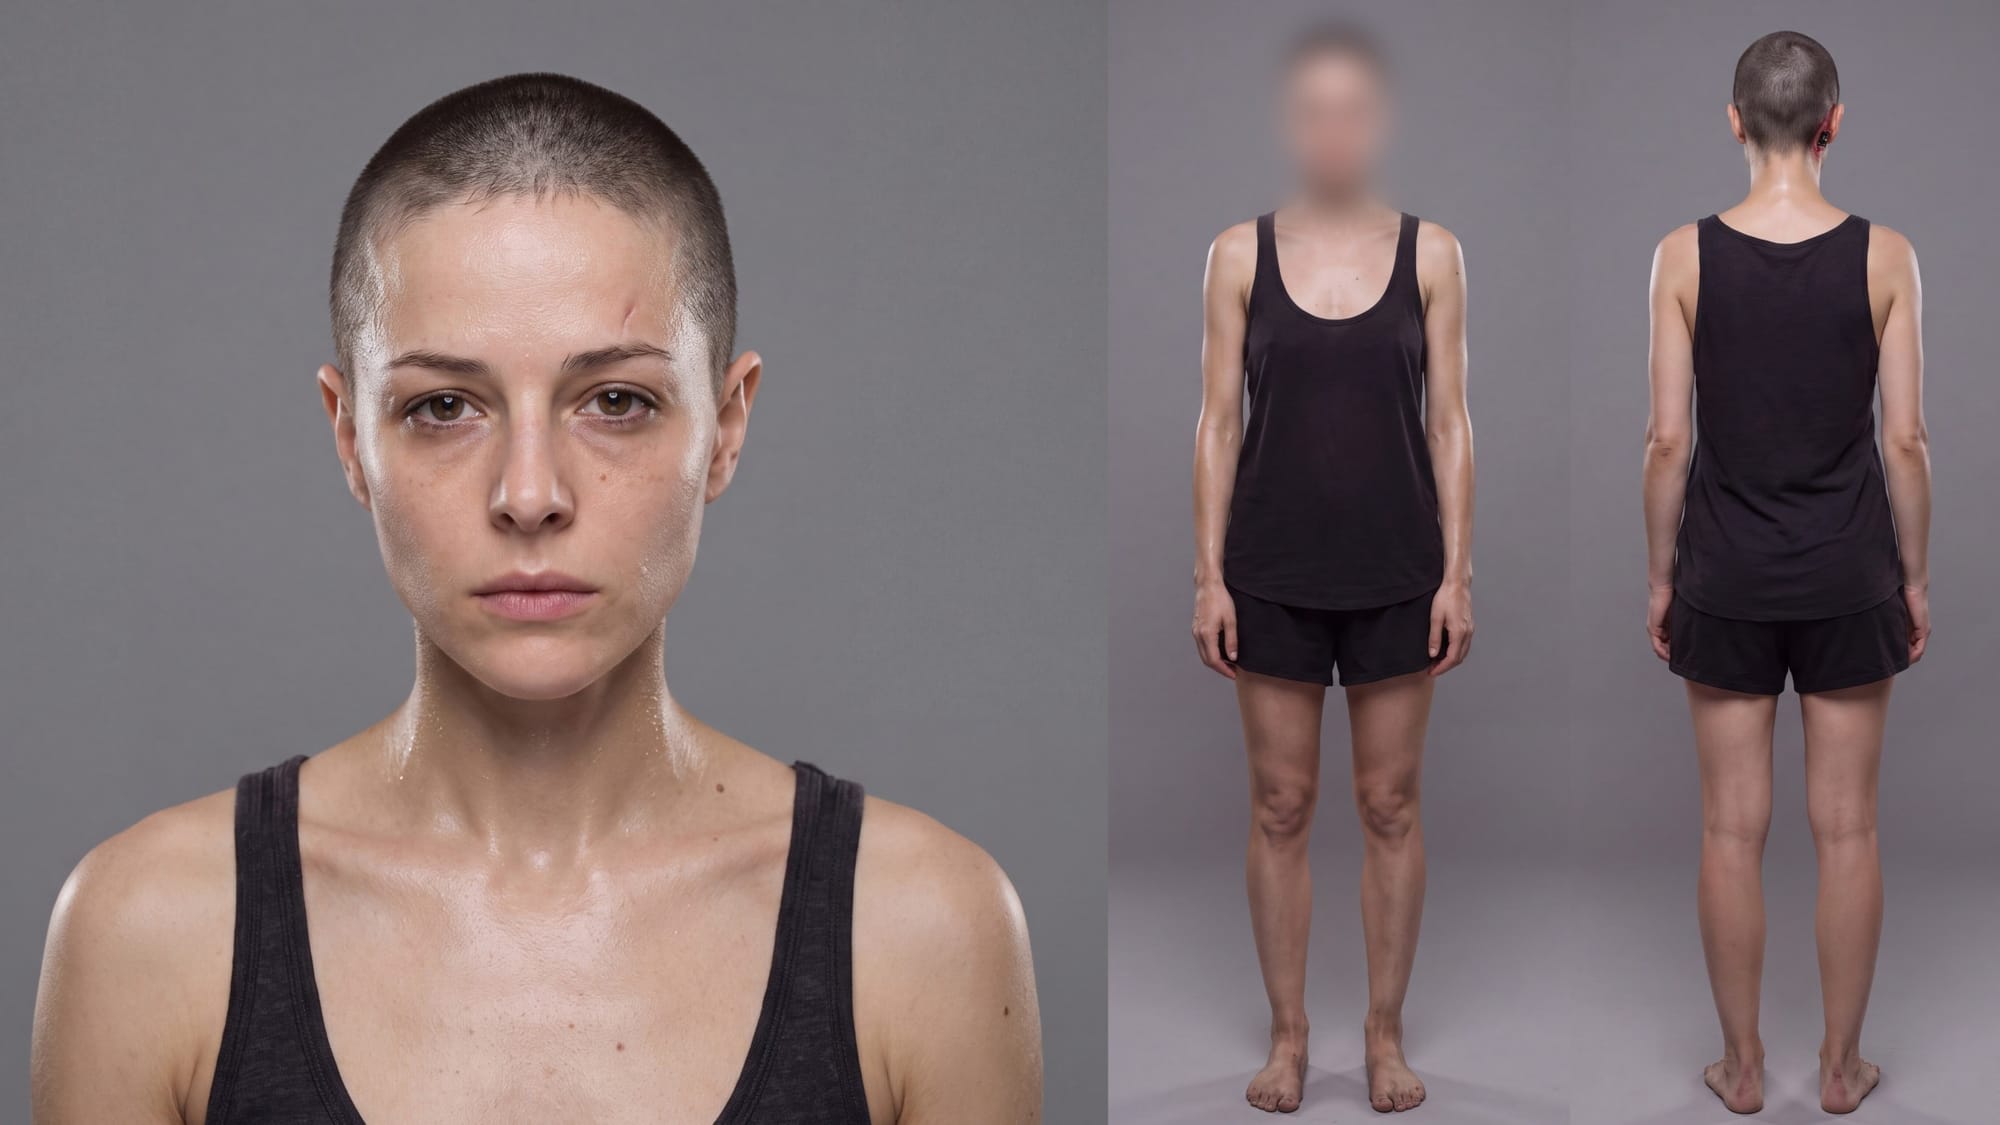
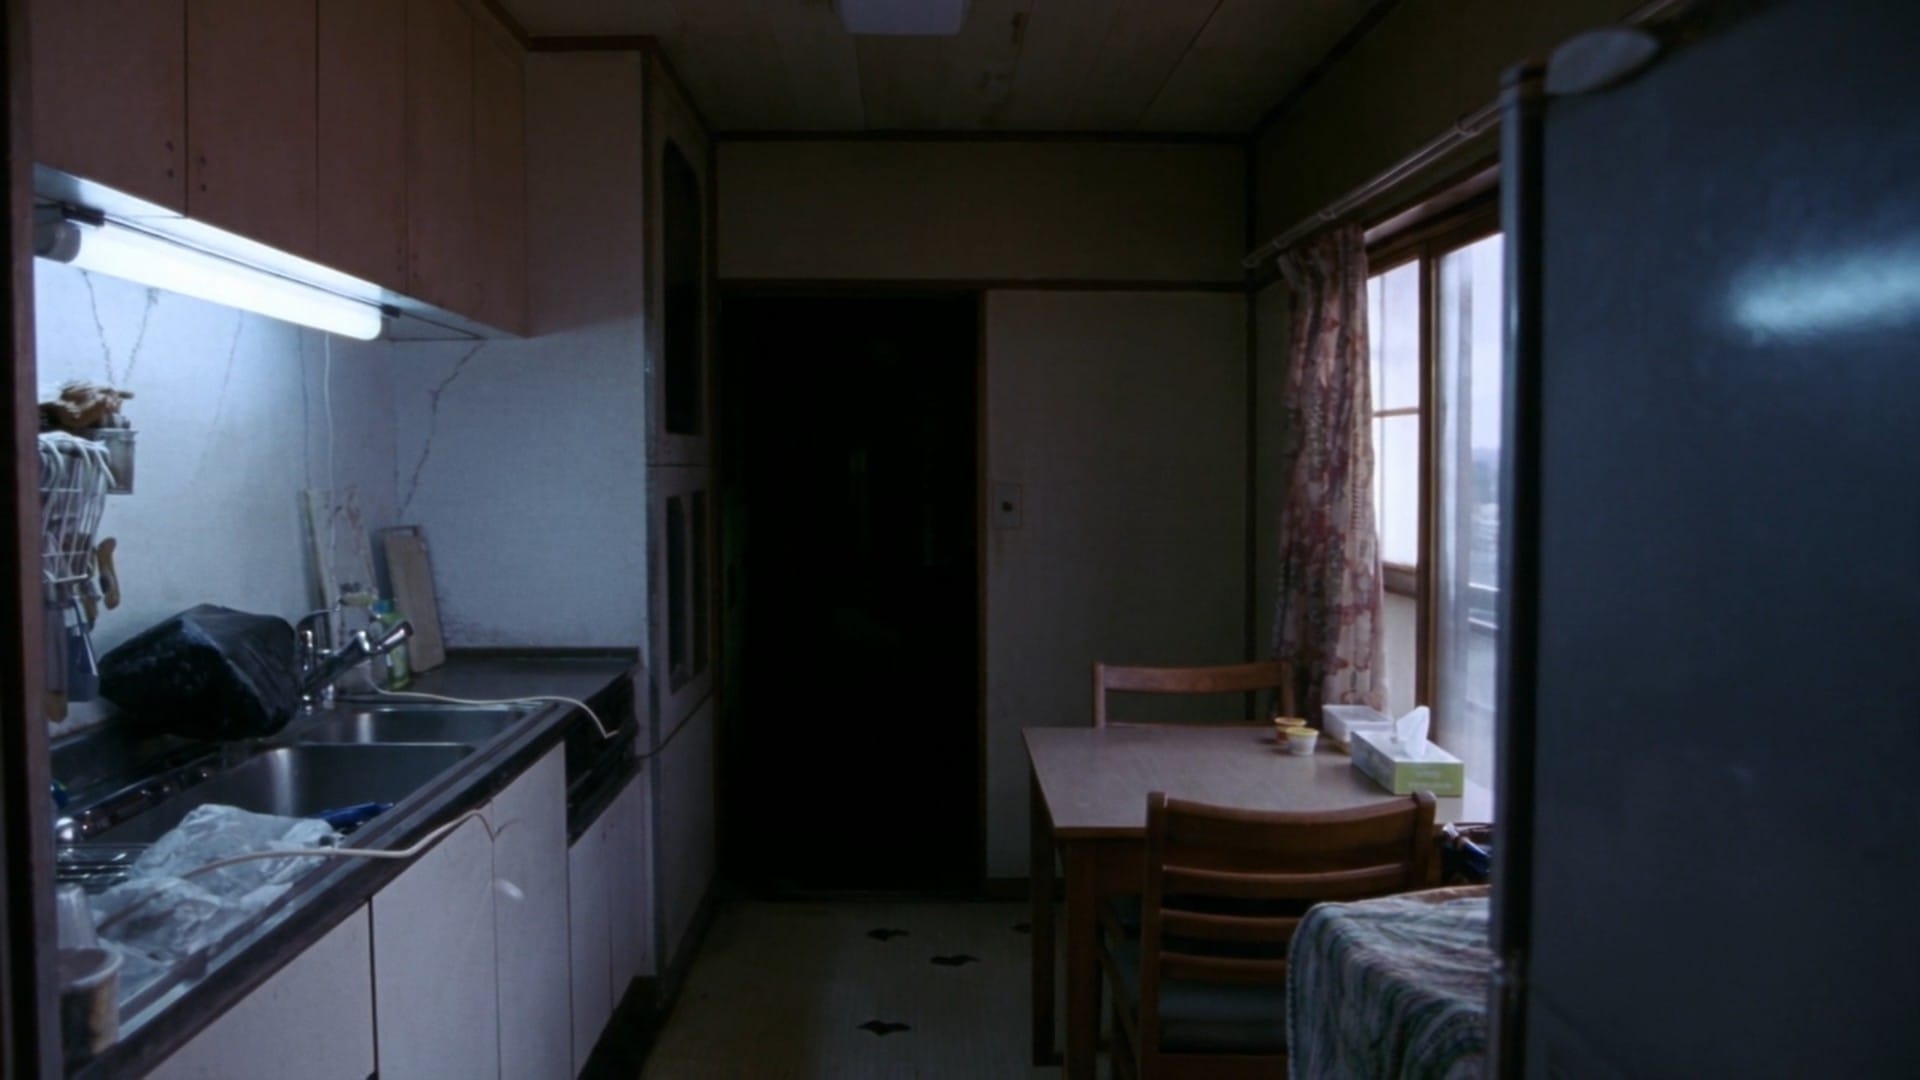
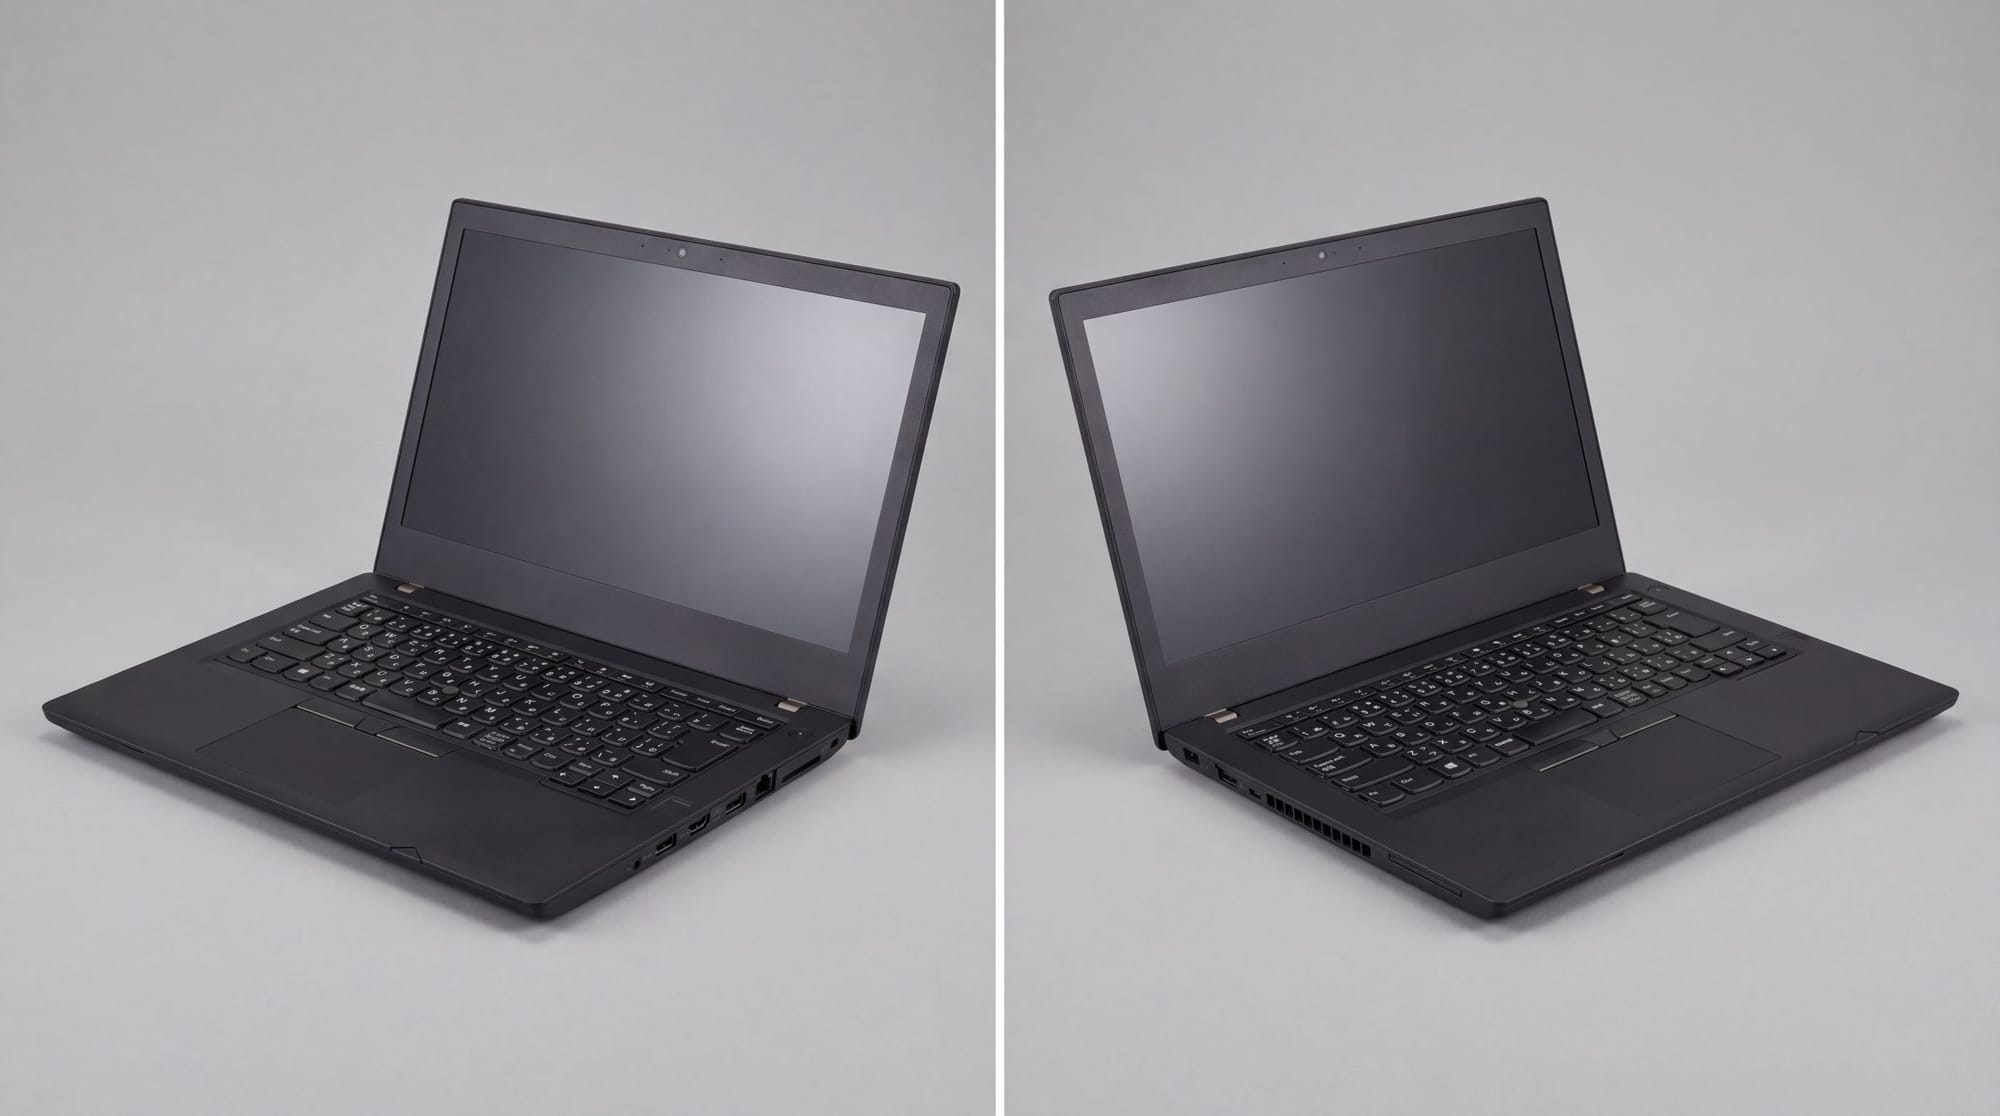
Prompt:
Medium shot of the woman in @image1 sitting at the table in @image2 with the laptop computer in @image3 on the table in front of her. She is leaning back in the chair and has her hands behind her head. Her eyes are closed. The camera starts positioned across the table from her and slowly tracks towards her. Then, the woman's eyes open. She stands and picks up the laptop, then walks out of the room.
Strategy 2:
Reference Image:
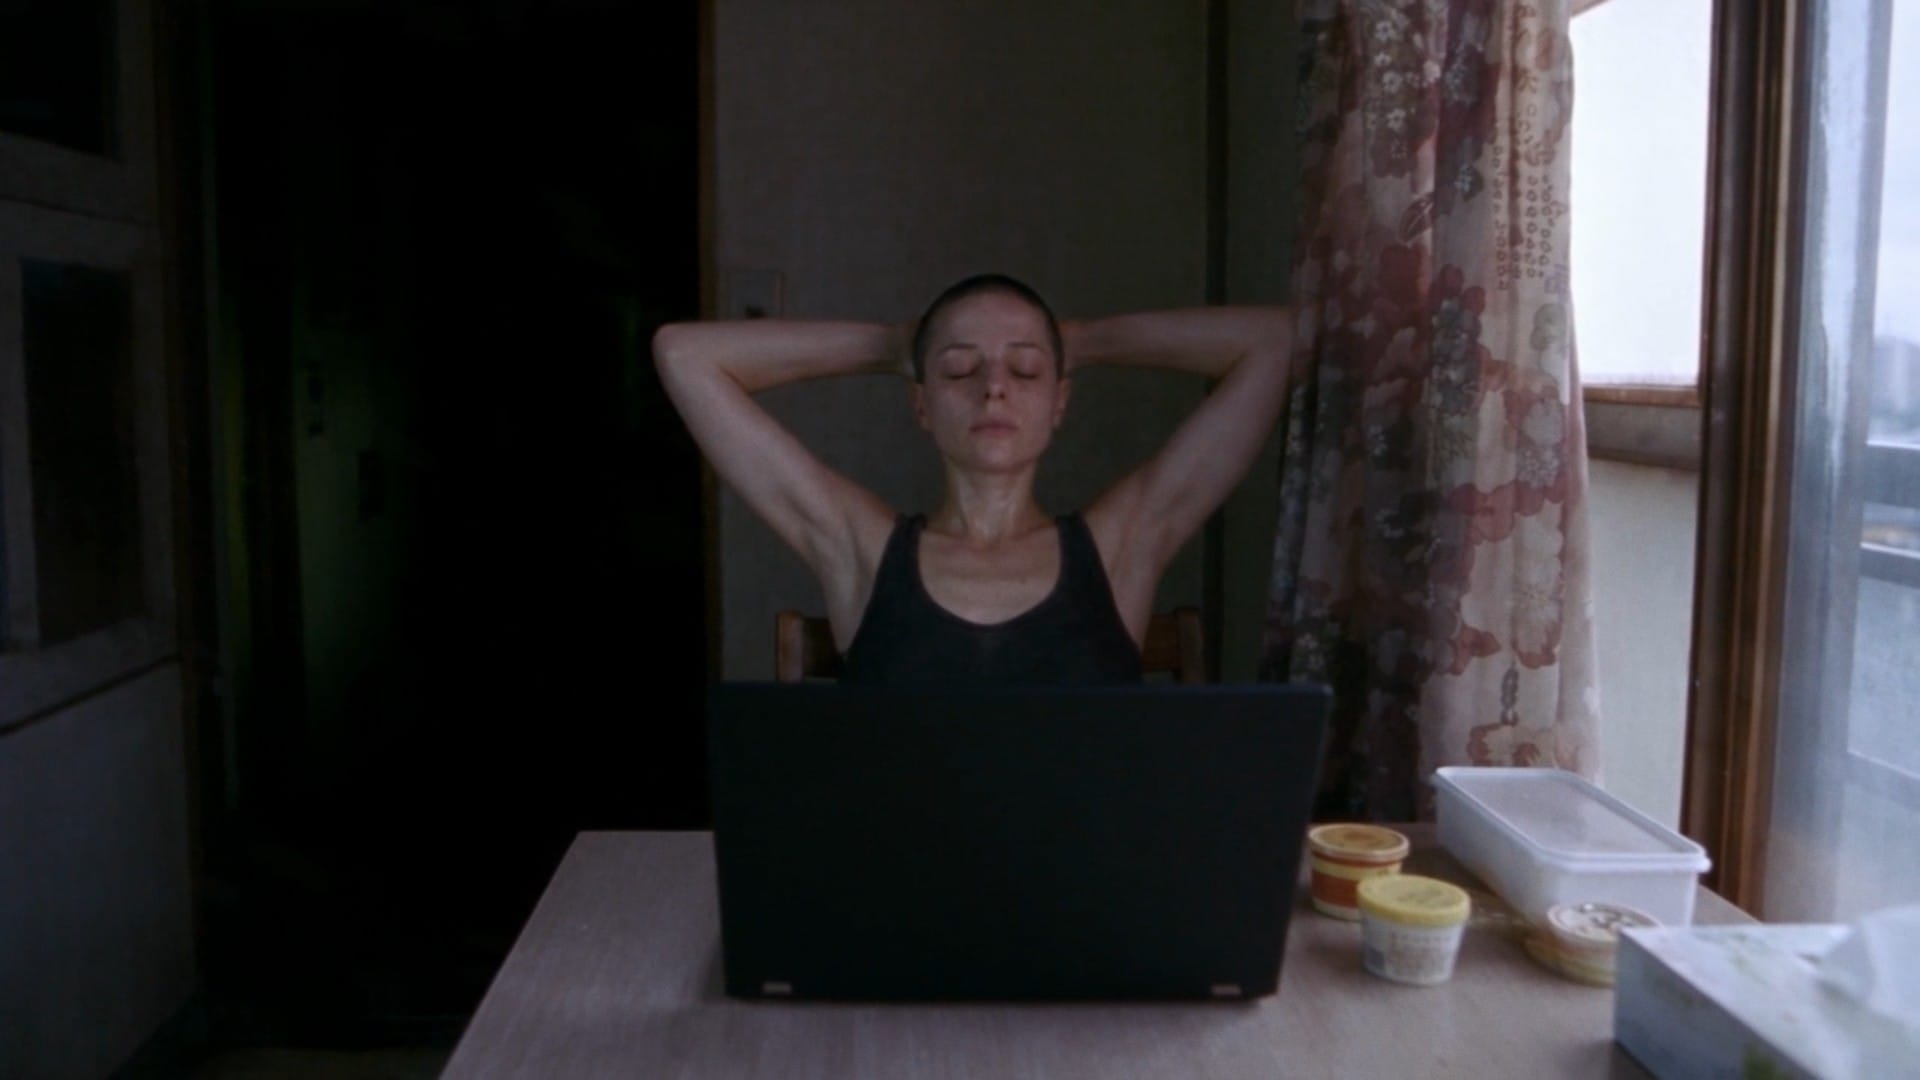
Prompt:
The shot begins at @image1. The camera slowly tracks towards the woman. Then, the woman's eyes open. She stands and picks up the laptop, then walks out of the room.
Strategy 1 puts more onus on the video model. It has to create the actual shot: the camera and character positioning, the framing and depth of field, the lighting, etc. It infers all of these from the reference images and does its best to match the text description.
With Strategy 2, all of the key shot elements are included in the start frame. The video model only has to make things move.
My theory was that Strategy 2 is best. I hadn't been impressed with the aesthetics or shot composition that came out of video models like Seedance 2.0. I felt I could get better-looking start frames using a combination of tools like Midjourney and Nano Banana Pro. I also thought that this would be more economical, because I would be doing most of my iteration with the image model rather than the video model, and image models are far cheaper to use.
Then, a few things happened that changed my mindset. One was the release of Seedance 2.5, which I found far more capable than Seedance 2.0.
On top of that, Higgsfield AI announced a film contest along with a campaign for new subscribers that offered unlimited Seedance 2.5 generations for 32 days. I had never used Higgsfield, but I decided that entering this contest and forcing myself to create a full movie by a deadline would be the best way to advance my knowledge.
The unlimited plan gave me the freedom to do some testing and I concluded that Seedance understands cinematic language better than image-gen tools, so it makes sense to let it build the shots itself. In other words, I shifted to Strategy 1.
Learning Resources
Higgsfield has been putting out a lot of "open source" projects lately. In this case, open source means they share all the video clips generated during the entire production, along with the prompts and reference images used to create those clips. These project pages often include a detailed brief that describes the techniques the production team used. One example is Cully Hill Boys. I pulled a lot of useful information from this project brief.
On Cully Hill Boys, I gather that they used Claude to write all or most of their prompts, and the brief includes the Claude skills they used. These skills are tailored for Seedance 2.0, but there are skills available for Seedance 2.5 on other sites, like this one. I experimented with using Claude to write my prompts, but ultimately decided that I could write clearer, more concise prompts myself. Still, I recommend combing through these Claude skills with your own eyes to learn how to write better prompts.
And, here is the project page for the short movie I submitted to the contest, for anyone interested in reading my prompts.
You can watch the final movie on that page, or on YouTube:
Budget Constraints
For this contest, I used an abridged Sub·Object script. The full movie would probably be 15-20 minutes long, and I (correctly) guessed that I wouldn't have enough time to make the whole thing before the deadline. The shortened version came out at close to 9 minutes.
I should also mention that without the 32-day Seedance 2.5 unlimited plan, I couldn't have afforded this. In the end, I spent about $250 for two months of subscription time on Higgsfield, but the cost of the credits I used with the unlimited plan are valued at around $3,500. And, because the unlimited plan was restricted to 720p, so was my movie. I didn't have the credits (or the time, to be honest) to upscale the shots. Still, I think the low resolution was fine for the movie's low-tech, grungy aesthetic.
A New Apartment Set
I decided to redesign the reference images for the apartment location. Higgsfield has an interesting tool called Cinematic Locations, which is straightforward to use: give it a description of a place and it outputs an image of a similar location that (usually) looks like a still image from a movie. For example:
A cramped, cluttered Tokyo apartment room, shot from a 3/4 angle so that the space reads with depth (not a flat head-on view). On the left side wall in the foreground is a door to another room. On the far wall, in the background, is a window with a cityscape visible outside. Beneath the window is a floor-level table with a laptop computer on it. Against the wall directly to the right of the low table there is a tall home-built computer rack, filled with hardware and cables. Thick bundles of cables snake along the walls, floor, and ceiling, and out through the open window. To the left side of the floor-level table is a closet with the doors open, filled with boxes and computer hardware. Two blankets and spread out on the floor in front of the floor-level table. The light sources are the strong gray sunlight coming through the window, the laptop monitor, and a dim overhead light.
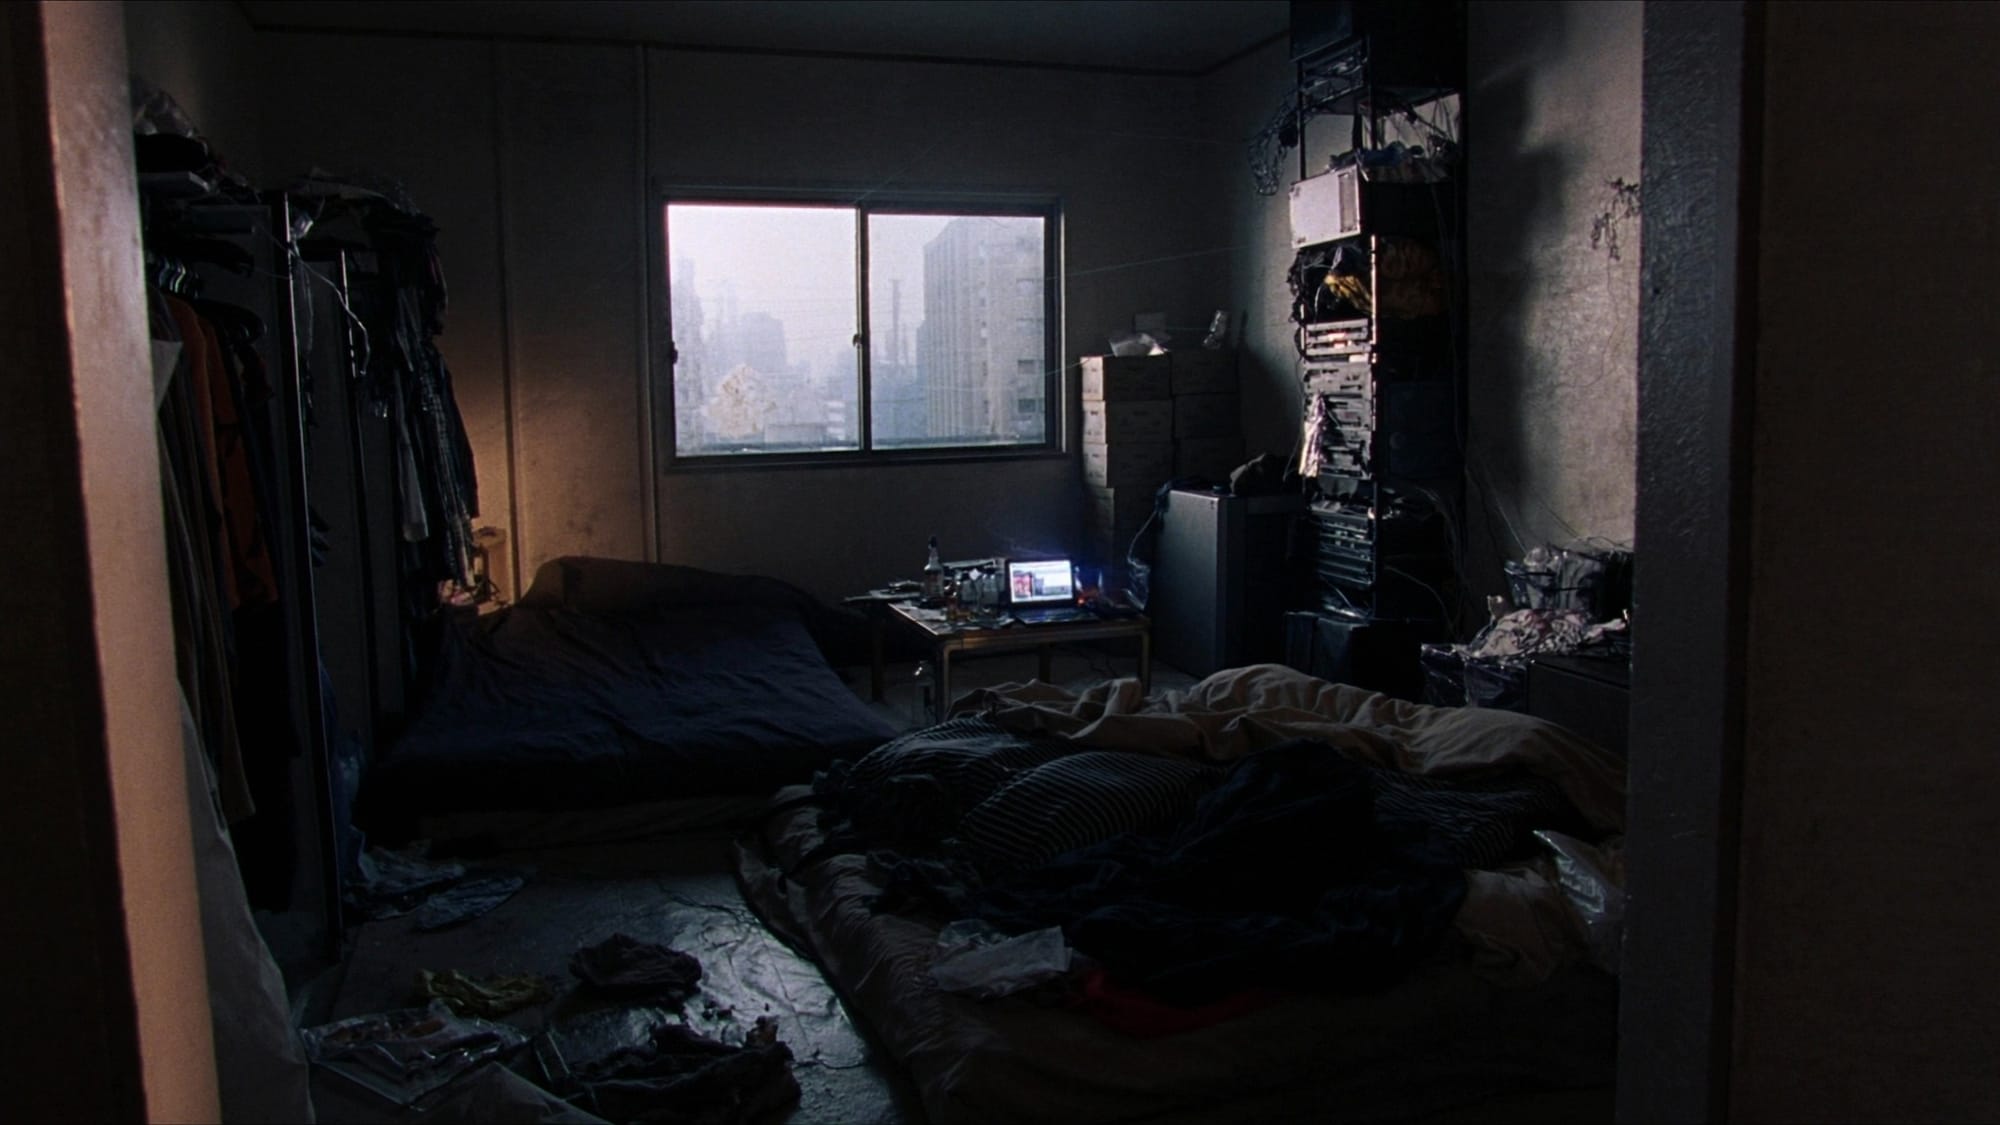
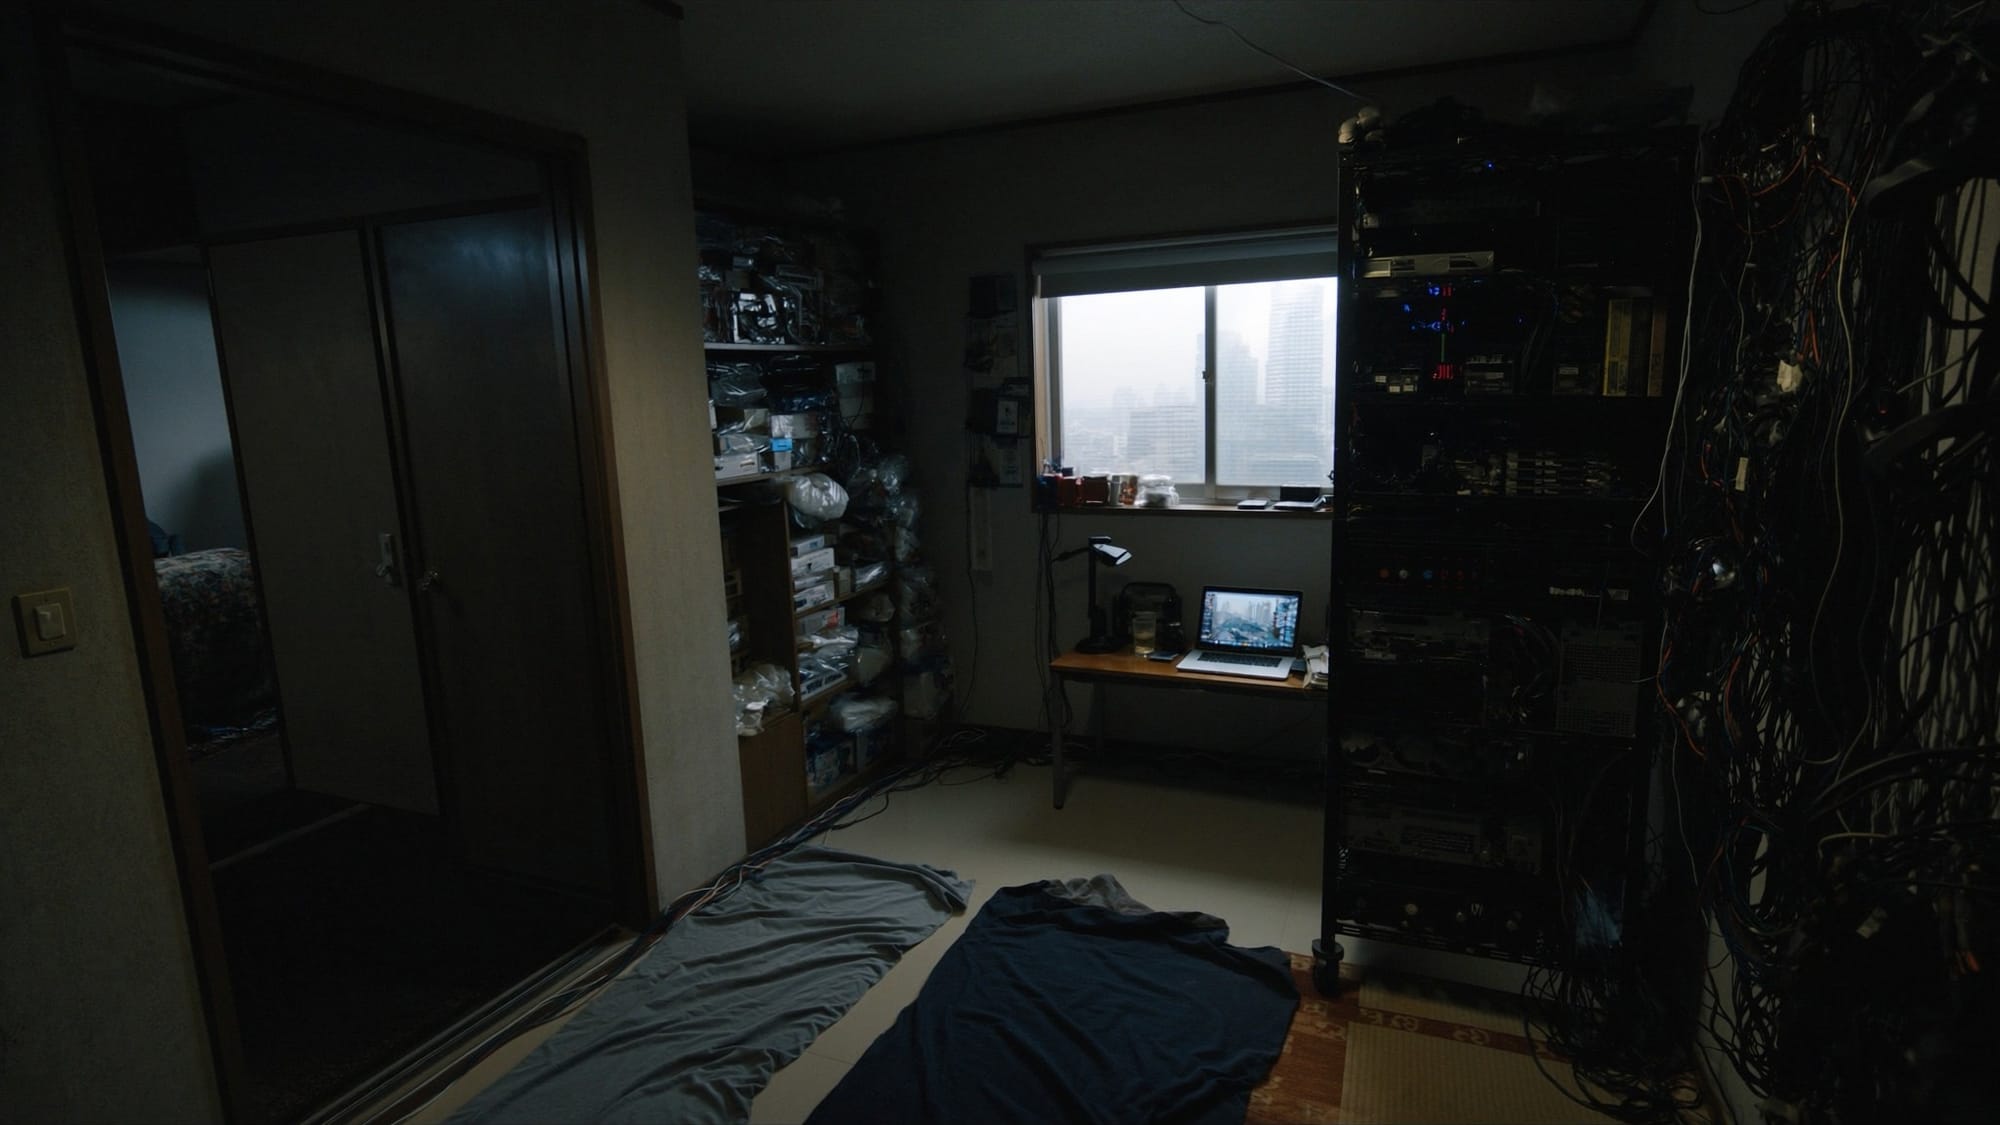
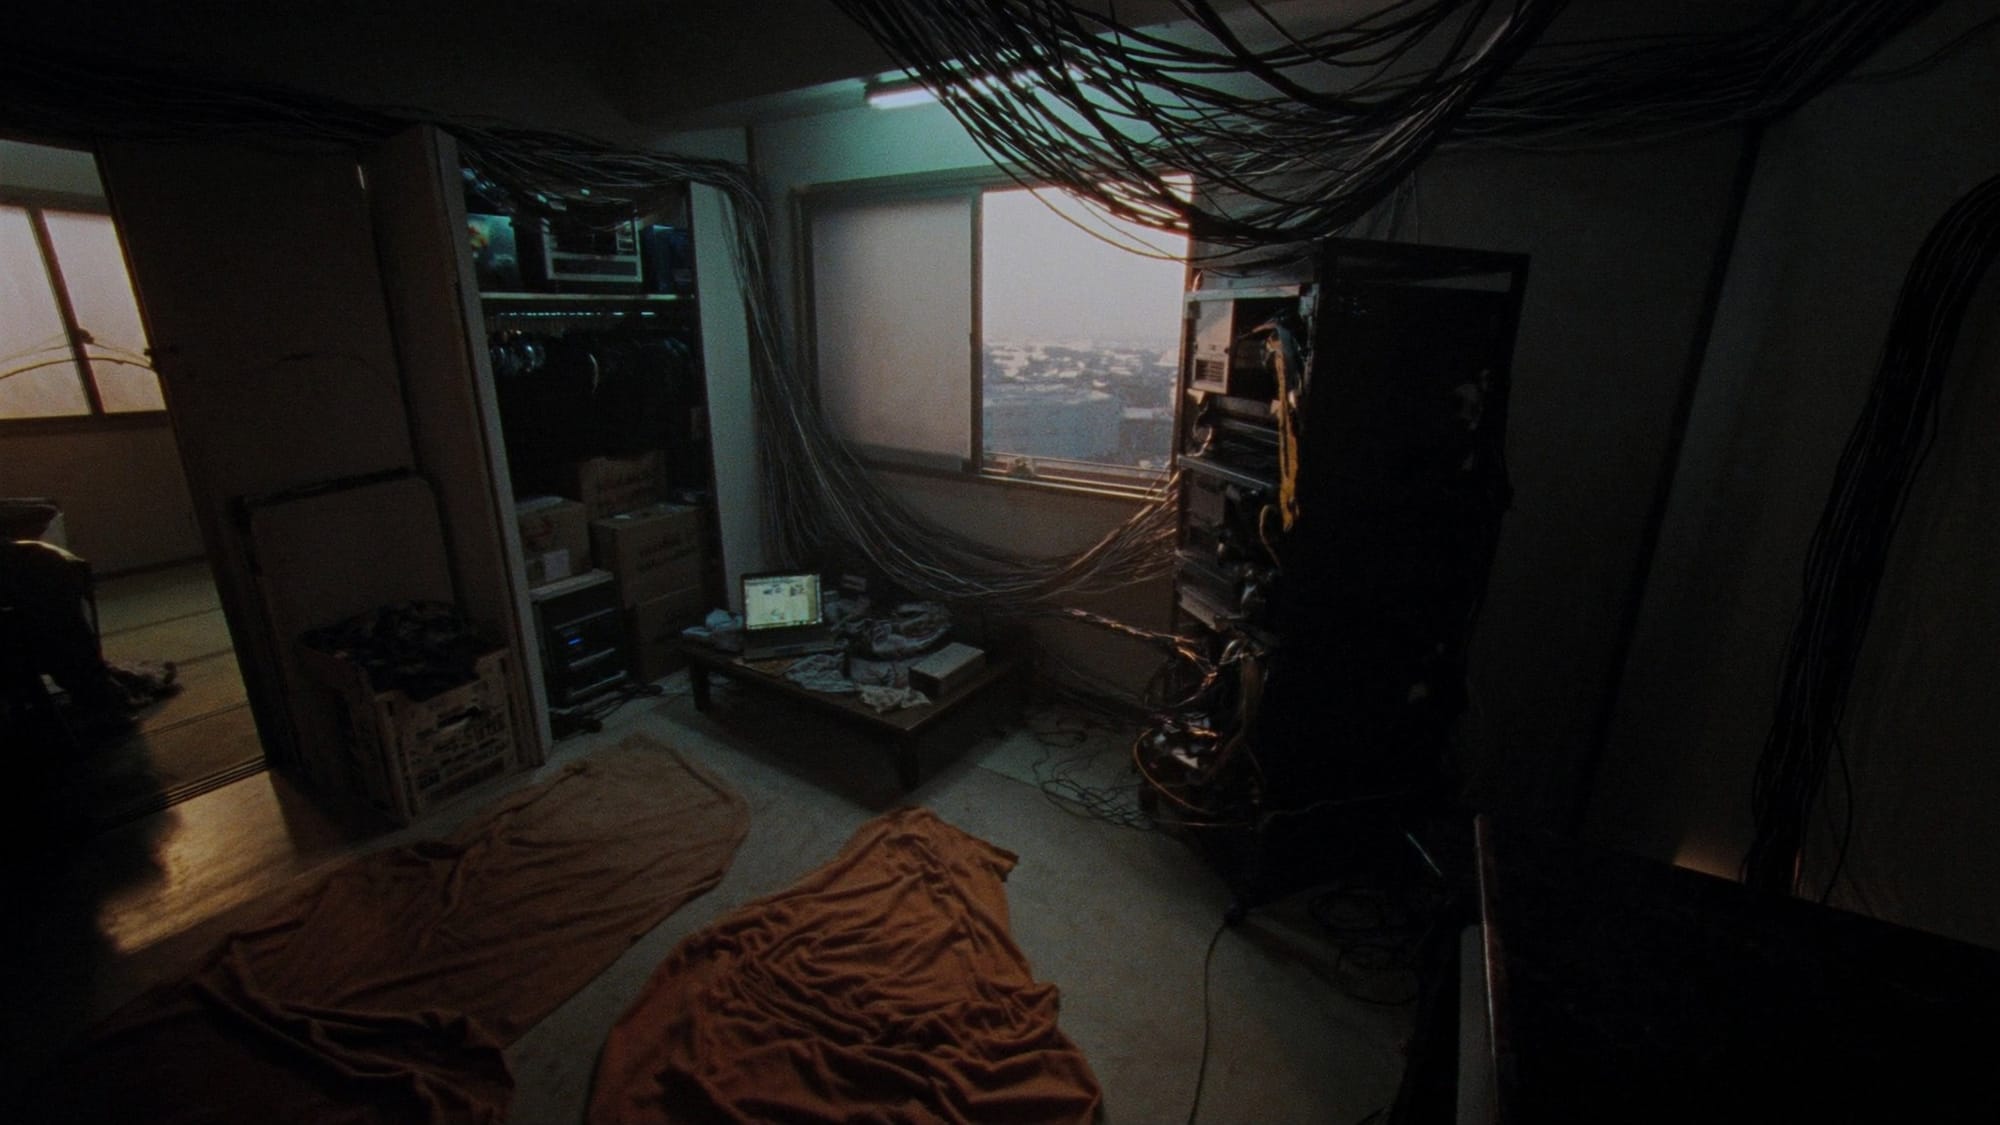
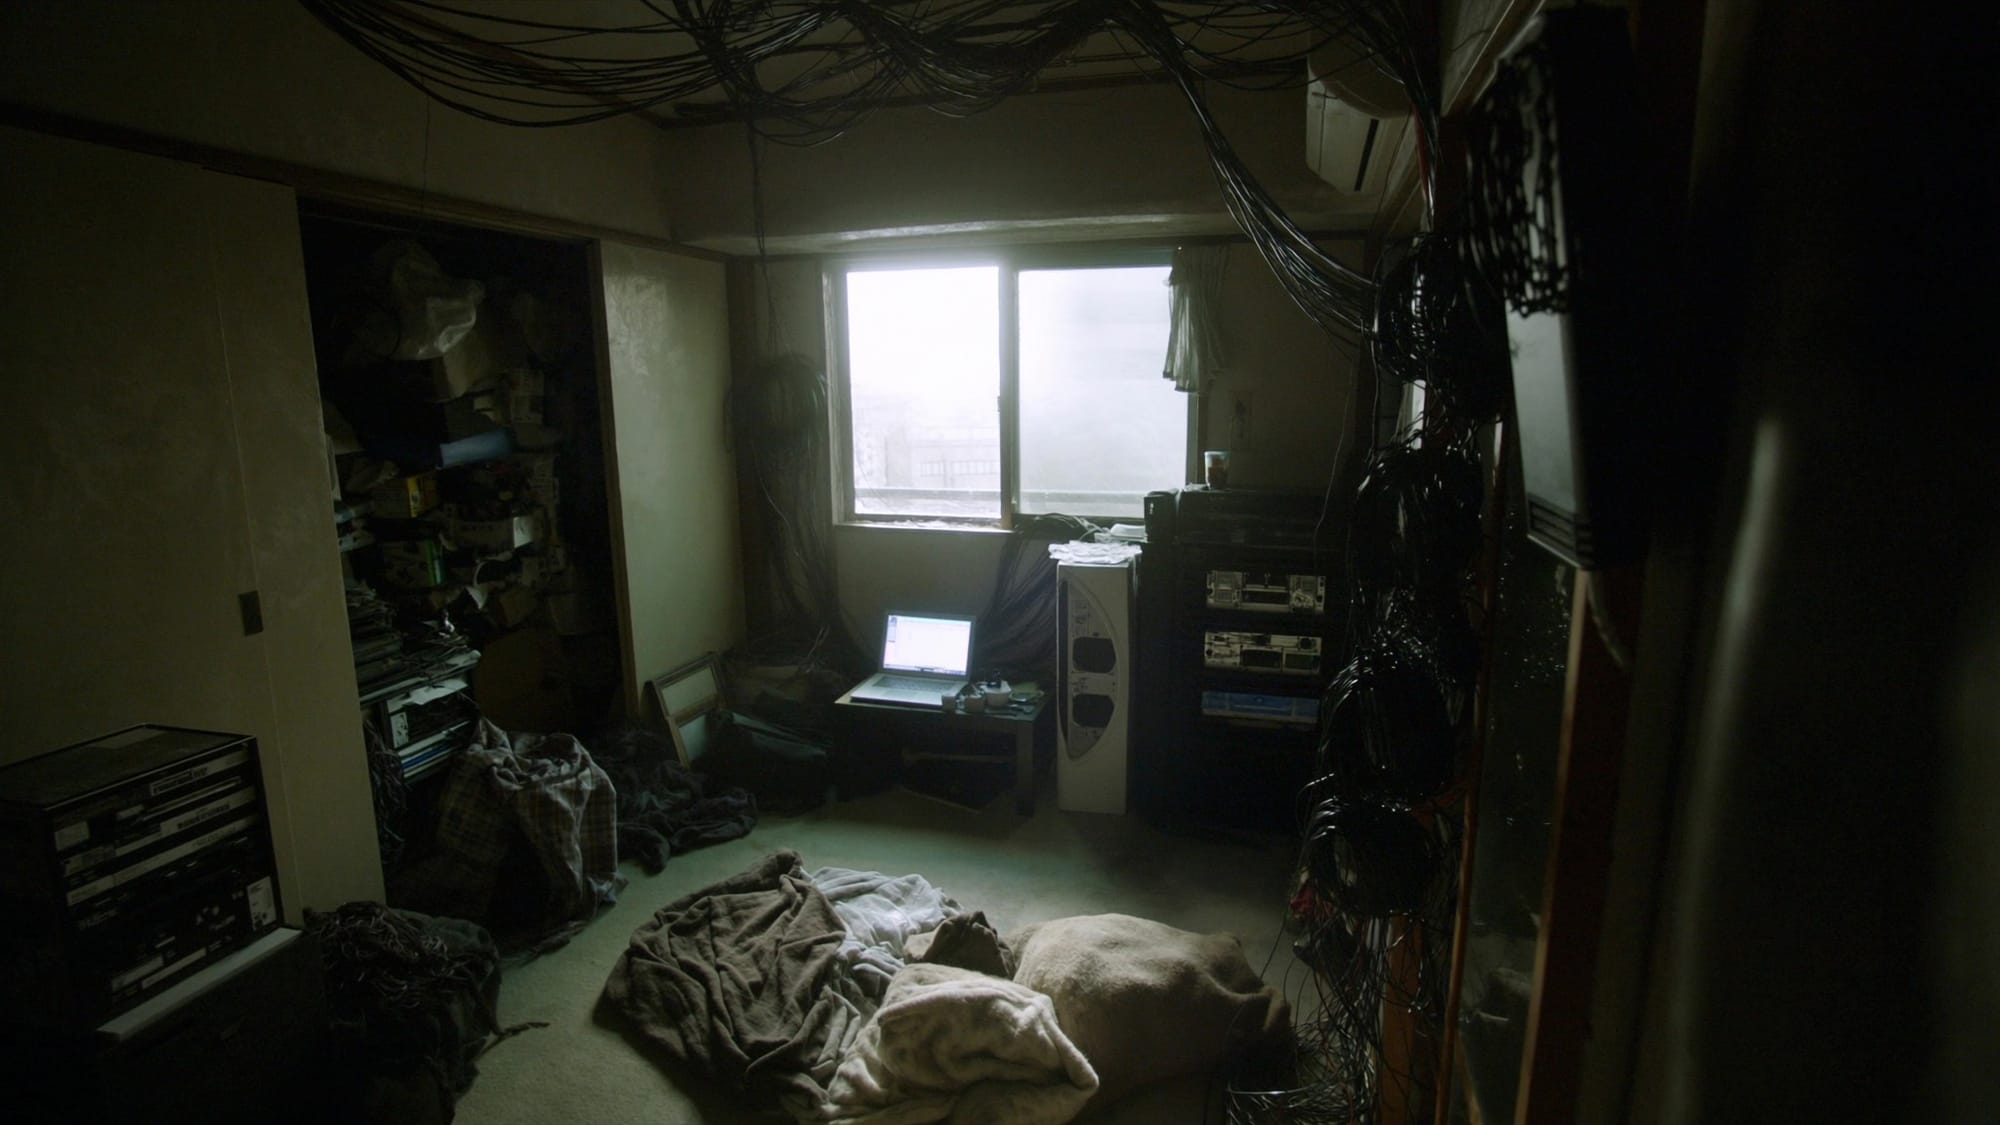
I imagine the Cinematic Locations tool has back-end features that push every image towards a cinematic style, because with a more general image model like Nano Banana Pro, I would have to stipulate the style in every prompt.
I settled on this image for the bedroom/workroom location:
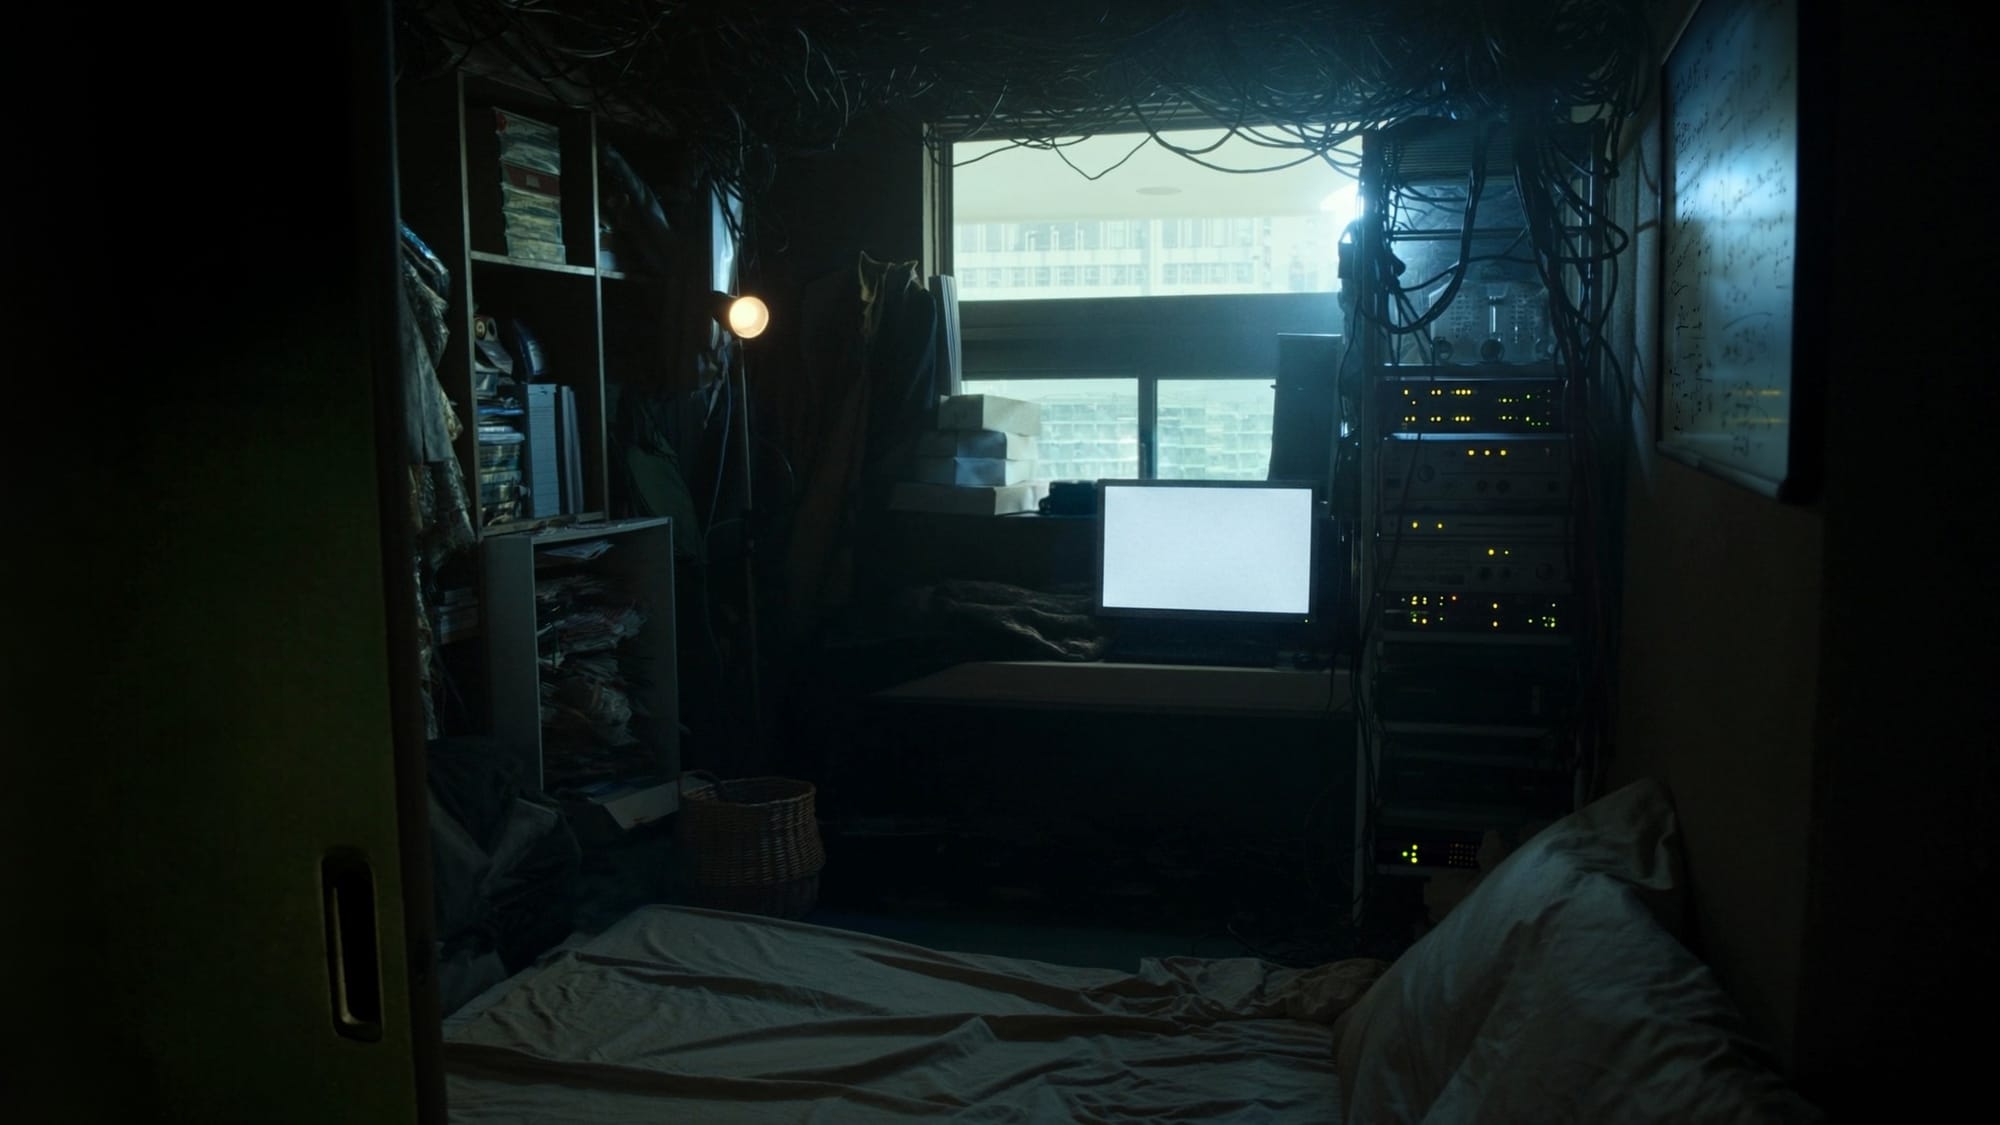
Now, I needed to generate an additional image of the room. Because a number of the movie's shots would face the entrance of the room, I needed a reference image to cover that angle. Otherwise, for every shot pointed in that direction, Seedance would have to invent something and the room would look different in every output.
Unfortunately, Cinematic Locations can't output alternate angles of the same room, so I needed to use other tools for that. Nano Banana and GPT Image also struggled. I covered this in my last entry, but image models aren't great at "moving" the camera to view the same location from another angle. What tools are good at moving the camera? Video models! Rather than burn credits with the image models, why not use my Seedance 2.5 unlimited plan? I gave Seedance the location image as a start frame, then asked for a clip of the camera floating into the room and turning around 180 degrees. This is the output I ended up using:
I simply pulled the last frame of this shot, did some edits with Nano Banana, and used it as the workroom's second reference image.
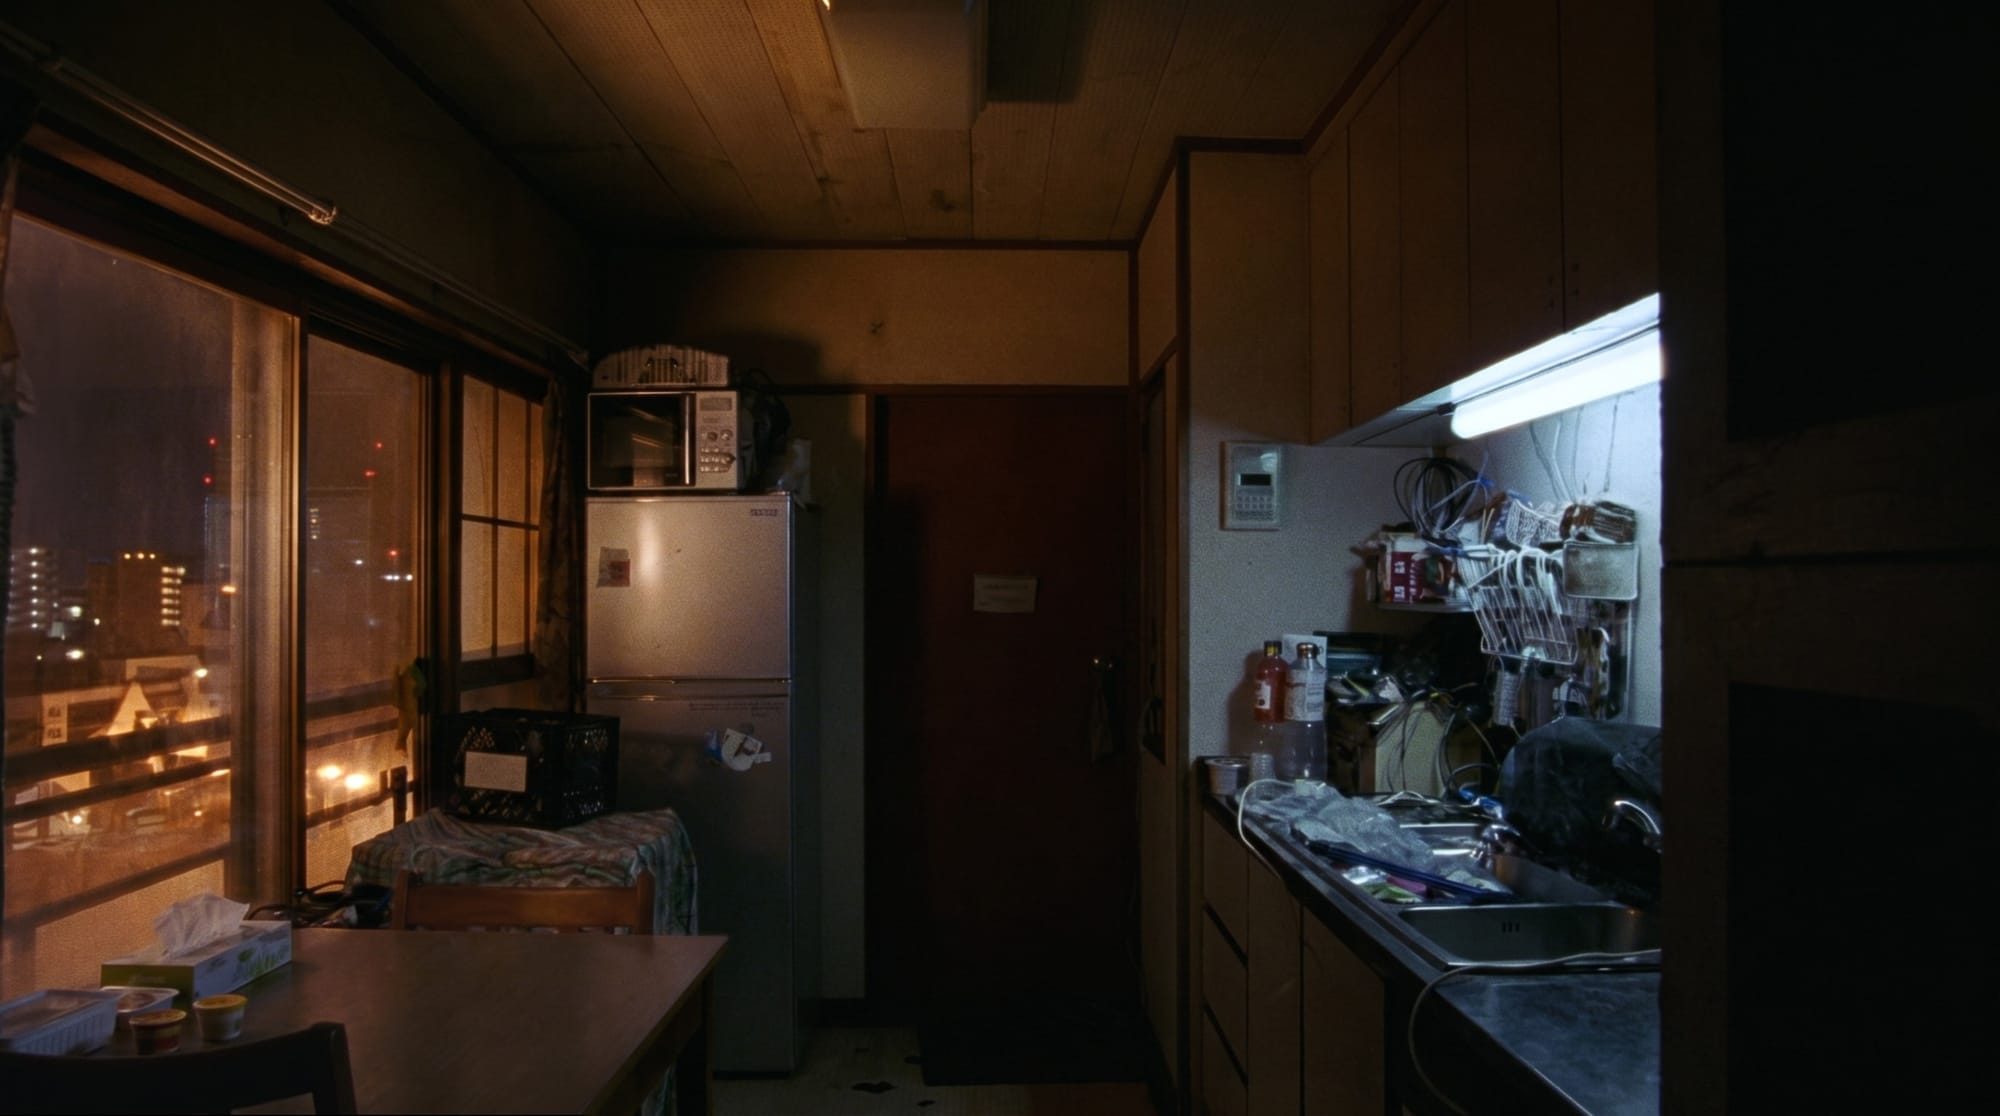
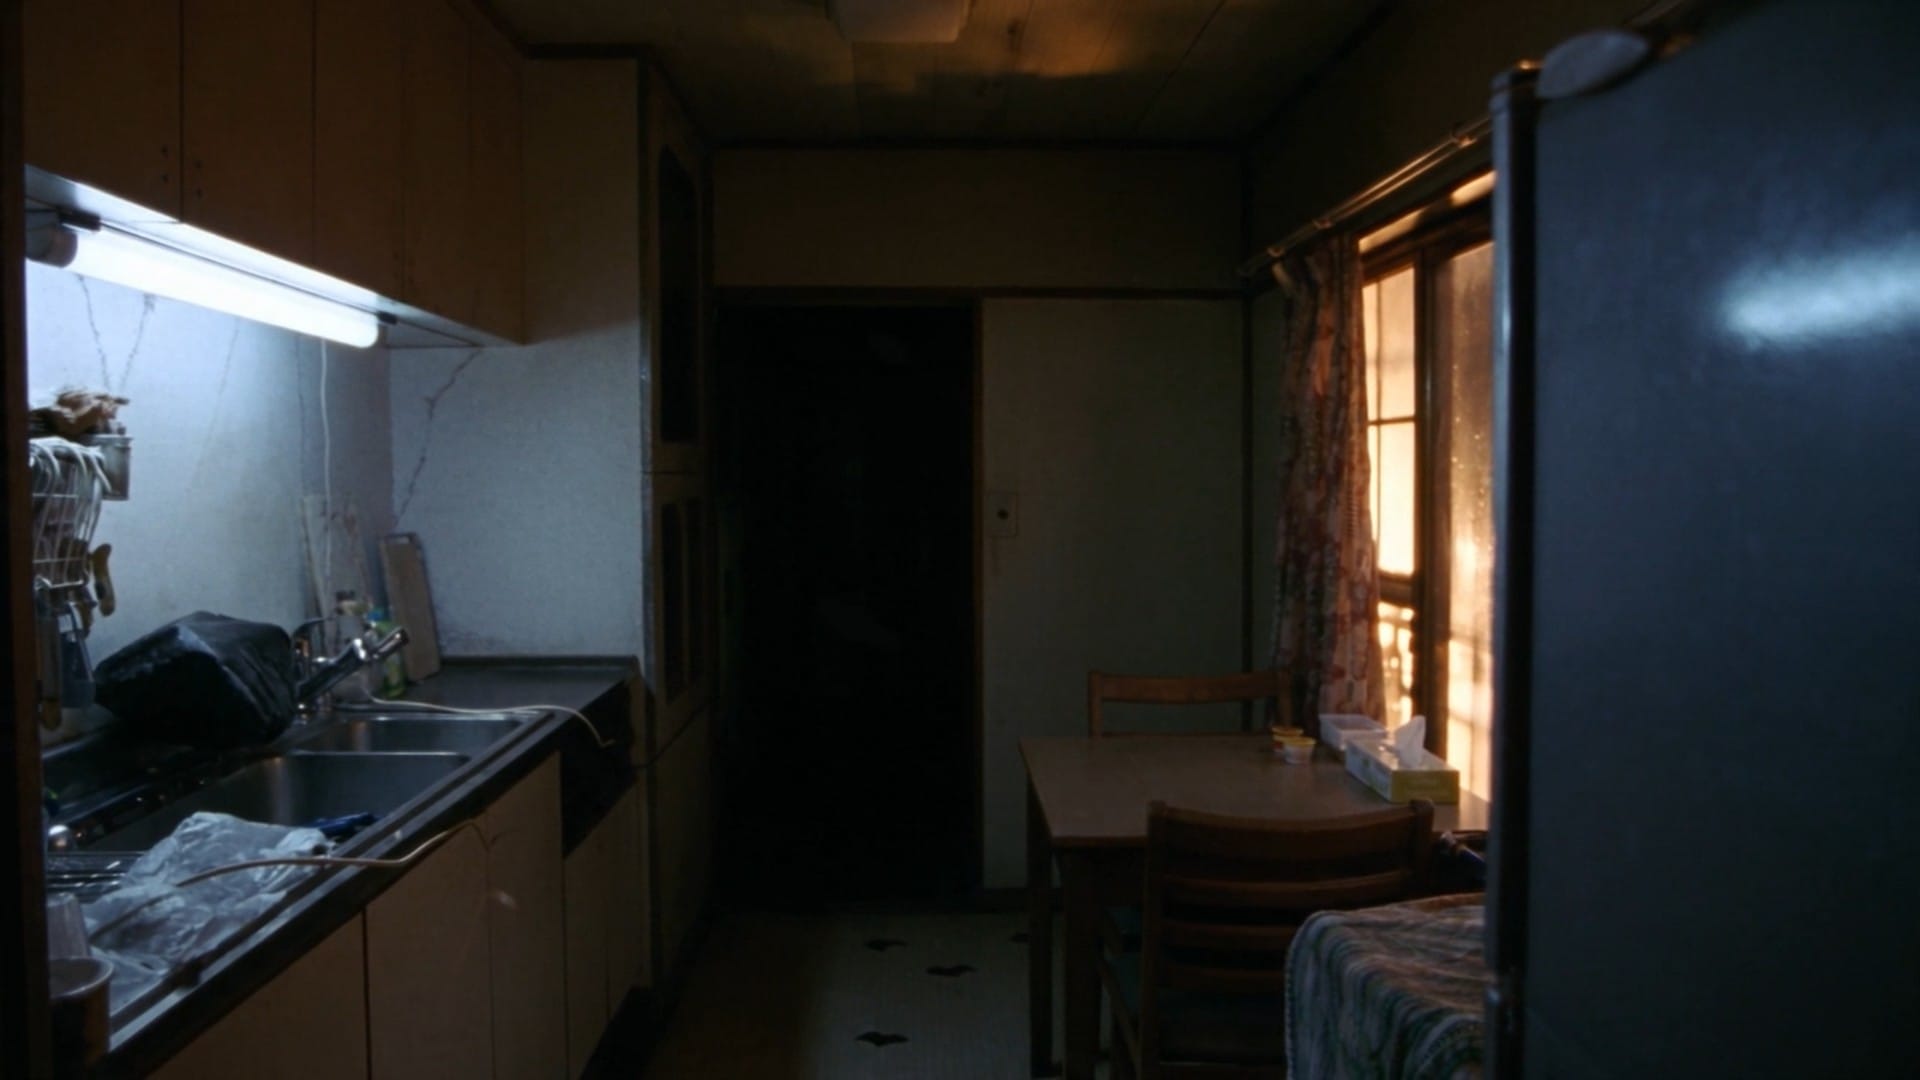
I did the same thing for the kitchen:
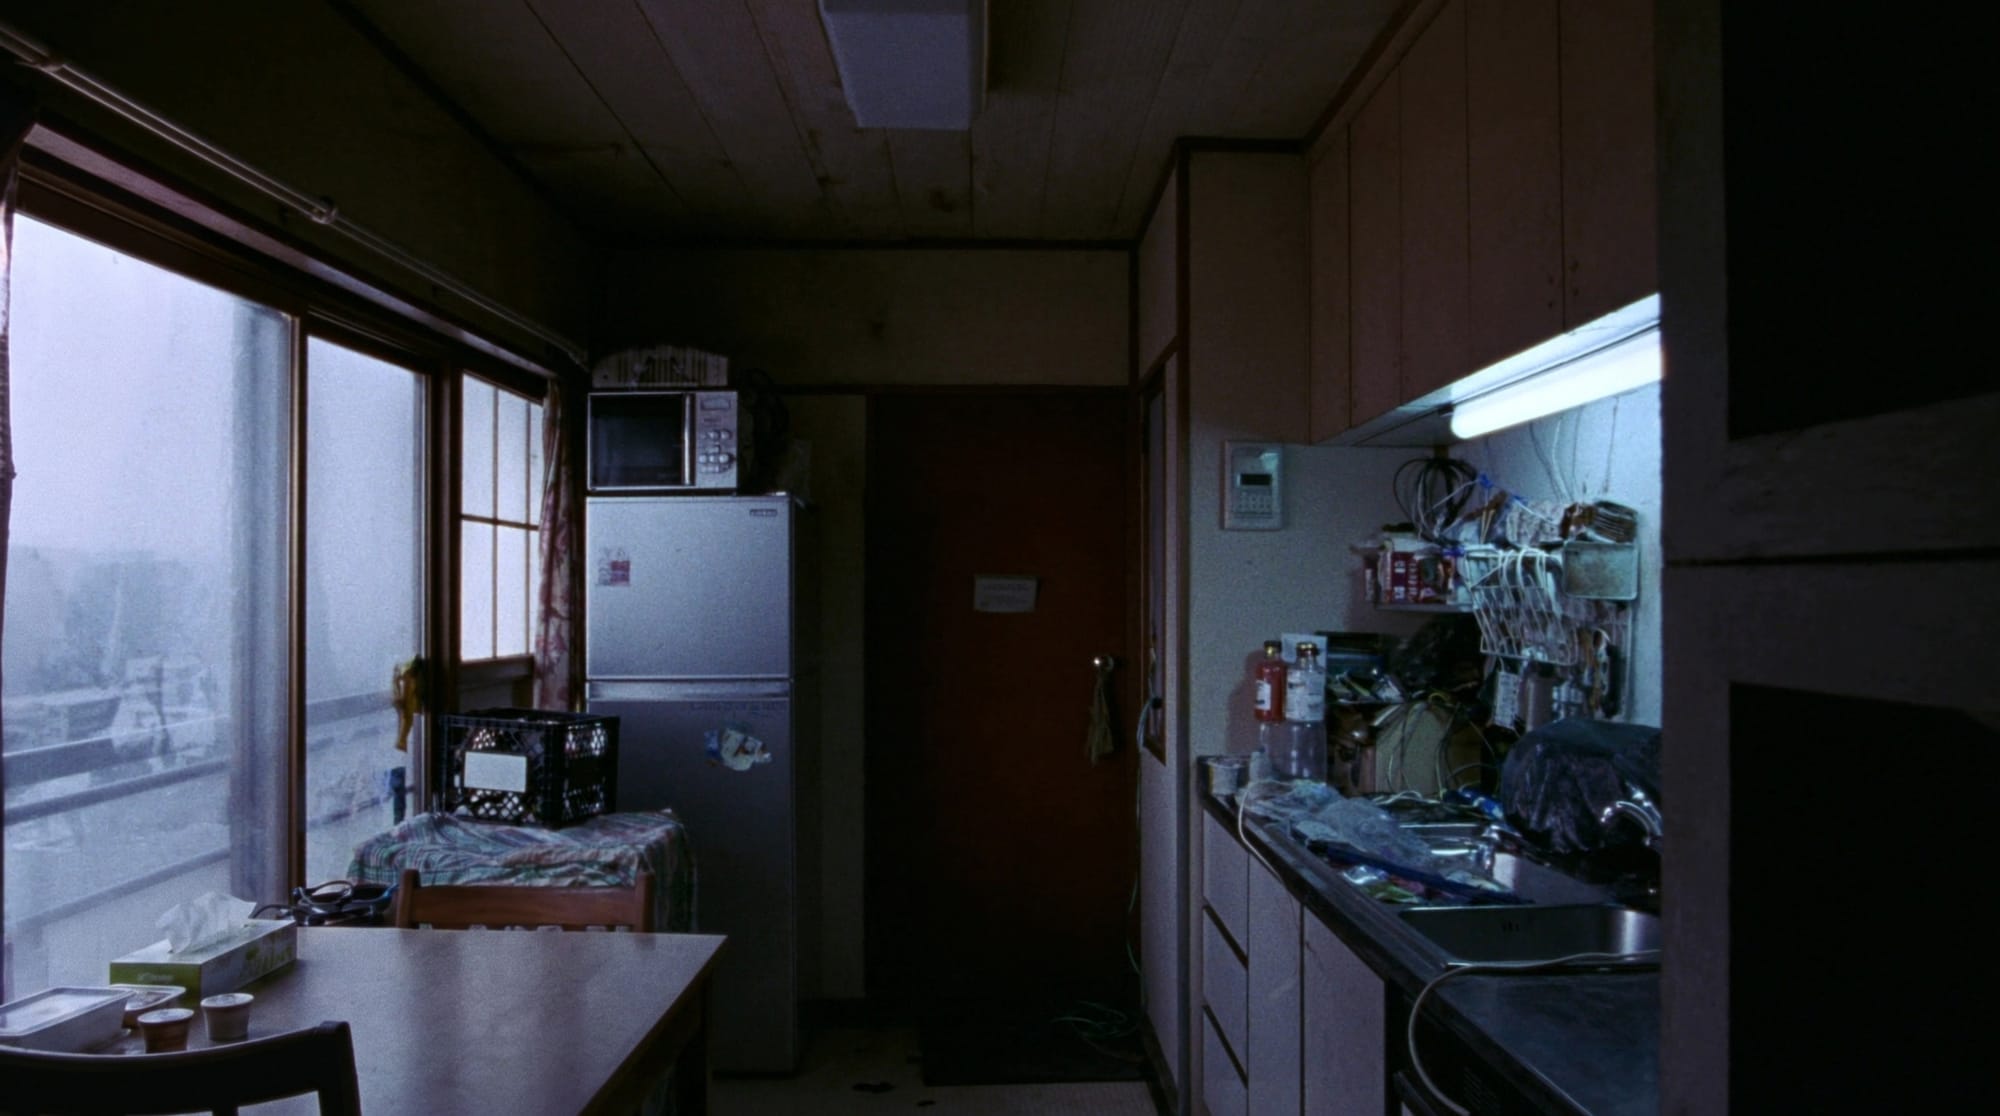
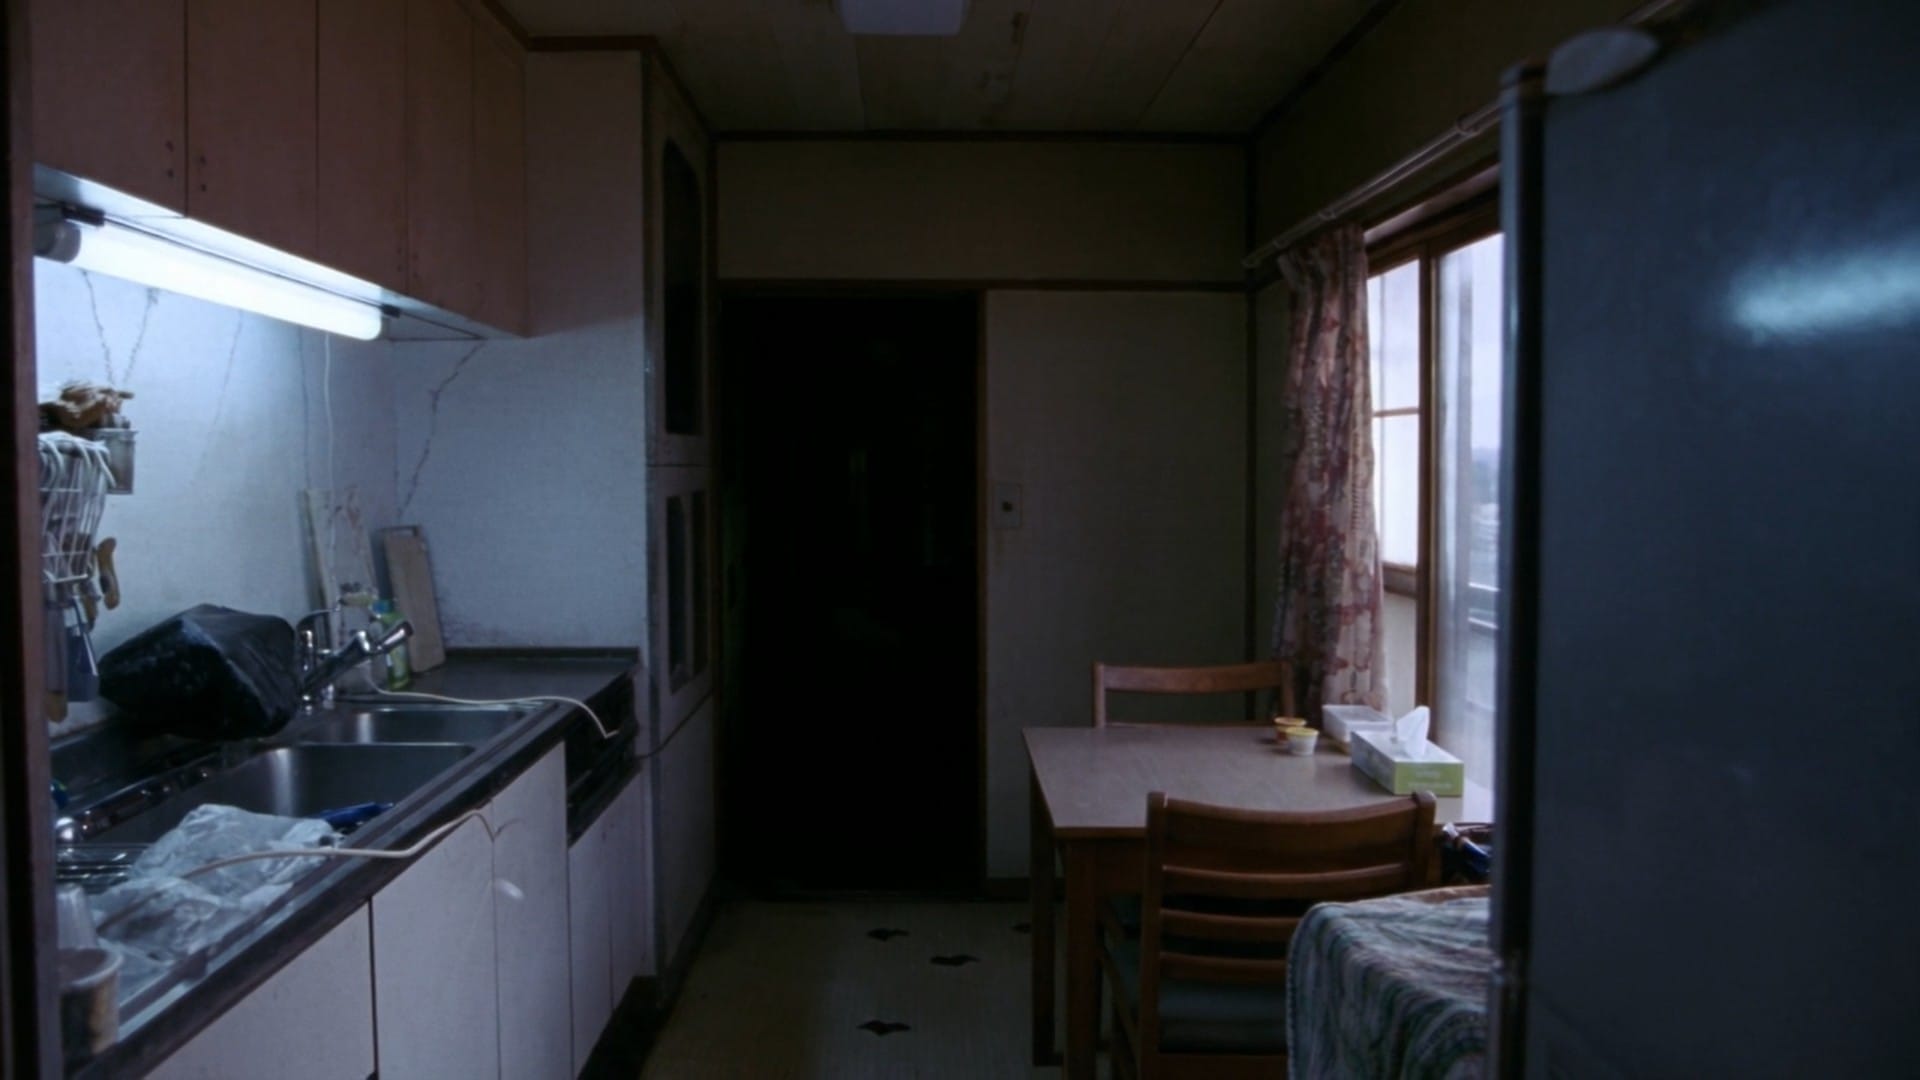
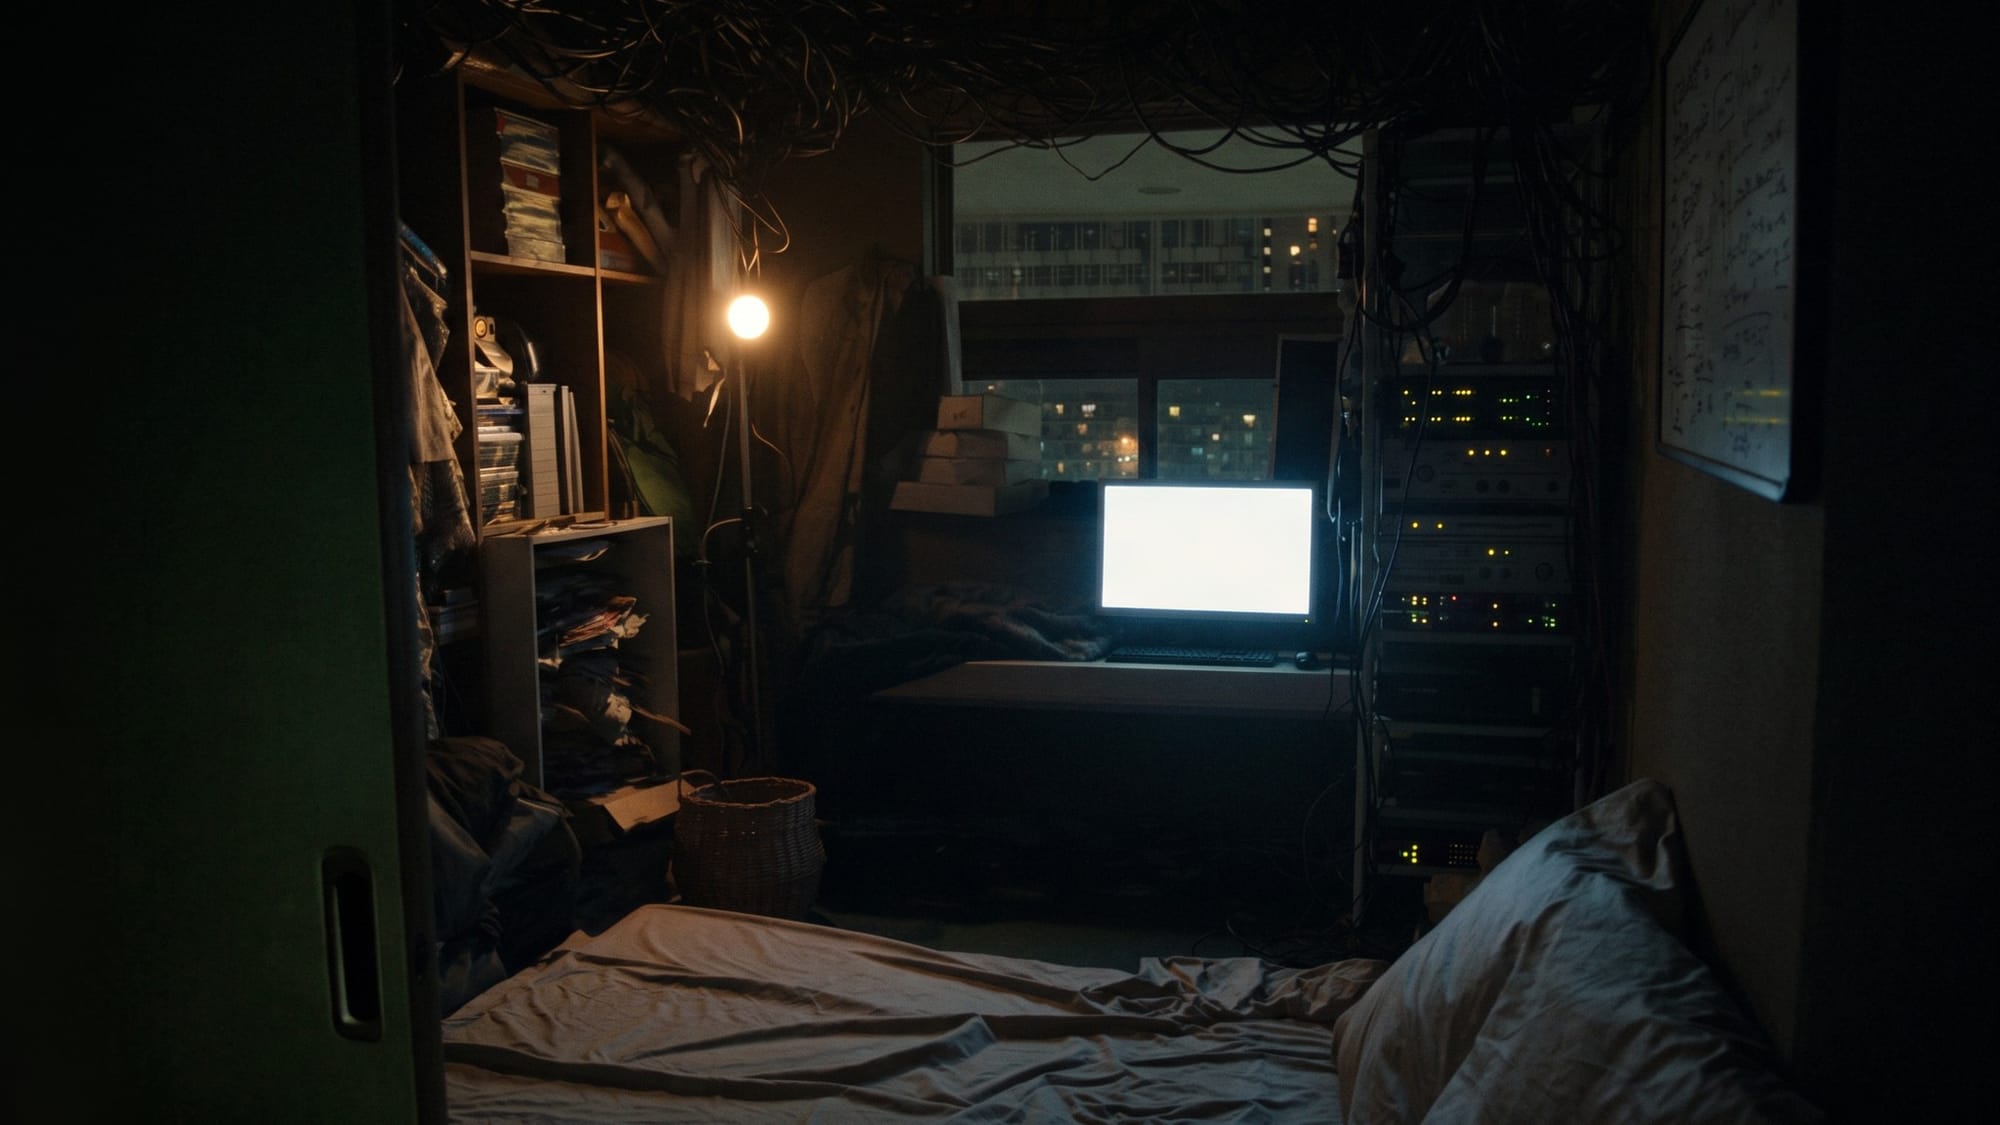
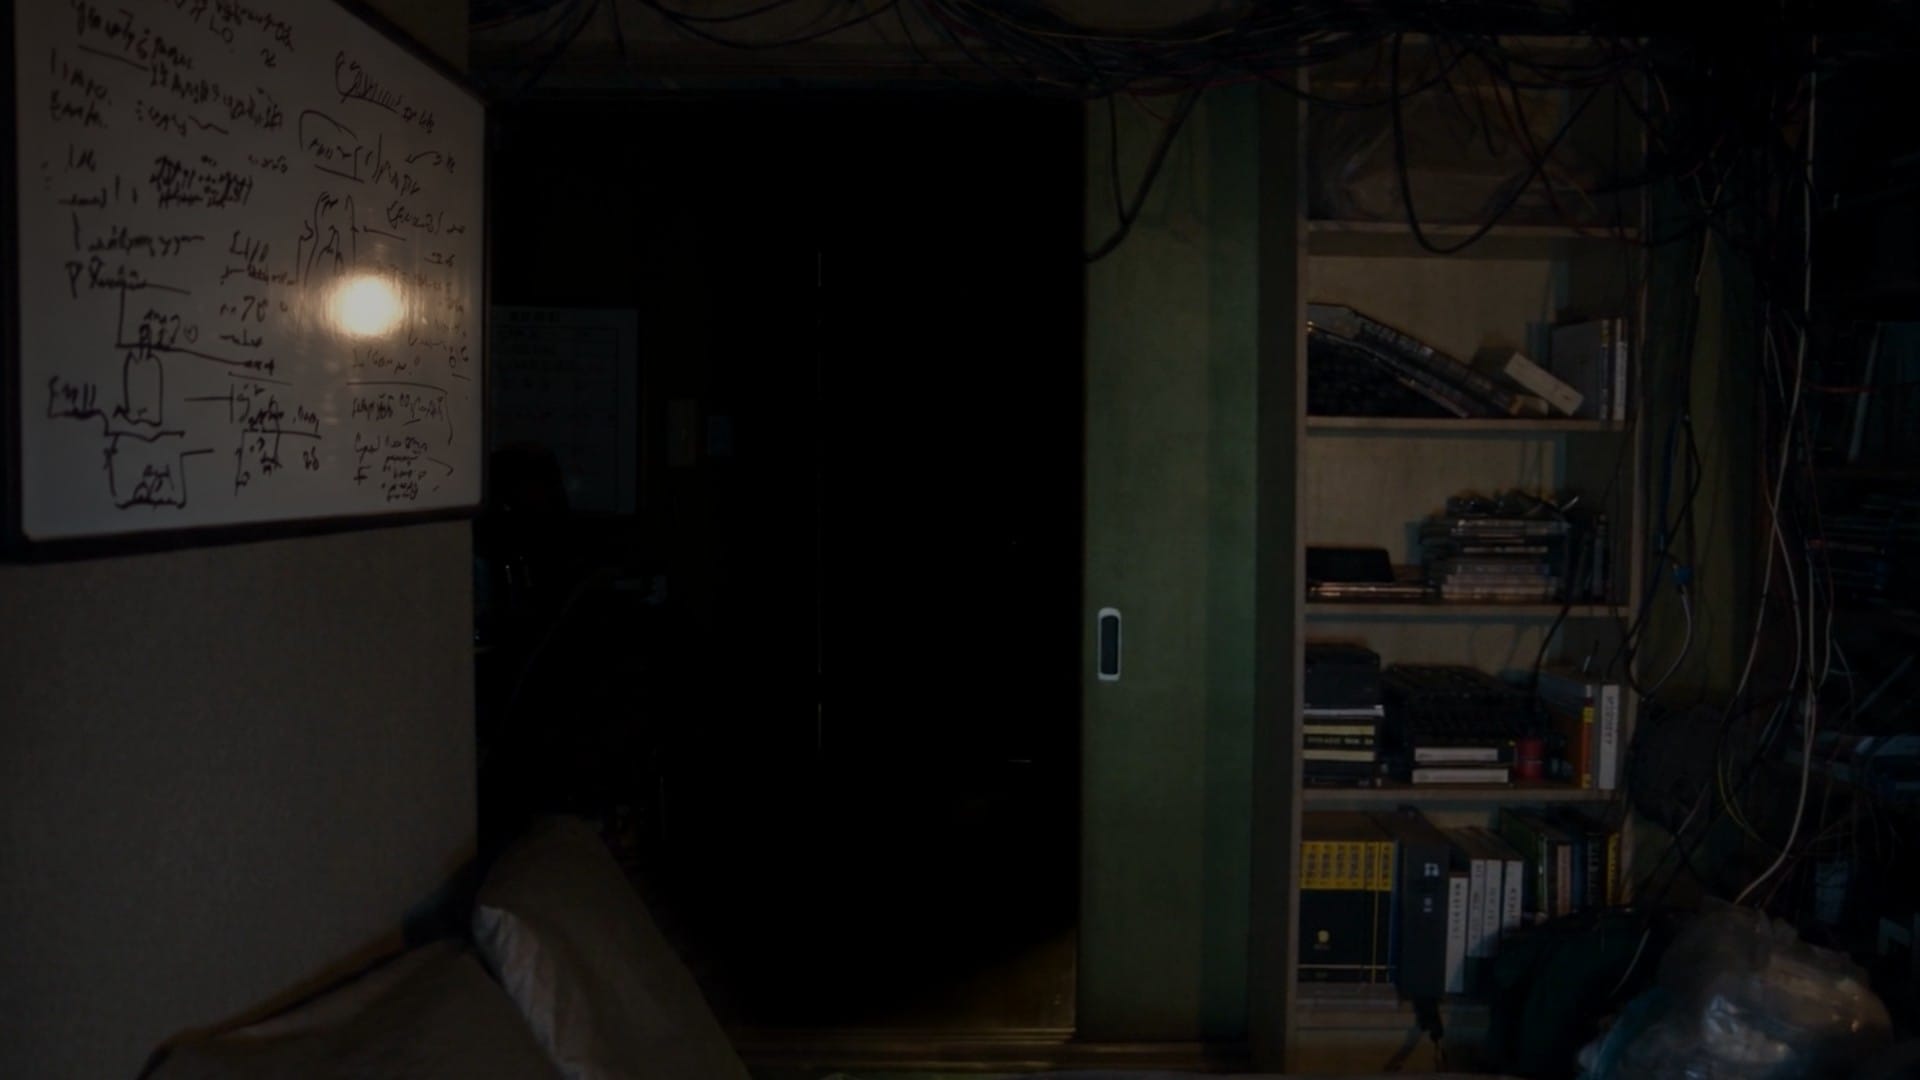
I also needed nighttime versions of both the workroom and the kitchen. For this, image models were good enough. These images came from Nano Banana Pro and Nano Banana 2:
A New Aneta and Anders
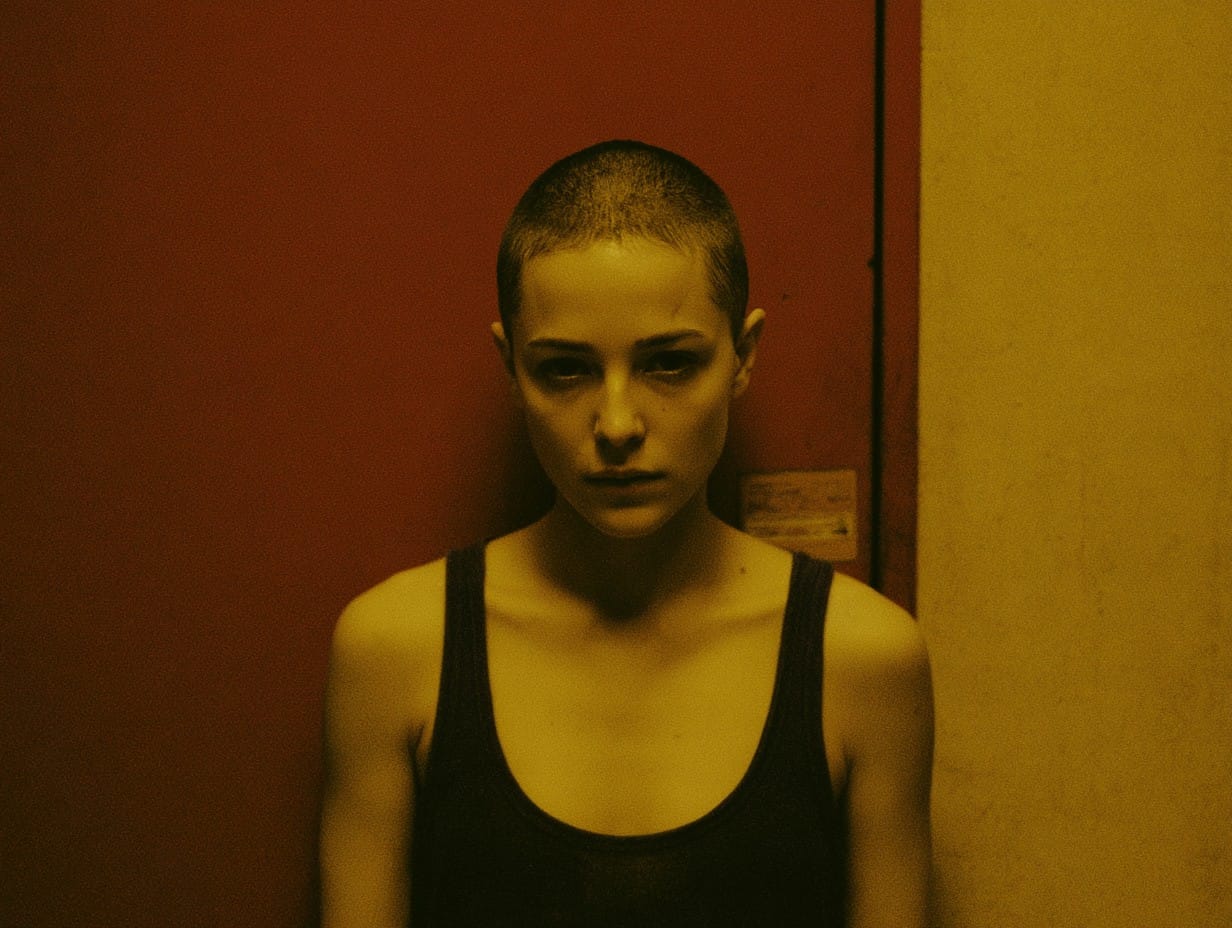
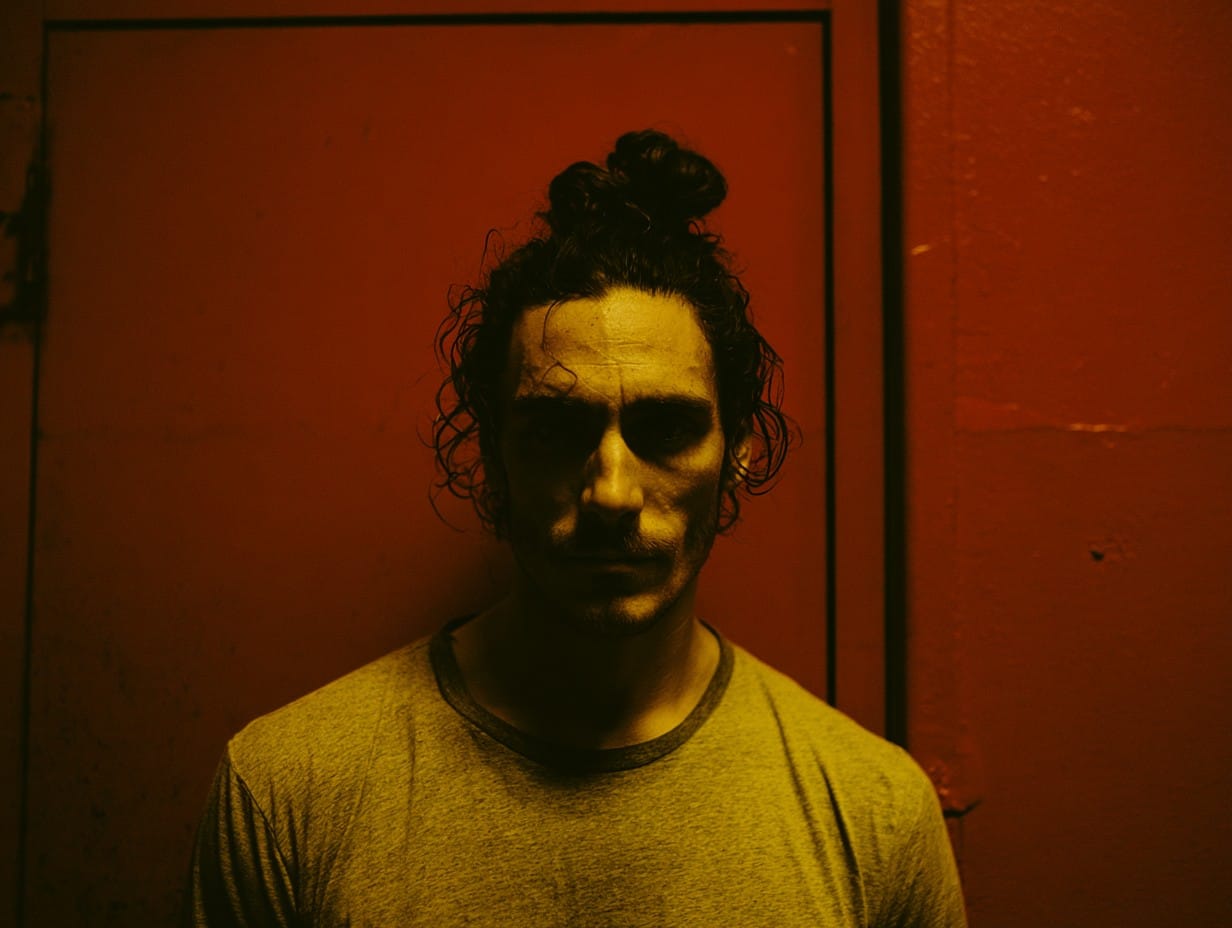
I also redesigned the character sheets for Aneta and Anders. The original sources were still the same two Midjourney images:
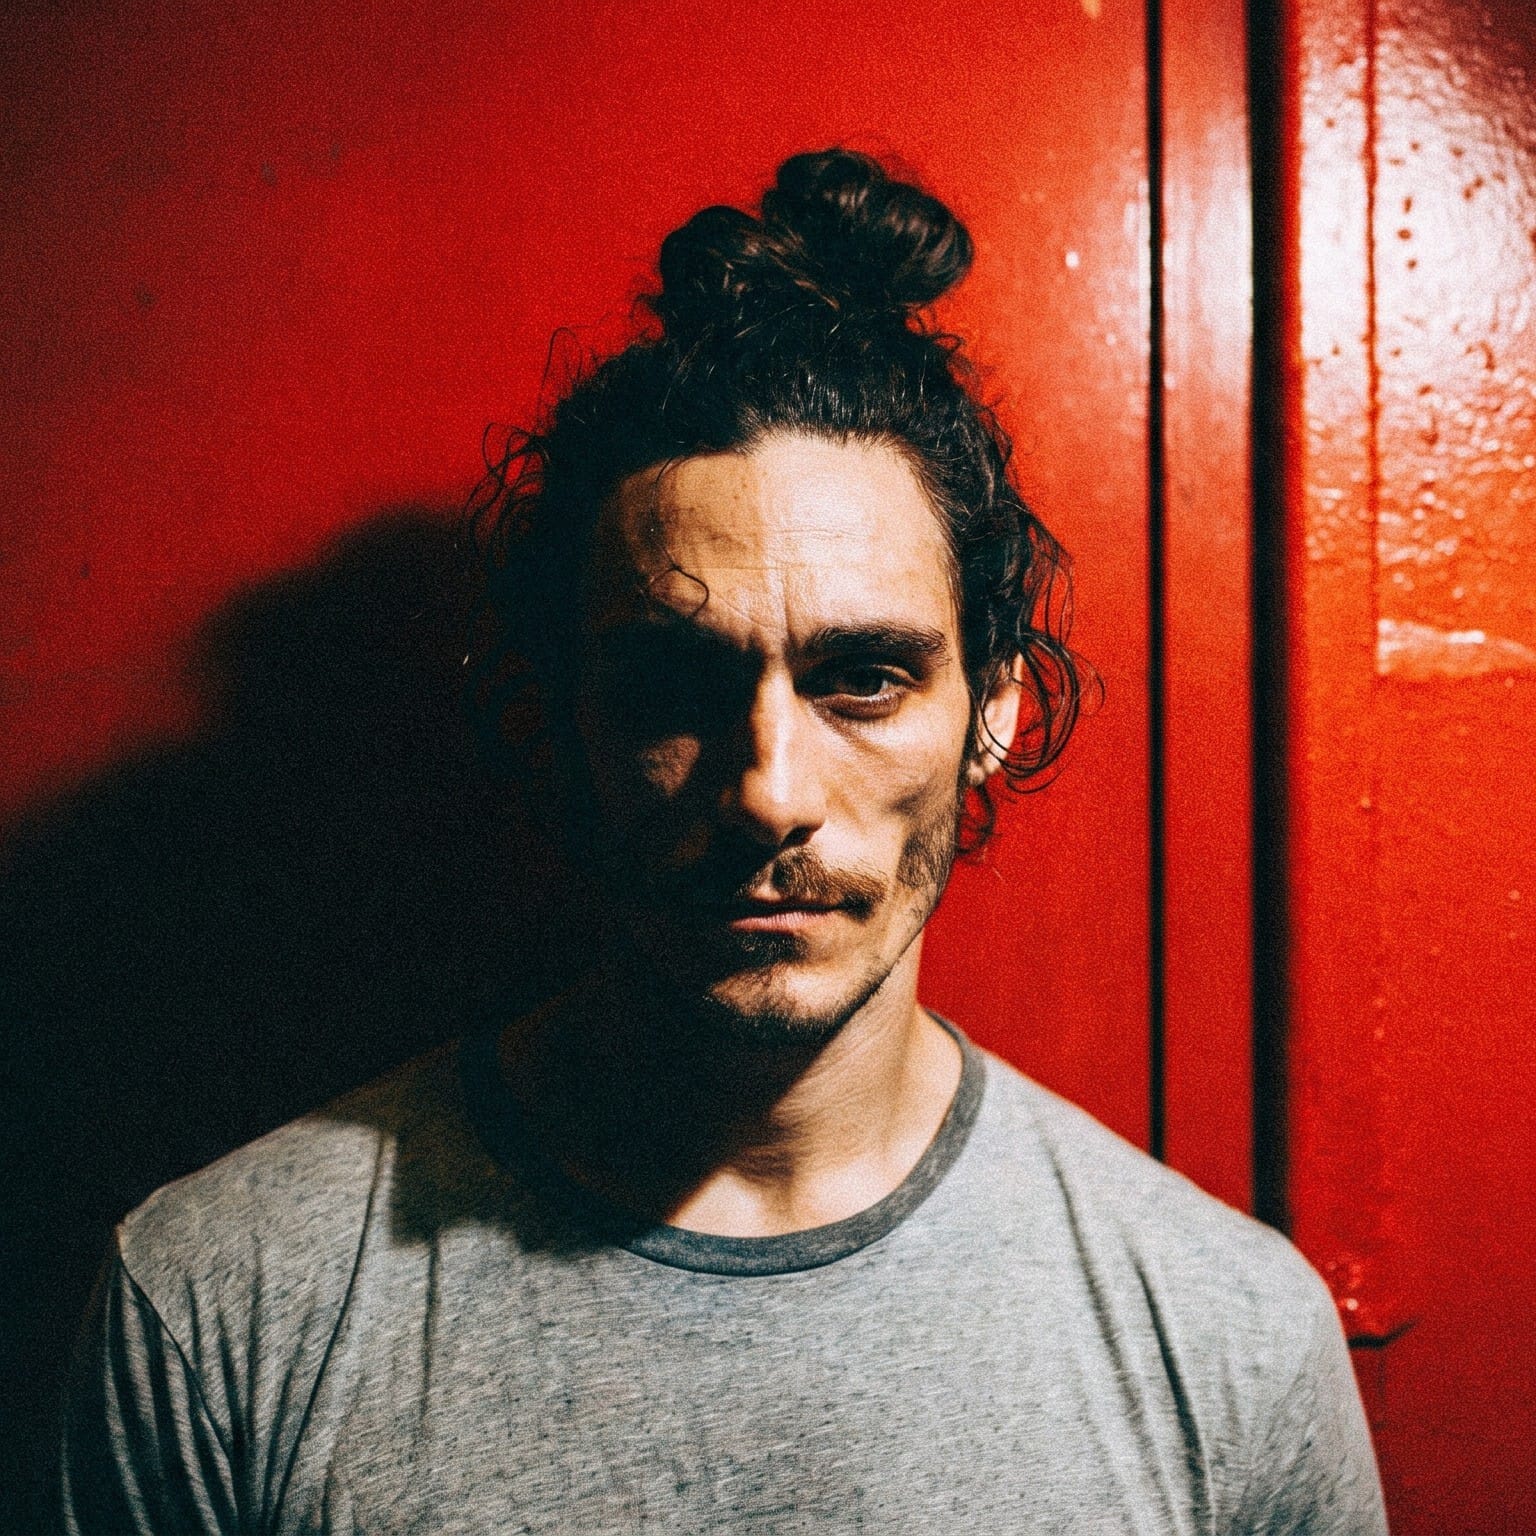
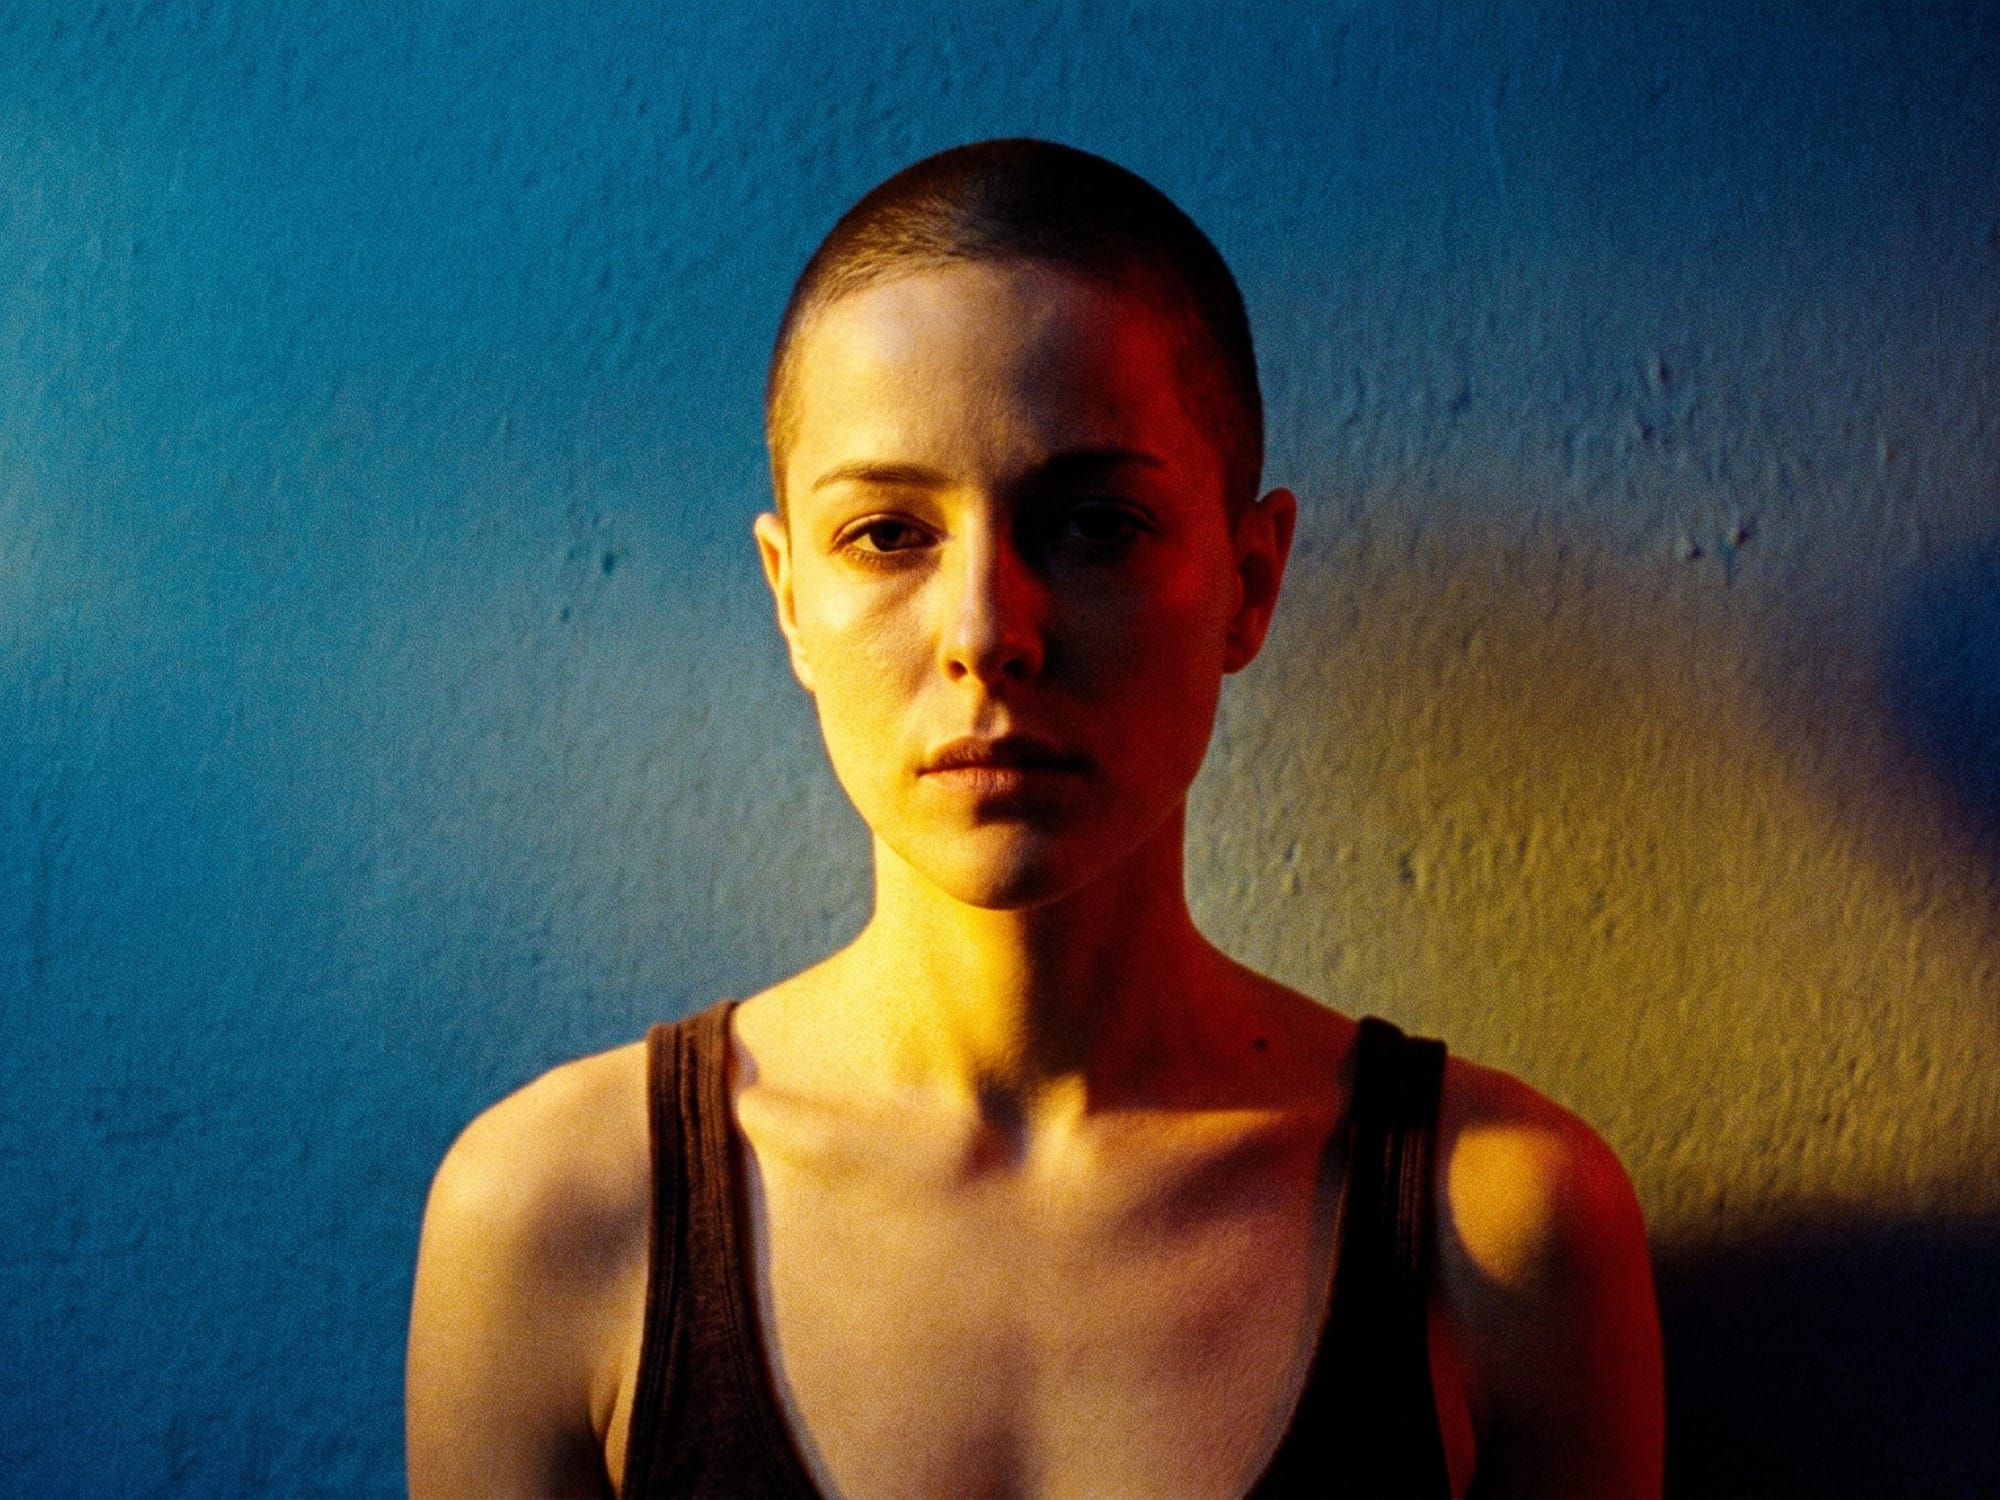
During my last project, I ran these images through Nano Banana to make alternate versions with different lighting environments:
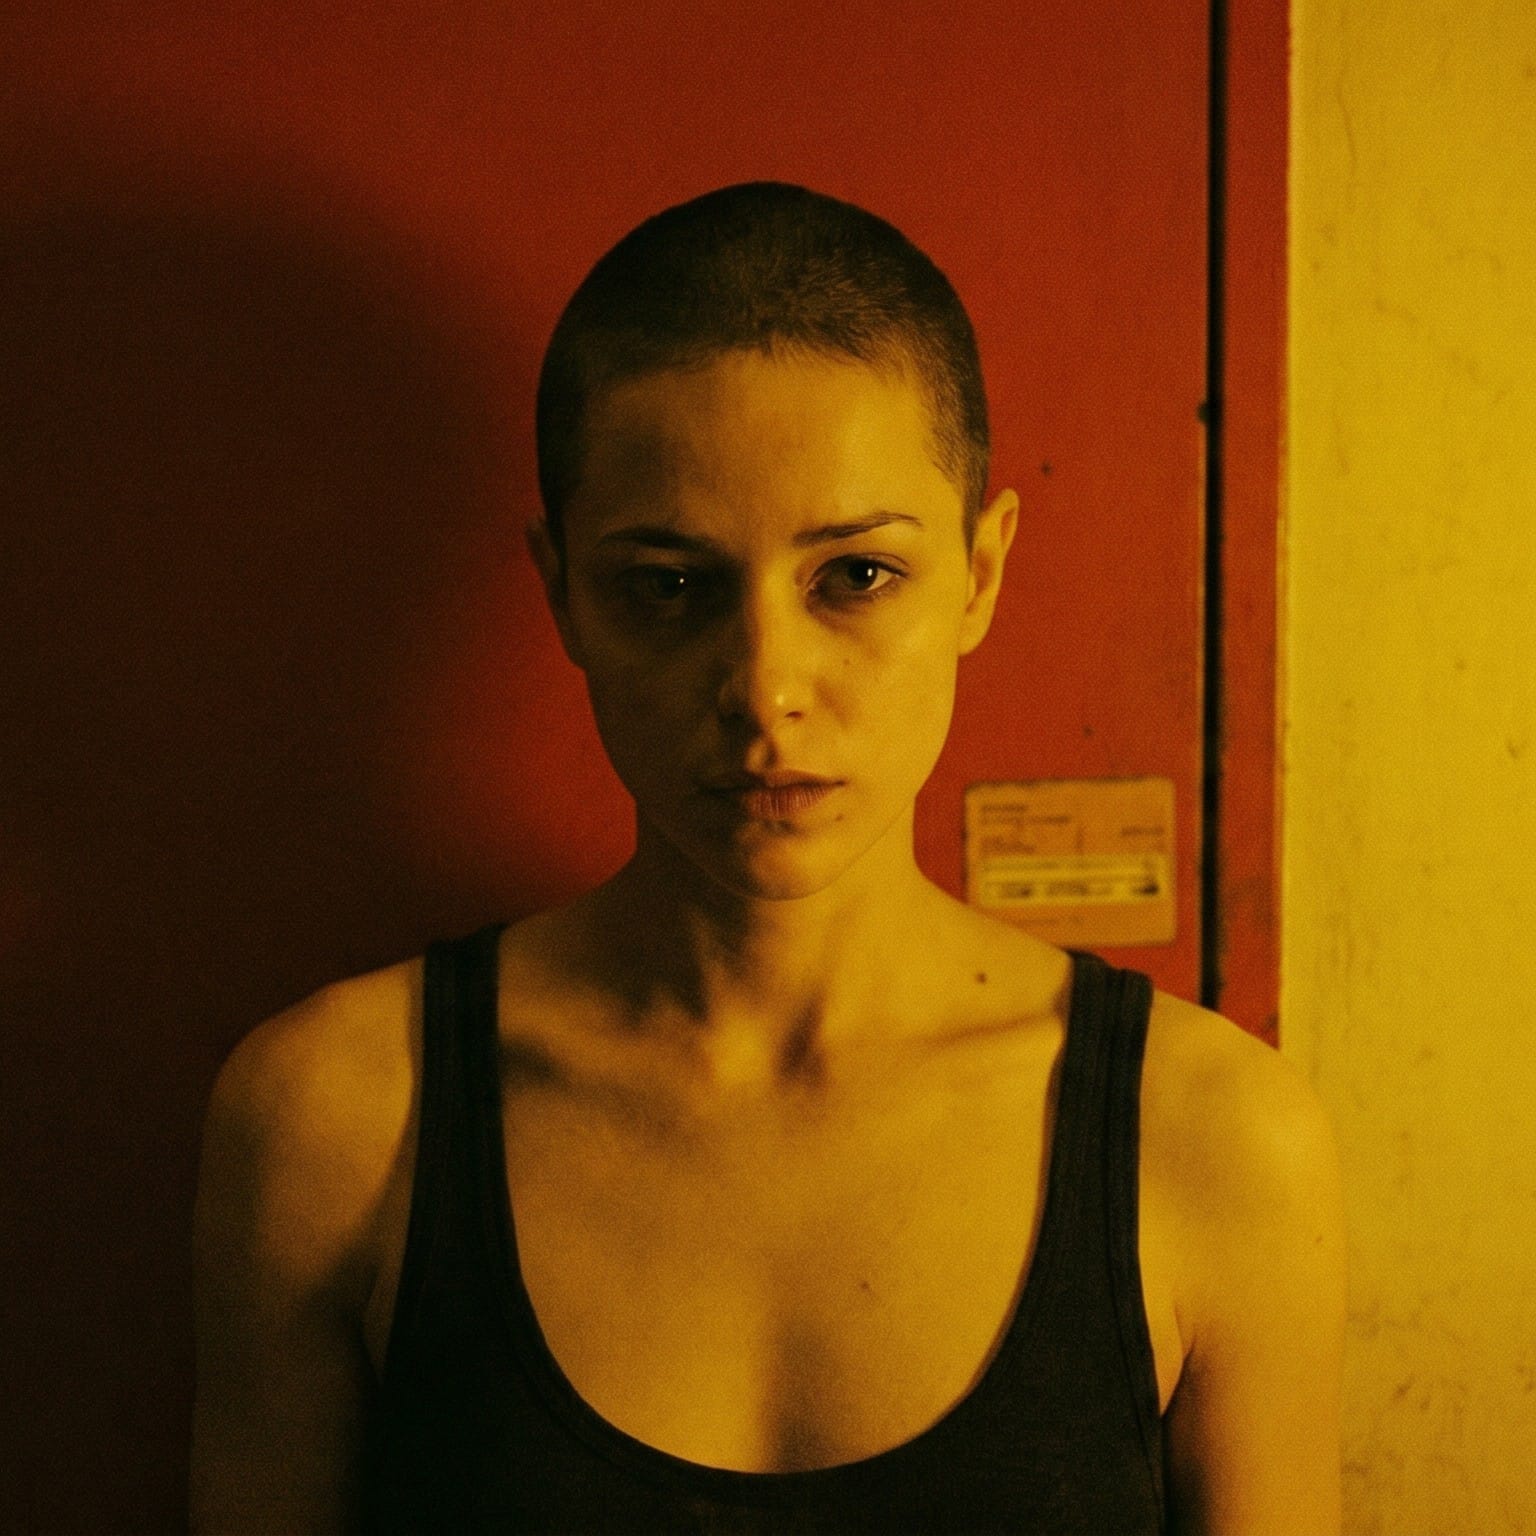
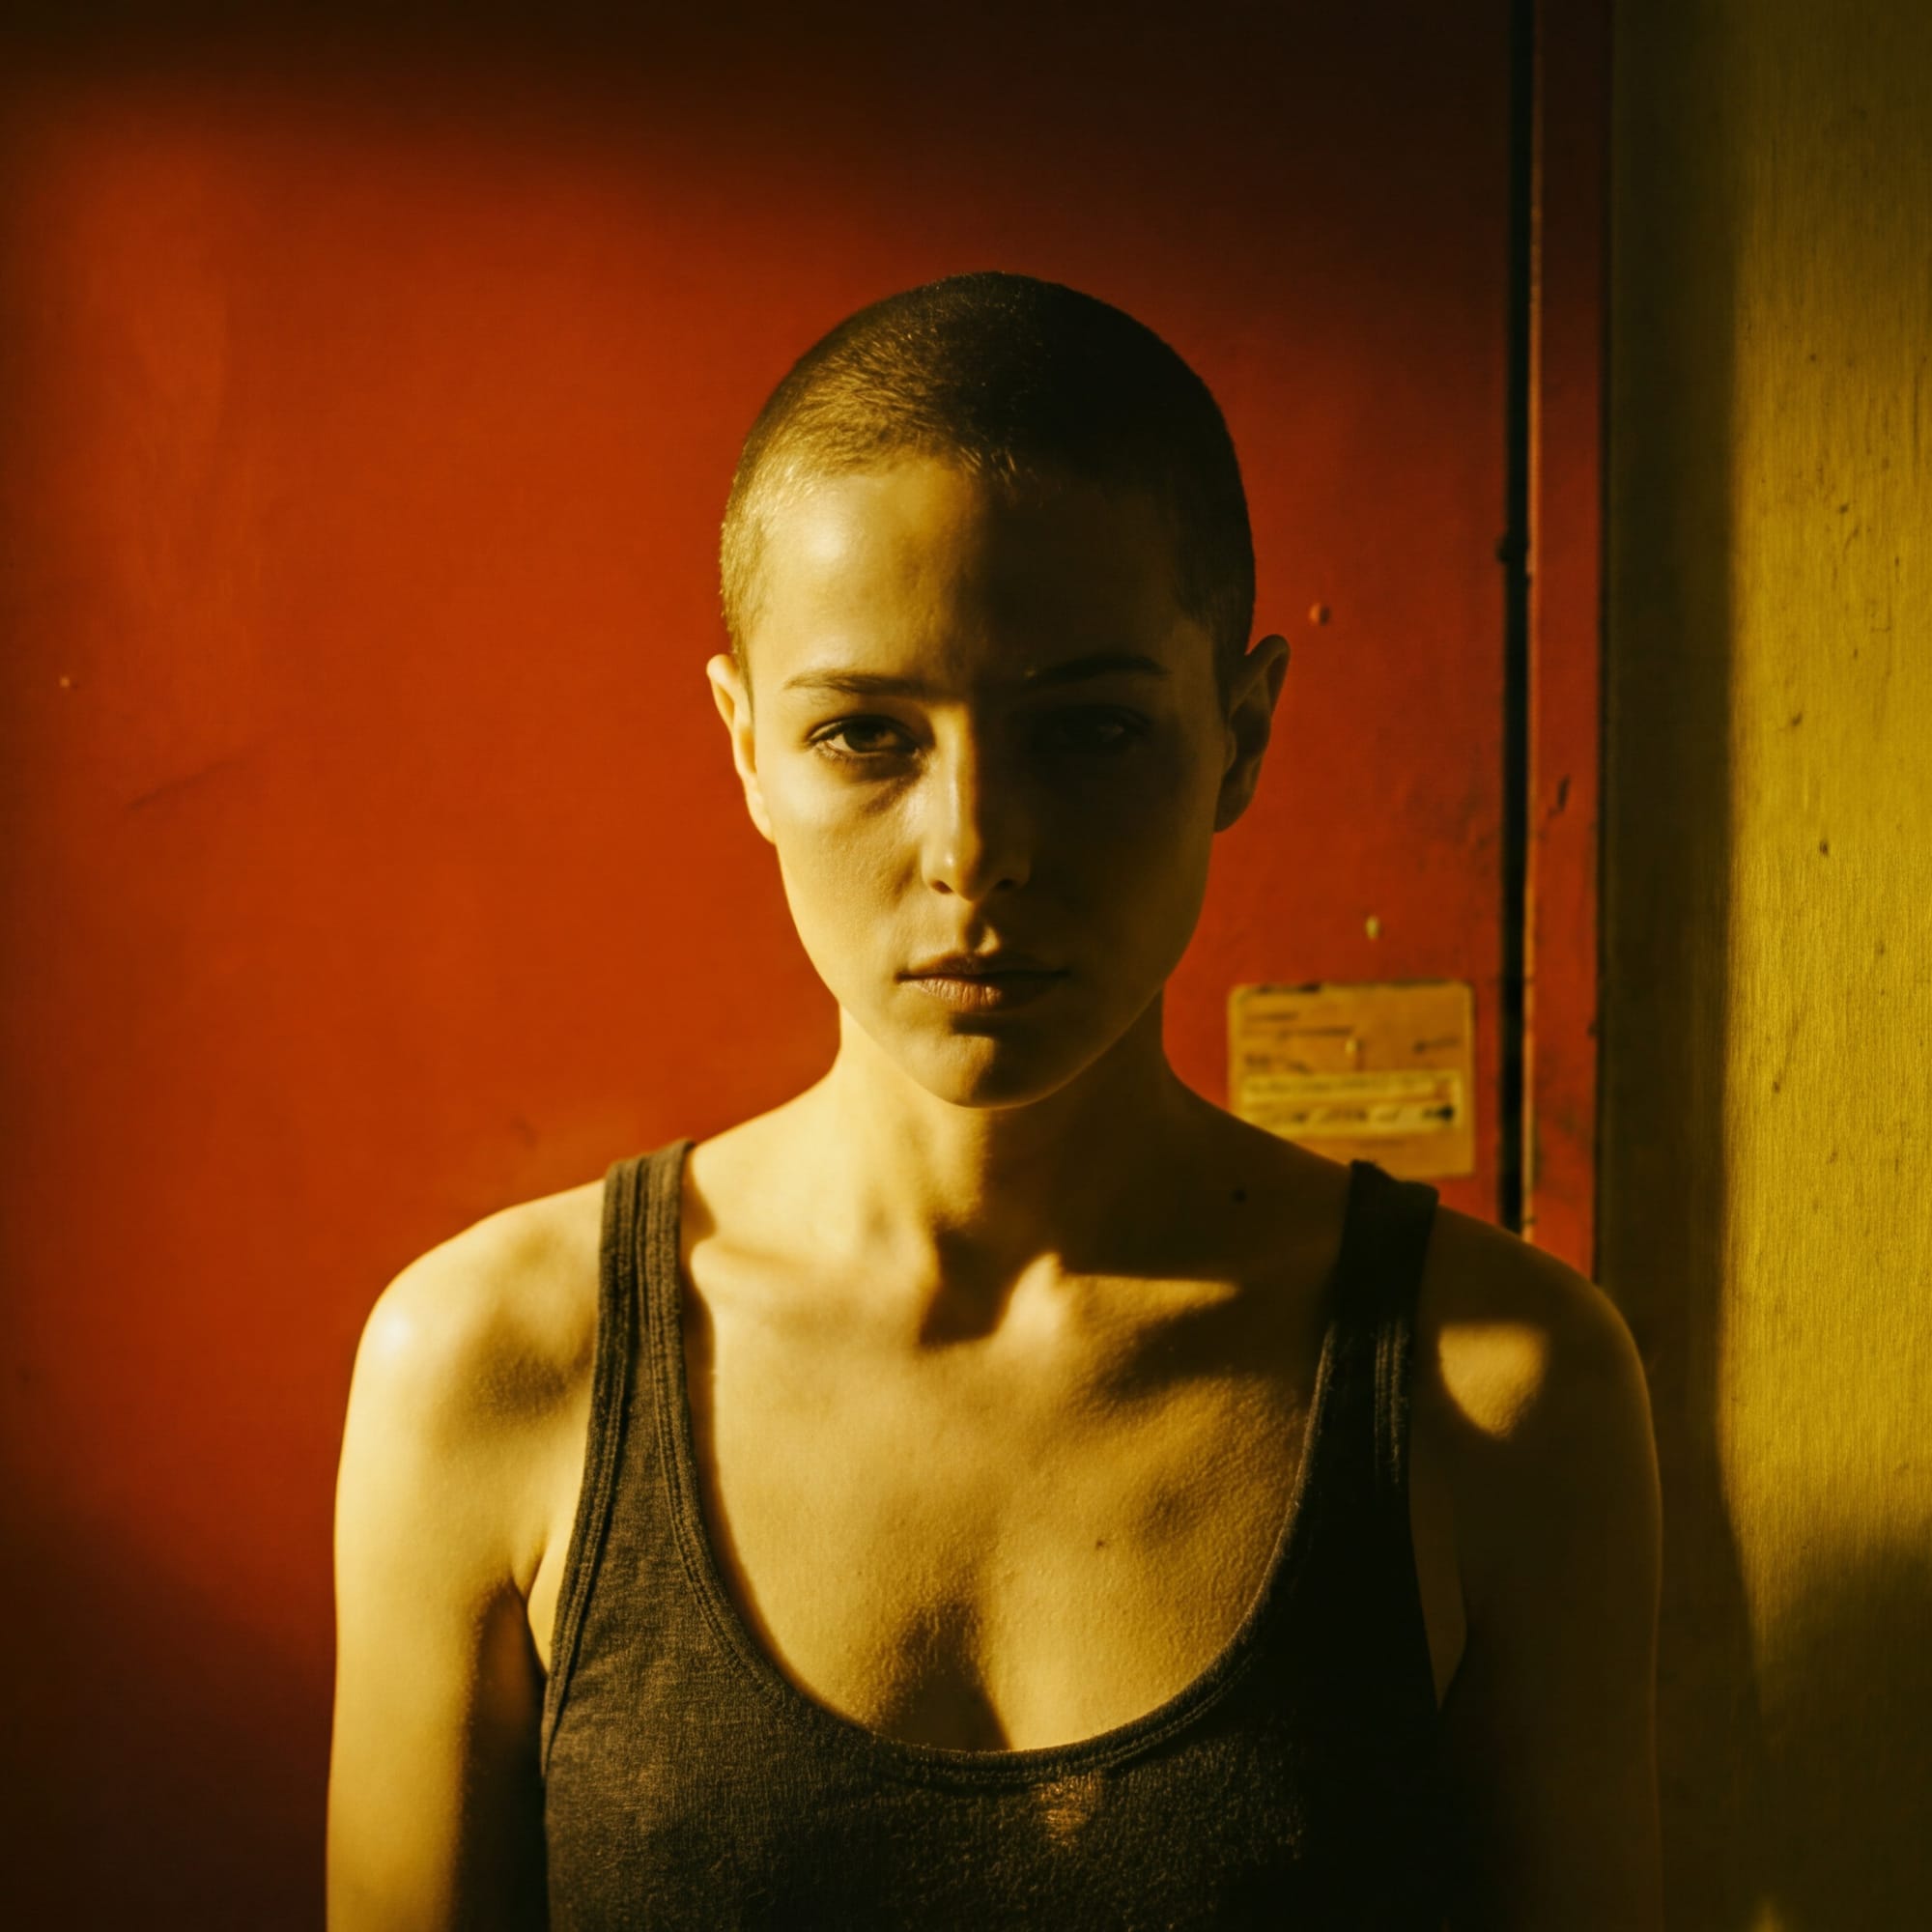
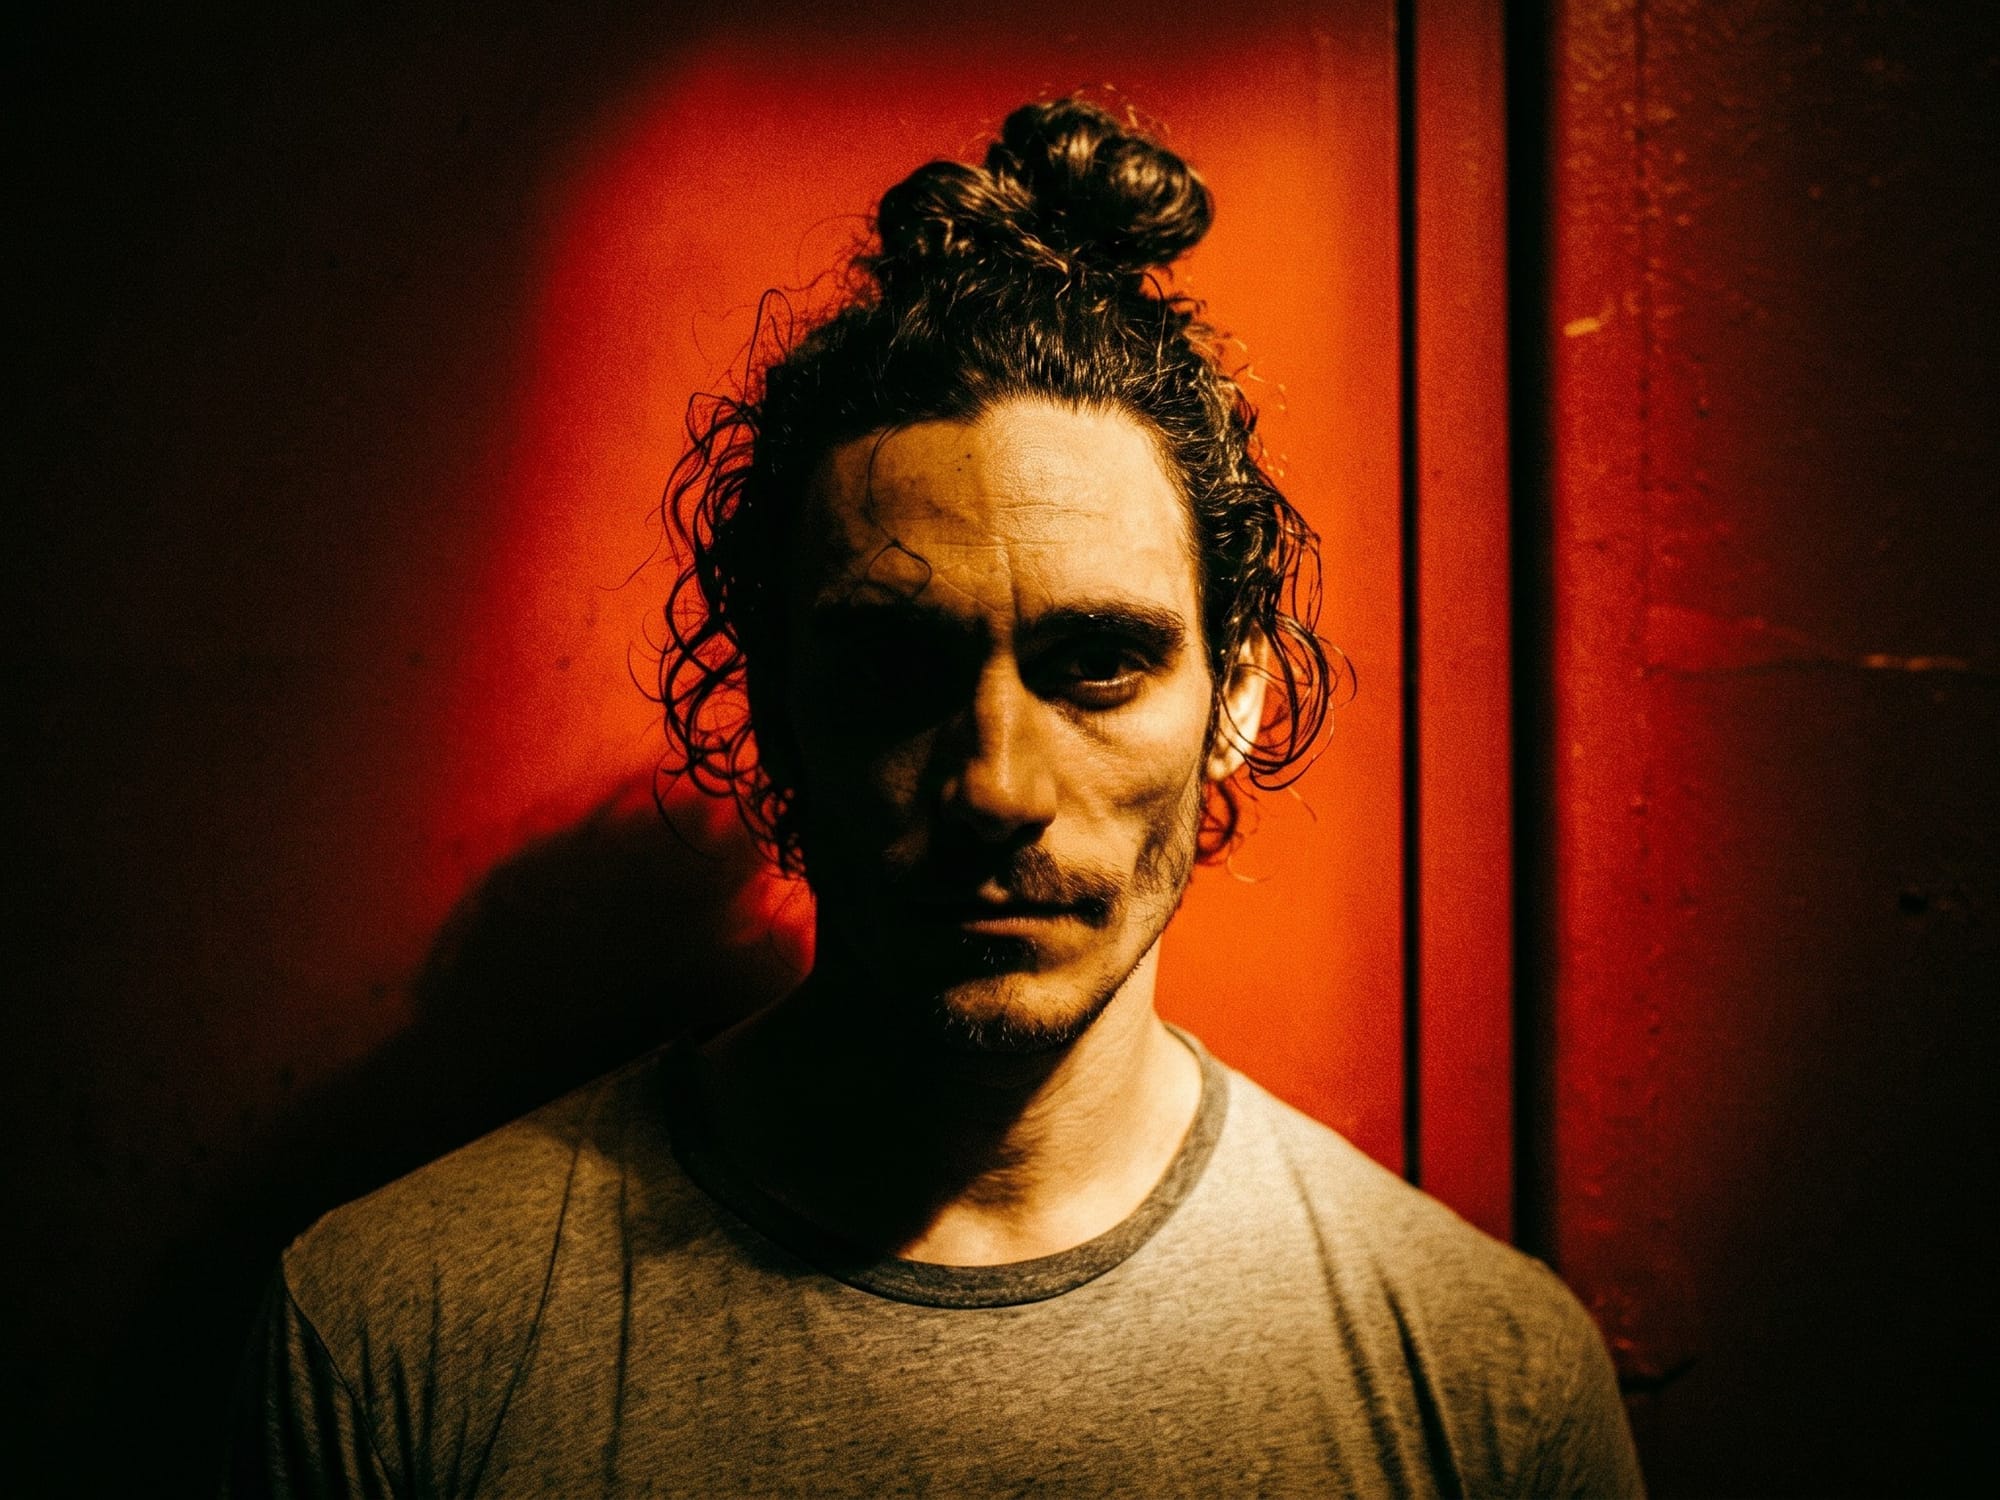
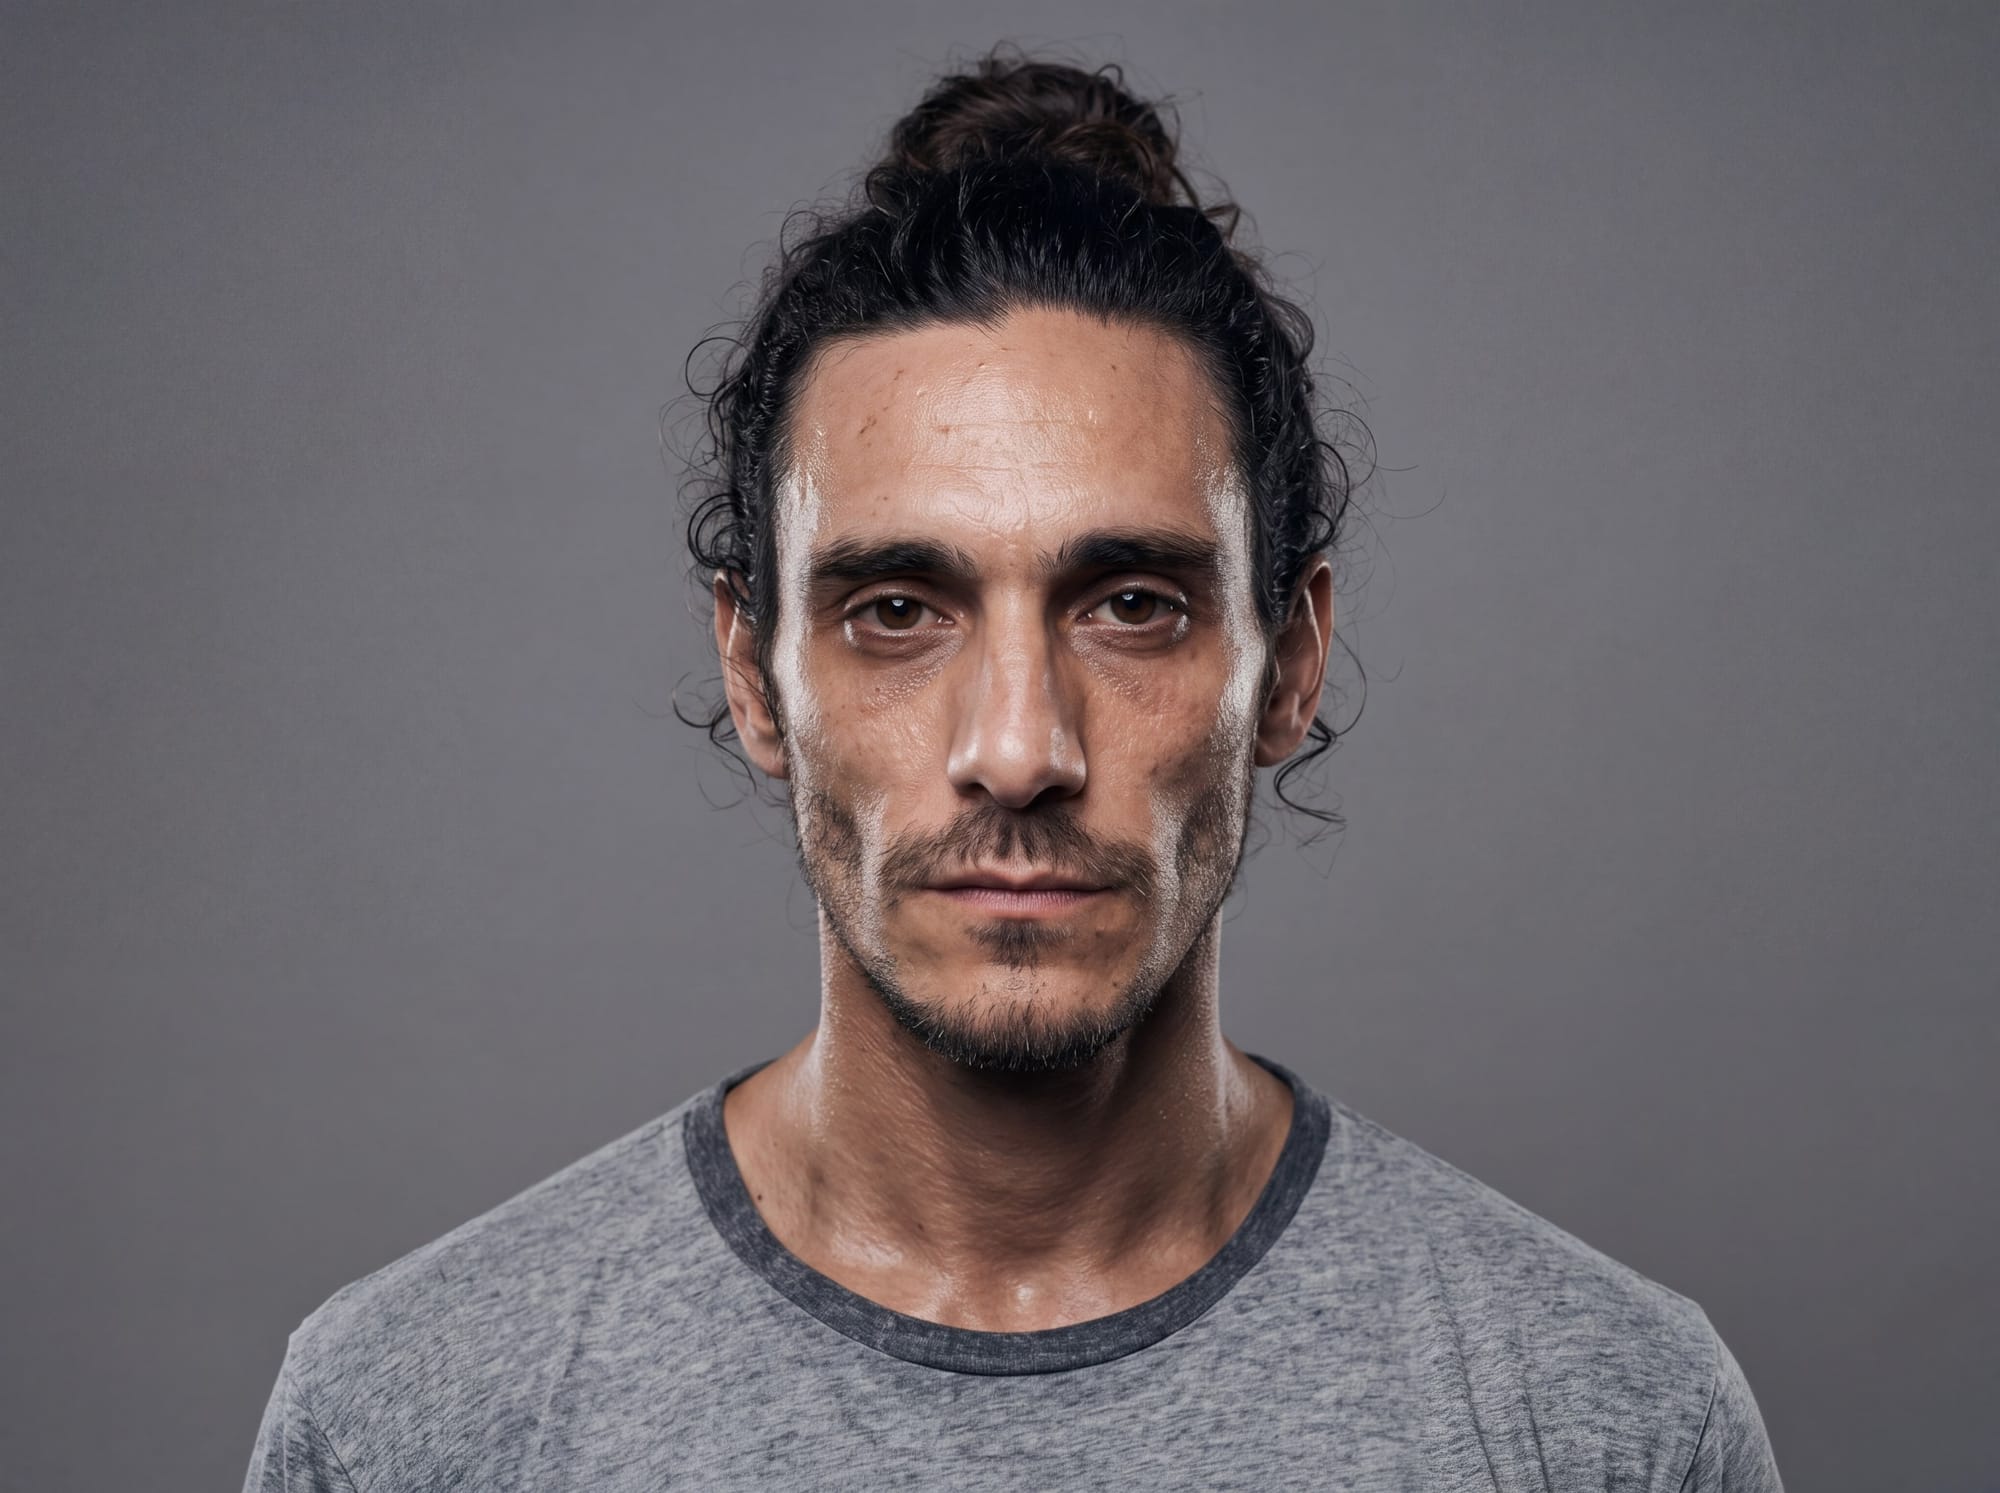
I used a handful of these as reference images to generate the shoulders-up portraits, this time in front of a gray background with neutral lighting:
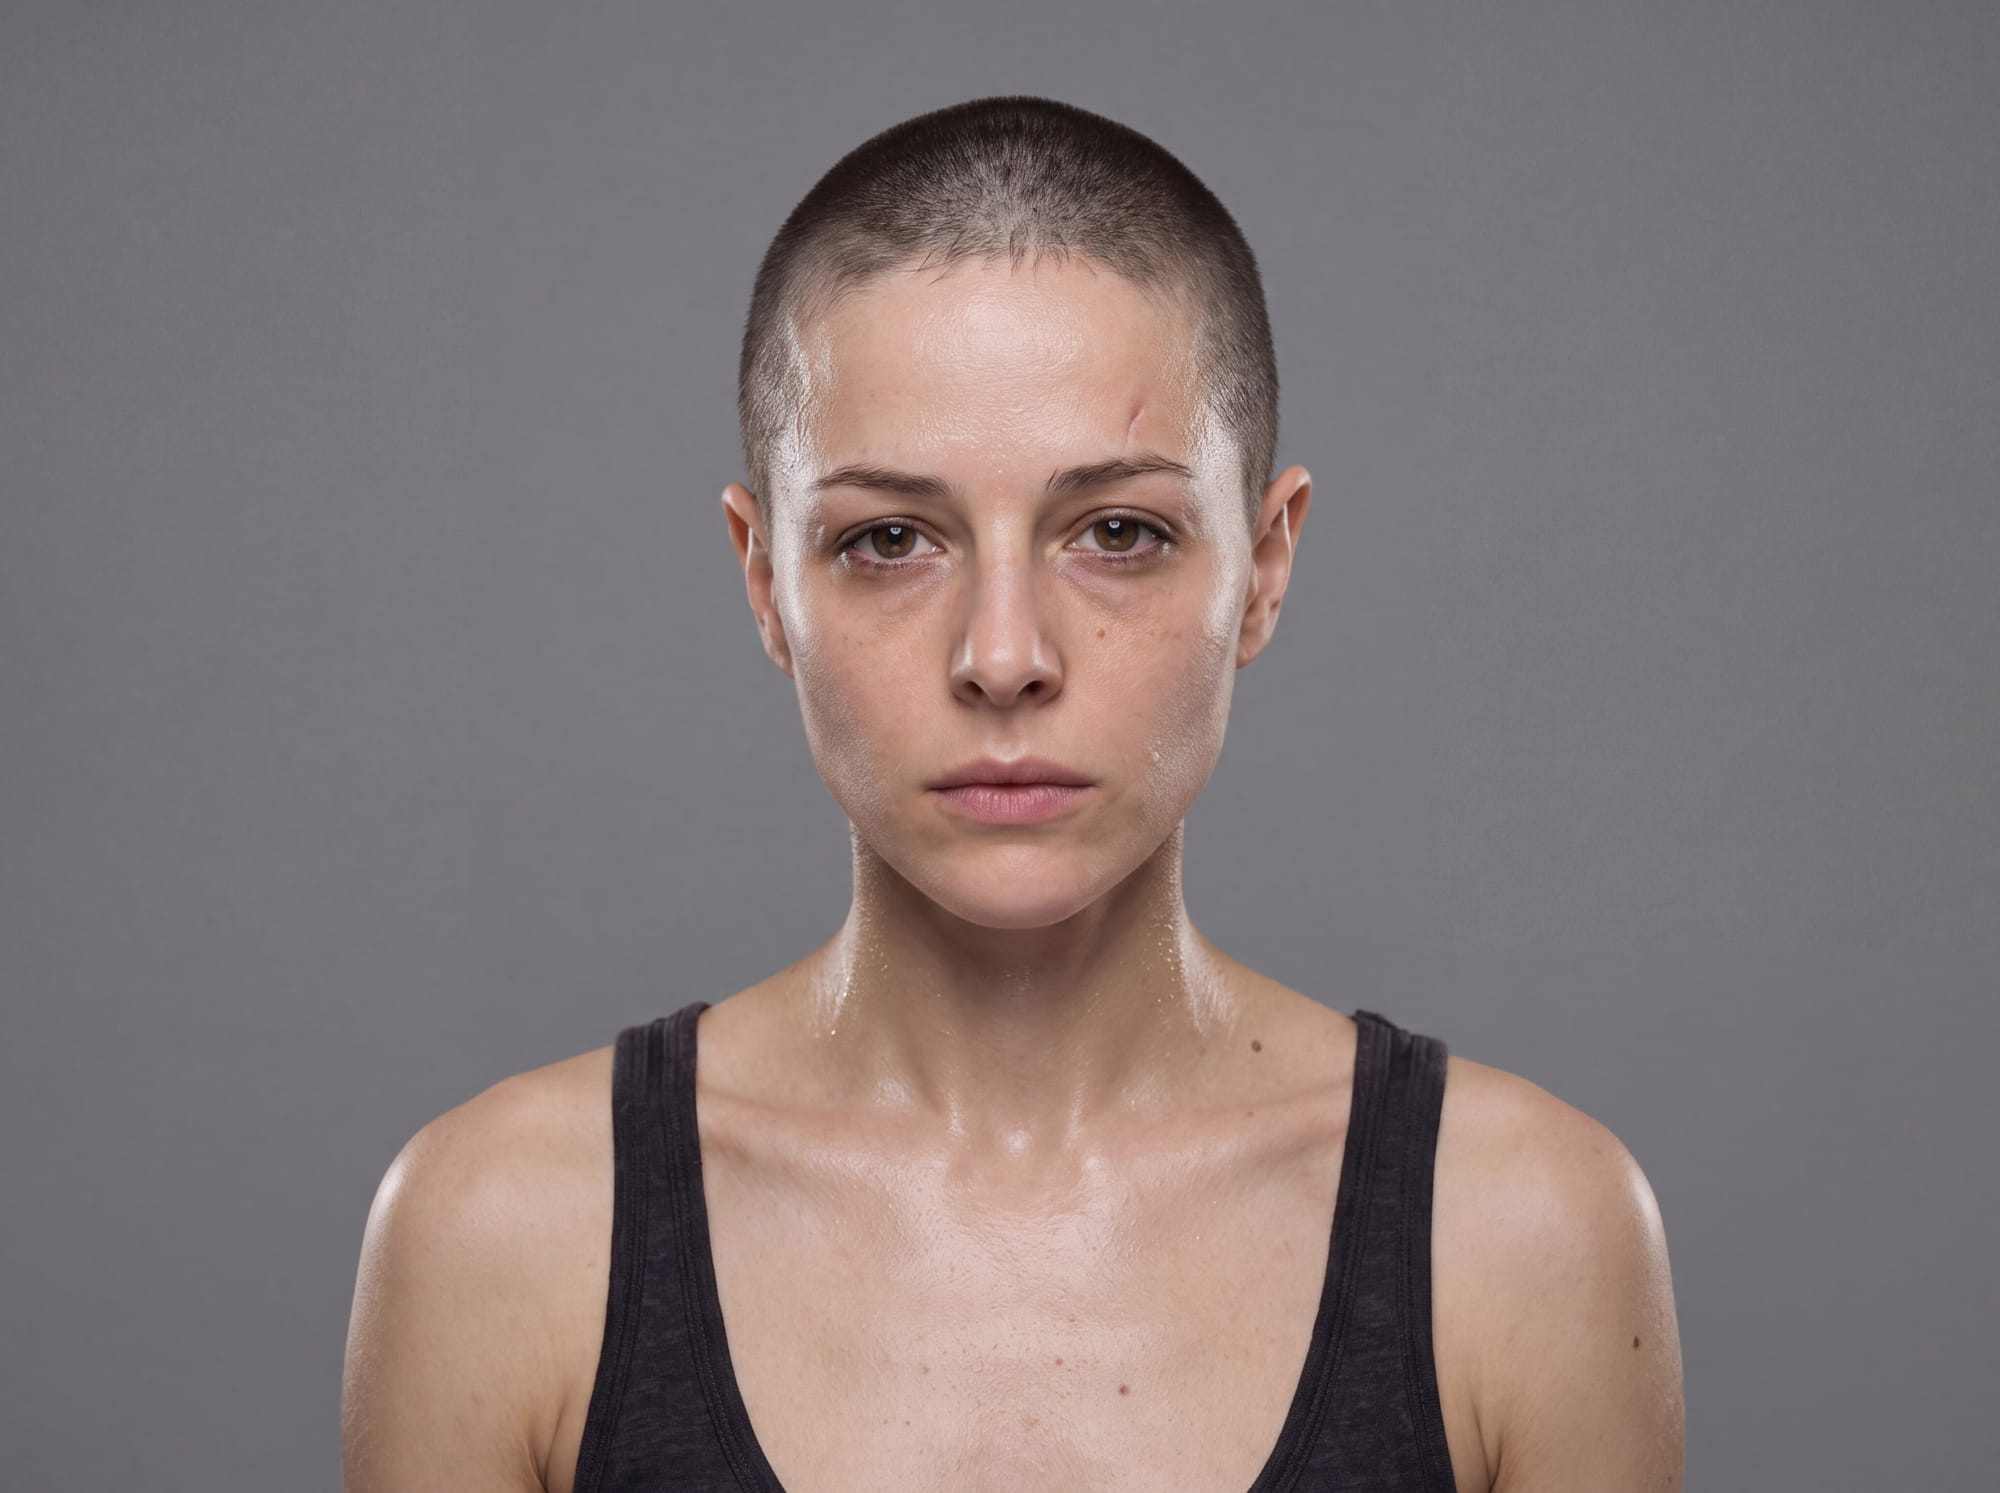
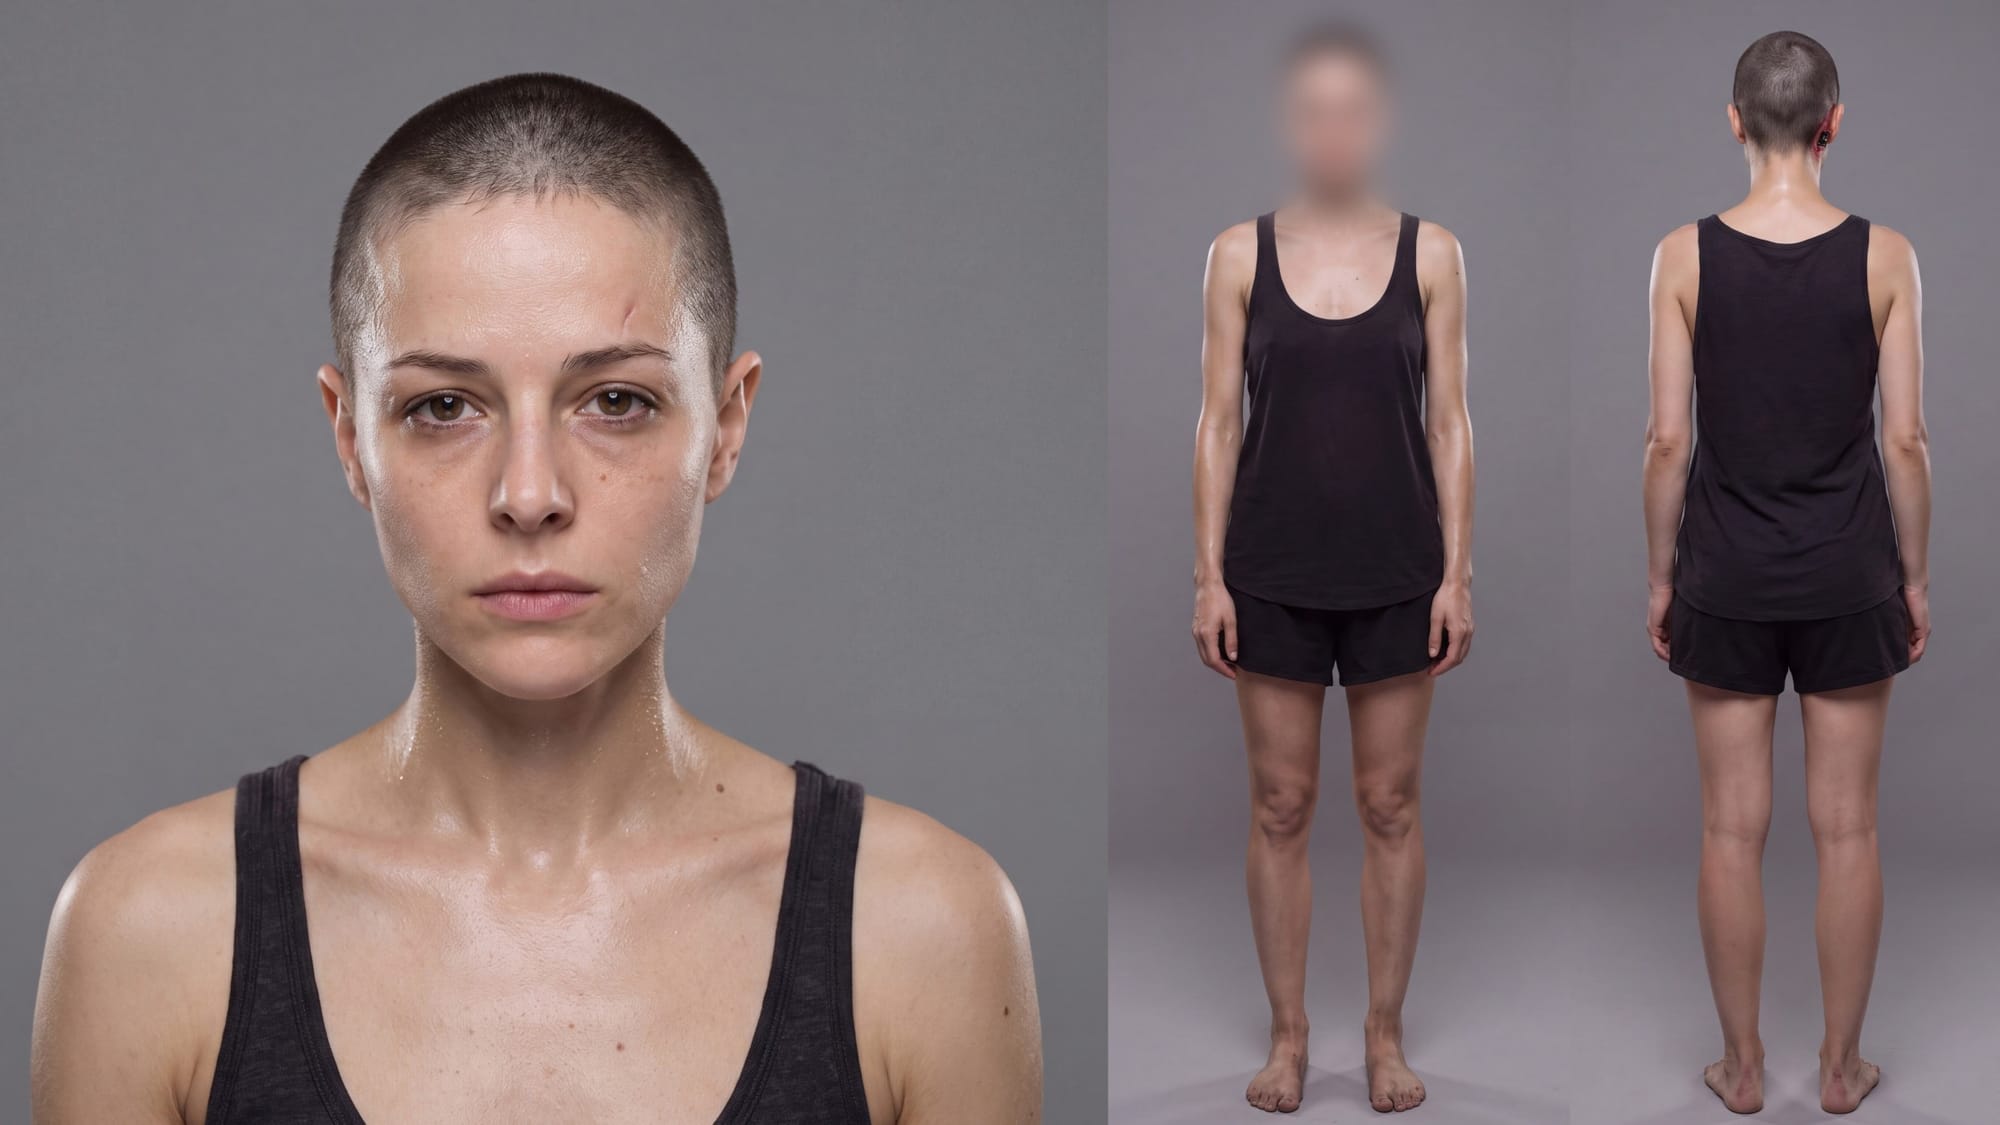
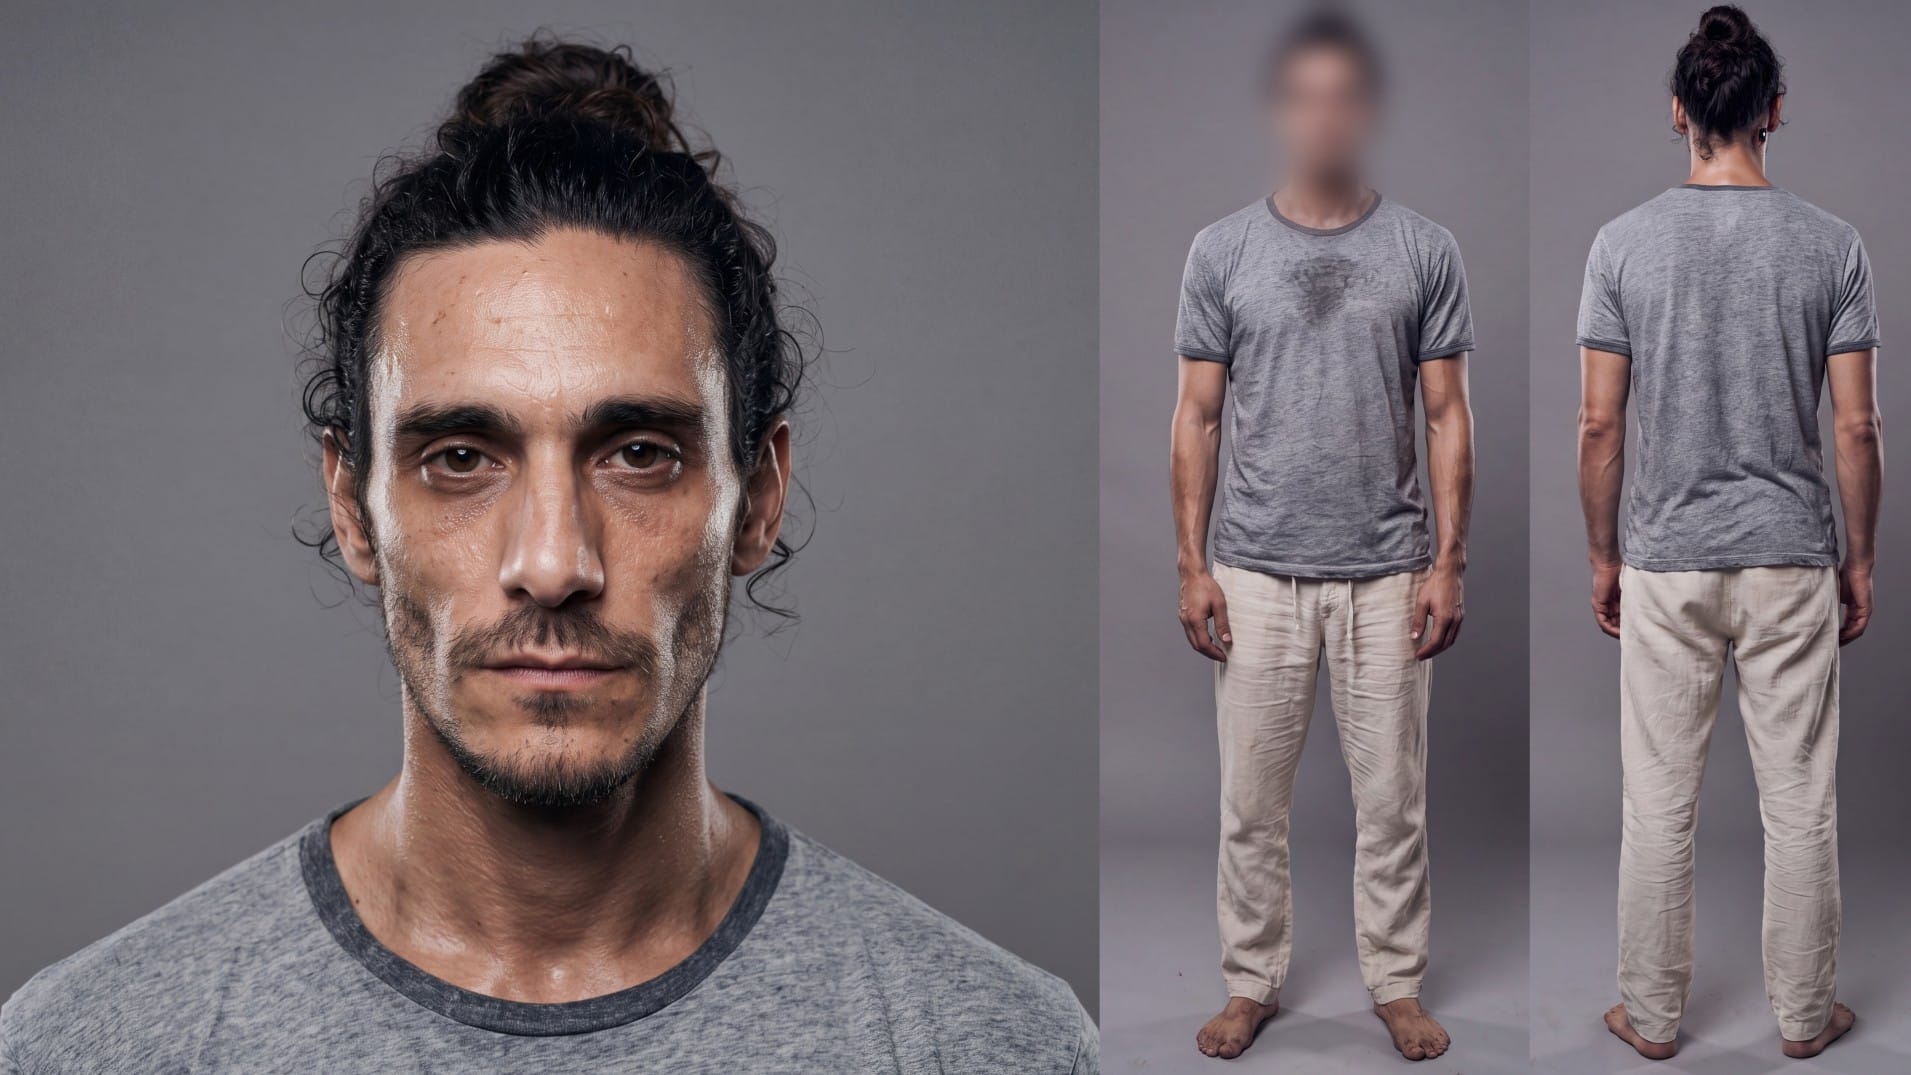
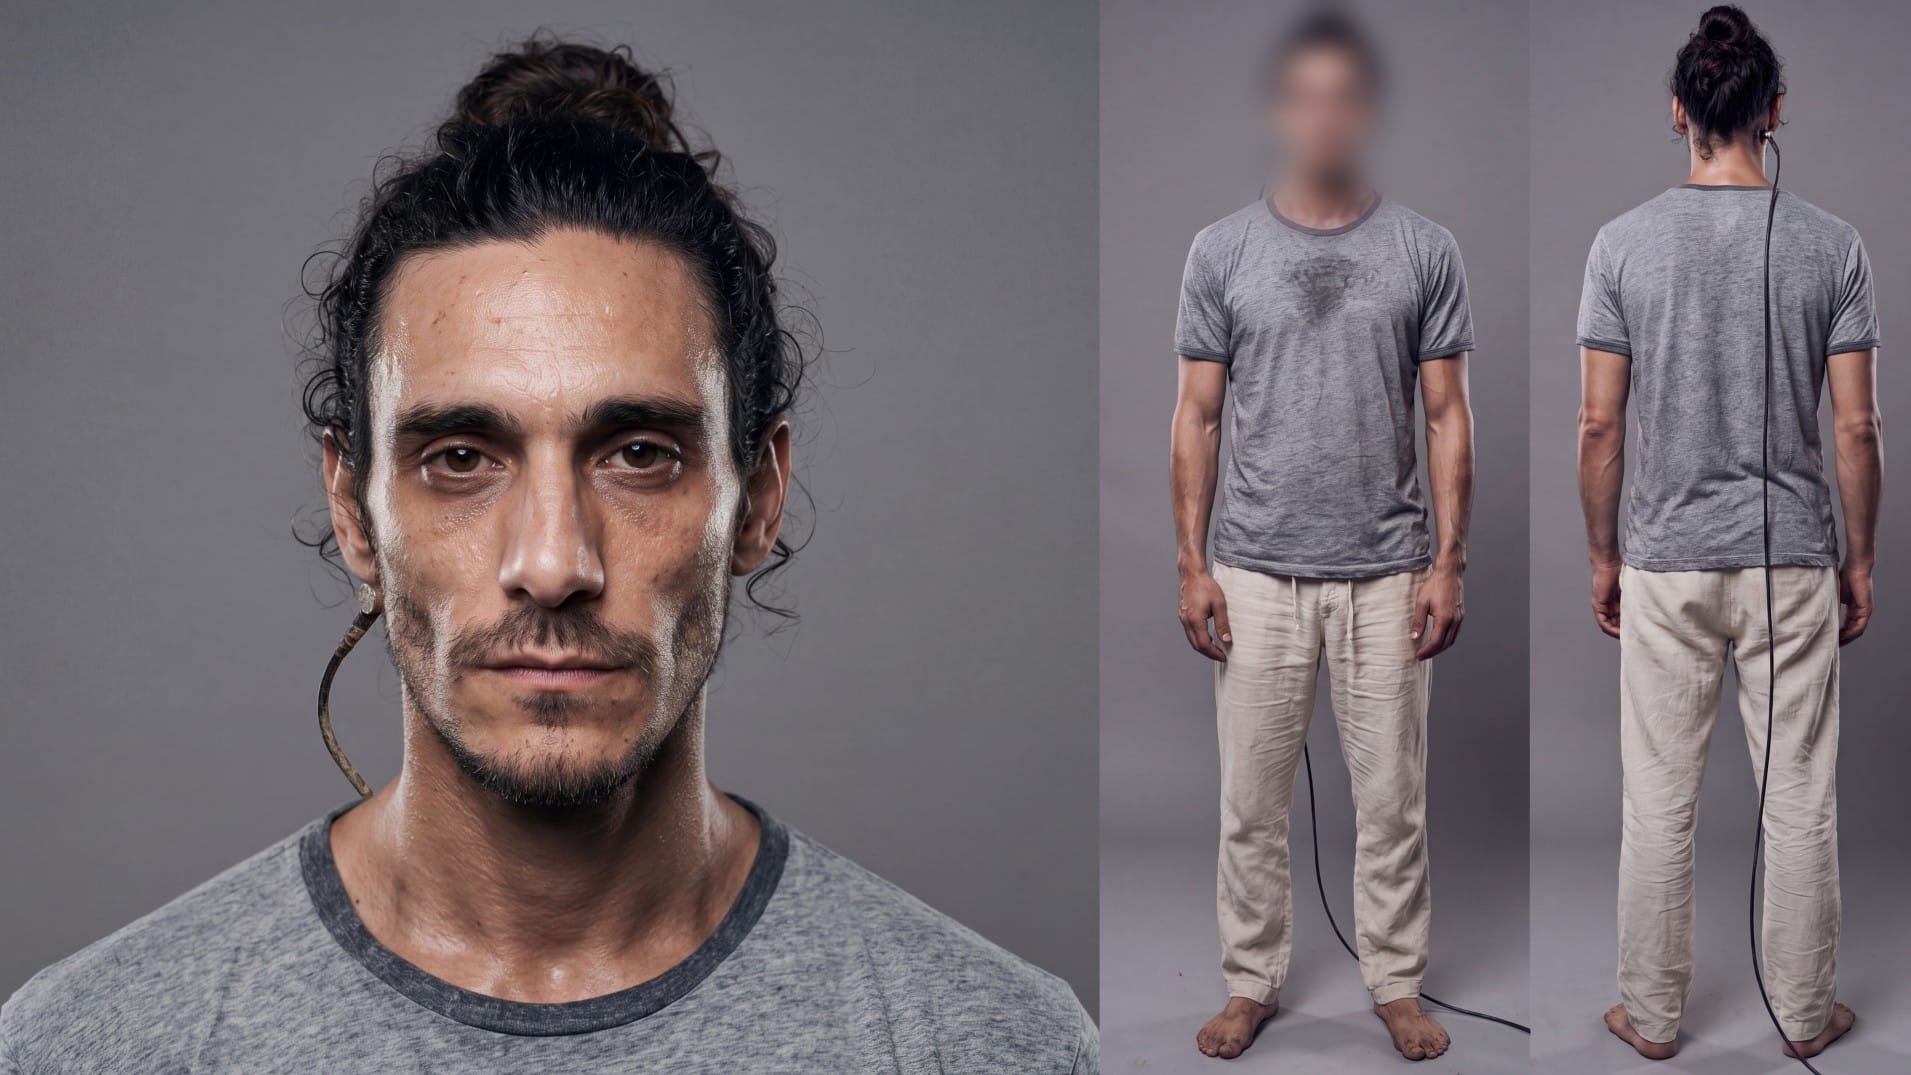
The body references were generated separately, and I cropped and composited them along with the shoulders-up portraits to make the final character sheets:
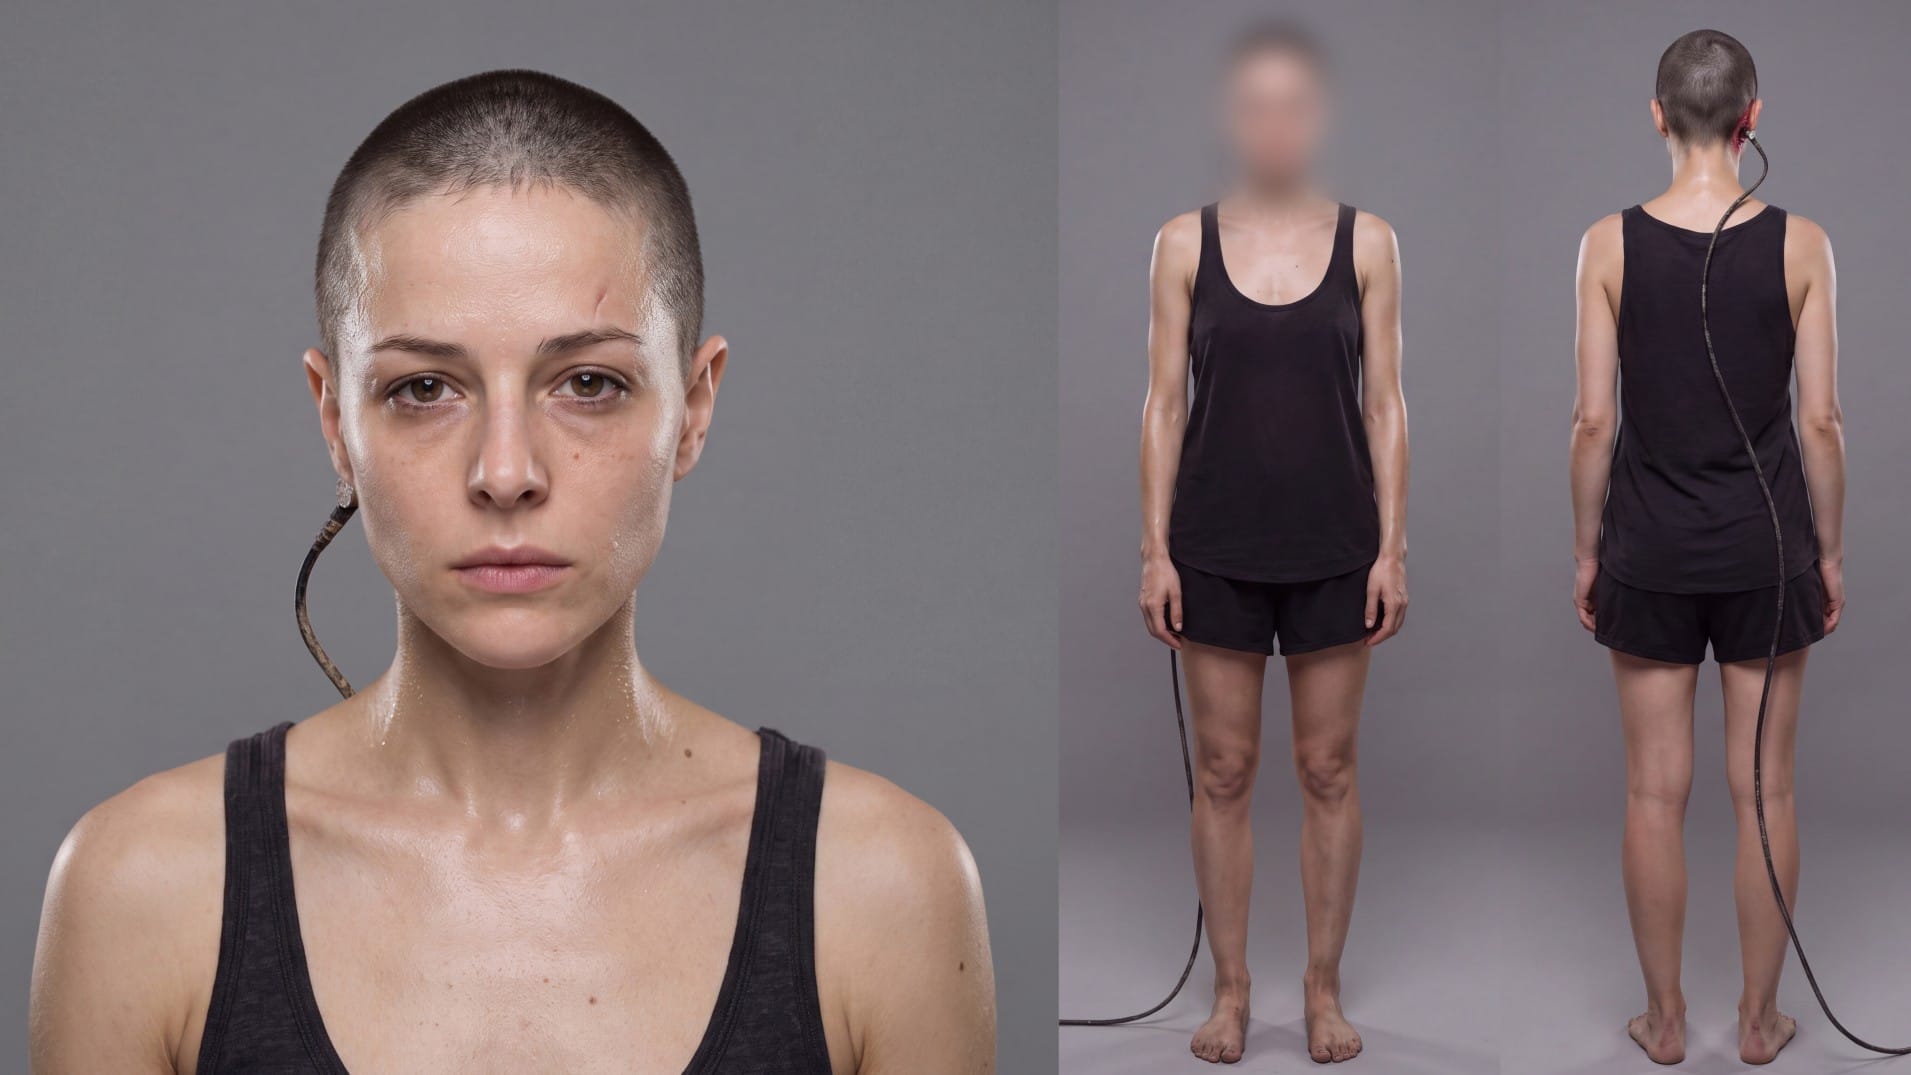
In half of the movie's scenes, the characters have a cable attached to a port behind their right ear, so I made cable-attached versions of the character sheets. I wanted the characters' faces to be 100% identical in both versions of the character sheets, but image tools like Nano Banana never do purely local edits. They always regenerate the entire image, so even if my prompt states to only add the cable and make no other changes, there will be subtle differences across the entire image. So, I masked the cable-attached images to isolate only the cable portions and manually composited them into the original character sheets:
The cable port behind Aneta's and Anders's right ears is a crucial element of the story, so I created close-ups of those to include in my Seedance prompts.
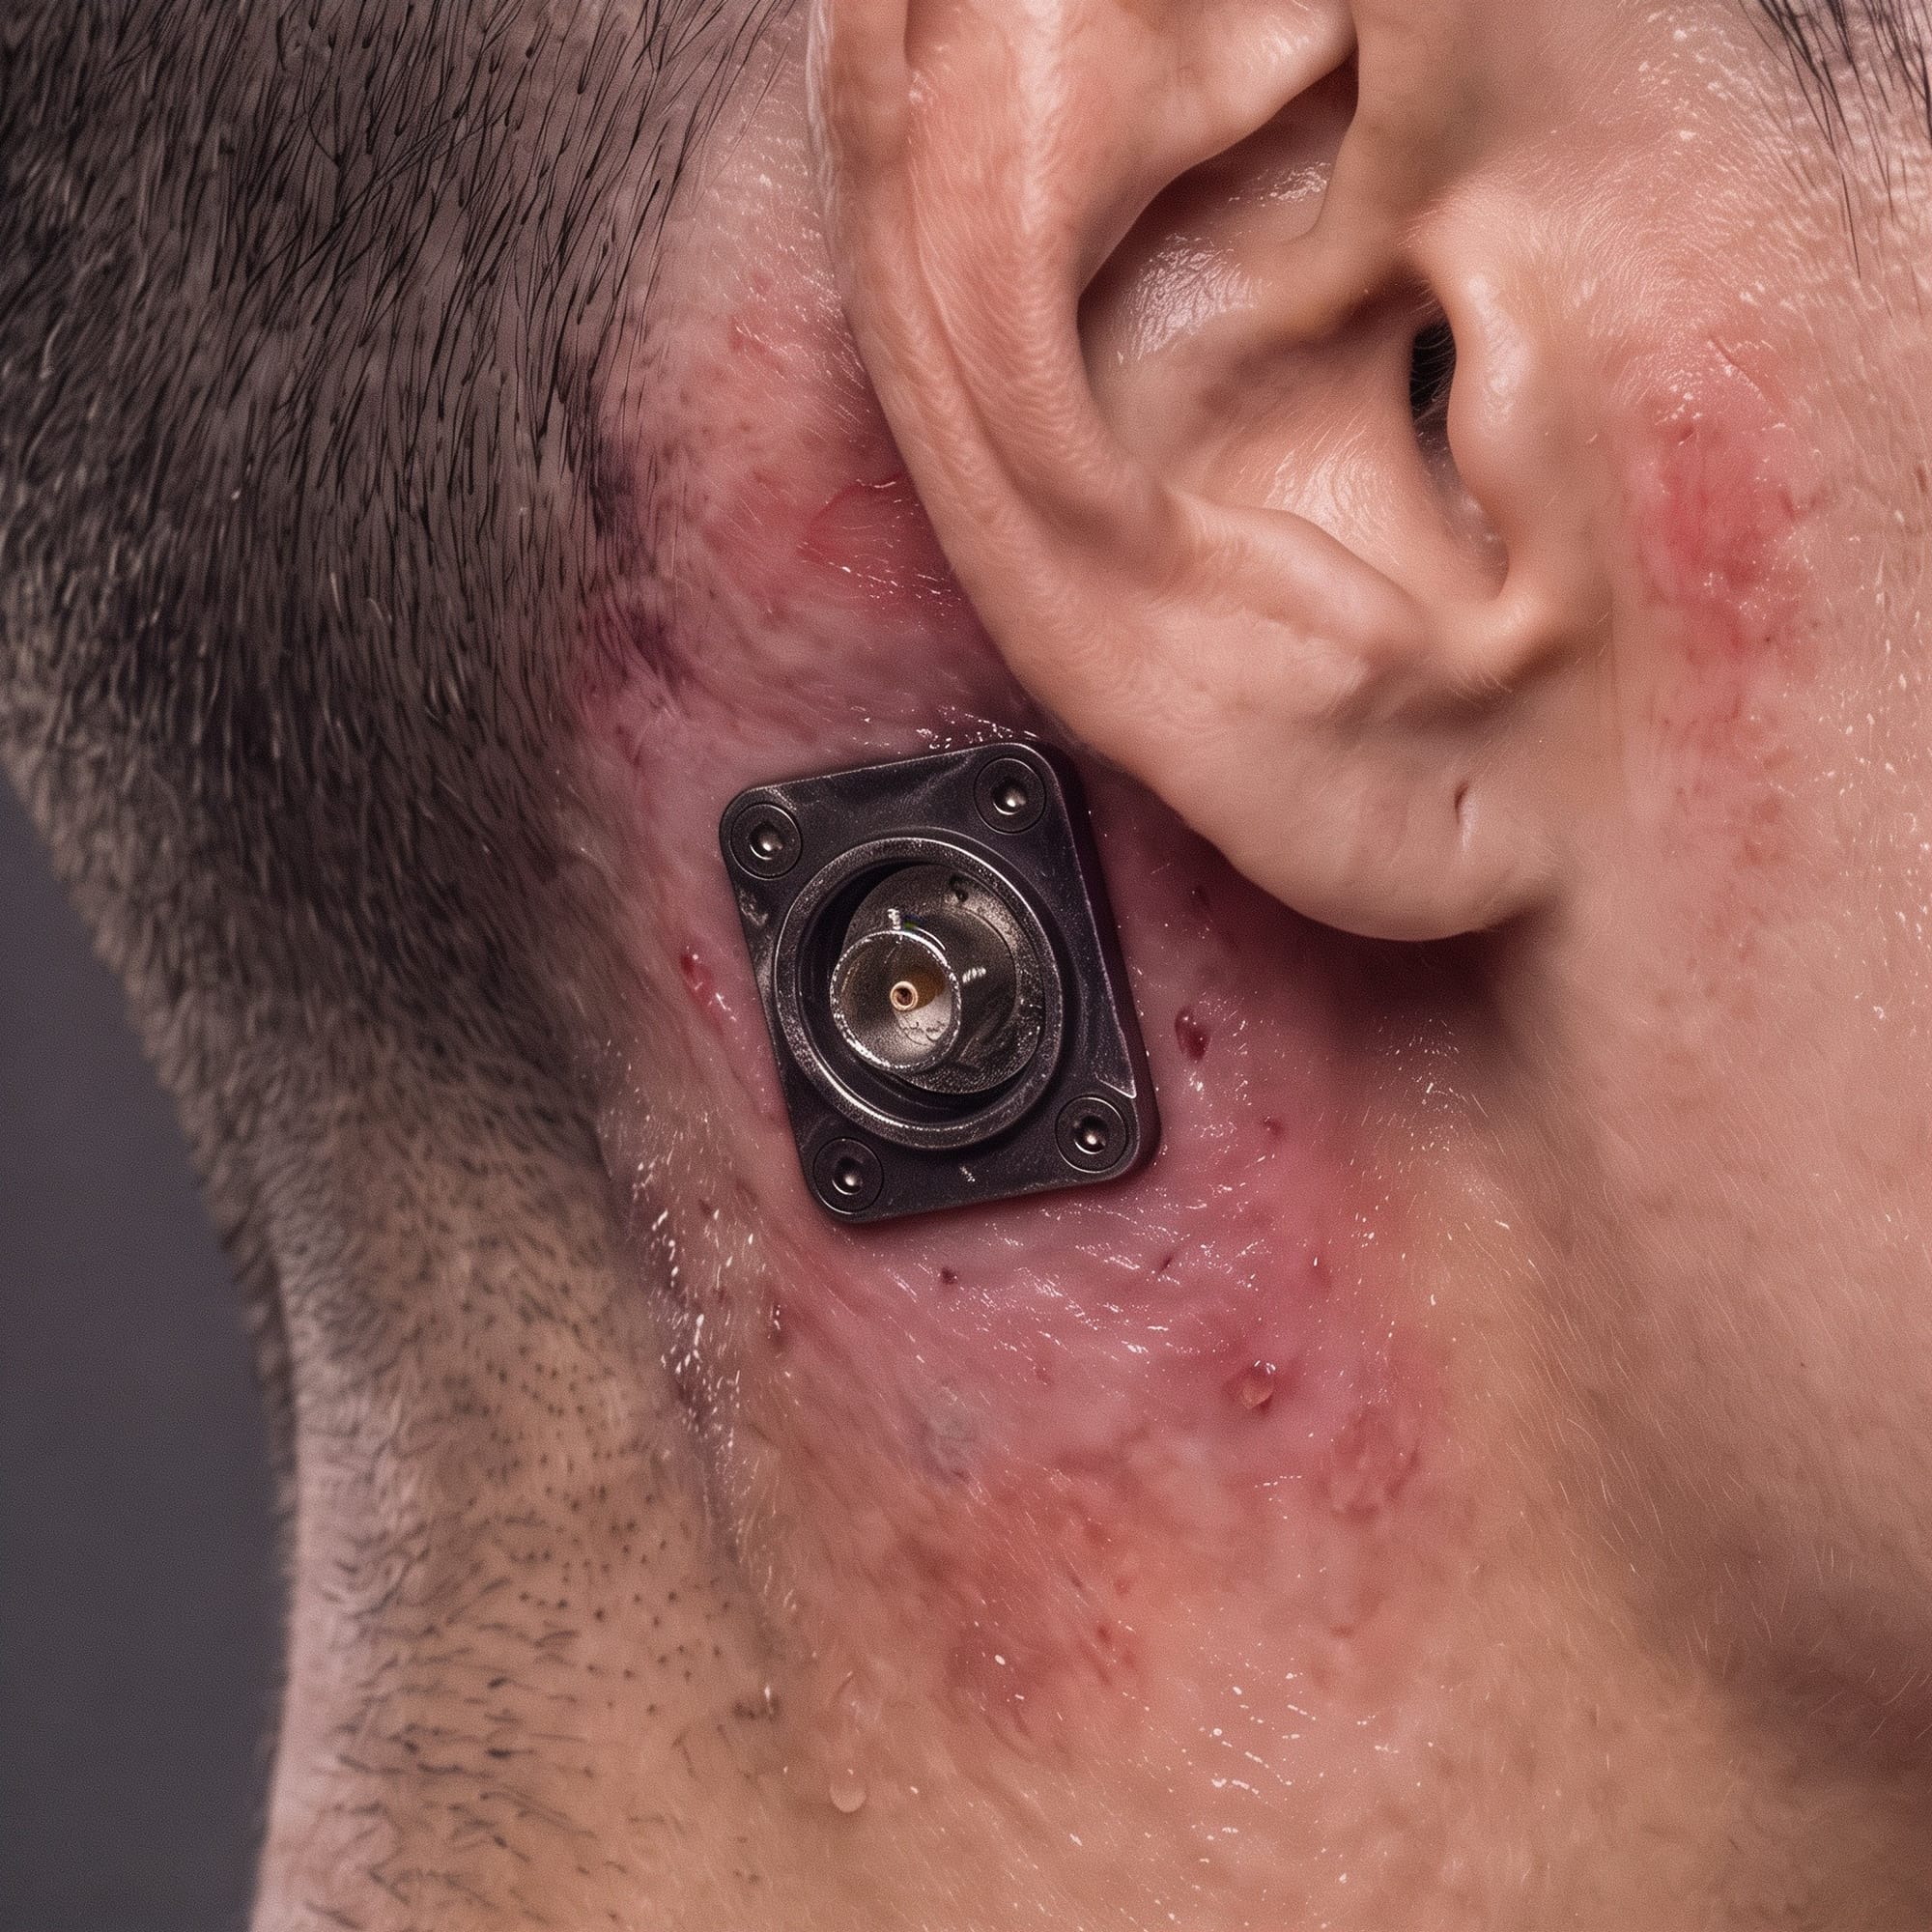
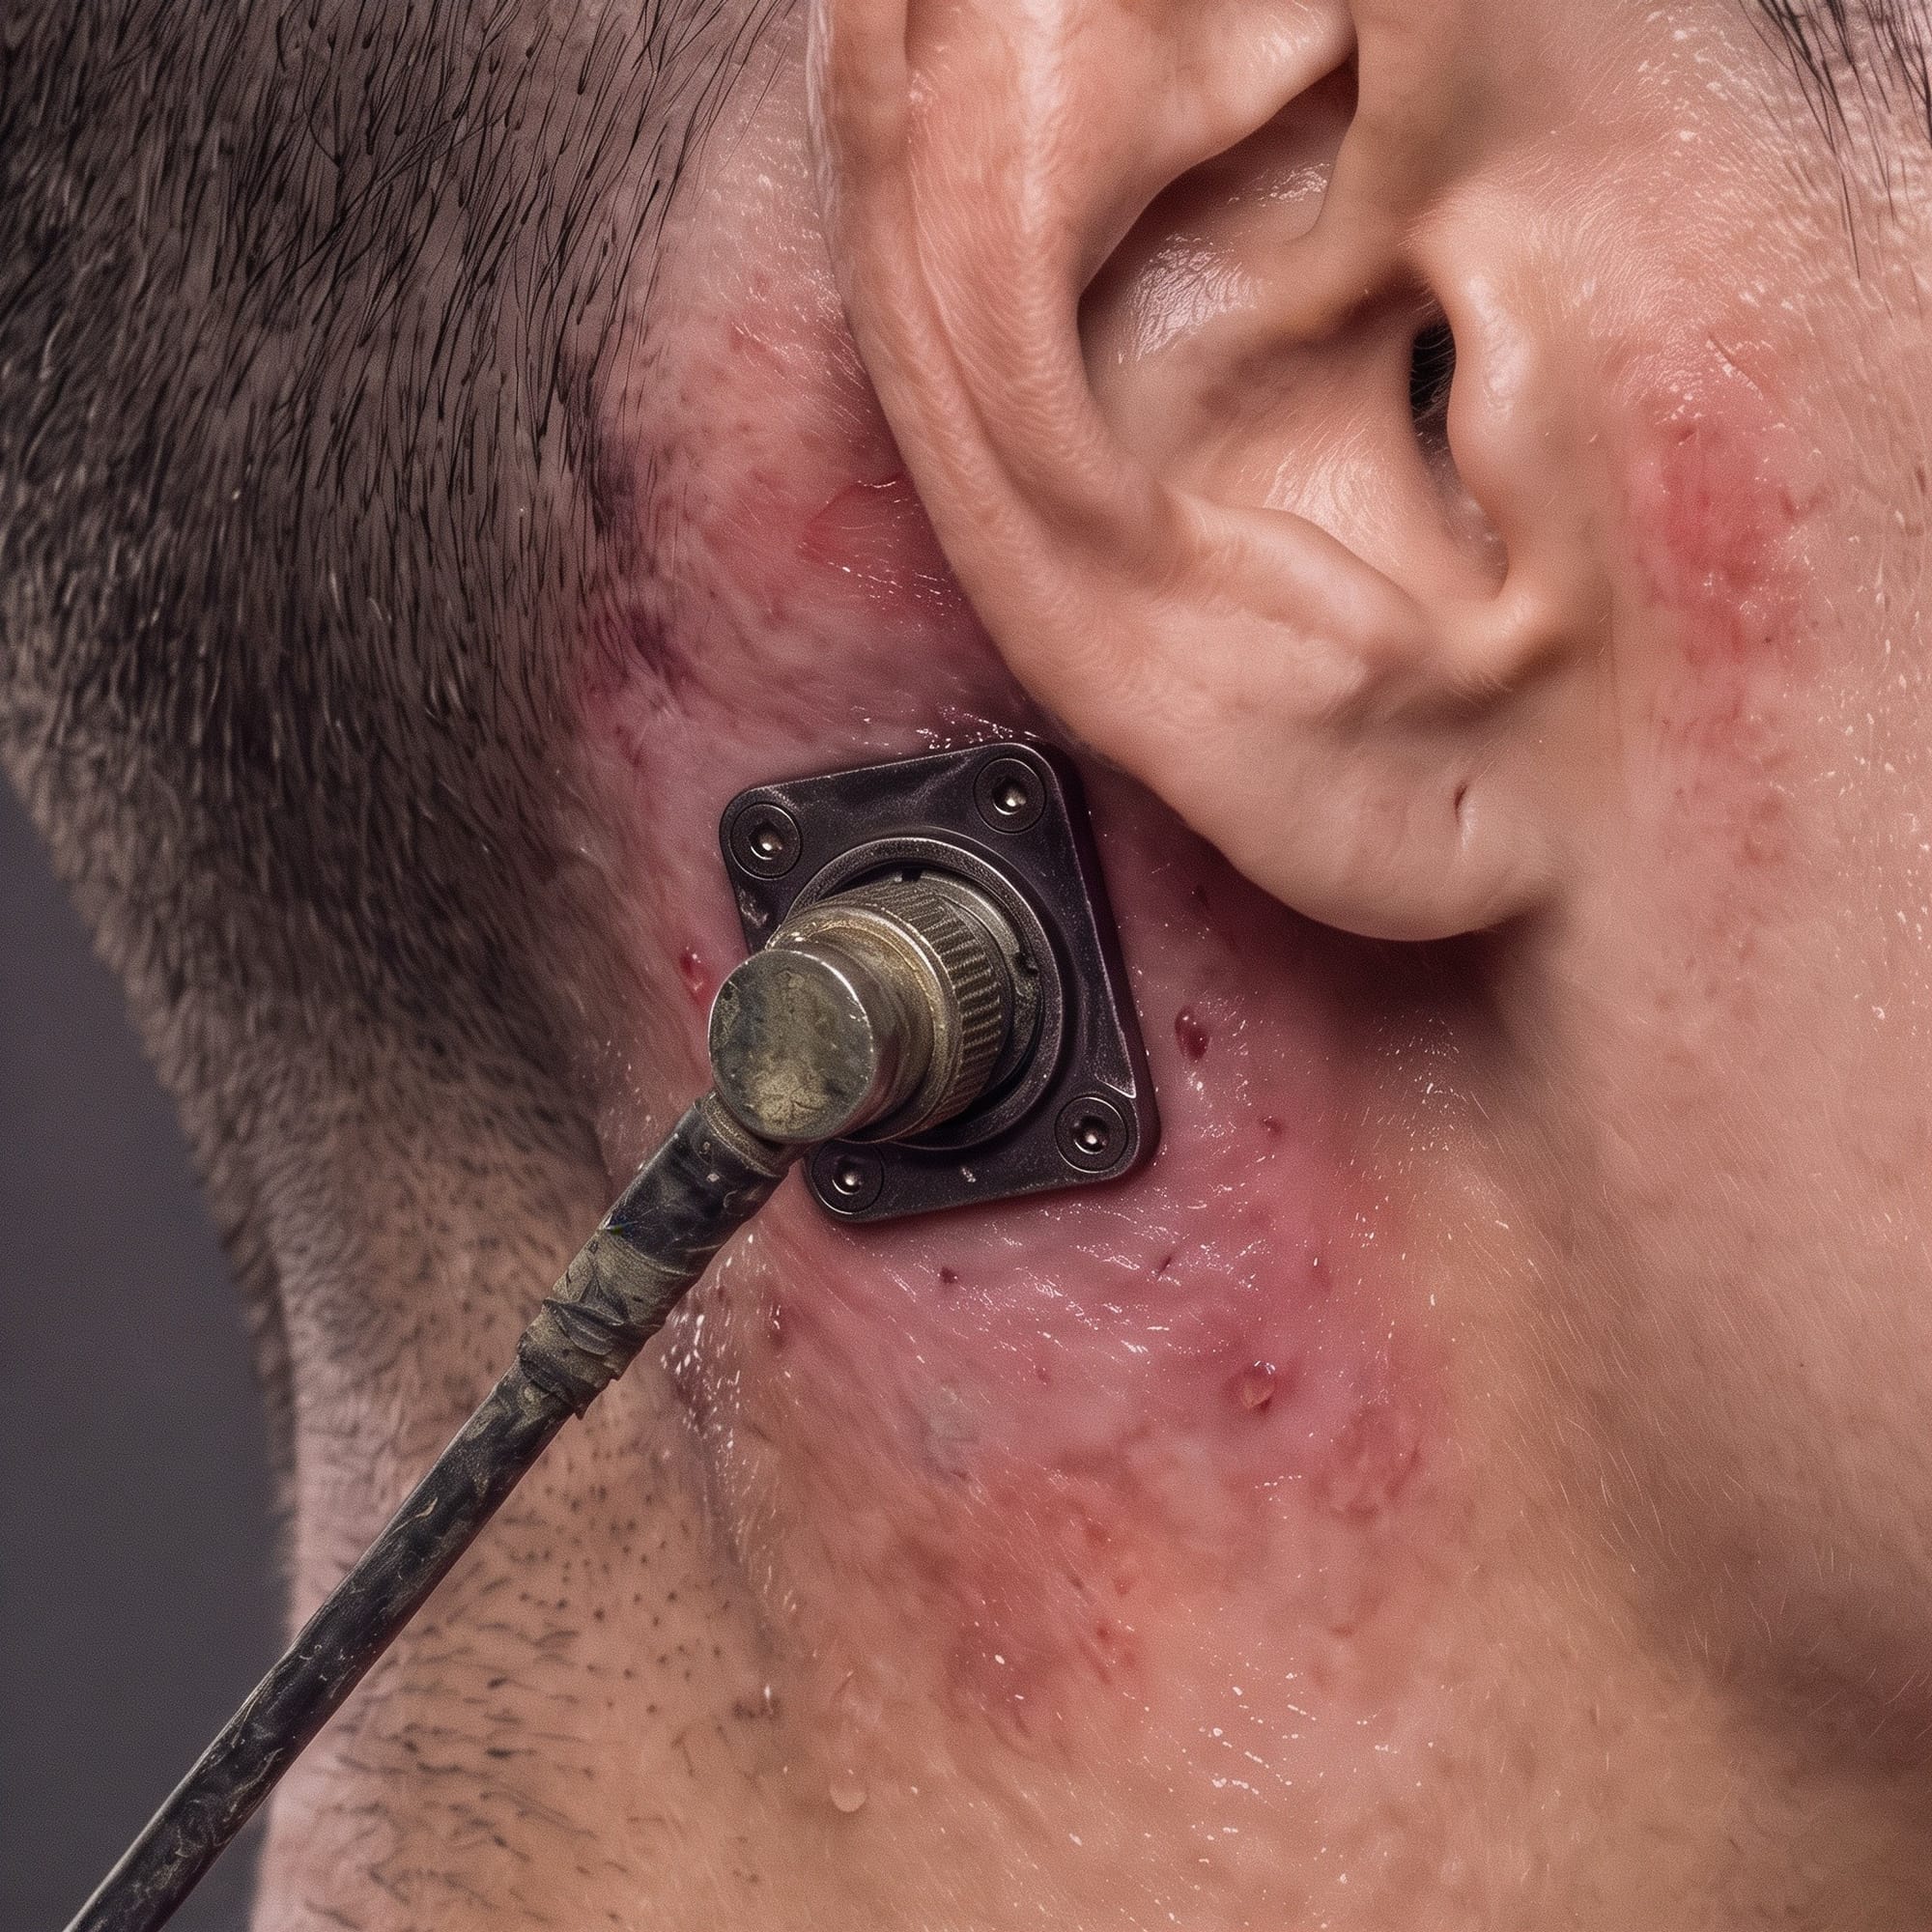
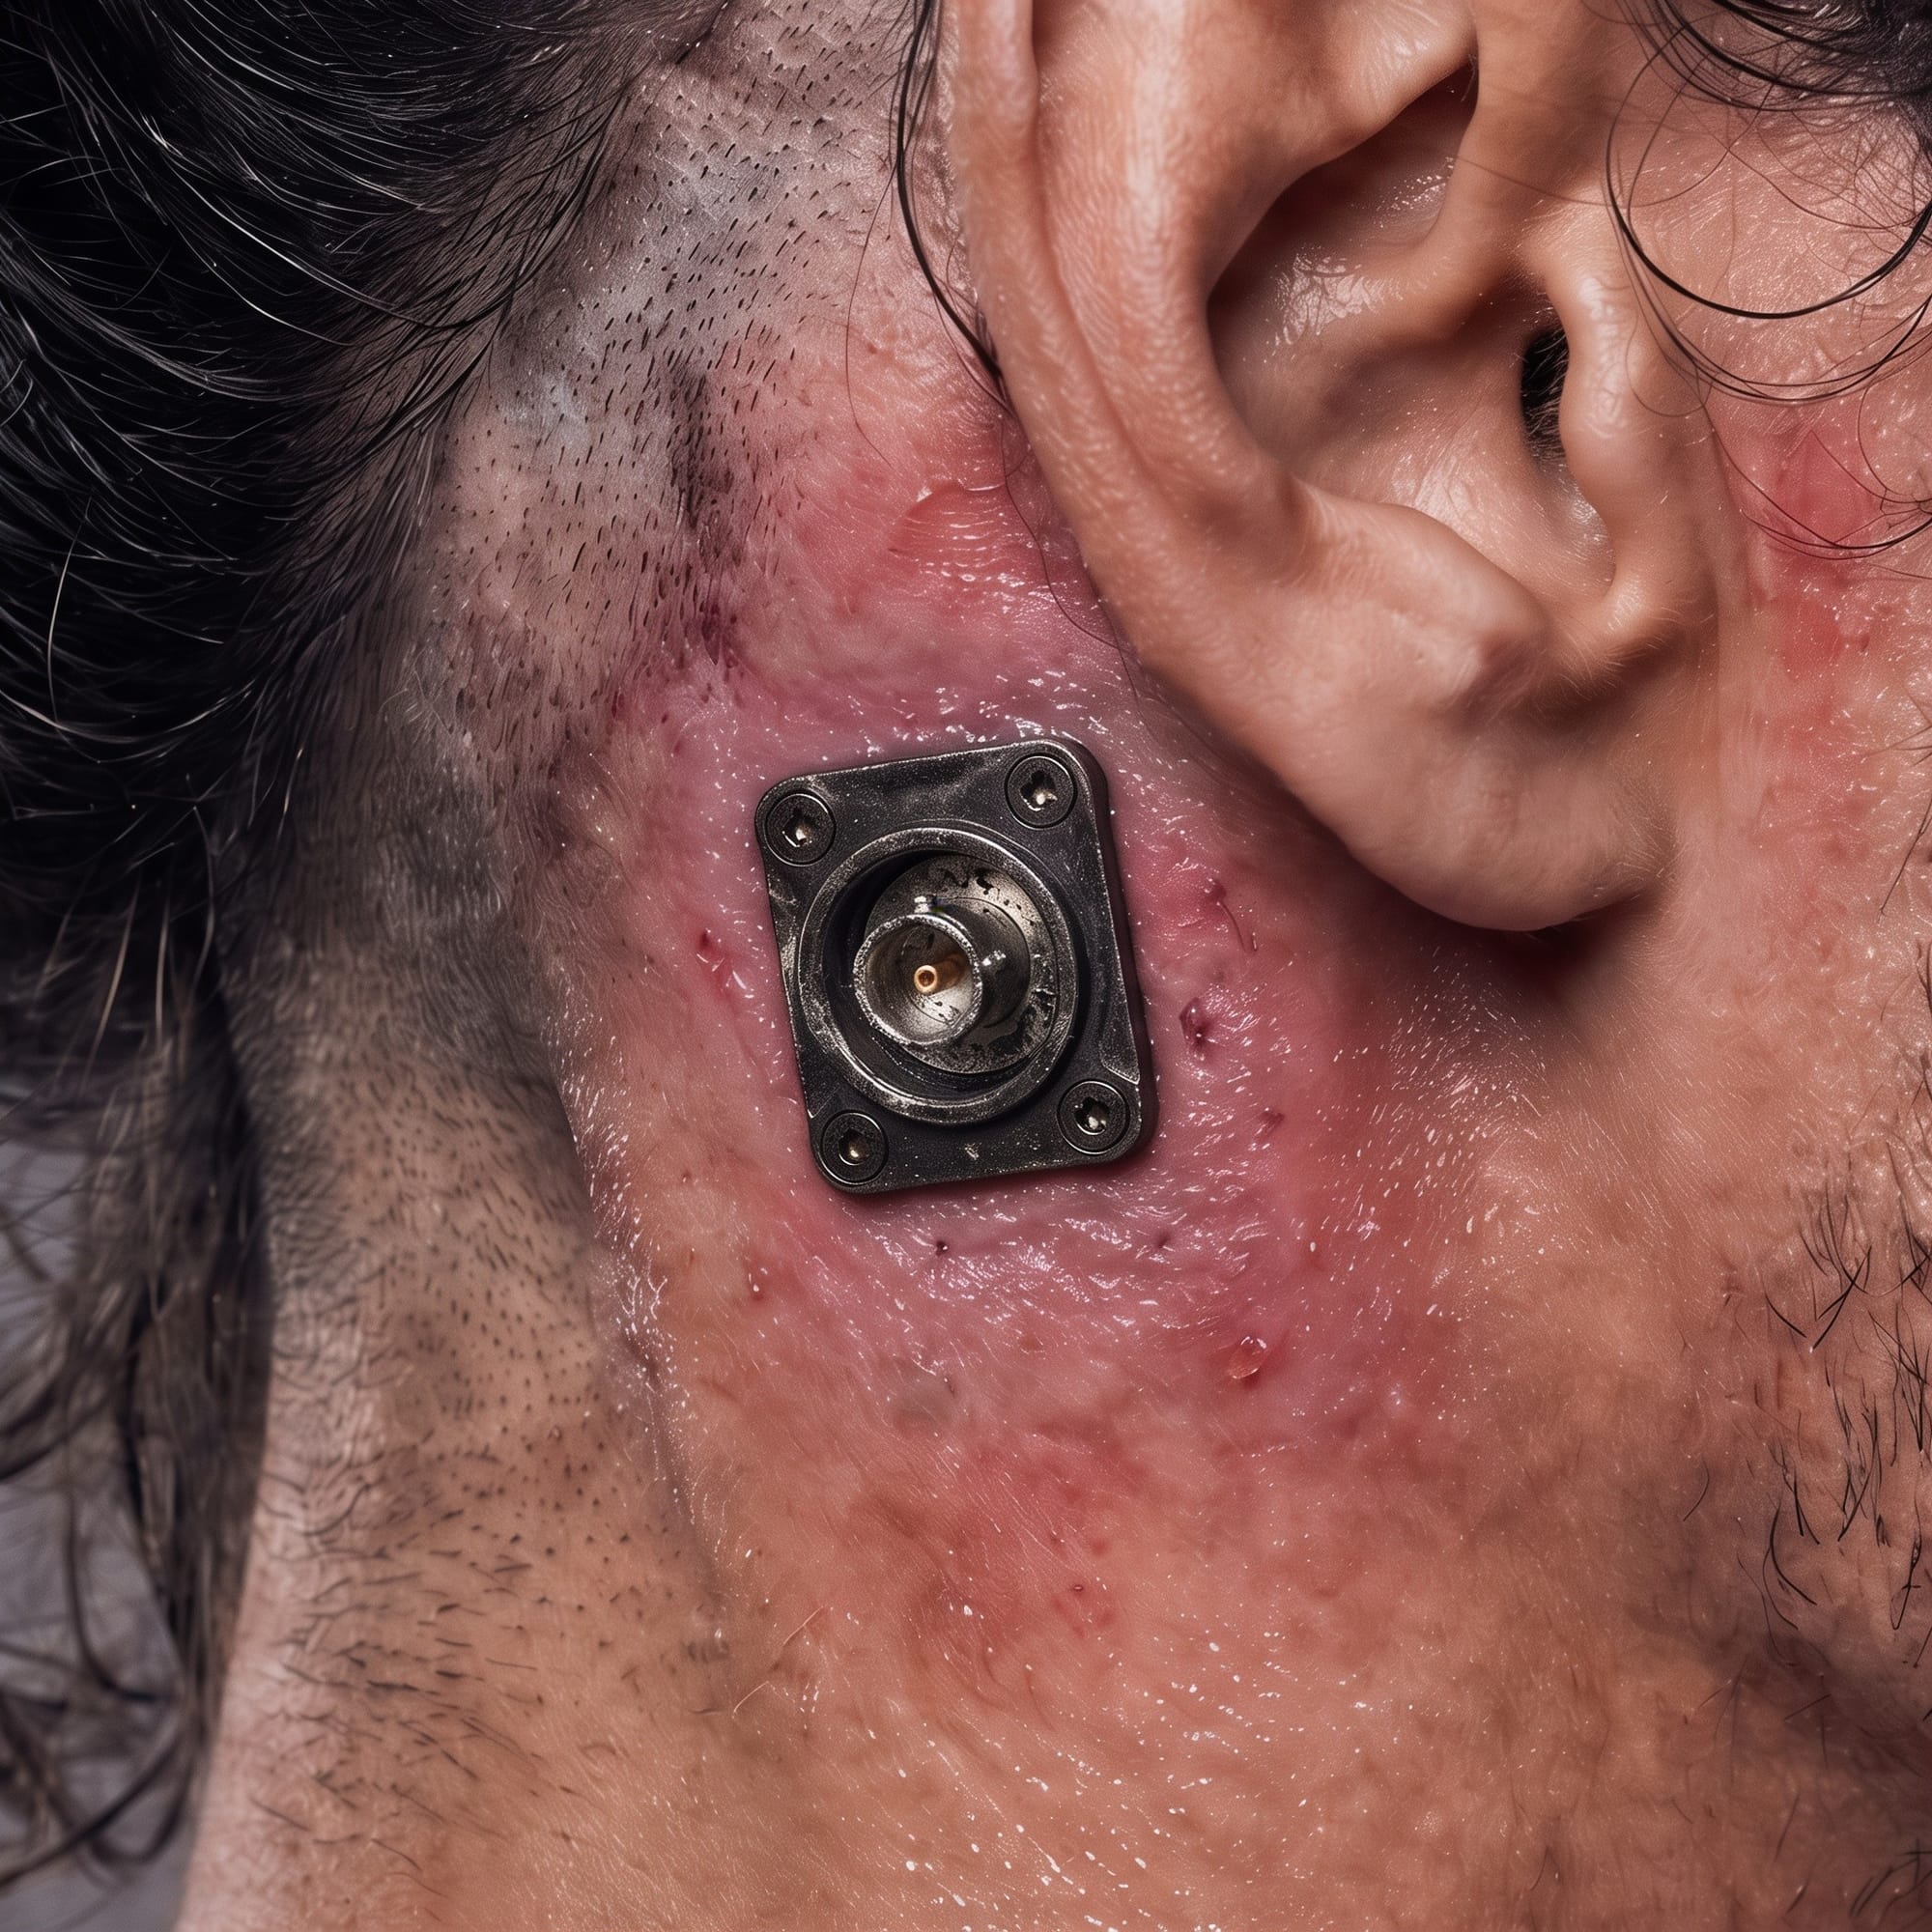
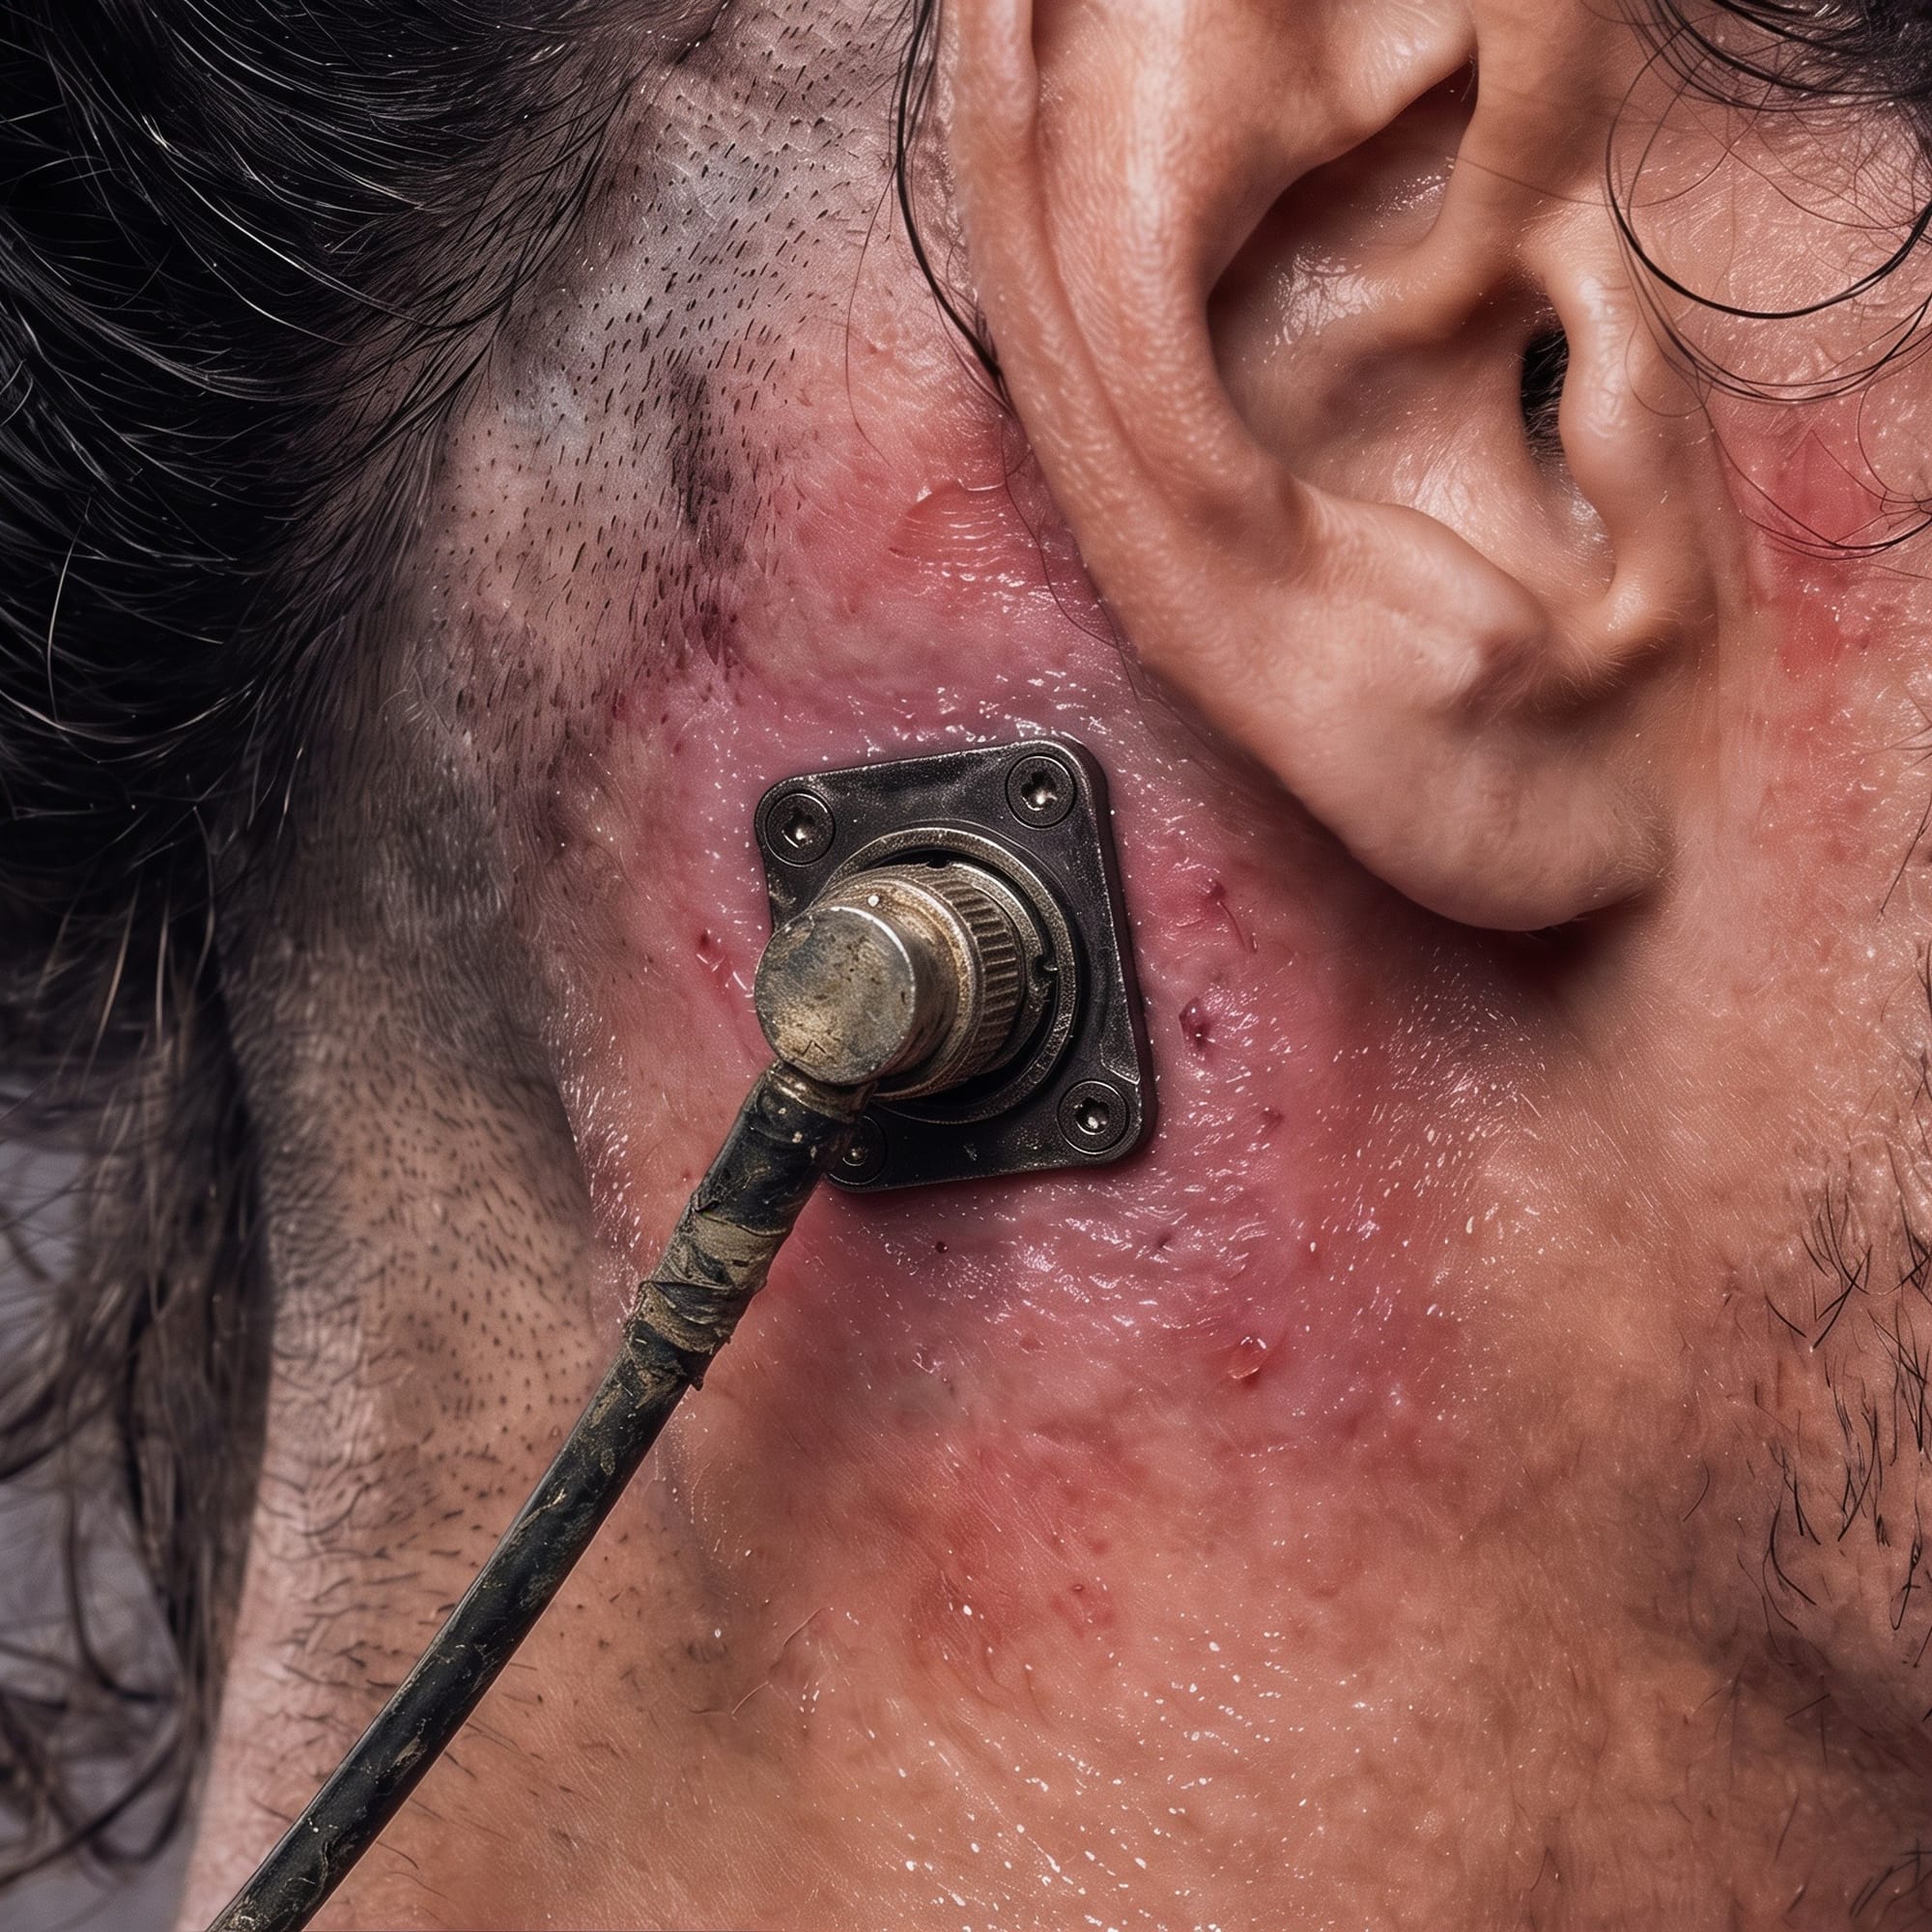
These cable port close-ups were created using the following reference images:
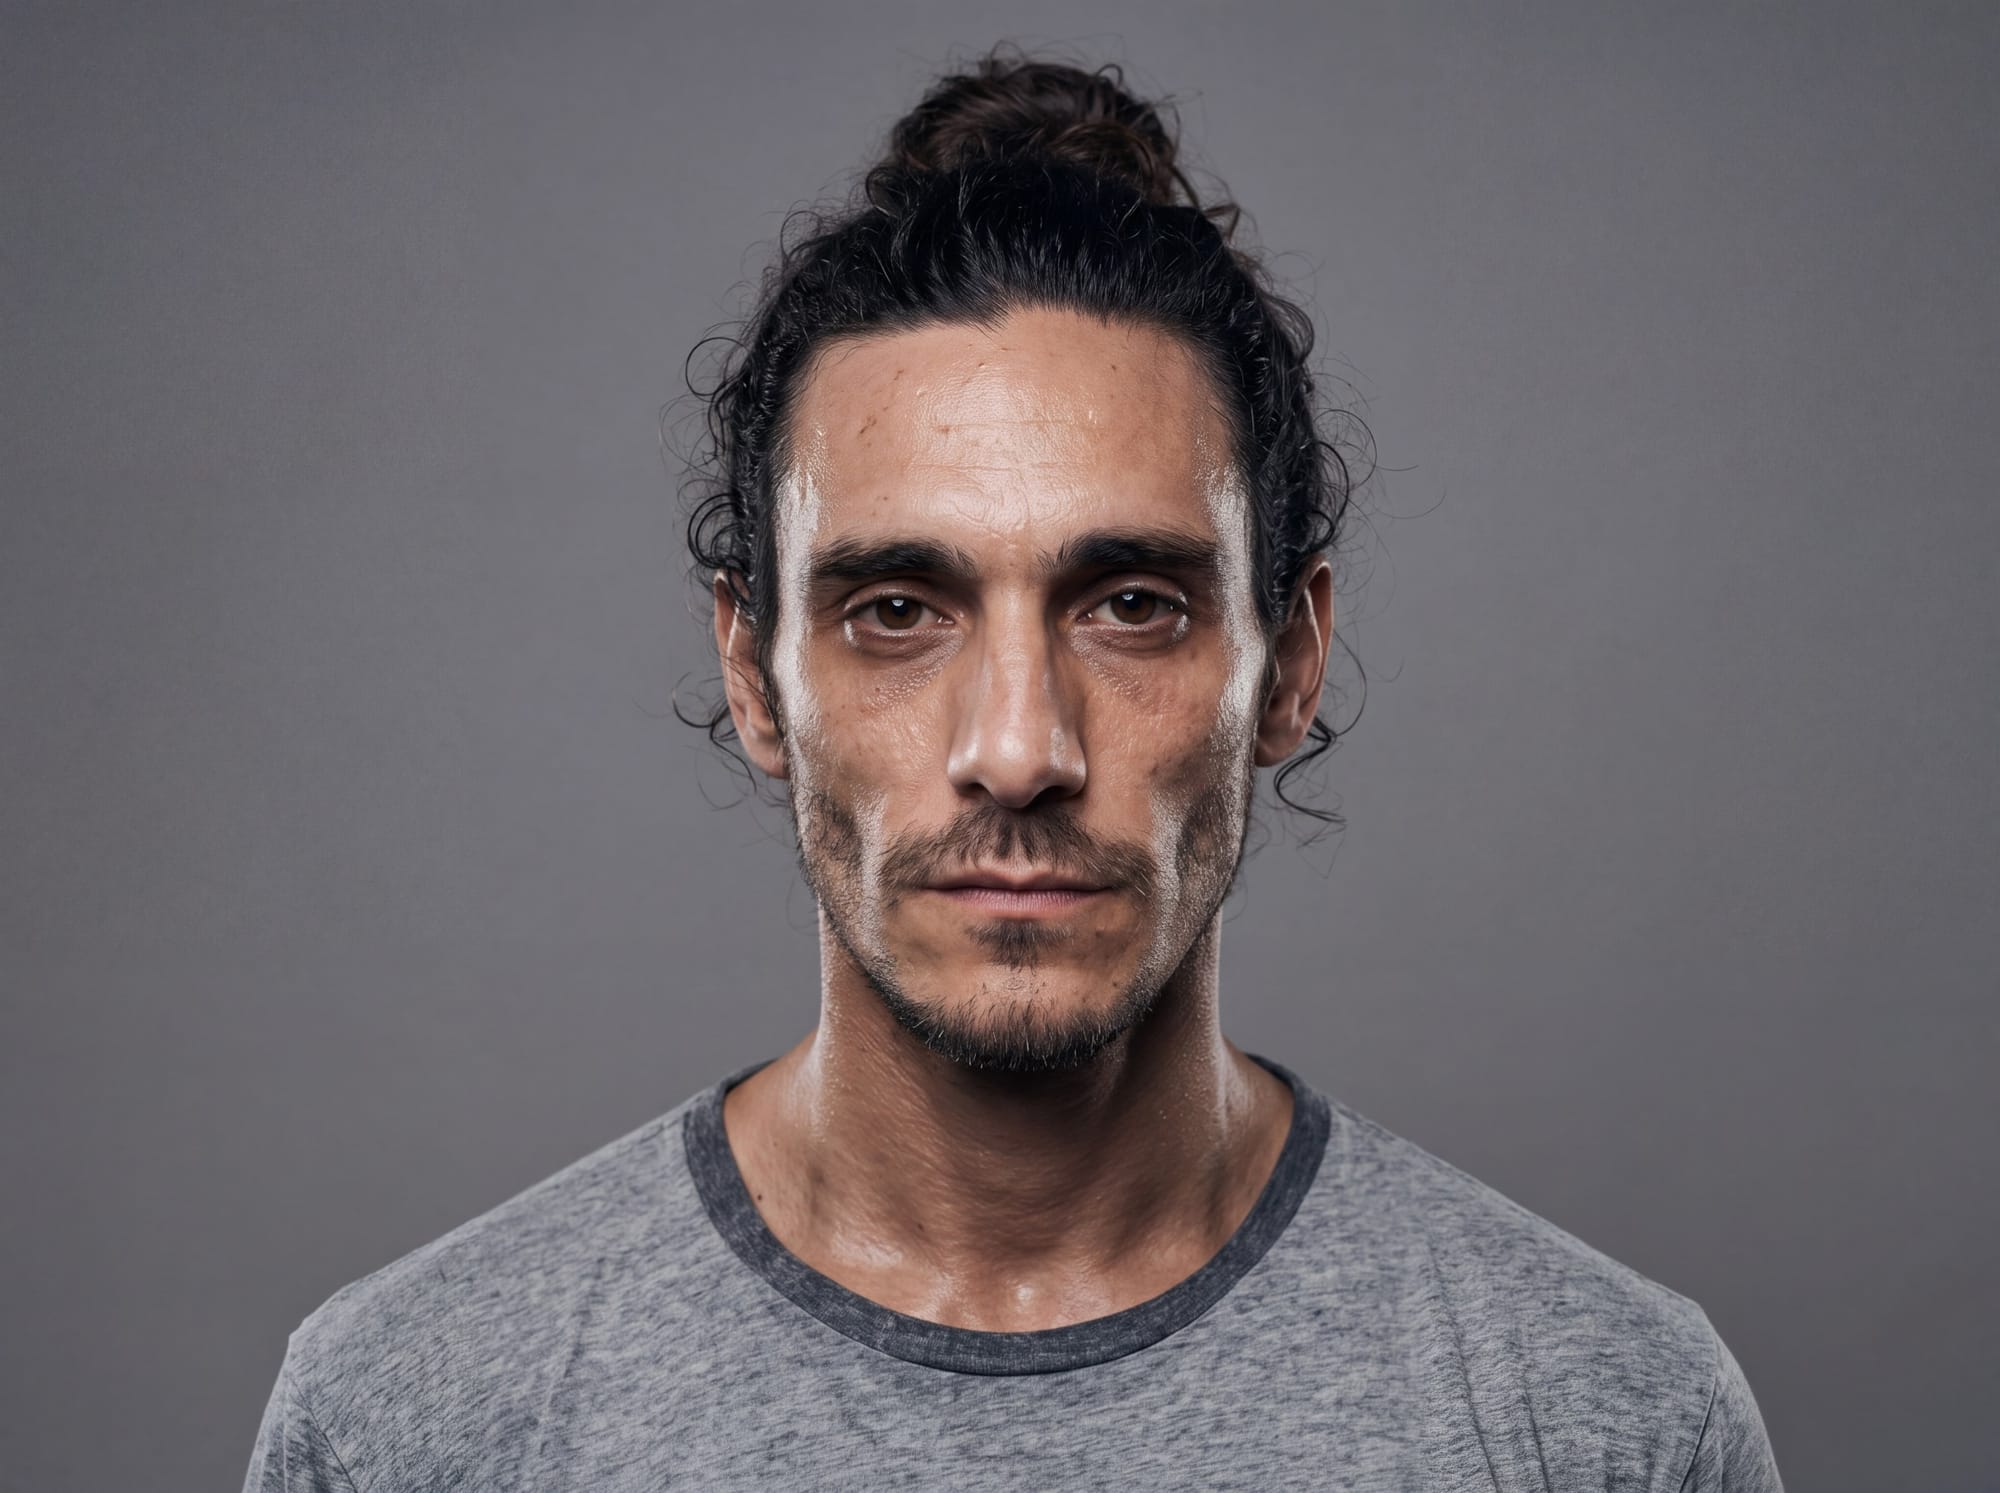
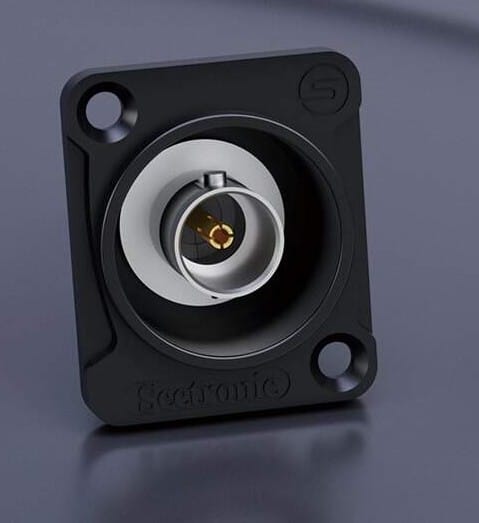
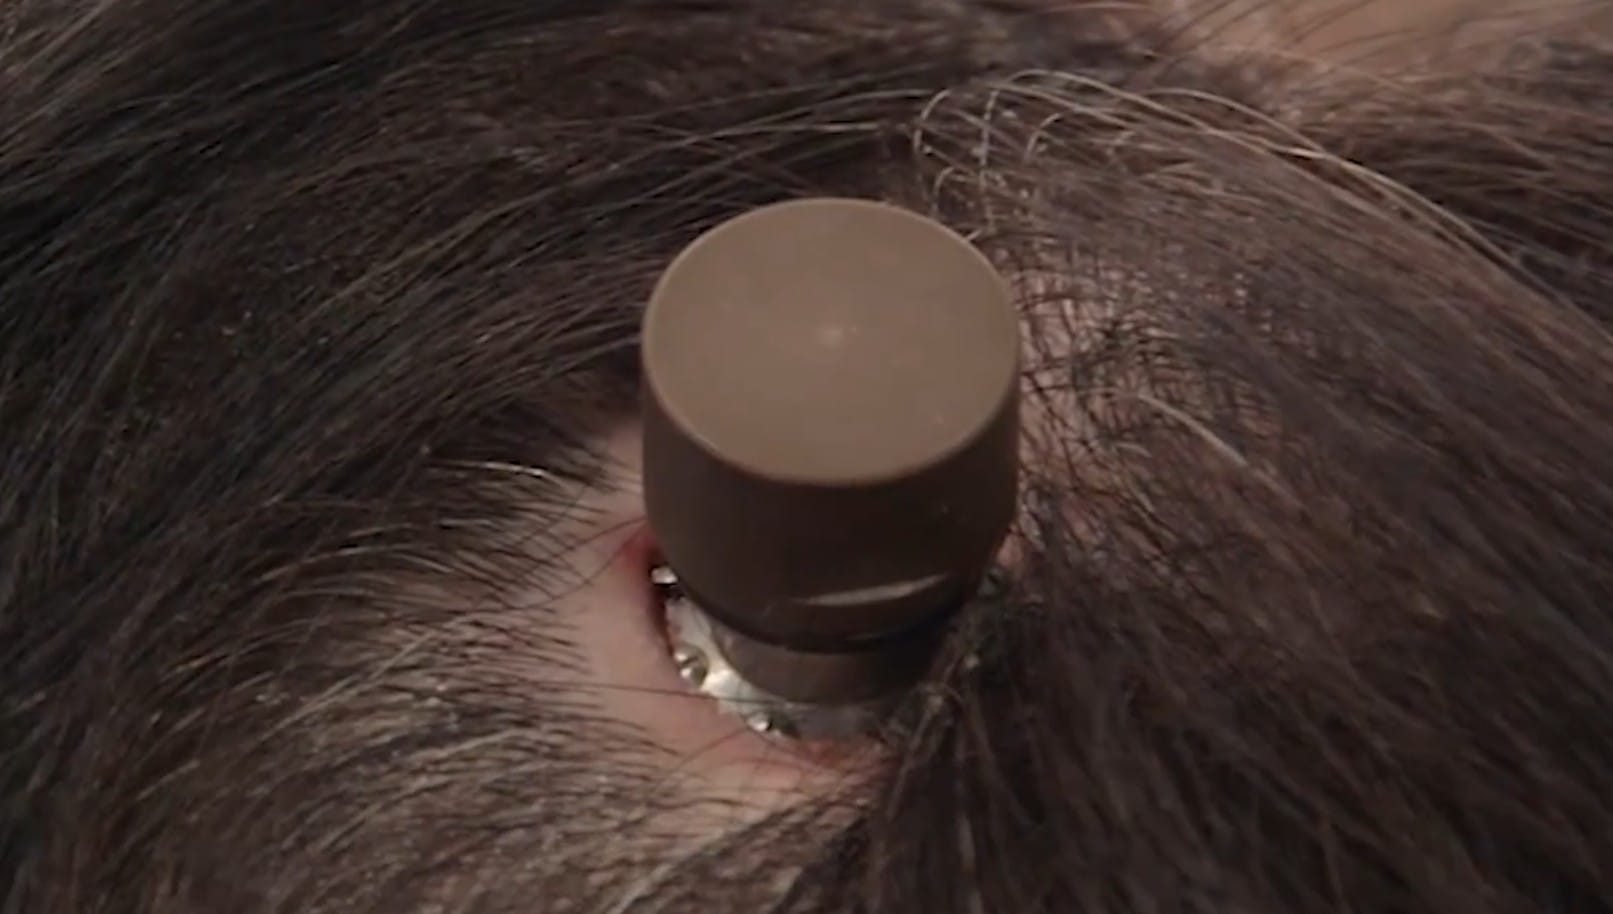
And prompt:
Keep the environment and lighting the same, but turn the man 90 degrees so that he is directly facing the right side of the frame.
Also make the following edits:
-In the area behind his ear, some of his hair has been shaved away.
-In the area that his hair has been shaved, there is a science-fiction style cable port implanted. Use @image2 as a reference for the cable port. It is a small, simple, black metal design. The port is about 2 x 2 centimeters in size. The port is submerged in the man's skin, and does not stick out. The holes in the black metal have flat-headed black screws in them.
-The edge of the skin around the port is slightly red and irritated, similar to reference @image3. Use reference @image3 as a reference for the skin only, not the port itself.
Preserve the facial features, hairstyle, body proportions, clothing, and skin tone of the man in @image1.
Preserve the realistic photographic style of @image1. Blend the metal port seamlessly into the scene.
Getting a good result required a lot of generations, plus additional prompting to adjust the size and details of the port, and then some manual compositing.
Consistency
Seedance 2.5 has a maximum generation length of 30 seconds, but my "unlimited" plan on Higgsfield was actually limited to 20 seconds per generation. My longest prompts would ask for 3-4 shots and usually be 15-20 seconds long. This scene had 39 shots, which I broke into 16 prompts:
The video should automatically play from time code 04:47.
When Seedance generates a clip, it has no memory of any previous generations. So, how do you get the characters and the environment to look the same across all the outputs?
I paired the character and location reference images with a detailed text block in every prompt. An example of a full prompt for a complex, 16-second clip can be seen on the right-hand column of this page. The full prompt is about 1700 words, but the section for Aneta looks like this:
The character Aneta corresponds to @image1. Reference her facial features, buzz cut hairstyle, petite body proportions, the thin layer of sweat on her skin, the dirt and grime on her feet, the black tank top and shorts. Do not use the studio backdrop or the anonymizing blur on the body-reference panels.
@image2 references the matte black square metal port implanted in the skin, visible behind Aneta's right ear, with raw red healing scar tissue around it. This metal port is only behind her right ear.
And the section for the nighttime workroom location looks like this:
@image7 and @image8 show the same room from two directions. @image7 shows the room from the entrance: the window on the opposite wall with the LCD monitor and table just below the window, the server rack with blinking yellow and green indicator lights just to the right of the table, the closet filled with computer hardware, clothing, and other clutter on the left-side wall, the whiteboard scribbled with notes on the right-side wall, and the thin mattress and large pillows on the floor. @image8 shows the same room from the opposite direction, facing the entrance and sliding door. Keep the room layout, the positions of the objects, the lighting, and the reflections.
It was important to use the same reference images and same text descriptions across all the generations to keep the setting and the characters looking as consistent as possible. The specific details mentioned in the text block help reinforce the reference images. For example, the thin layer of sweat on Aneta's and Anders's skin is visible in their character sheets, but mentioning it in the text description ensures the model won't overlook it.
At least, that's how I assume it works. Since gen-AI tools are a black box, I don't think there is a way to be completely sure of how different prompts lead to different outputs. But, my mental model is that when Seedance is generating the imagery for a particular character, it searches over a vast space of options that might satisfy the prompt. In addition to the reference images, each word of text constrains Seedance and reduces the number of options it can pull from while still honoring the description. Obviously, a simple prompt like "30-year-old woman with a shaved head" and no reference images would produce a different-looking woman in each shot. But clear reference images along with a detailed description push the model towards the same imagery each time.
The same applies to the characters' voices. I used fairly detailed descriptions:
Aneta (A 28 year old Swedish woman with a crisp, mid-range voice. She speaks fluent American with a slight Scandinavian lilt. Her "r" is often slightly tapped or rolled at the front of the mouth. It is less deep in the throat than a standard American "r." The "a" sound often leans closer to an open "ah" or "ae." Her consonants are clear and sharp.)
In this case, I think the specific details included in the description are less important than the simple fact that the description is detailed and specific. Again, it is about pushing the model toward a smaller range of options so that there is less variance in the voice across outputs. I didn't care if Aneta's voice literally satisfied all the points in my description, I just wanted her voice to always sound the same.
I used a similar voice description for Anders, but for some reason his voice seemed to vary more across generations. I eventually solved this by using audio references. Seedance can also take audio clips as reference inputs, so once I had enough clips where I liked Aneta's and Anders's voices, I spliced the dialogue from those clips together to make a voice reference for each character. From then on, I prompted Seedance to reference the audio sample, and I cut out the text description.
Blocking
One of my biggest challenges was getting Seedance to consistently position the characters and objects in the scene. Because Seedance has no memory of any previous generations, I needed a way to establish the characters' positions with each prompt.
The common way to do this is to use coverage shots at the beginning and end of each generation. For example, the prompt for Shots 1-3 would include an additional 1-second shot at the end, which shows a wide angle of the room and the characters in the same positions they were in at the end of Shot 3.
I would pull a still frame from that coverage shot and use it as the start frame for an establishing shot in the prompt for Shots 4-6. For reference, the long prompt I linked above includes both an initial establishing shot and a final coverage shot.
Obviously, for a scene's opening shot there is no establishing frame to reference, so the opening shots always took the most time and iteration to get right. But, once I had it, I could chain these coverage shots and keep the characters consistently positioned throughout the whole scene.
Sometimes complicated blocking could still throw Seedance off, despite the establishing shot. This section was particularly challenging:
The video should automatically play from time code 05:09.
From the start of this scene, Aneta is sitting to Anders's right. The cable port is behind her right ear, so she needs to lie down with the right side of her head facing up, towards Anders. Because she is on his right side, this means lying down and resting her head on Anders's right knee. The establishing frame clearly showed Aneta on Anders's right side...
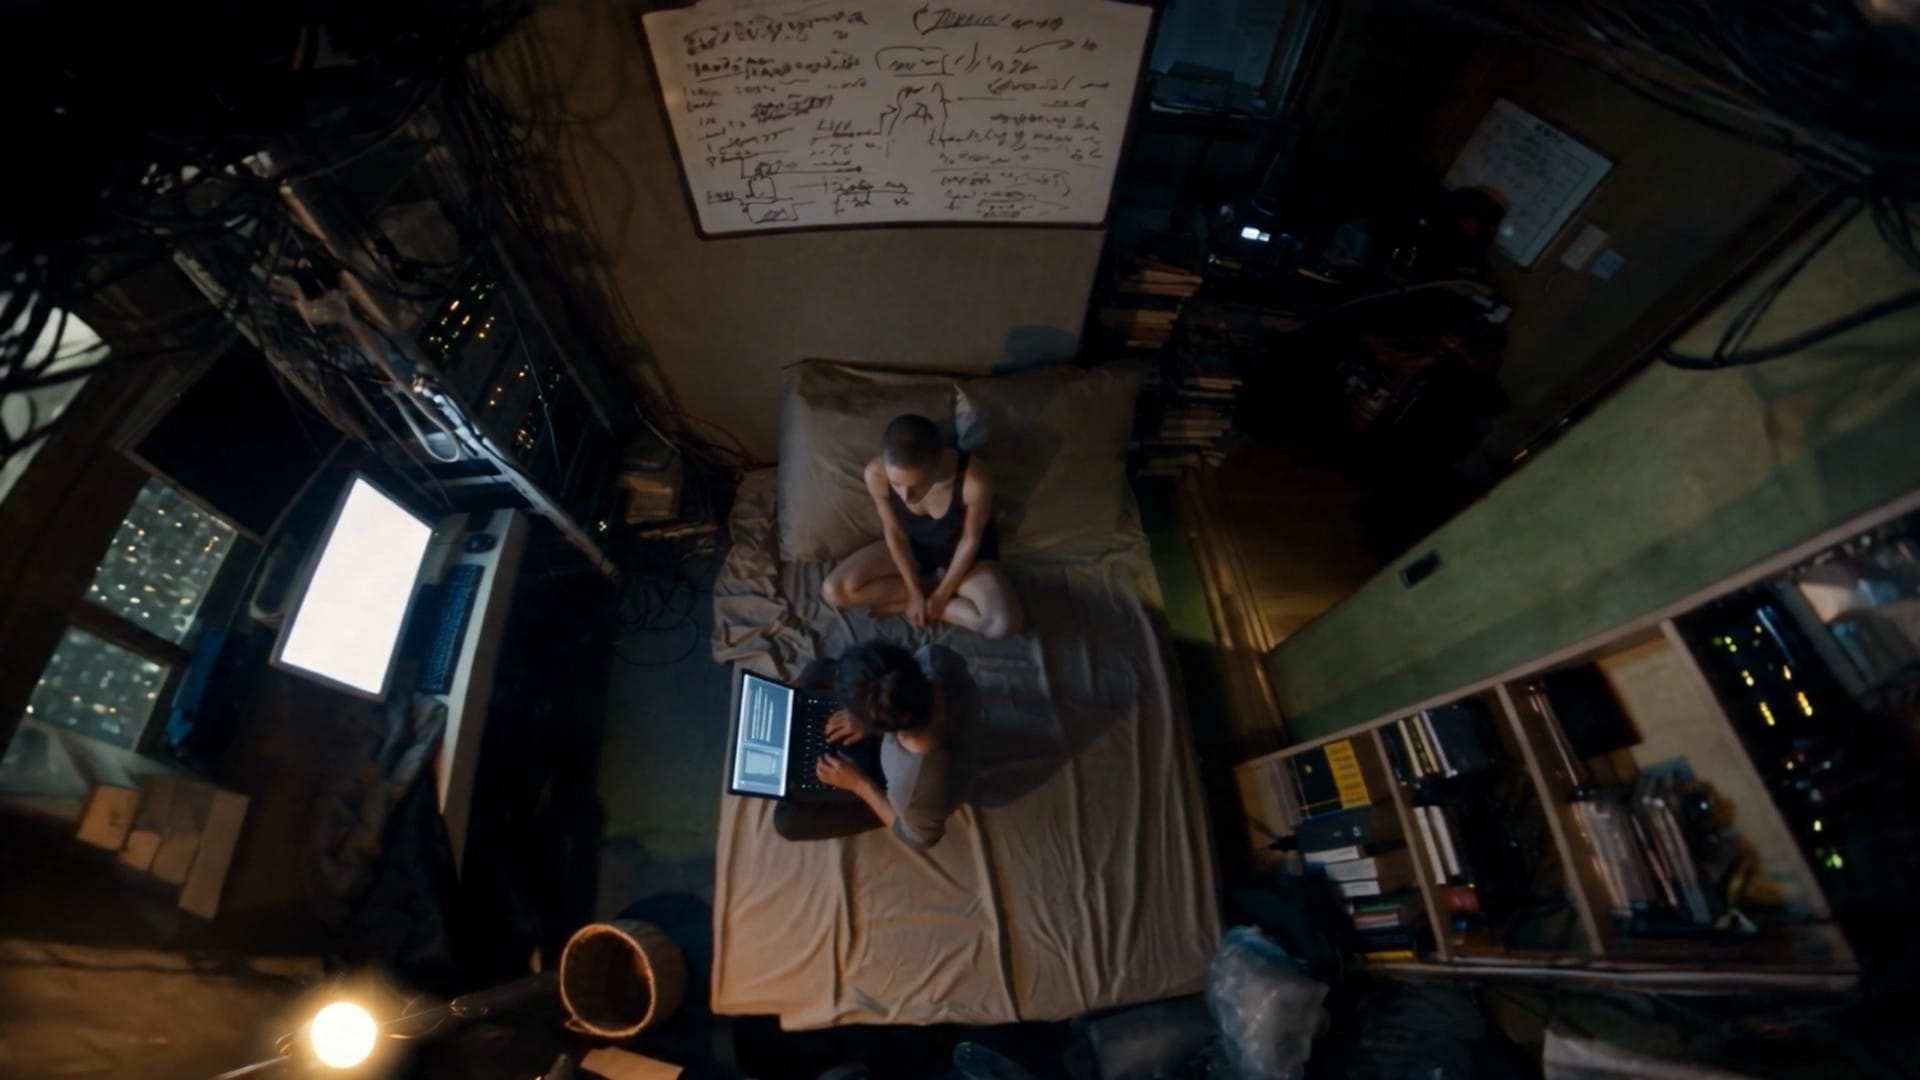
...but Seedance frequently botched it. It was funny to watch some outputs, where it would mess up the positioning from the start and then have to mangle Aneta in order to complete the scene's action:
Aside from these extreme examples, the coverage-shot strategy worked well through the whole production.
Revenge of the Start Frame
Even with Aneta and Anders properly placed in the scene, the camera position and framing would vary from generation to generation. For example, here is the same shot in four different outputs:
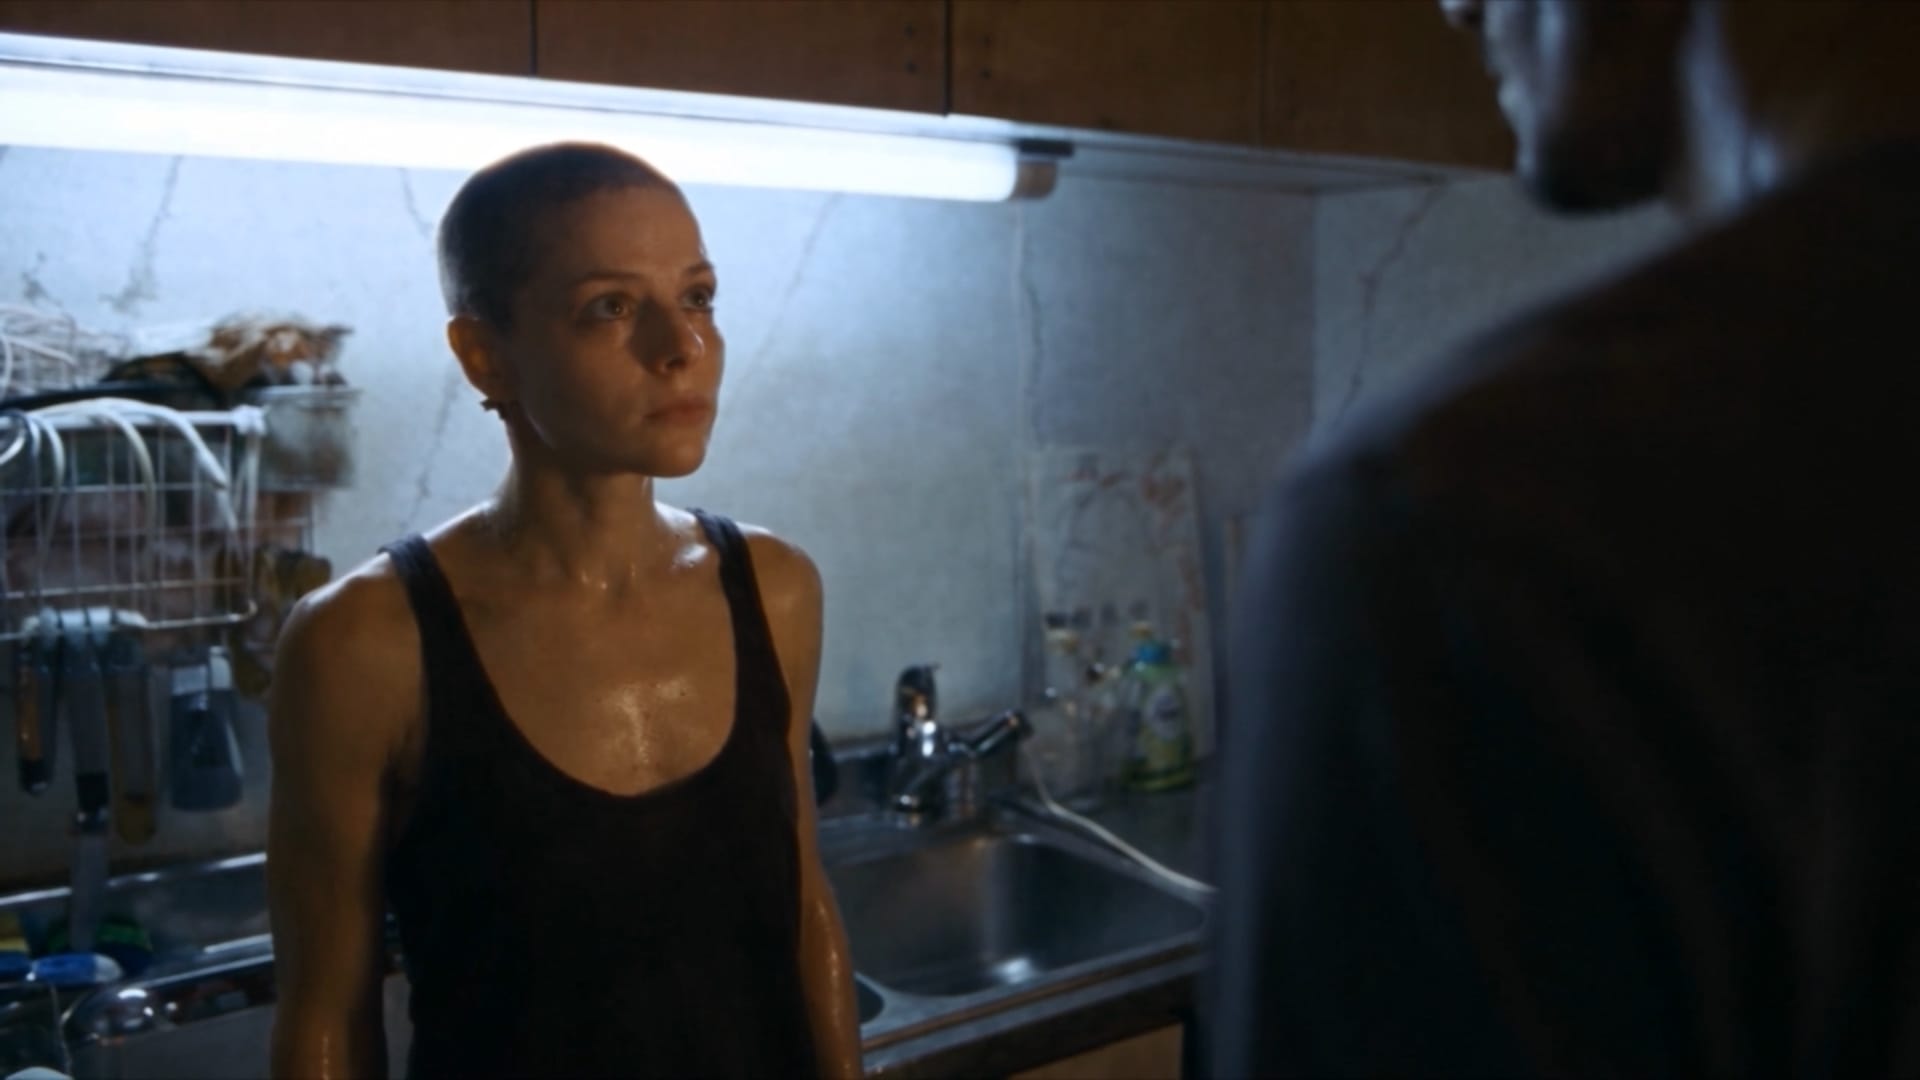
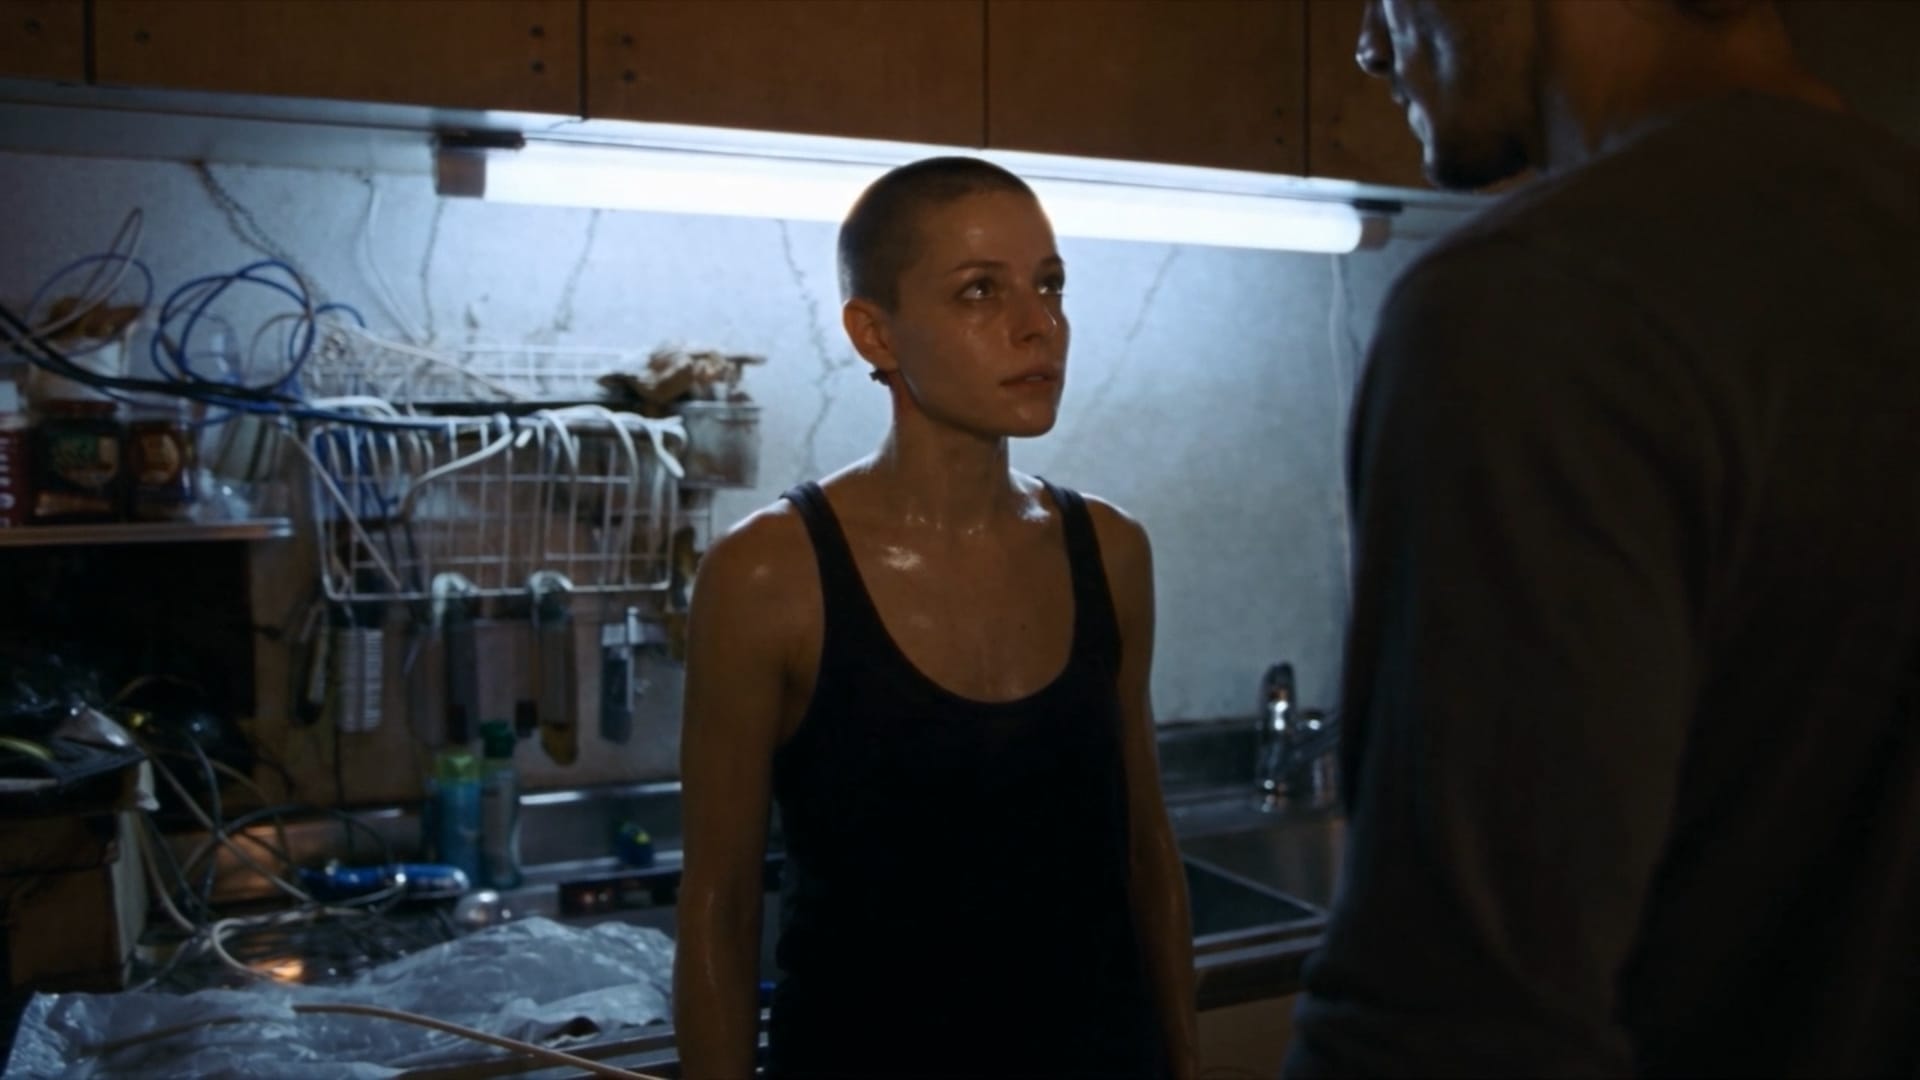
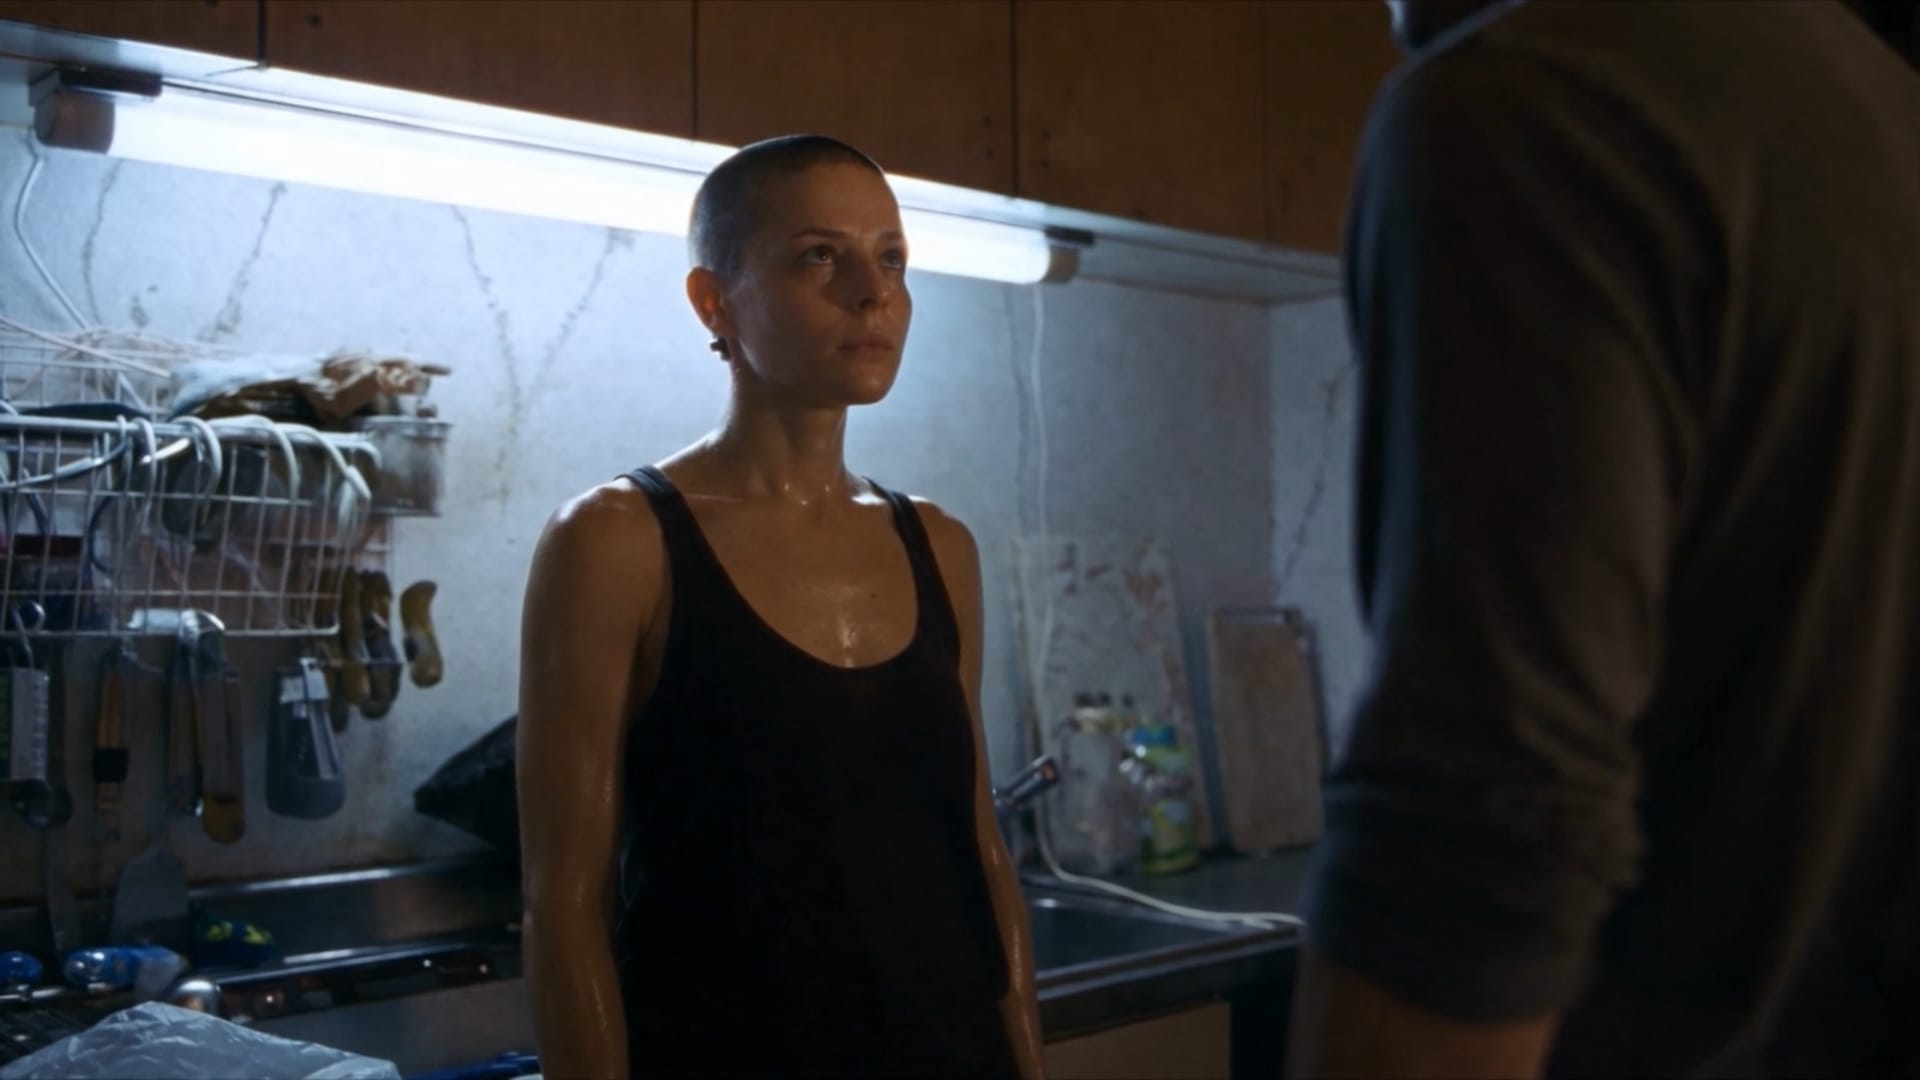
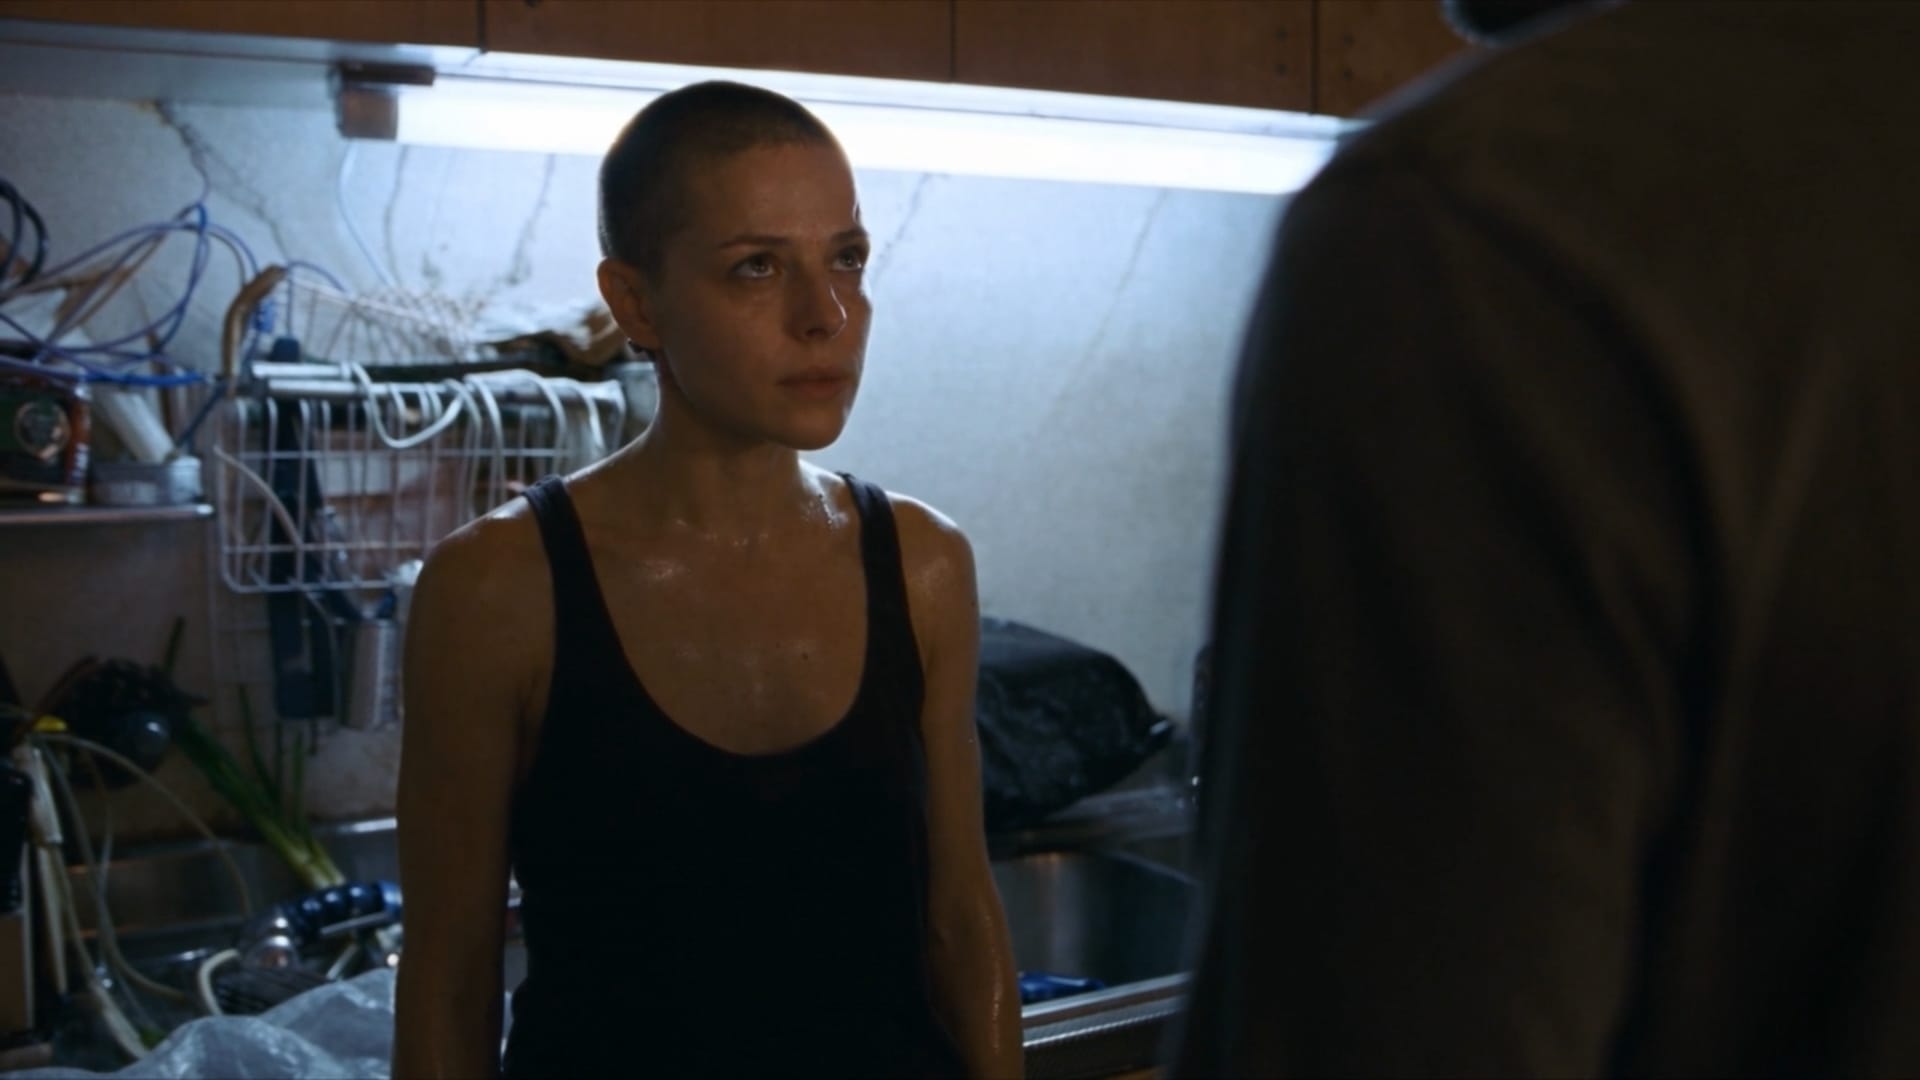
This inconsistency wasn't a problem if the shot only appeared once in the final edit, but in a dialogue-heavy sequence, where the camera bounces back and forth as Aneta and Anders converse, it would be off-putting if every time the scene cut back to Aneta, the camera angle had changed.
To fix this, I picked an output with good framing, pulled a still frame, and used that as a start frame on the next generations, forcing Seedance to frame the shot identically each time. This is an example of when I used start frames for both Aneta's and Anders's shots.
Performance
The process of directing actors has always been fascinating to me. The common advice for directing actors is similar to the advice for describing a character's performance to a gen-AI tool: avoid asking for an emotional result and instead give the actor context along with something to do.
Guides for prompting Seedance emphasize that phrases like "she makes a sad face" or "he says angrily" will produce generic, uncanny results. Instead, like when working with real actors, you can describe the character's goal in the scene. Usually this goal involves invoking some kind of change in the scene partner. For the kitchen scene where Aneta and Anders debate whether to push forward with their risky experiment, I usually phrased Aneta's performance in terms of trying to inspire Anders or build up his confidence, and Anders's performance was based around protecting Aneta, or preventing her from making a terrible mistake.
Another way to direct is through metaphor. On one shot, I described Aneta's expression as "Aneta watches Anders like he is her father about to give her a scolding." Not all the takes were good, but Seedance seemed to understand the assignment:
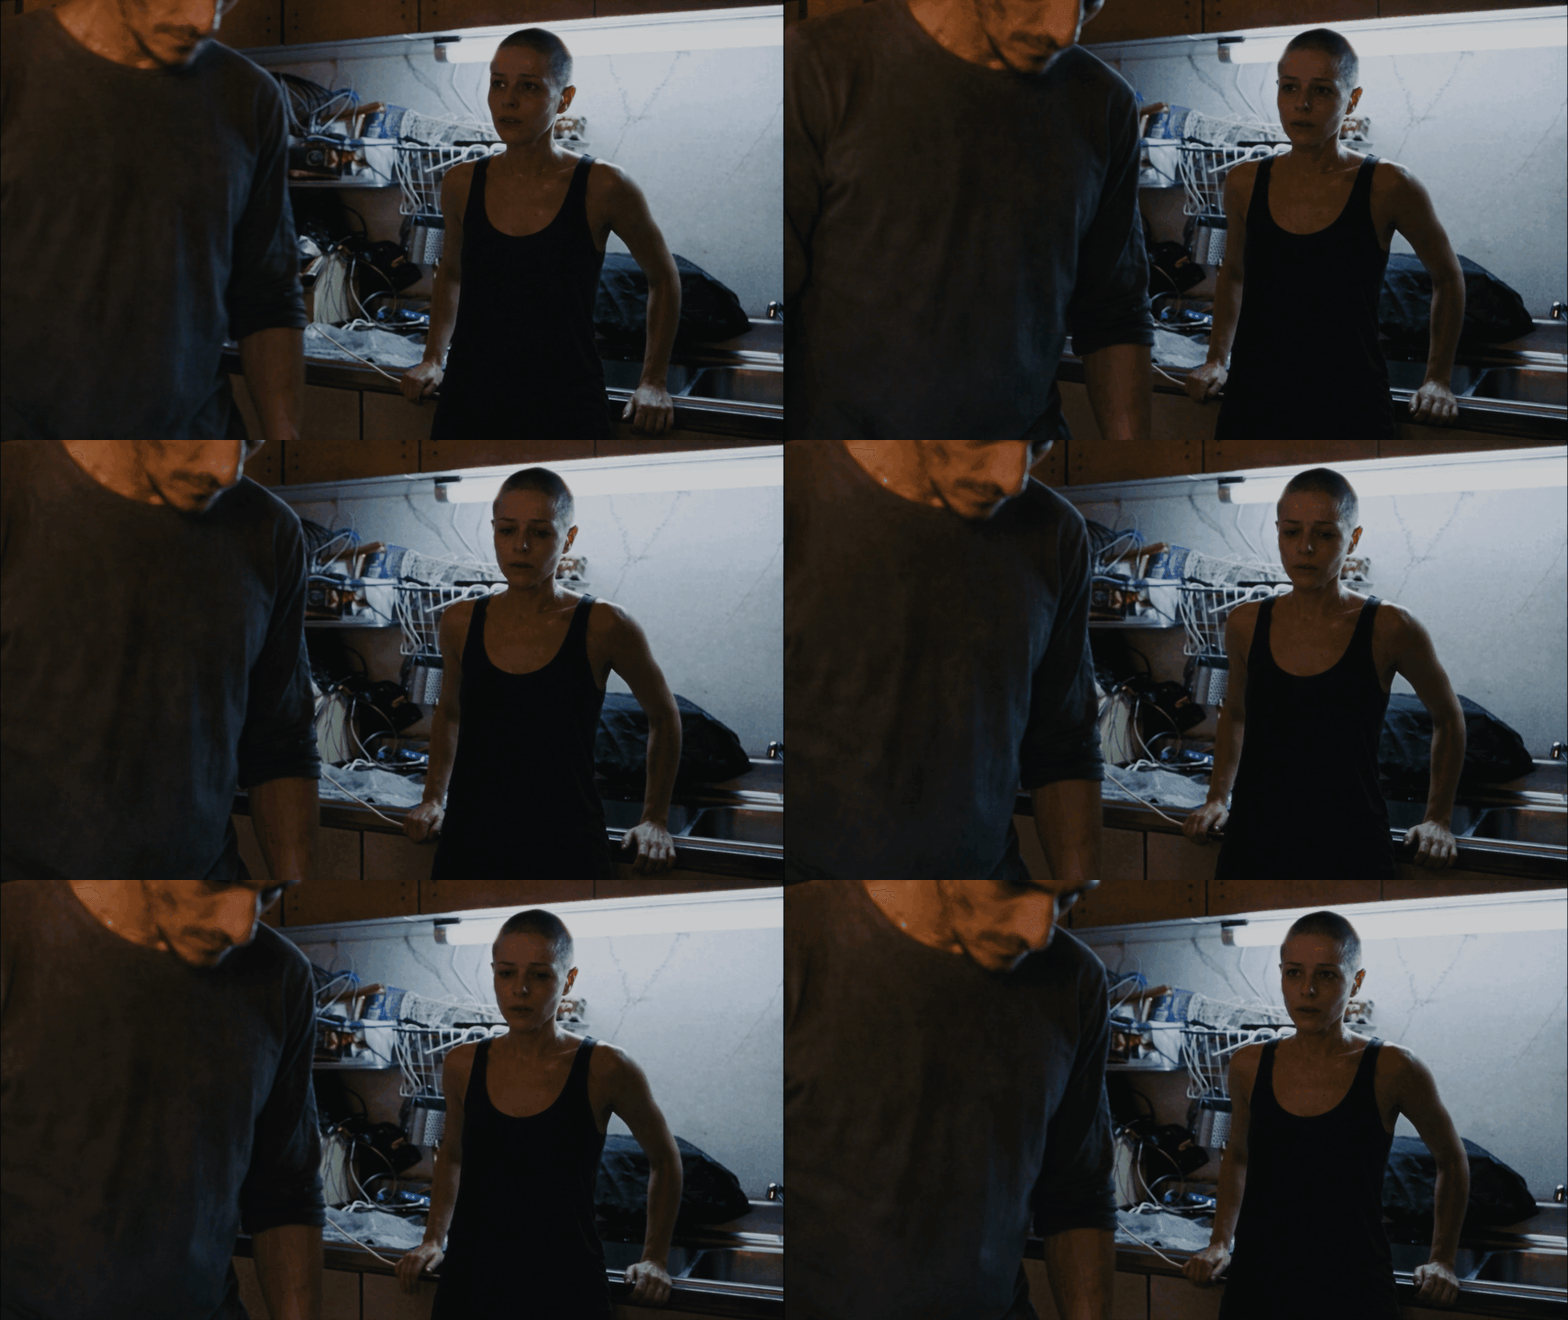
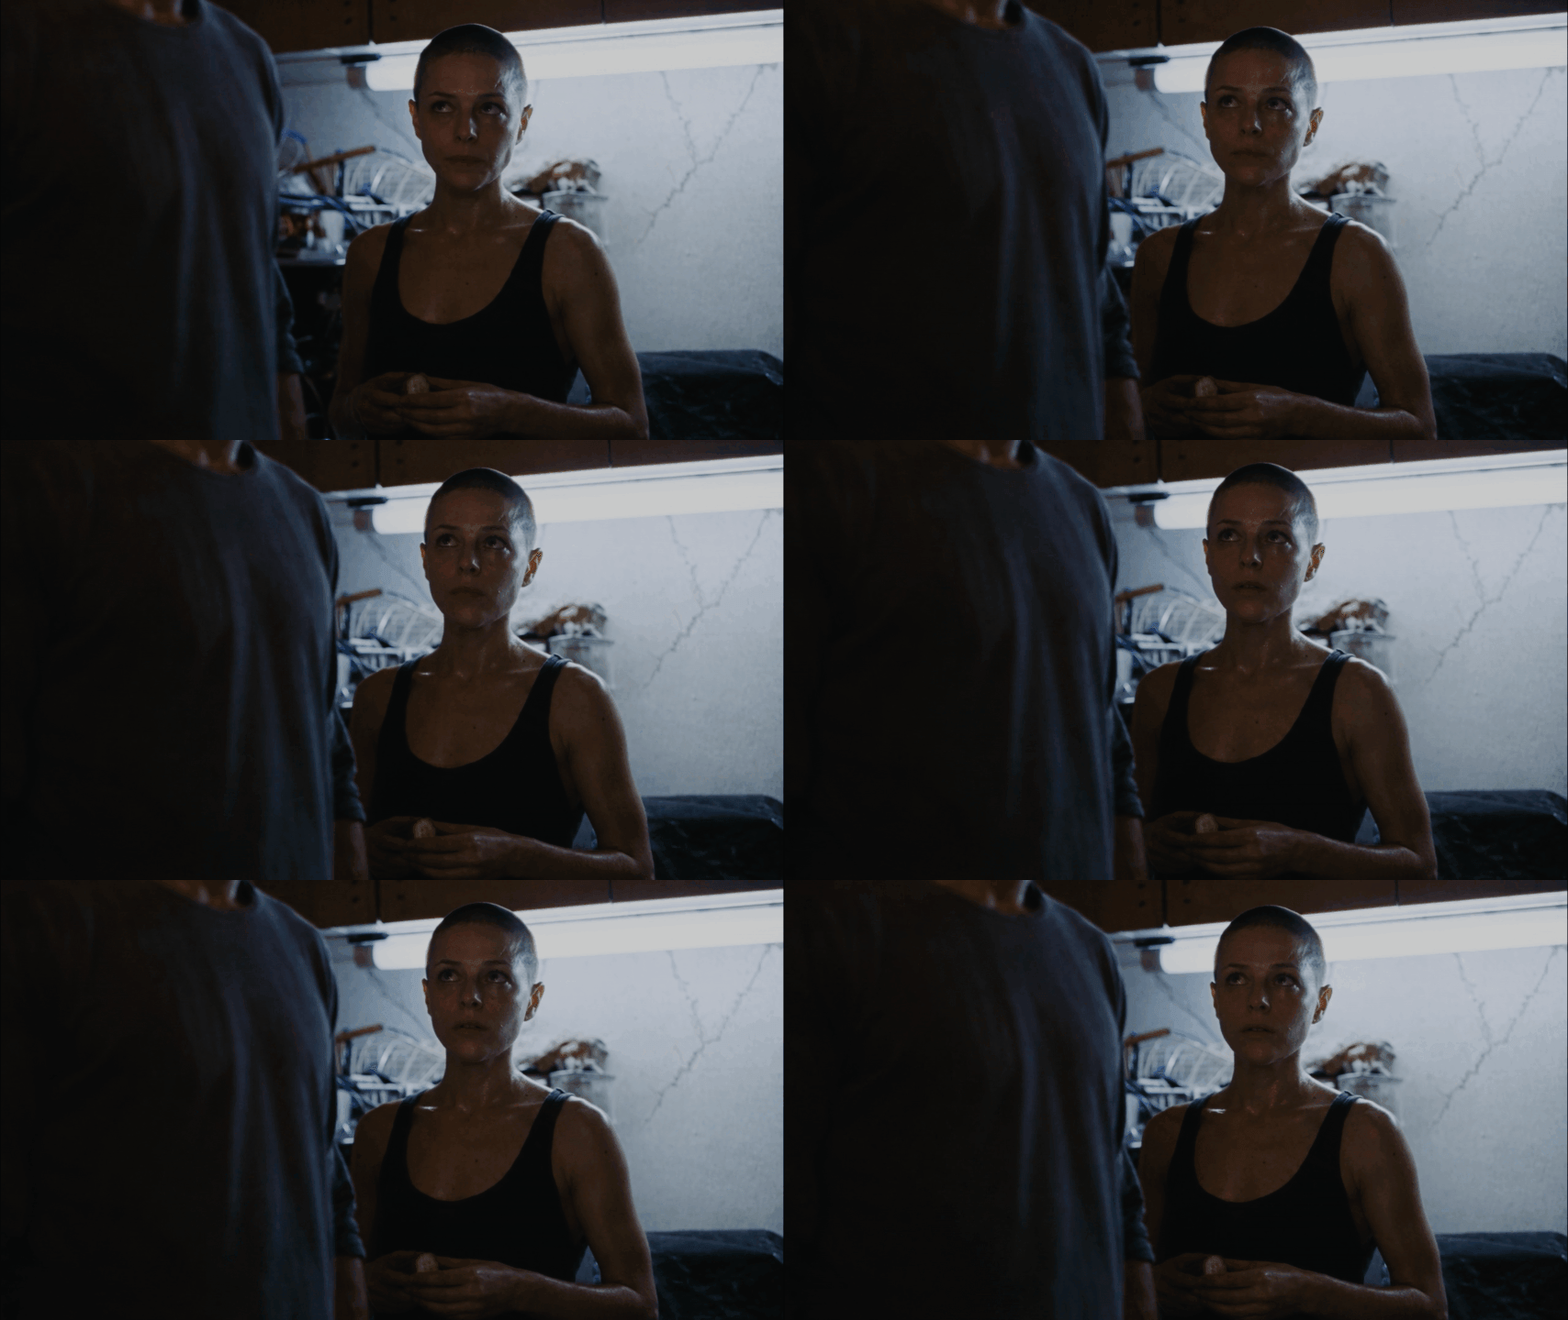
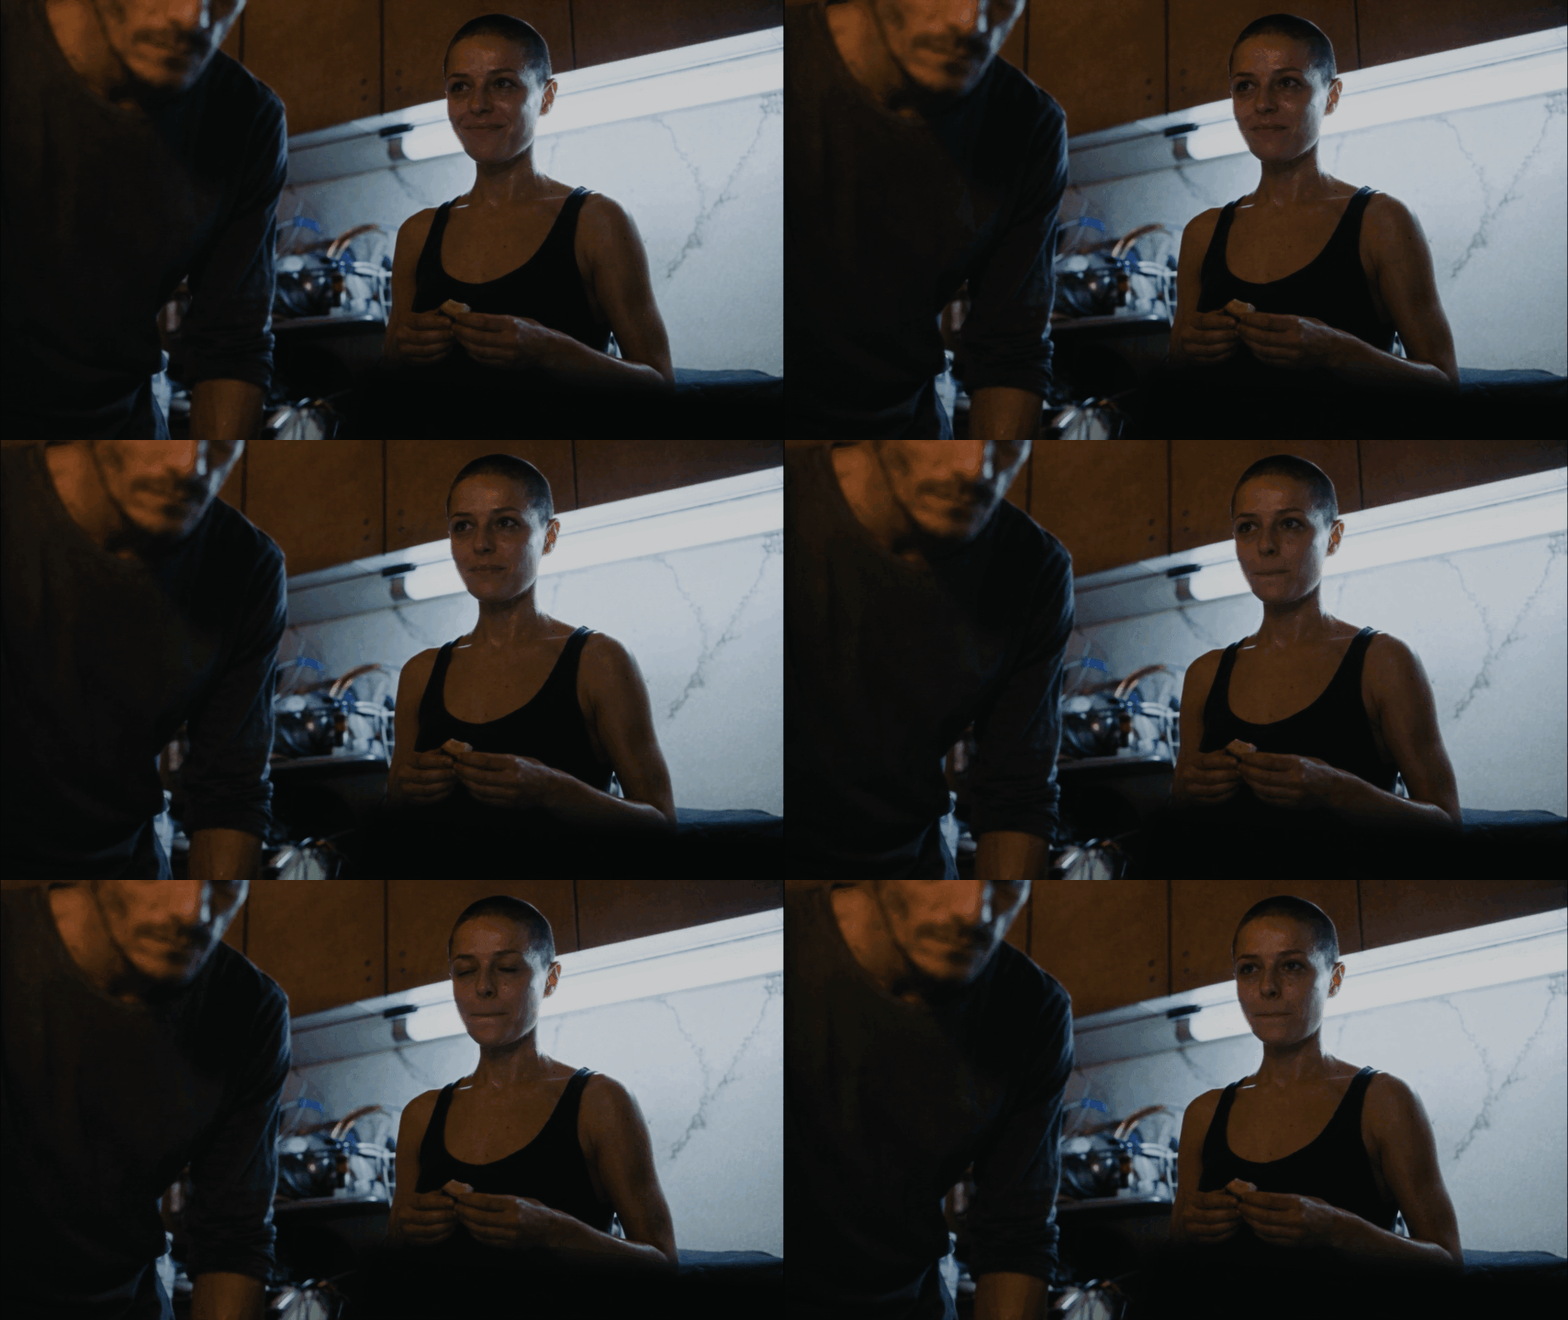
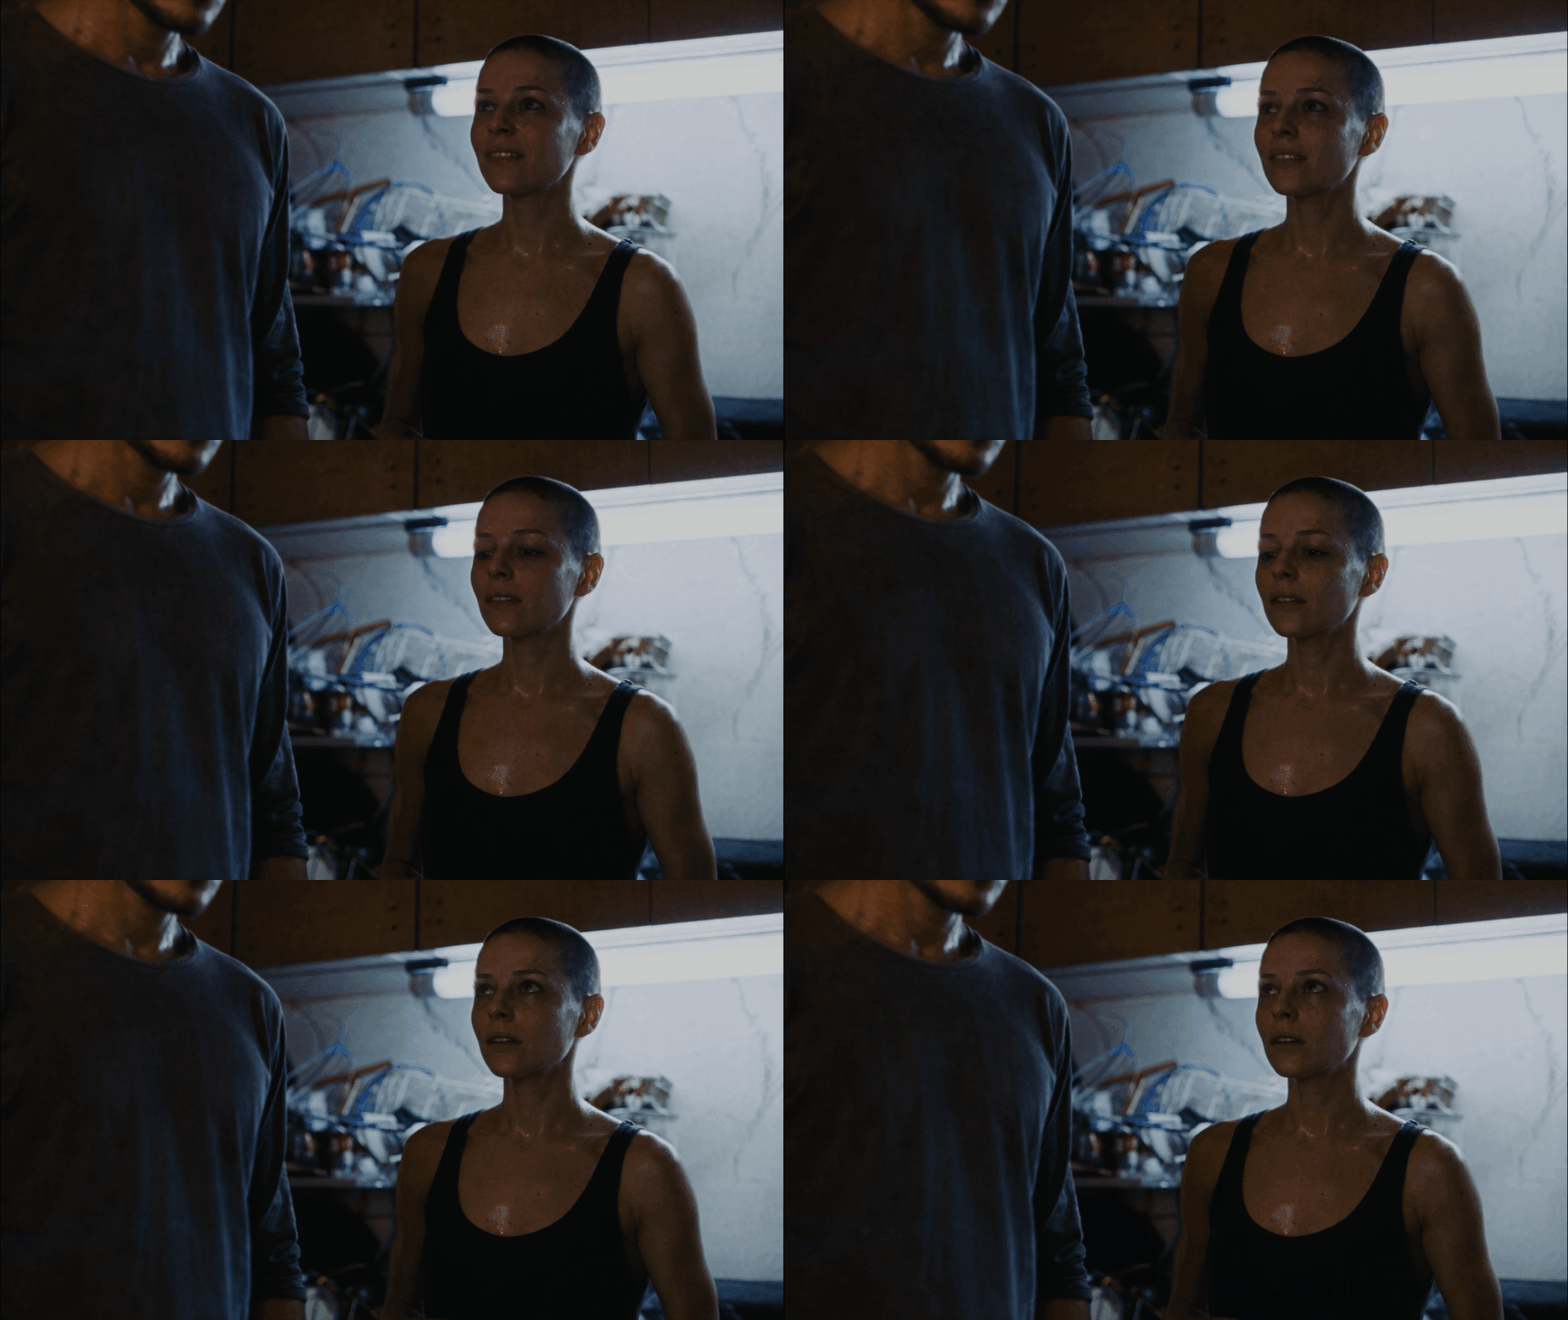
As I've written before, even though AI tools often miss the mark, it's honestly amazing that they can do this at all.
One option with gen-AI characters that isn't available with human actors is micro-managing their facial expressions. For most shots, I didn't find it necessary to go this far. However, for this shot I was more specific and got some good results:
Aneta's body is tense. Her eyes well up. She keeps her eyes locked on Anders and forces a nod. When she nods, her body trembles.
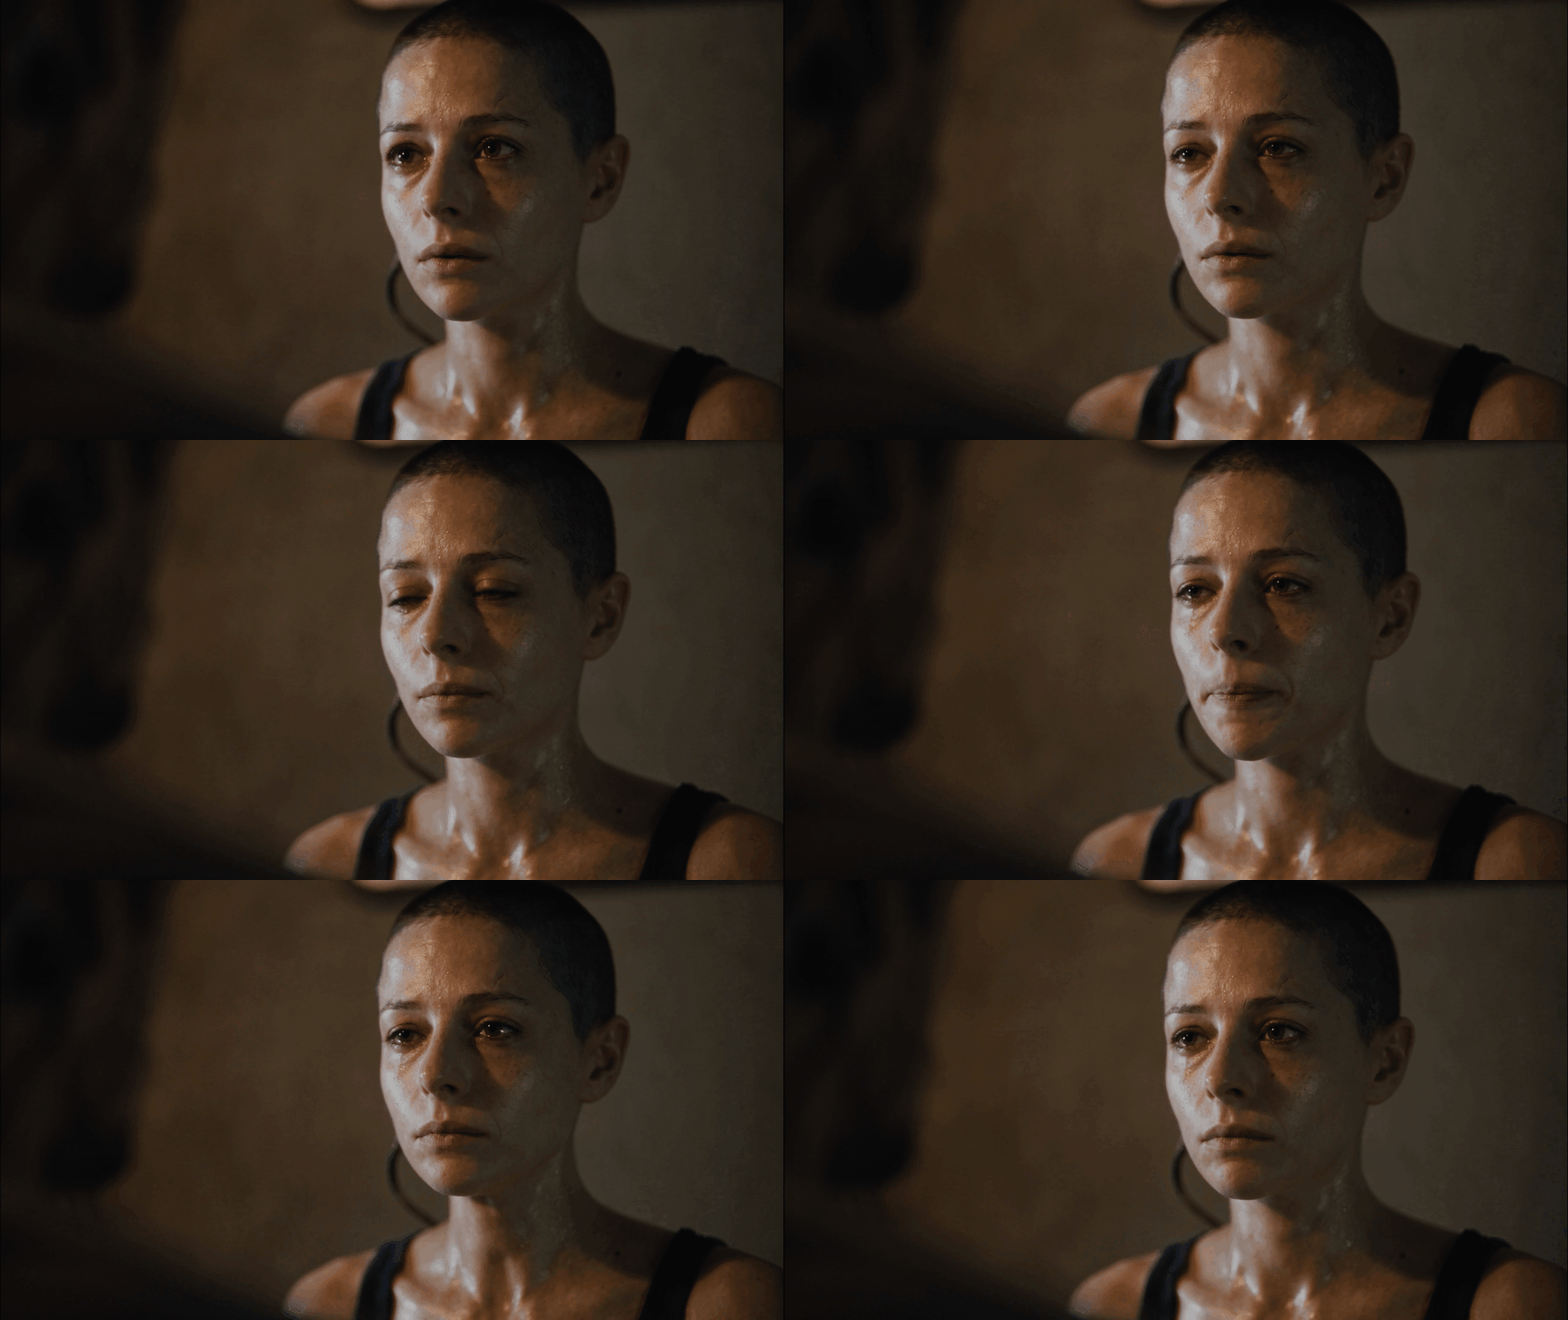
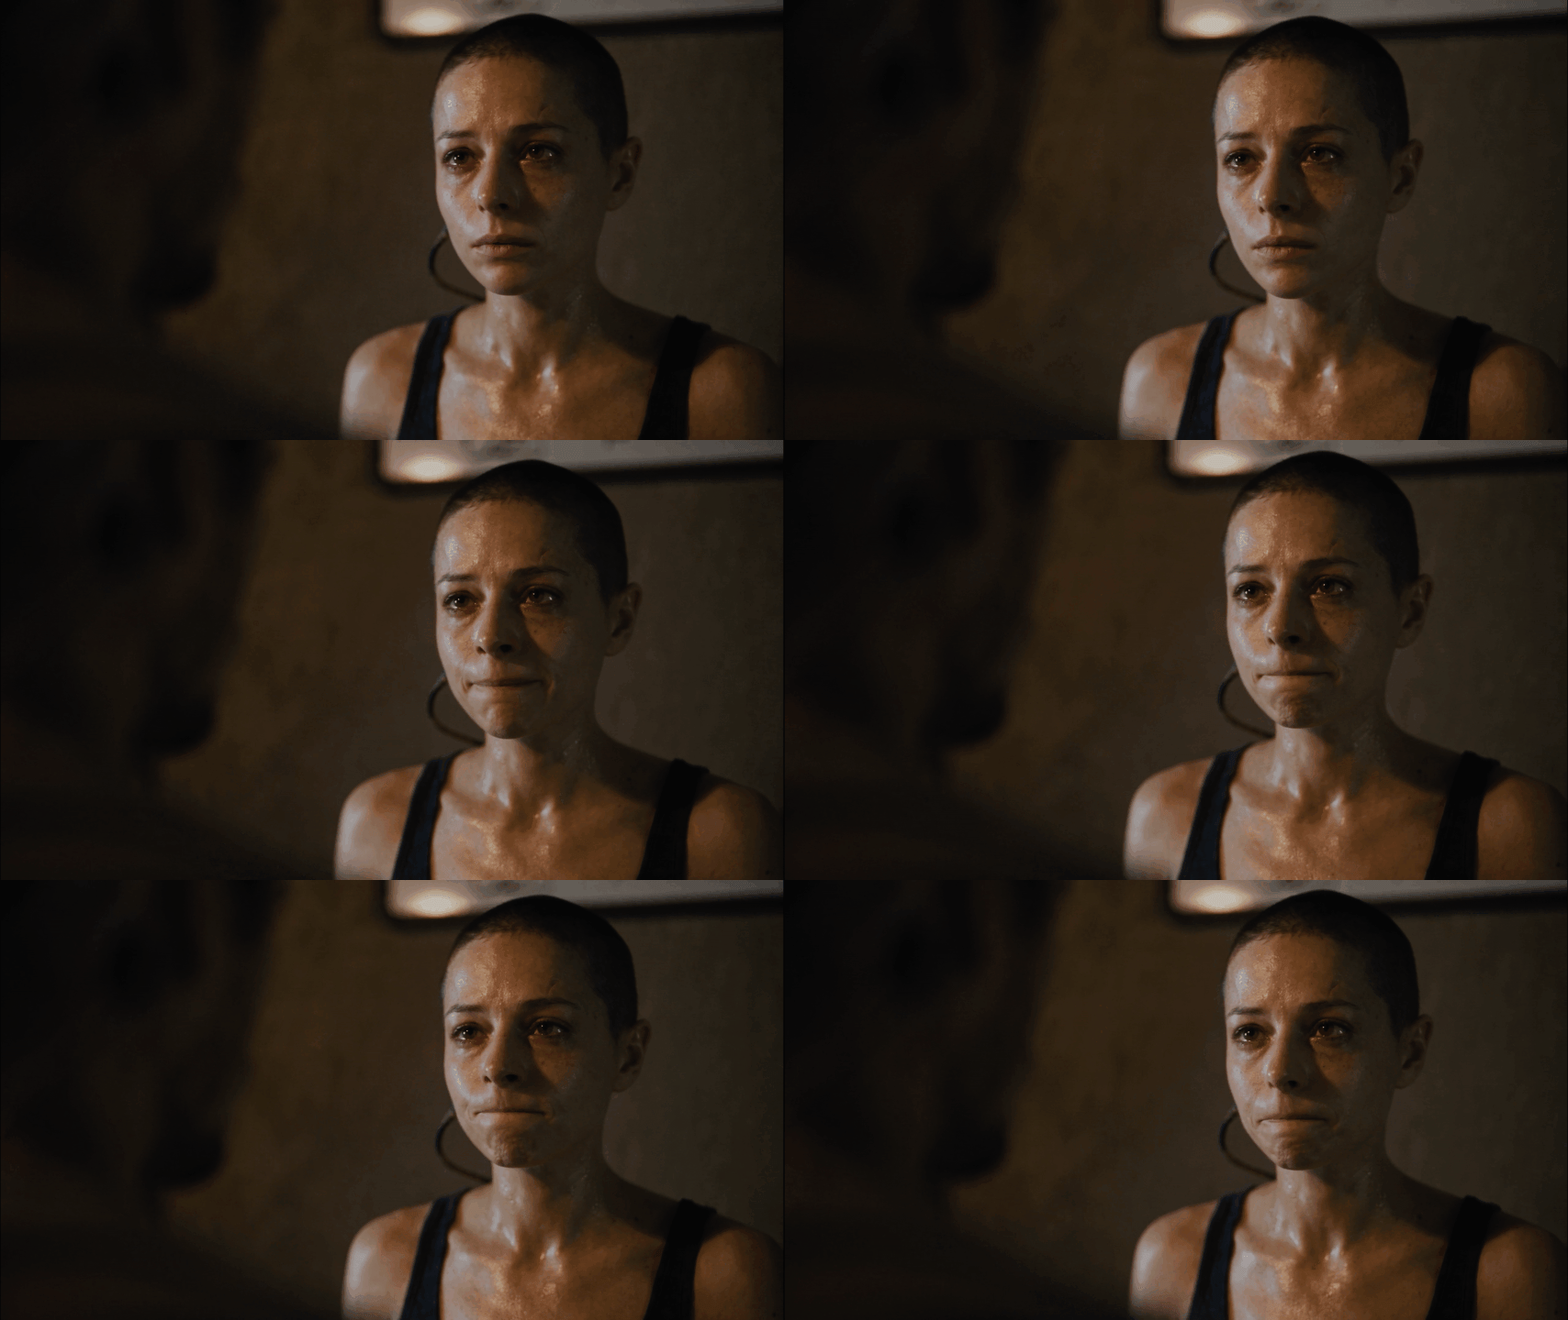
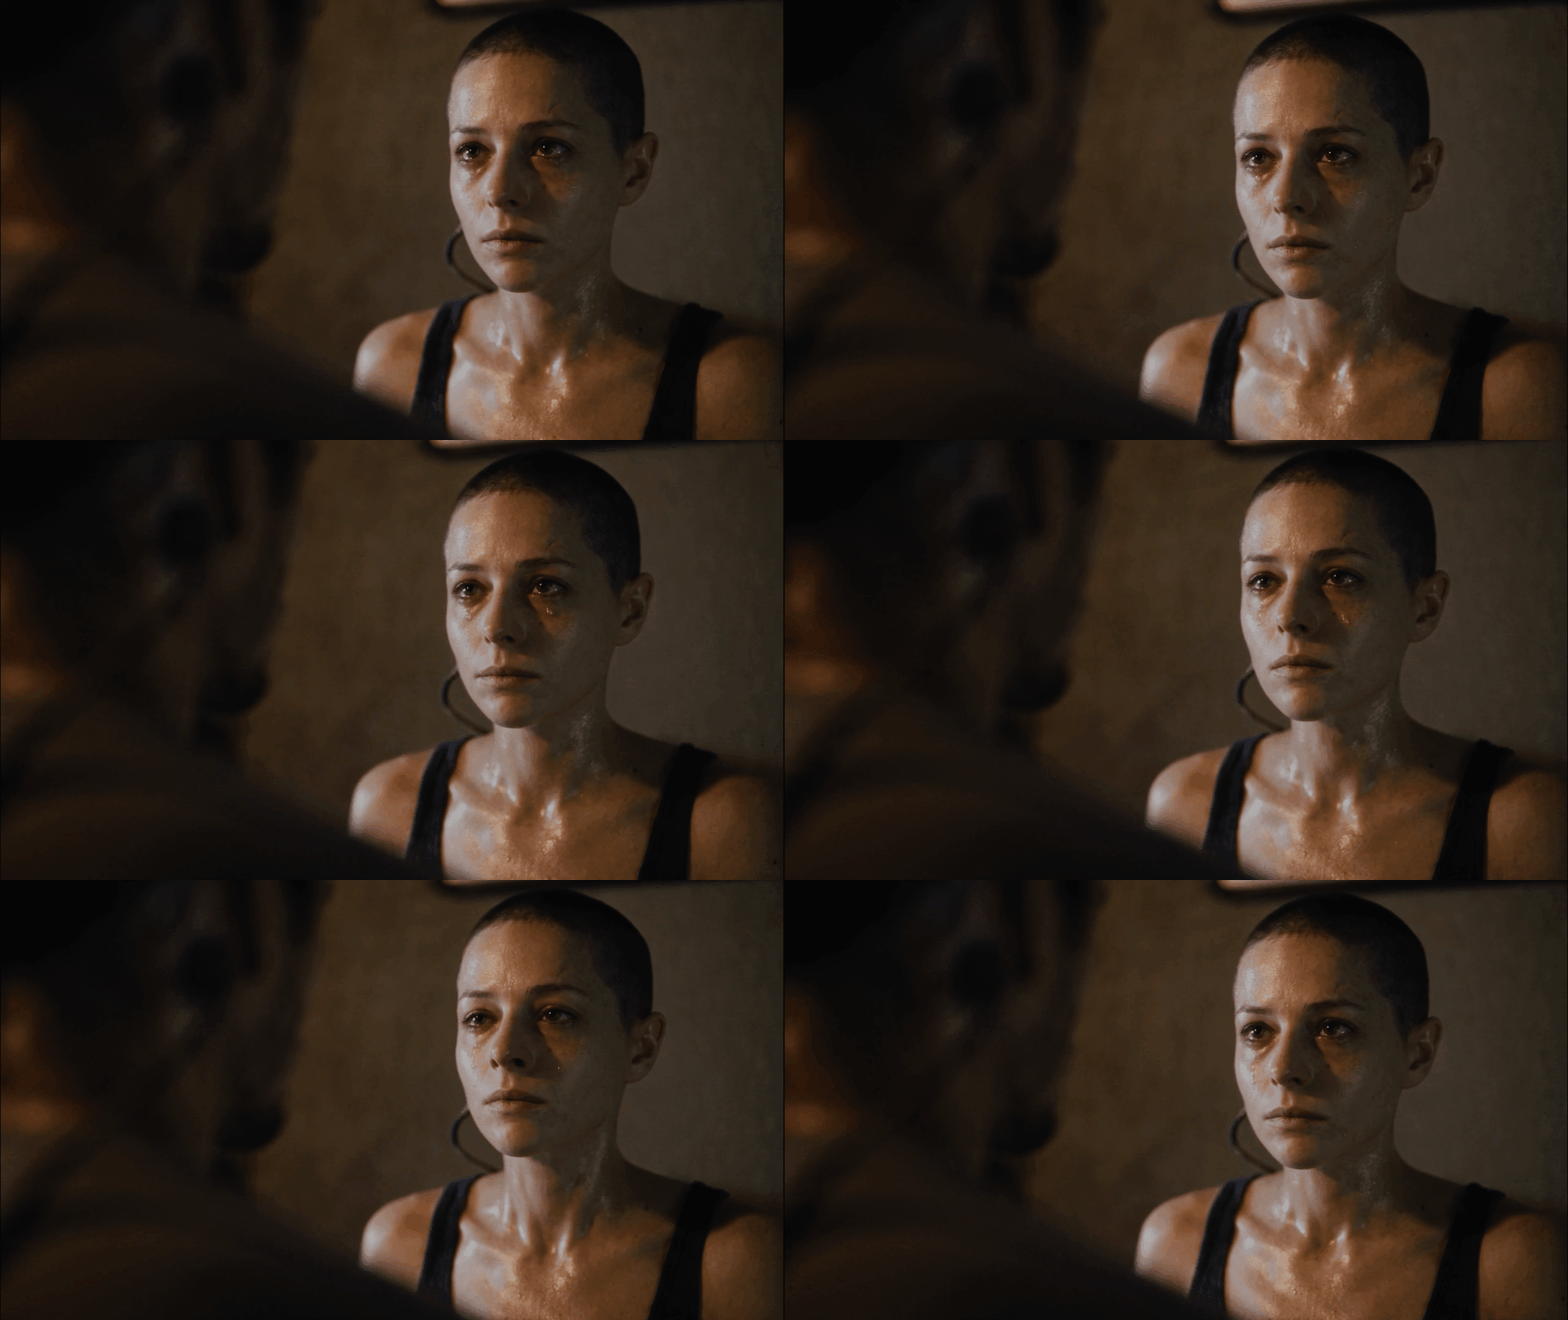
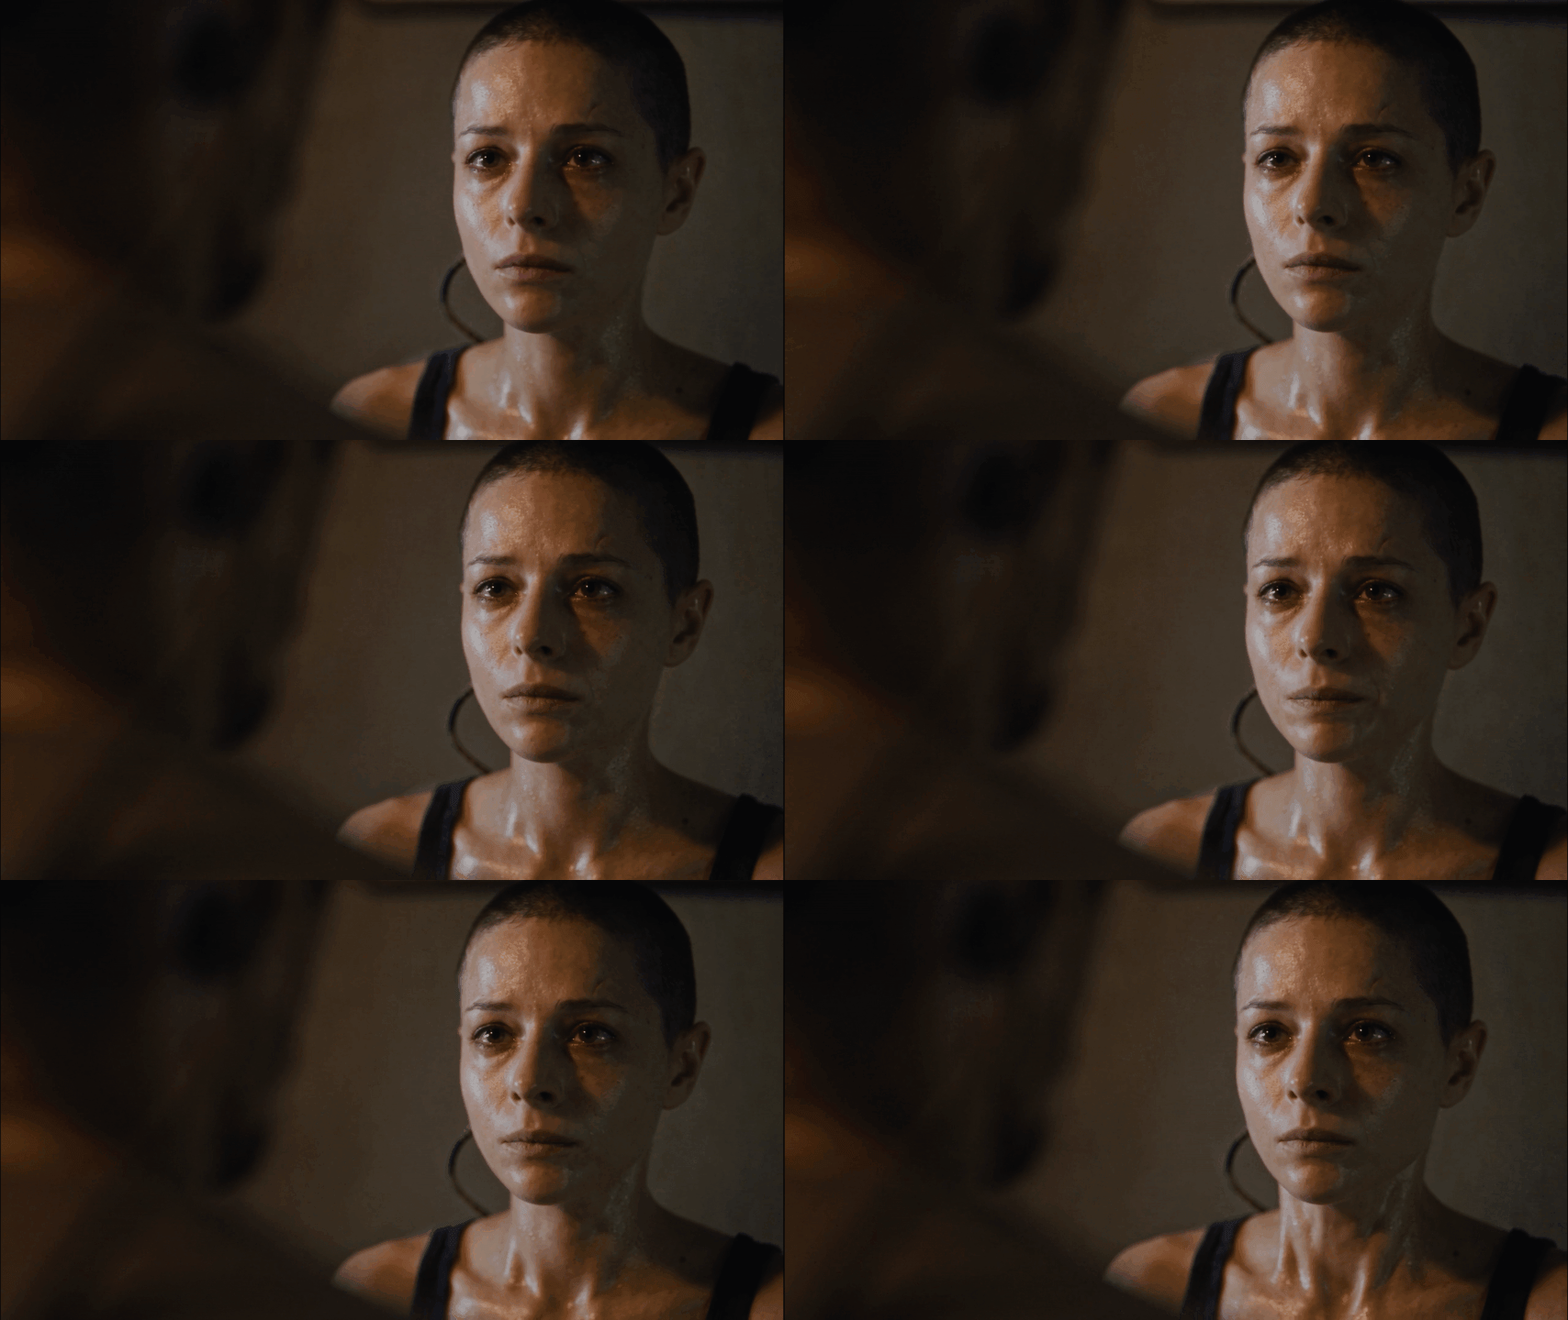
Again, Seedance rarely does exactly what I ask for, but this prompt seemed to push it into interesting territory.
An Unexpected Challenge
A prominent part of the story is the large monitor in the workroom that shows Aneta's and Anders's brain activity. Back when I planned on shooting Sub·Object as a live-action movie, I made some simple animated graphics to display on the monitor in every scene. Here is one example:
Given all the amazing things Seedance can do, I assumed it could easily take a video clip of these graphics and integrate it into the monitor when it generated the shot. In the end, it wasn't that simple. Seedance could do it sometimes, but this type of compositing job seemed to consume a lot of its resources. If the shot was a simple close-up of the monitor, with little else in the frame, it could faithfully reproduce the animated graphics. But when the monitor was in the background of a wider shot that also featured Aneta and Anders, it usually altered the graphics into a loose interpretation of the reference. This example is from the 20-second tracking shot that moves from the bedroom window down to reveal Aneta and Anders:
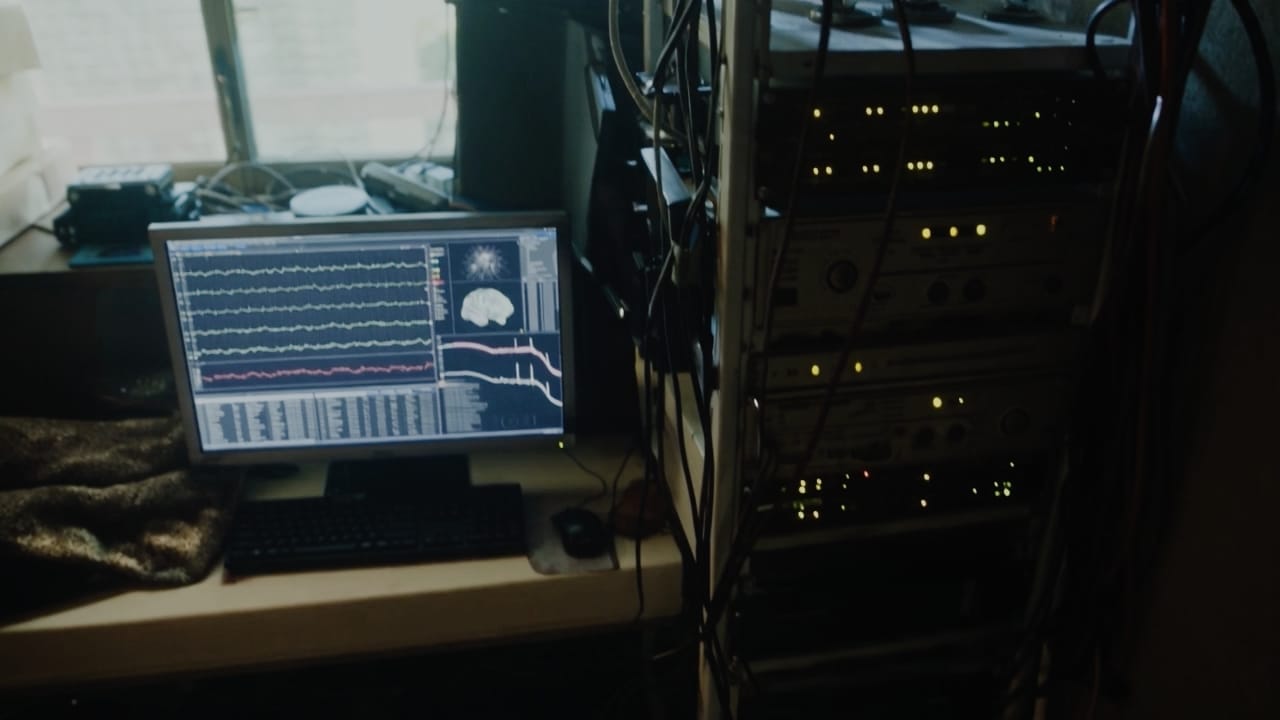
It was as if the more complex shots overtaxed Seedance and it wasn't able to accurately integrate the monitor display while attending to everything else in the shot. In the finished movie, the close-ups of the monitor were all done by Seedance, but I ended up generating many shots with a blank white monitor and added the graphics myself in DaVinci Resolve.
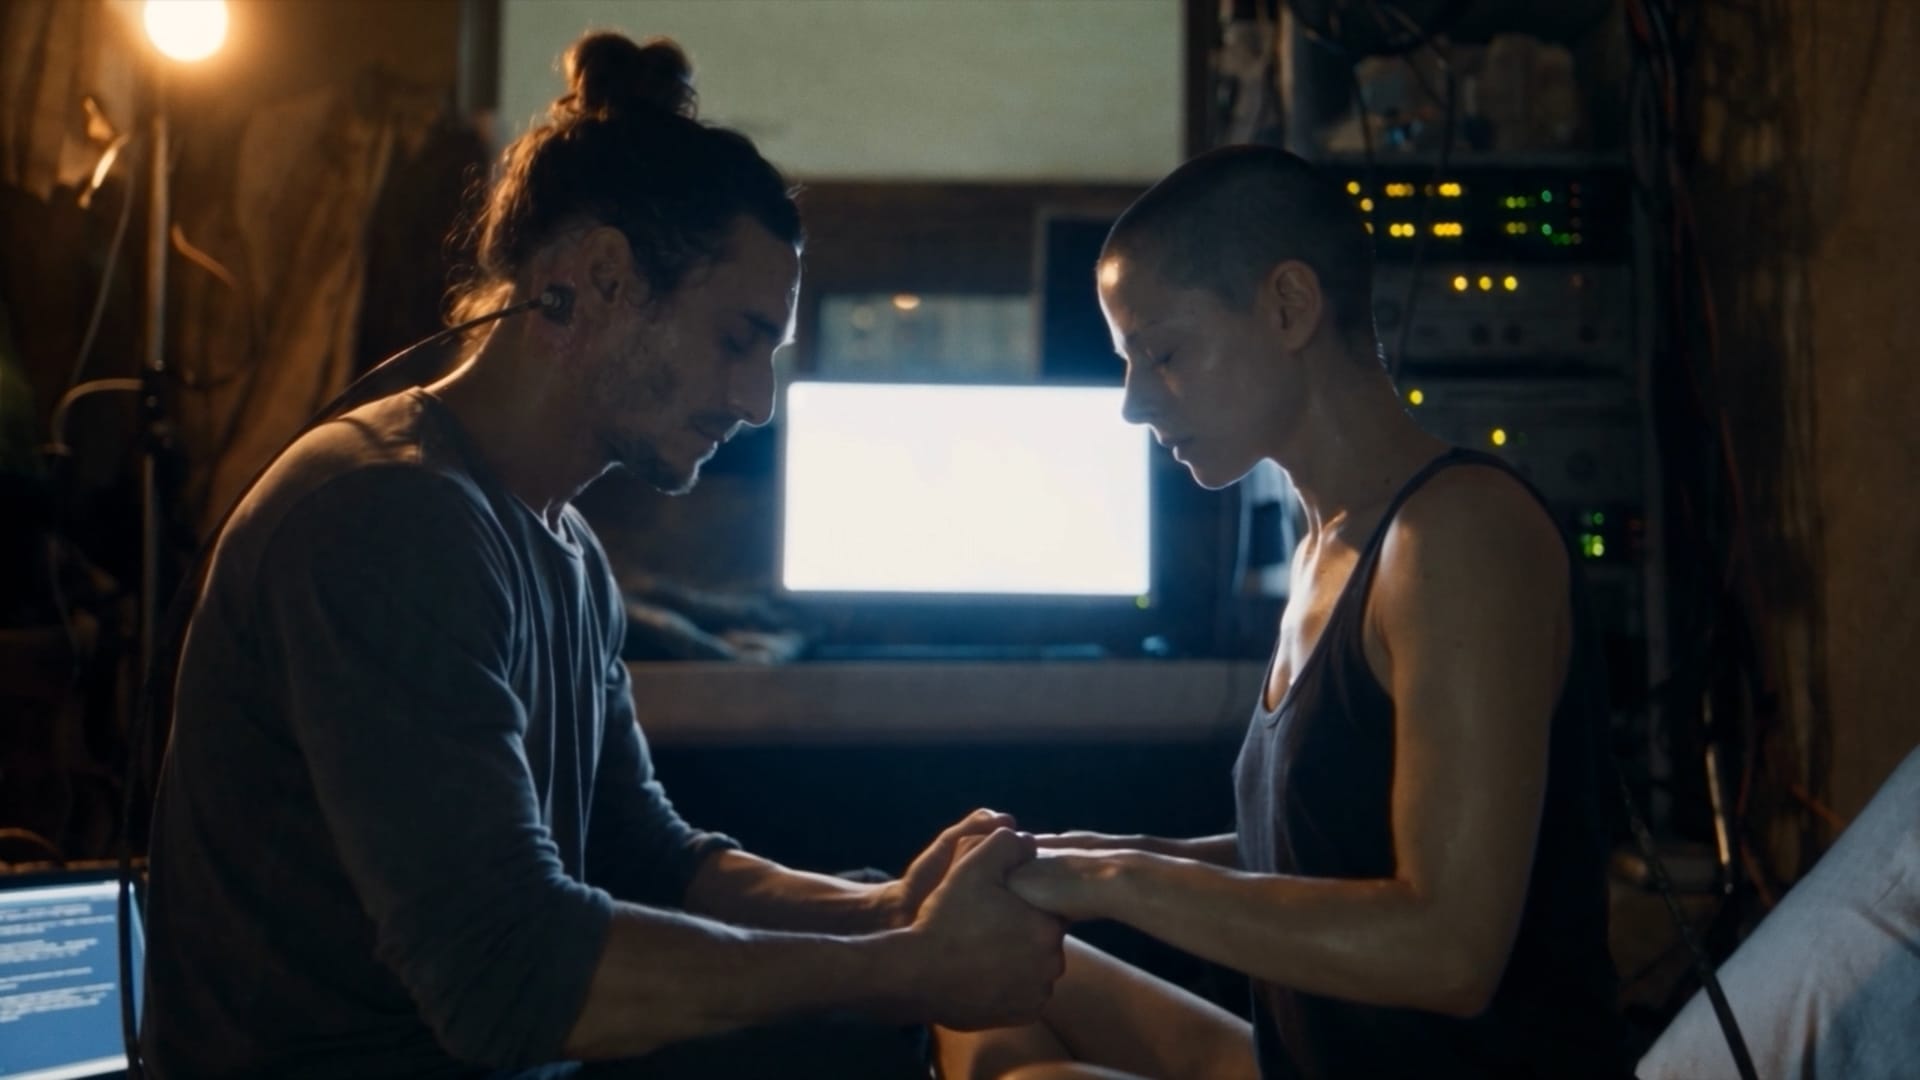
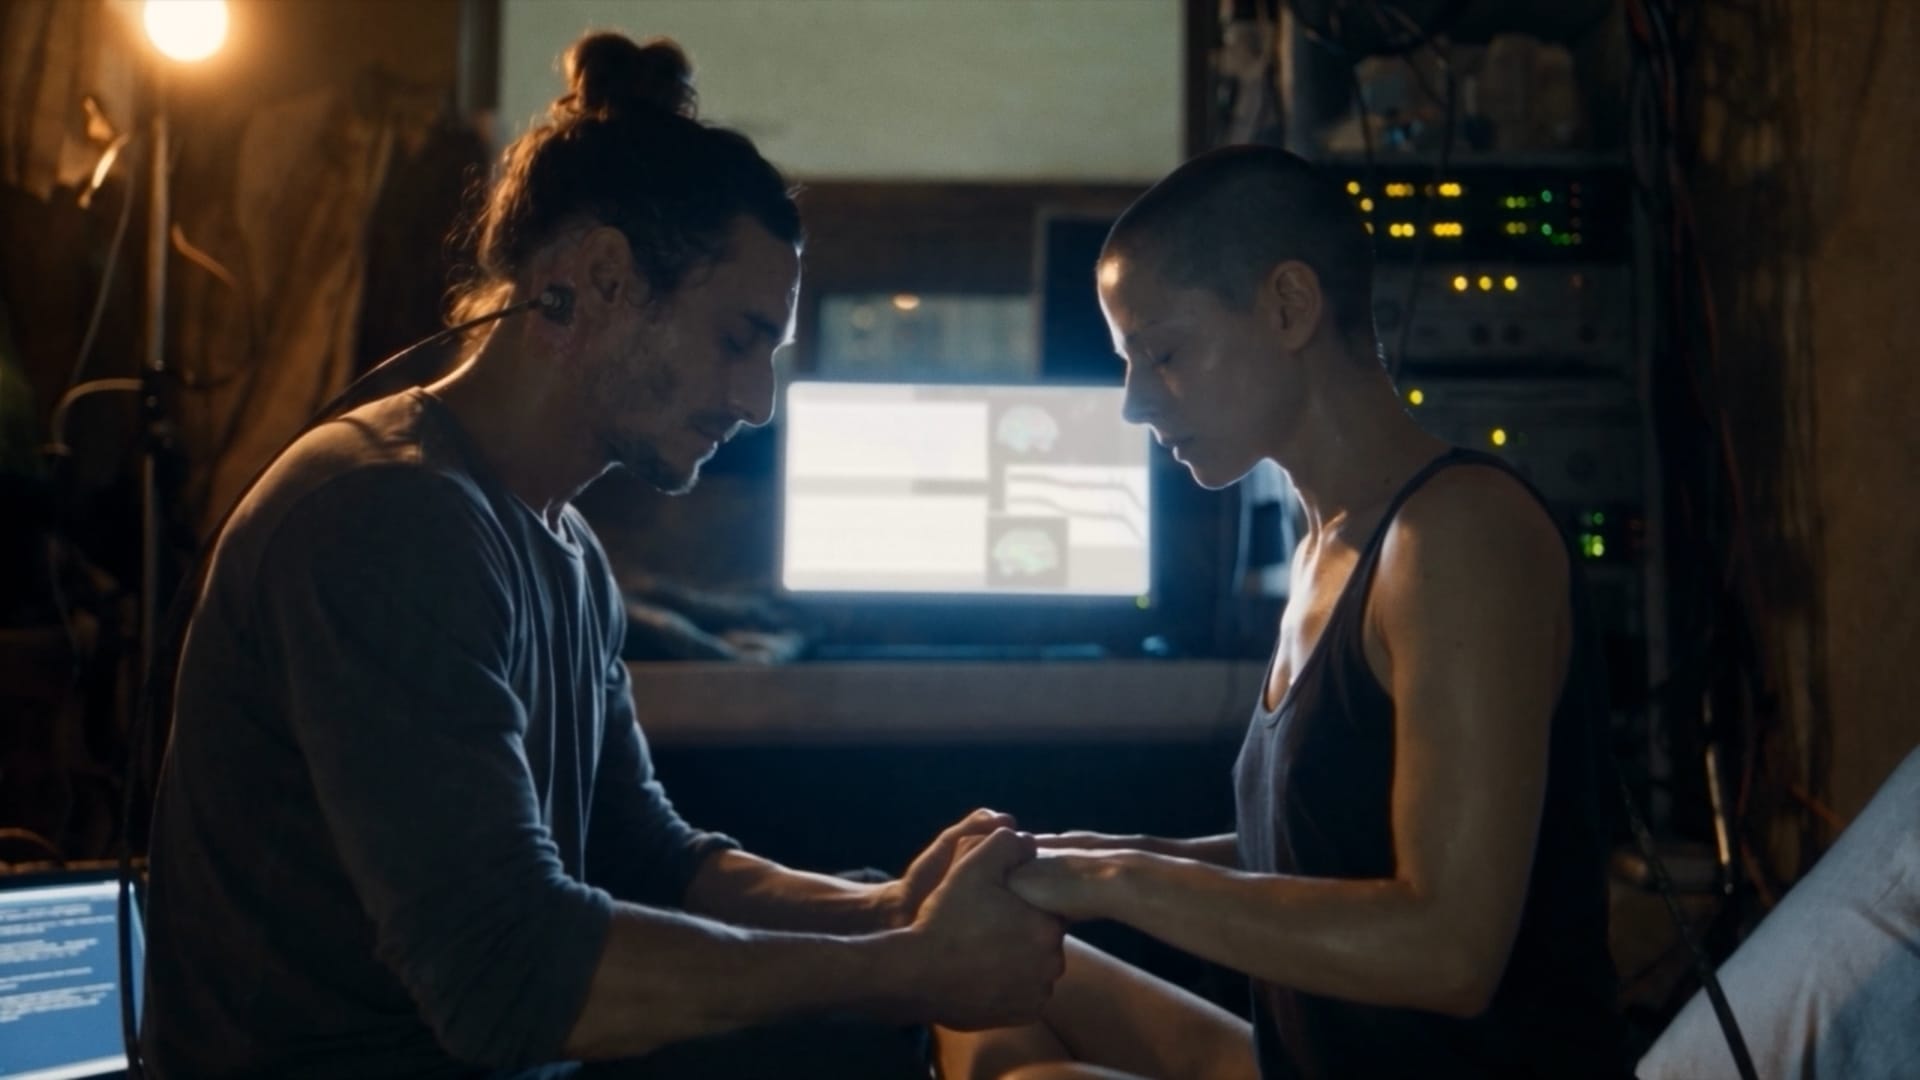
Since I had no experience with this, the monitor doesn't look great in a lot of the shots. In fact, the very first and last shots in the movie that show the monitor were too complicated for me to seamlessly composite before the deadline, so I just left it blank. I decided that a bad compositing job would be more distracting than the monitor displaying pure white.
These monitor struggles led me to realize something that ties into my last topic.
What's Next?
My next project will be to make the full movie. I want to recreate it from scratch, applying what I learned during this Higgsfield contest. I also want to do it with more vivid imagery, ideally in 1080p or 4K.
I'm not sure when I'll be able to do that. I couldn't have afforded this 9-minute 720p movie without an unlimited Seedance plan, so a 15-20 minute movie in 1080p or 4K is out of the question, for now.
The reason this relates to the monitor shots is that, in the course of making this version of Sub·Object, I realized that my vision is a bit too grounded in reality. Because I originally wrote the script with the intention of shooting a no-budget live action short in my own apartment, I made the story and imagery as small-scale as possible. This had some benefits, as it forced me to focus on the characters' relationship and performances, which I think was the right choice. But, I also had limited options in terms of showing what was going on in Aneta's and Anders's minds. The monitor display was a no-budget way for me to illustrate the intensity of their inner experiences.
With gen-AI, I have no restrictions. I think in the full version of the movie, I'll reduce the monitors' screen time and instead explore some kind of dreamscape that unfolds as Aneta and Anders merge consciousnesses.
I think I will also heavily modify the ending. For the 9-minute contest version of the movie, I didn't have time to explore the full potential of the closing scenes. I want to keep the same core elements: Aneta and Anders reborn in a new time and in totally different places, still connected as one mind. However, I want to expand my vision for the world we find them in, and how they partake in it.
I'll also eventually have to revamp this website. I look at this page, which starts with the sentence "'Sub/Object' the movie is being made entirely in 3D, rendered in Unreal Engine," and I can't believe it was barely more than six months ago when I wrote that. The 3D images on that page were a lot of work for me, but they look startlingly primitive compared to what I just completed using AI.
In the two years since I started this blog, most of my entries have focused on my learning process as I searched for a way to make Sub·Object in 3D. Now, suddenly, it looks like I have a new avenue to make this movie and whatever else I want in the coming years.
I think this site will transition from being a place where I share my learning to a place where I share new stories and characters. I'm imagining a fictional world and civilization where the story of Aneta and Anders is part of their foundational mythology...