Protagonists
Now that I've spent some time immersed in the world of 3D animation, I sometimes catch myself wondering why I never wanted to shoot a live-action movie to begin with. But, to be fair to my past-self, if you had asked me just three years ago, "Why not make your short film in 3D?" I would have had two quick answers: One, CG humans don't look good enough, and two, I don't know the first thing about 3D production.
I knew that cutting-edge VFX studios could occasionally create CG renders of (mostly) believable human beings, but their tools and workflows were so foreign to me that the idea of emulating them felt like planning a solo-trip to the Moon.
The reason that MetaHumans were so inspiring to me was not that they looked as good as professional VFX renders (though they can, with enough artistry and smoke and mirrors). It was that they gave me a foothold to start my journey into animation. Even a total novice can, with just an hour or two, download Unreal Engine, create a basic MetaHuman, and start animating it. Having free access to look under the hood of a high quality, rigged, 3D human is enough to start building a mental model of how the parts come together. For a beginner in the world of 3D production, the scope of knowledge is overwhelming, so it was helpful to center my learning and research on MetaHuman customization. It gave me a more targeted, concrete list of things to investigate, while still being a broad enough subject that it covers a solid range of essential 3D concepts.
Discovering the characters of Sub/Object and bringing them to life is the most exciting part of this project. On a micro-budget live action movie production, their appearance would be limited to the actors available to me and willing to work for a stipend (a small list). Working with MetaHumans, I have essentially unlimited options.
Pre Unreal Engine 5.6
Until the release of UE 5.6 in June, the customization options available in MetaHuman Creator (MHC) were simpler and more limited. There were preset faces to choose from, the option to blend between preset faces, and blunt sculpting tools.
There was also "Mesh to MetaHuman," which allowed you to generate a custom MetaHuman head using photographs of a real person or a sculpted 3D mesh. This tool used face-trackers like this:
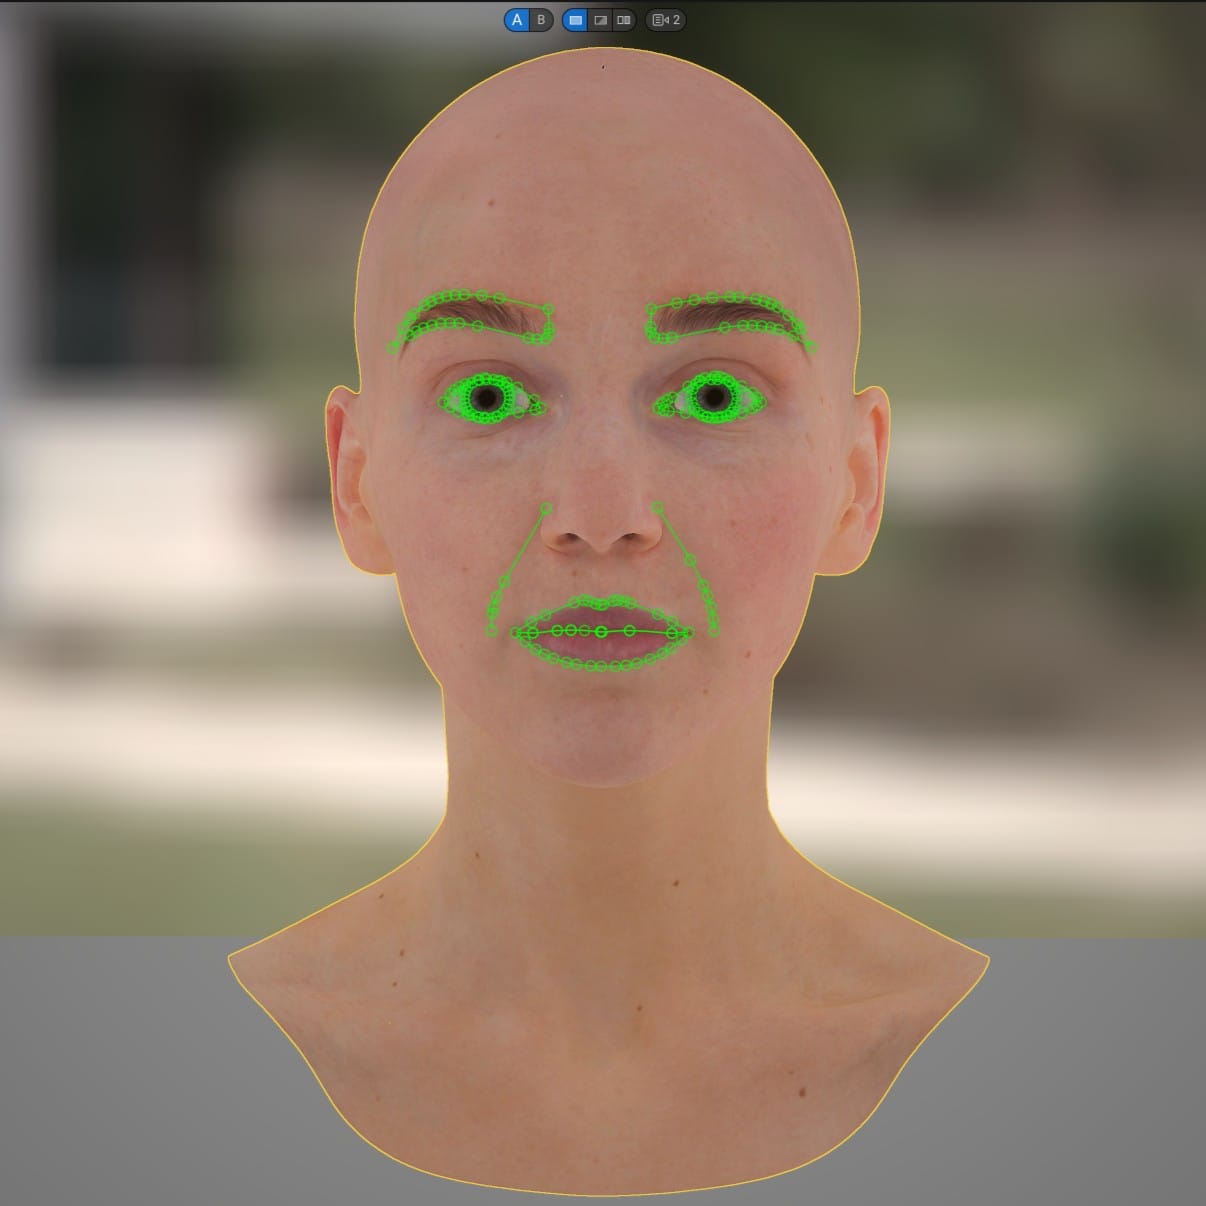
Mesh to MetaHuman
The geometry generated using these trackers was always an approximation of the source, never an exact match. There was an additional, roundabout method for exporting the MetaHuman conform topology (for the head only) from UE via a console command, altering it in a separate DCC, and re-importing it. In this case, Mesh to MetaHuman would recognize the topology and preserve the exact shape. I never tried this, personally.
As for the bodies in early MHC, there were a handful of preset options, and that's all.
Before UE 5.6, most customization was done after exporting the character from MetaHuman Creator, using methods like these. This included minor modification of the face and body meshes, or sculpting a separate high-poly version of the MetaHuman to include fine details like wrinkles, scars, veins, etc., and then baking those details into the Normal map, or painting details directly onto the texture maps.
But, in this scenario, the geometry of the MetaHuman couldn't be altered too drastically, or the animation rig would break. Since the rig is fixed on export from MetaHuman Creator, and it expects every vertex of the mesh to be in a specific starting point for animation, an edited mesh with vertices too far from this starting point would cause improper deformations. This was less of an issue with the body, because the rig is relatively simple. However, the MetaHuman face rig is densely packed with "bones" that each affect tiny portions of the mesh and blend together in subtle ways. Even small alterations of the mesh could lead to animation problems.
There are methods for editing the rig post-export, using Maya, but they are far more complicated and I never dug into them.
Post Unreal Engine 5.6
The UE 5.6 update included a major overhaul for MetaHuman Creator. Two helpful, surface-level resources are the new documentation and a talk from UE Fest Orlando:
Most significantly, it opened up the possibility to do far broader and more complex mesh alterations in the editor, before generating the rig. The hacky method I mentioned earlier for round-tripping the MetaHuman conform topology with Mesh to MetaHuman has been streamlined and is now available for custom bodies as well as heads. The tool can't handle every shape perfectly, but it can handle a variety of characters, including gorillas, monsters, or Pixar heroes.
There are also numerous options for skin textures, freckles, accents like redness or lightness, makeup, and almost ridiculously customizable eyes.
On top of all this, there are many other features I haven't had the chance to explore, including the ability to export a custom MetaHuman to Maya to edit the animation blendshapes or Houdini to create custom grooms.
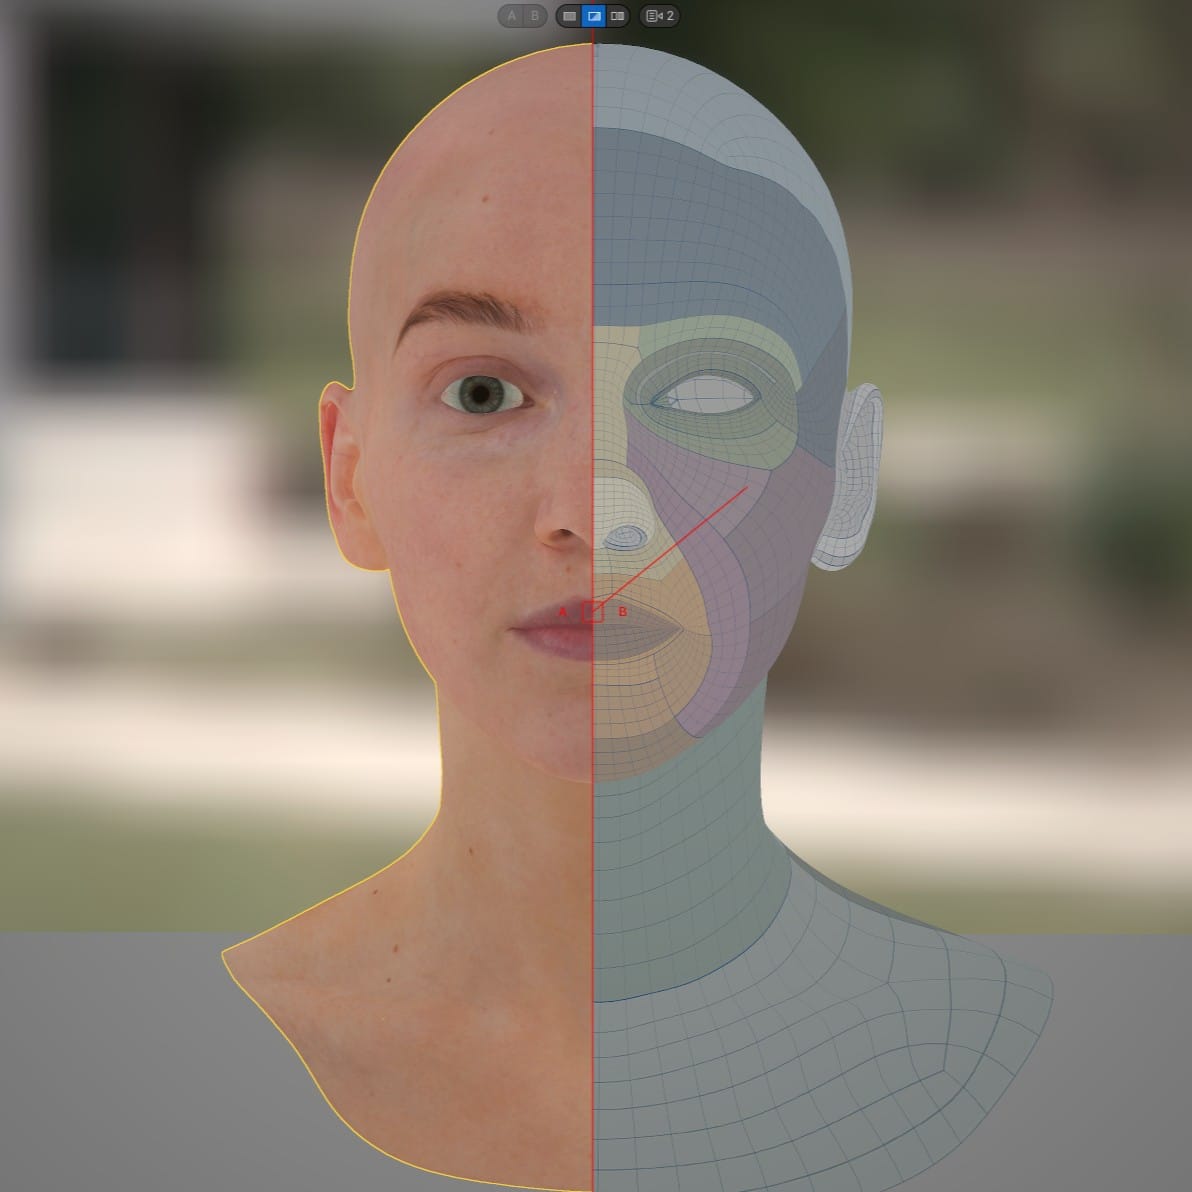
Similar to previous versions, 5.6 MetaHuman bodies are less detailed than the faces. Both the face and body meshes can be conformed to match a custom mesh, but the body topology is simply too sparse to match an anatomically correct body.
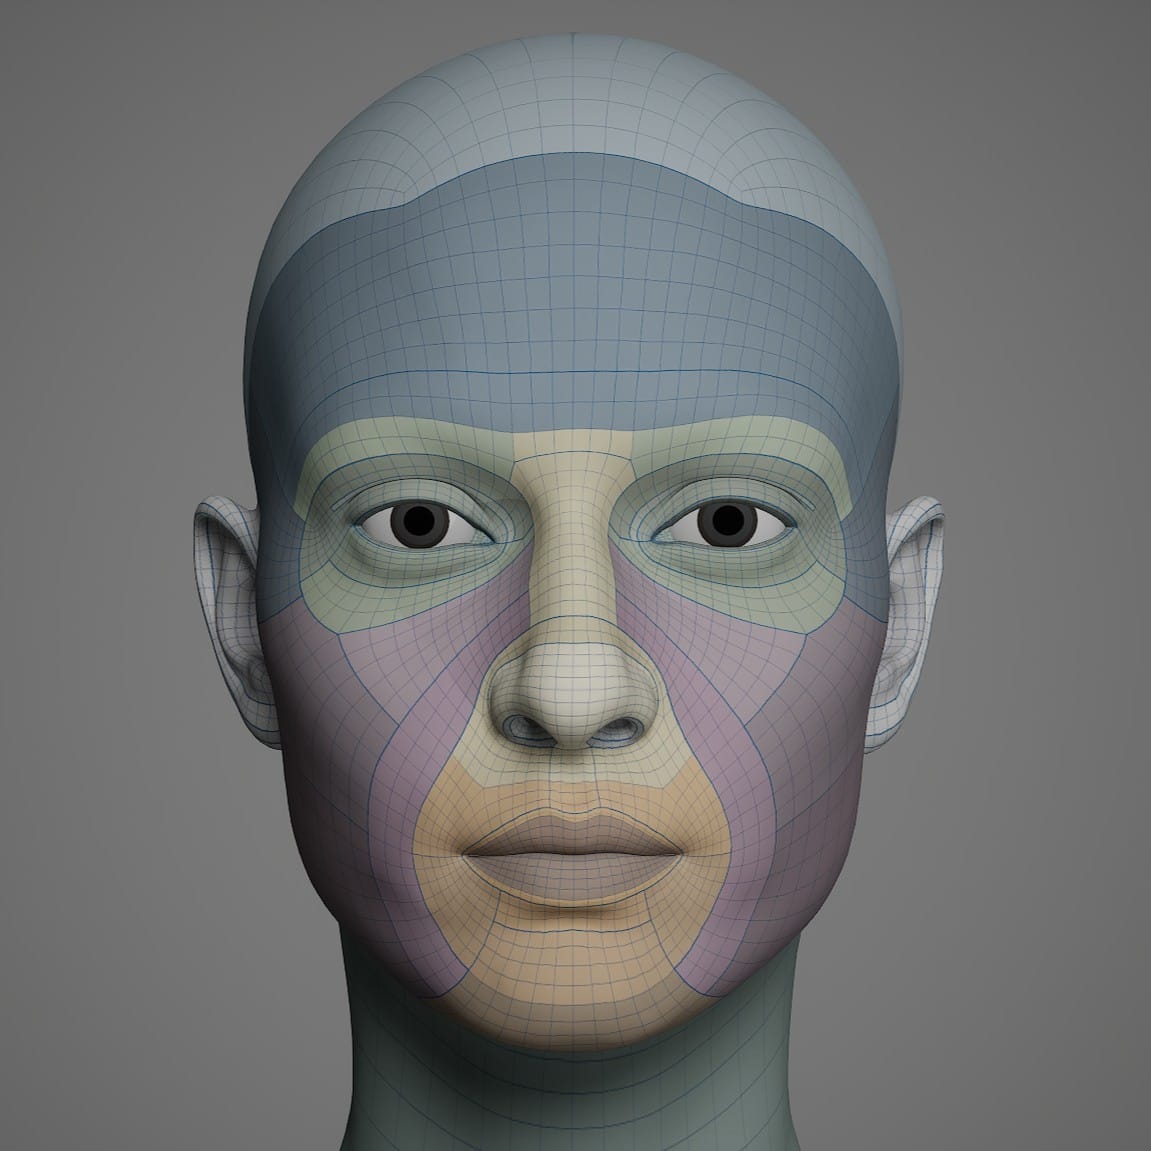
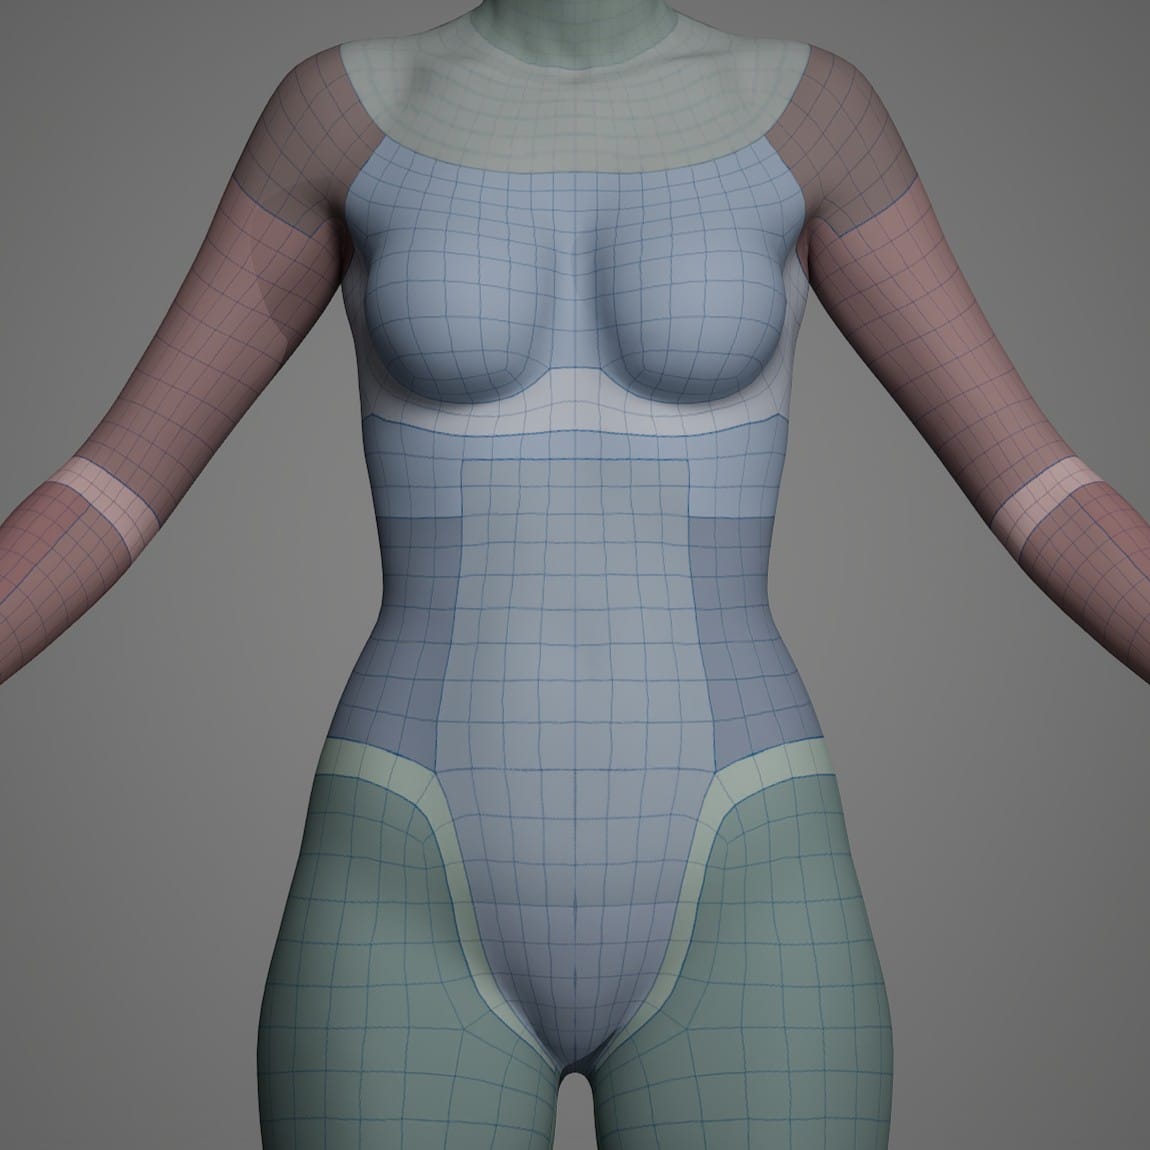
The 5.6 MetaHuman face and body topology.
It's not hard to understand why they neglected the nether regions, but the current iteration of MetaHumans aren't even allowed nipples. Maybe someday?
That aside, the new MHC greatly expanded the body customization options. The new parametric body controls allow a much wider range of shapes than before. This tool is interesting and requires a different mindset than standard 3D sculpting. I recommend reading the "Parametric Modeling Guidance" section from the documentation. The order in which the settings are applied will affect how the body is proportioned.
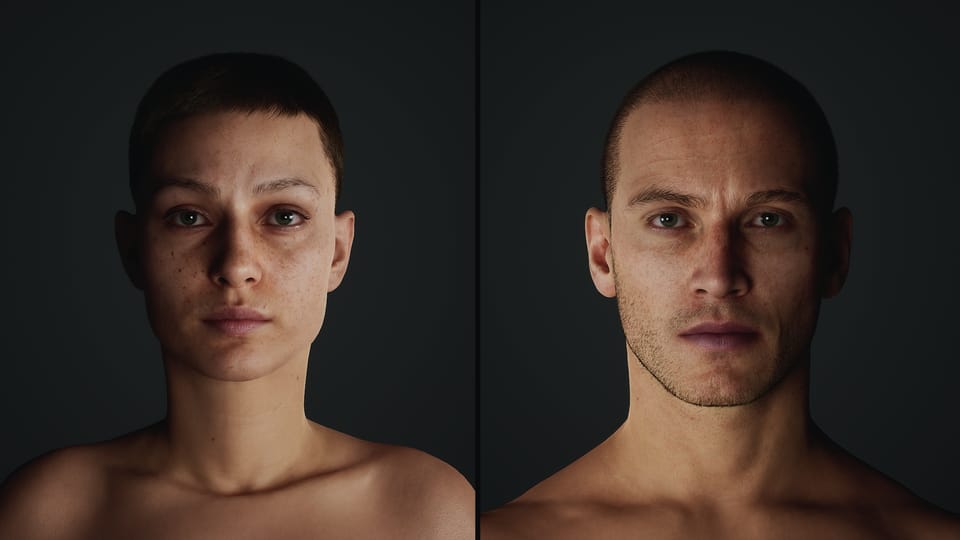
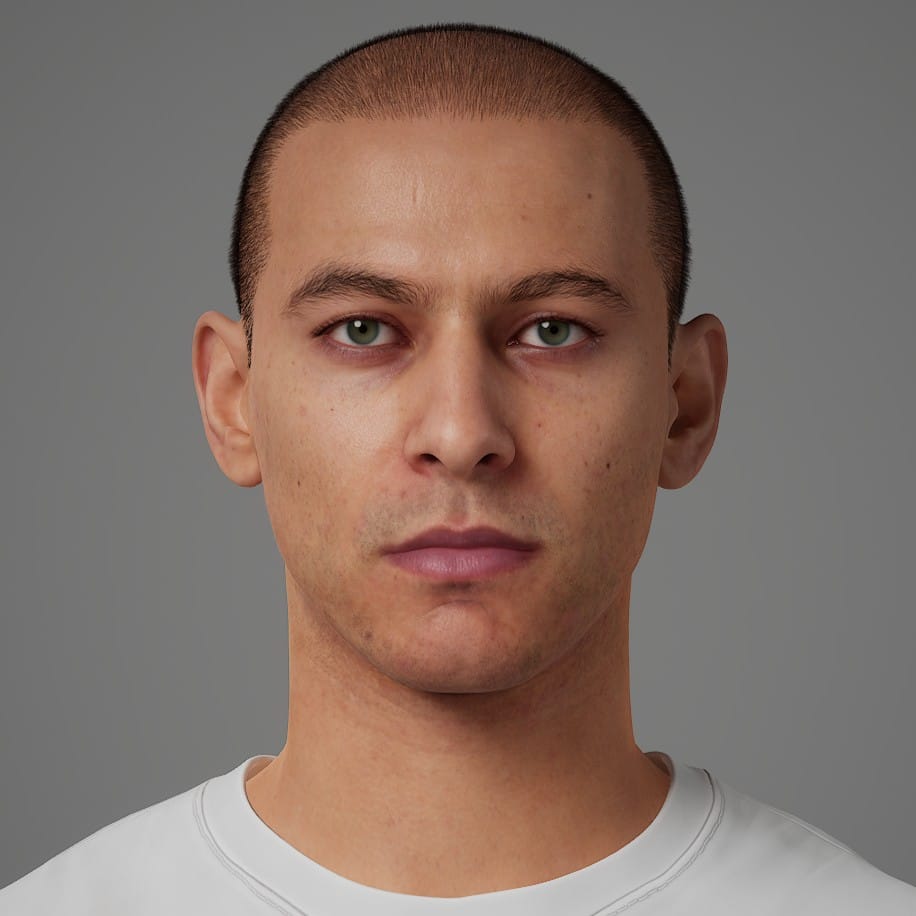
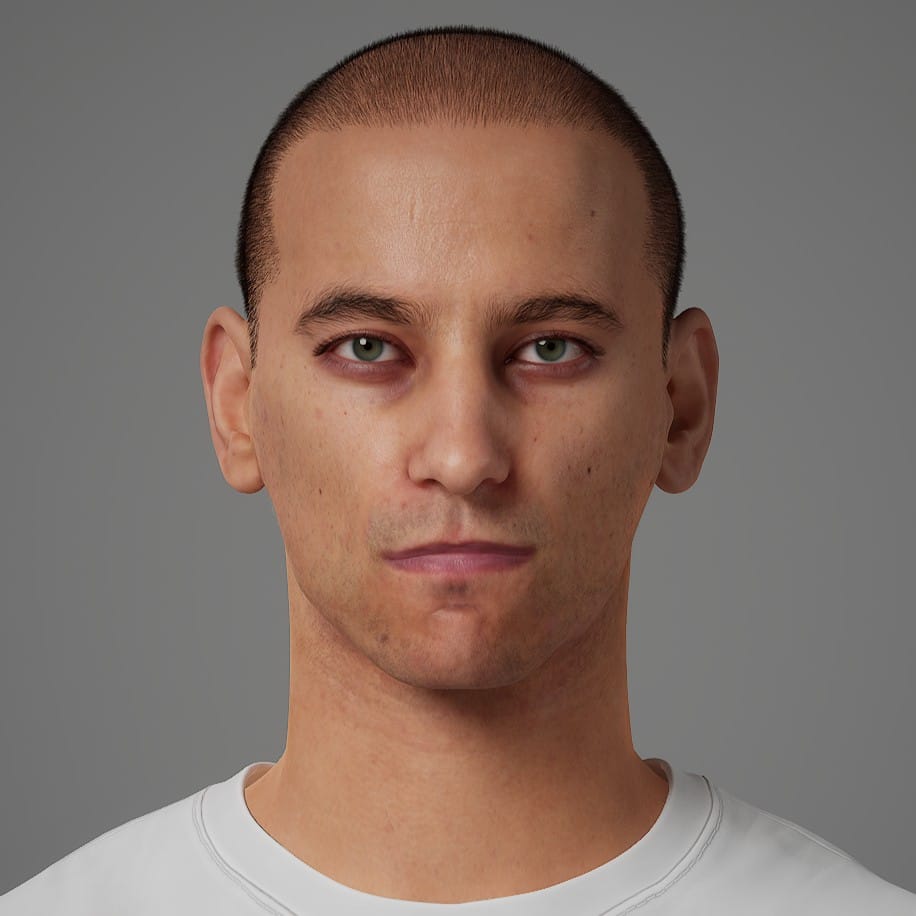
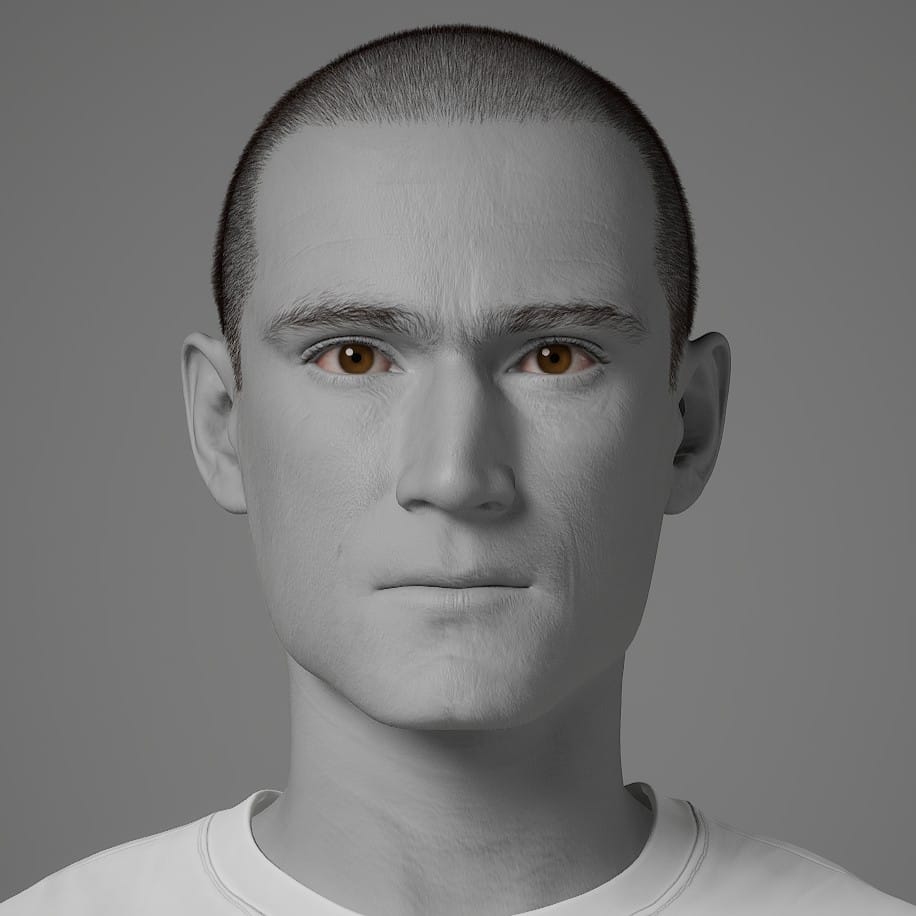
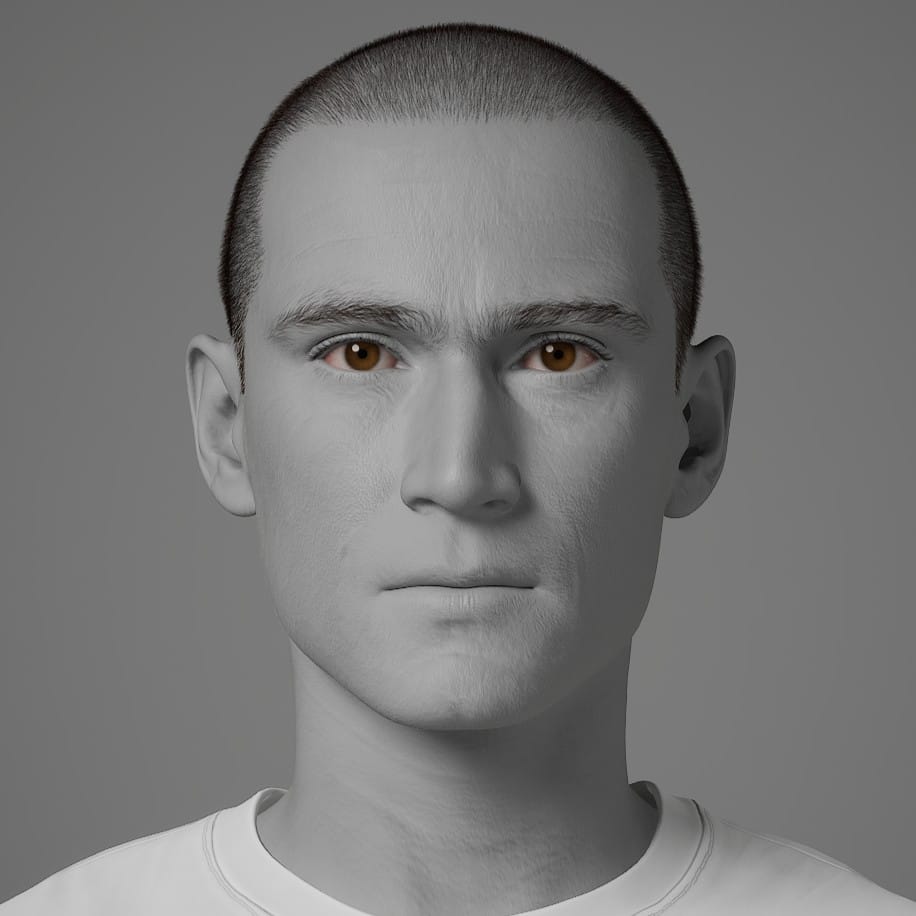
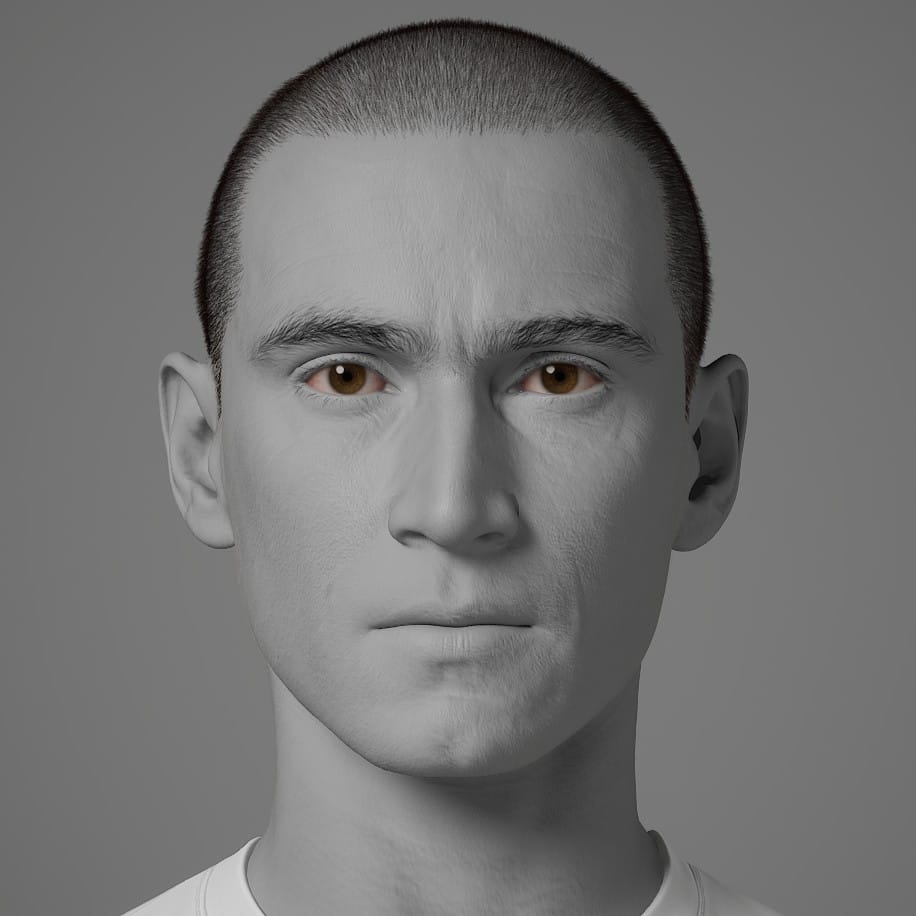
Aneta and Anders, Phase One
In Sub/Object, the characters' names are never mentioned, but I call them Aneta and Anders. Before writing this article, I used the new MetaHuman Creator to design an initial version of them. I plan to iterate on their appearance as I work on the movie, adding detail to their faces and bodies, trying custom hairstyles, and exploring whatever options are afforded to me. But, on this pass I didn't use any external tools. The Aneta and Anders featured in the opening image were made entirely in Unreal Engine's MHC.
My first plan was to dive in and use the sculpting tools. The MHC sculpting tools are designed to keep the face within reasonably human dimensions, so they are simpler to use than free-sculpting in Blender or ZBrush. I had a couple of actors in mind and the goal was to create a semi-likeness of them, starting from a preset MetaHuman. I soon realized that, even with the sculpting tools helping me out, I'm too awful at sculpting to create a real person's likeness. My repeated attempts went like this: I would make broad adjustments that didn't destroy the face but also didn't get close enough to the target. Then, when I tried making more targeted adjustments, the face degenerated into an abomination.
From bland to abomination.
I switched to the blend tools, which allowed me to smoothly blend between preset MetaHumans. The results were usually passable, but I never found them interesting.
Eventually, I discovered a hybrid method. My sculpting improved slightly over the course of a couple days, and I was able to mold faces that were more specific but not quite as horrific. They were still uncanny, but if I blended them about 50-70% with a pre-built MetaHuman, sometimes the result looked pretty good:
A sculpted MetaHuman, blended once, and twice.
Then, I would usually try a final pass to add some subtle asymmetries. As long as I kept these adjustments small, I didn't ruin the character.
As for the bodies, I followed the recommendation in the documentation to set and pin the Global settings before moving on to the smaller regions. First were Height, Fat, and Muscularity, in that order.
From there, I worked through the Lower Torso before the Upper Torso, pinned all the parameters in those sections, and in the other sections I only pinned the settings that seemed most impactful, like Neck Length, Neck Base, and Inseam. After finishing, I would go back to the Global section and try unpinning Height or Fat, as an experiment. Sometimes, the body would shift to a more natural shape.
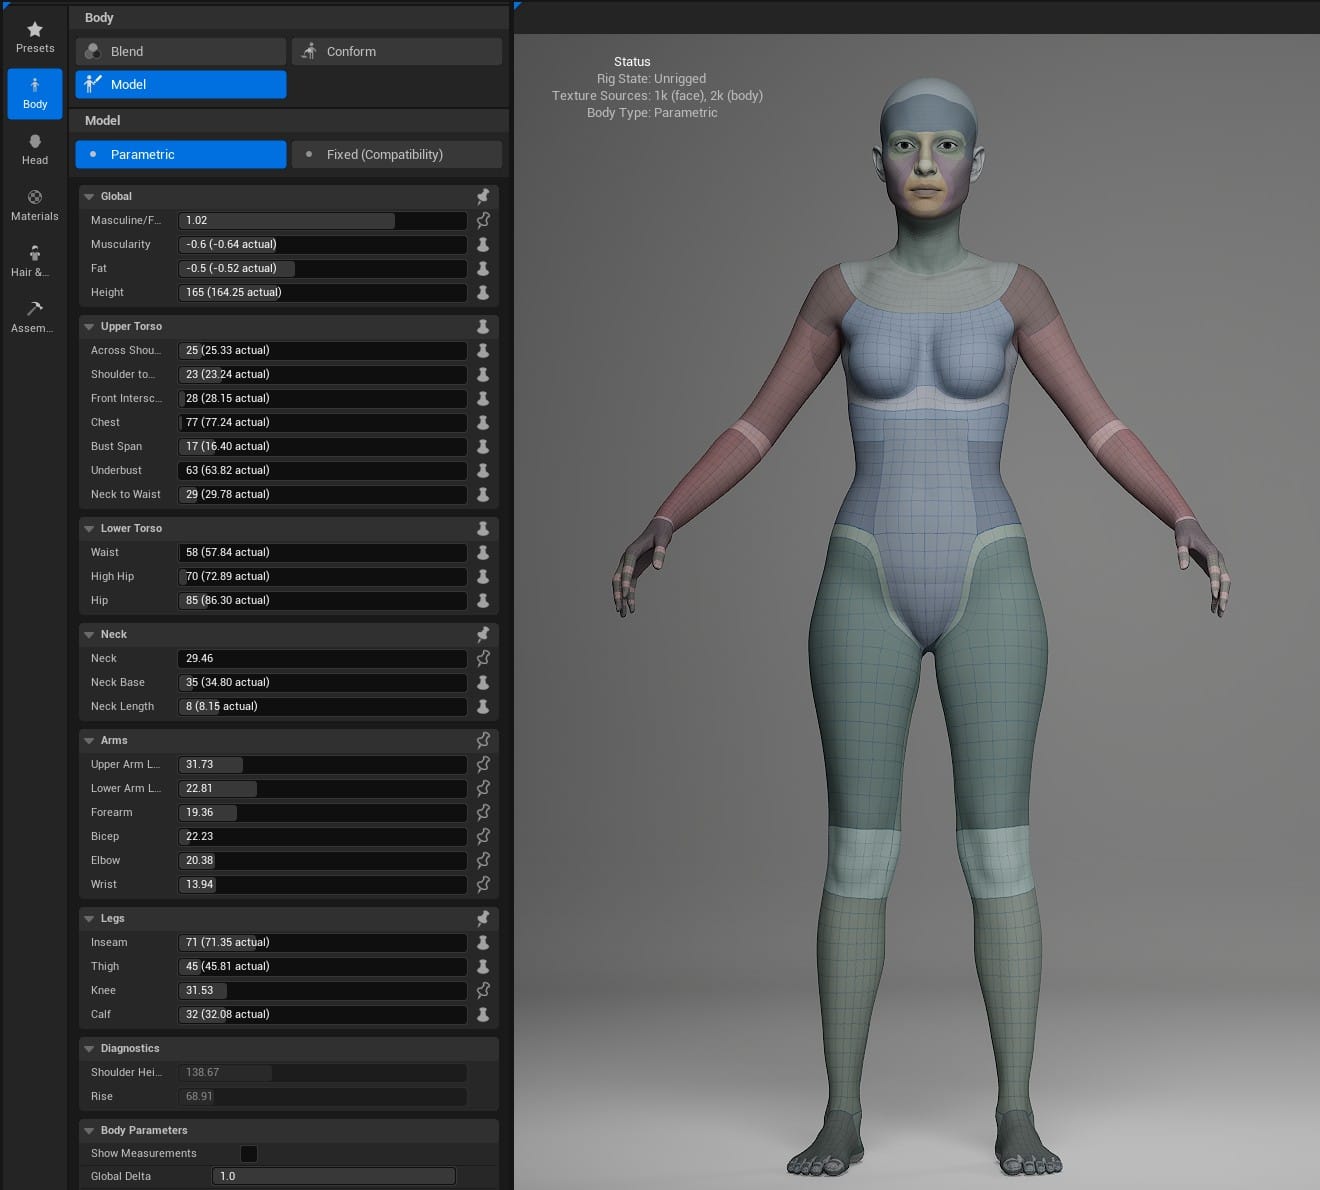
Since MetaHuman bodies have less detail overall, I didn't spend as much time on them. The protagonists' bodies are good enough to move forward, and I expect most of the customization I do in the future will be done in other software.
For now, here they are in their first awkward moments: