Constrained Generation
In my last article, written about six weeks ago, I took a broad look at the gen-AI landscape and toyed with the idea of making the Sub/Object short movie using AI tools. Since then, I've been living in this space and learning everything I can.
Most video generation models create clips between 5-15 seconds. Making a 15-minute movie would require generating hundreds of clips to edit into the final product. Generally, the best way to get good material from a video model is to give it images of the setting, characters, and style of the scene, then describe the action you need in words.
So far, my focus has been on creating good images. If I can't make interesting, cinematic stills, why try generating any videos? This strategy might also save money. AI video generation is much more expensive than image generation. In theory, if I spend more time/money iterating and perfecting the images that I feed to the video model, it will require fewer generations to get the clips I need, and cost less money overall.
After experimenting a lot with image generation and a little with video generation, my overall sense is that gen-AI tools are still unrefined, but worth exploring. In the tools' current form, I think it's possible to make an interesting, aesthetically pleasing movie, but I don't think I could realize the particular vision of Sub/Object that I have in my head. In my attempts so far, I've found a constant tension between beauty and control. Some tools and workflows can create beautiful images, and some can follow specific instructions to precisely edit those images, but they diminish the beauty in the process. I laid out my vision for the characters, set design, shot composition, etc. of Sub/Object years ago, and creating those specific images would require prompting tools like Nano Banana Pro or GPT Image 2.0 to make repeated edits, and with every edit, the image's cinematic qualities would be scraped away.
To give an example, here is a series of edits I did with Nano Banana Pro (I'm tired of writing "Nano Banana Pro," so from now on, it's called NBP).
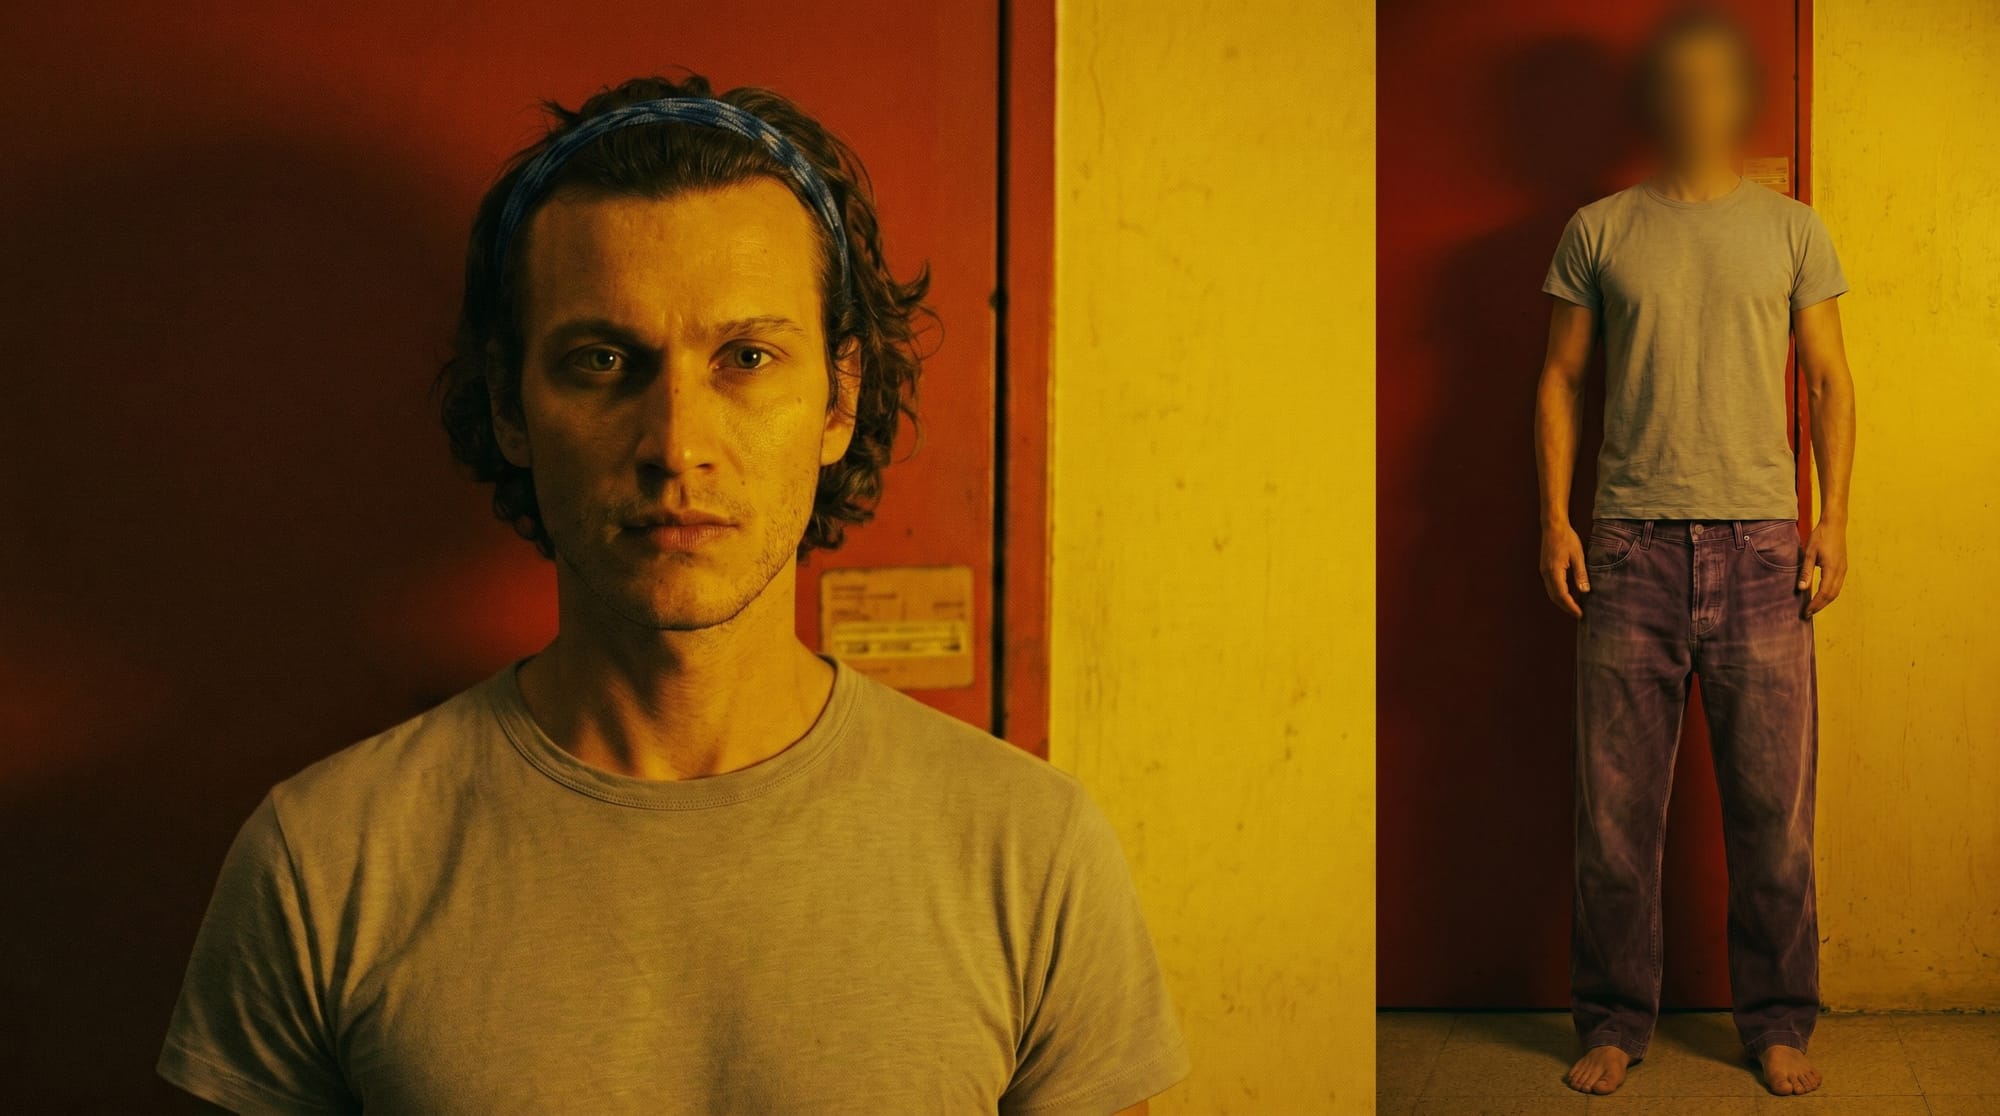
I started by giving NBP these two reference images and prompted it to add the man to the scene in a pose like this:
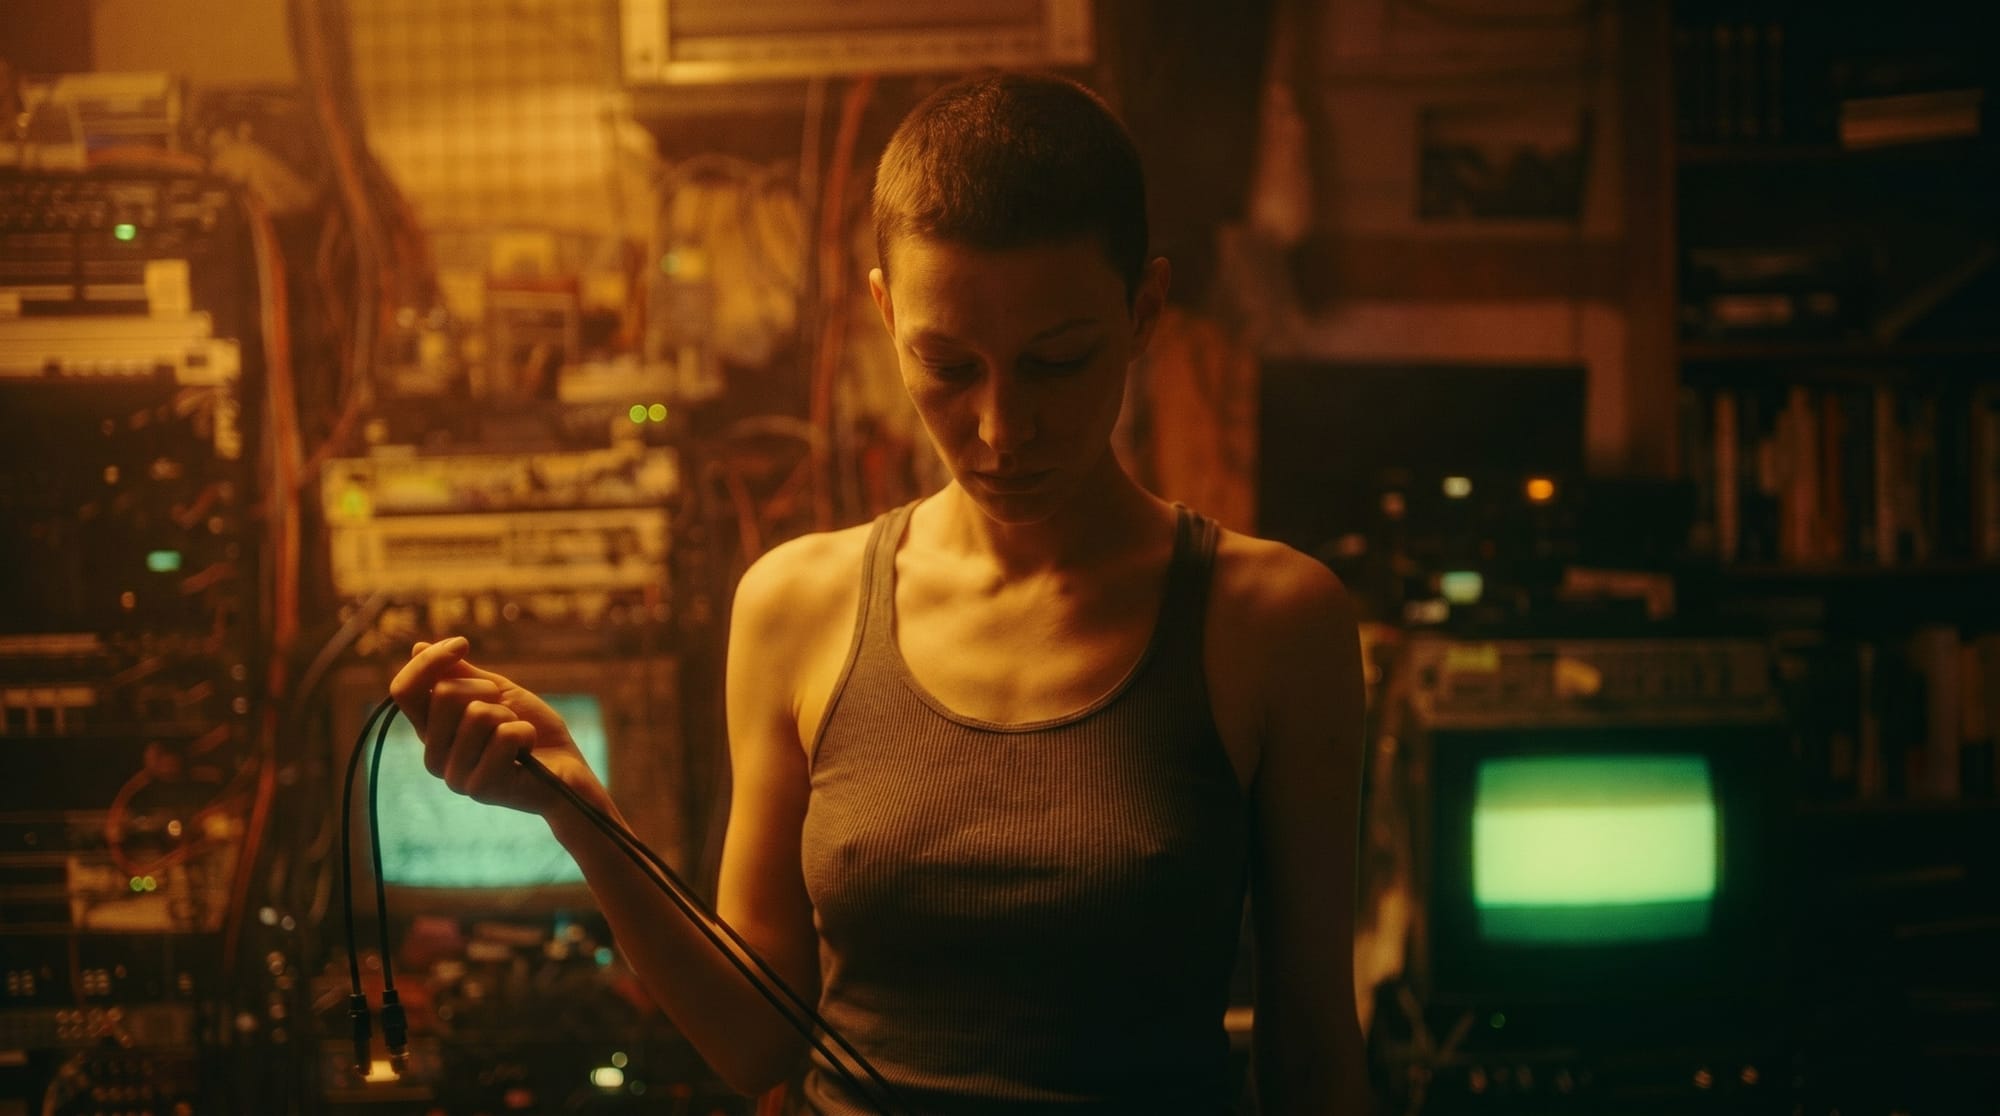
Then I provided a different character reference and asked it to add her lower legs to the foreground of the scene, as well as change the man's face so that he's looking up at her.
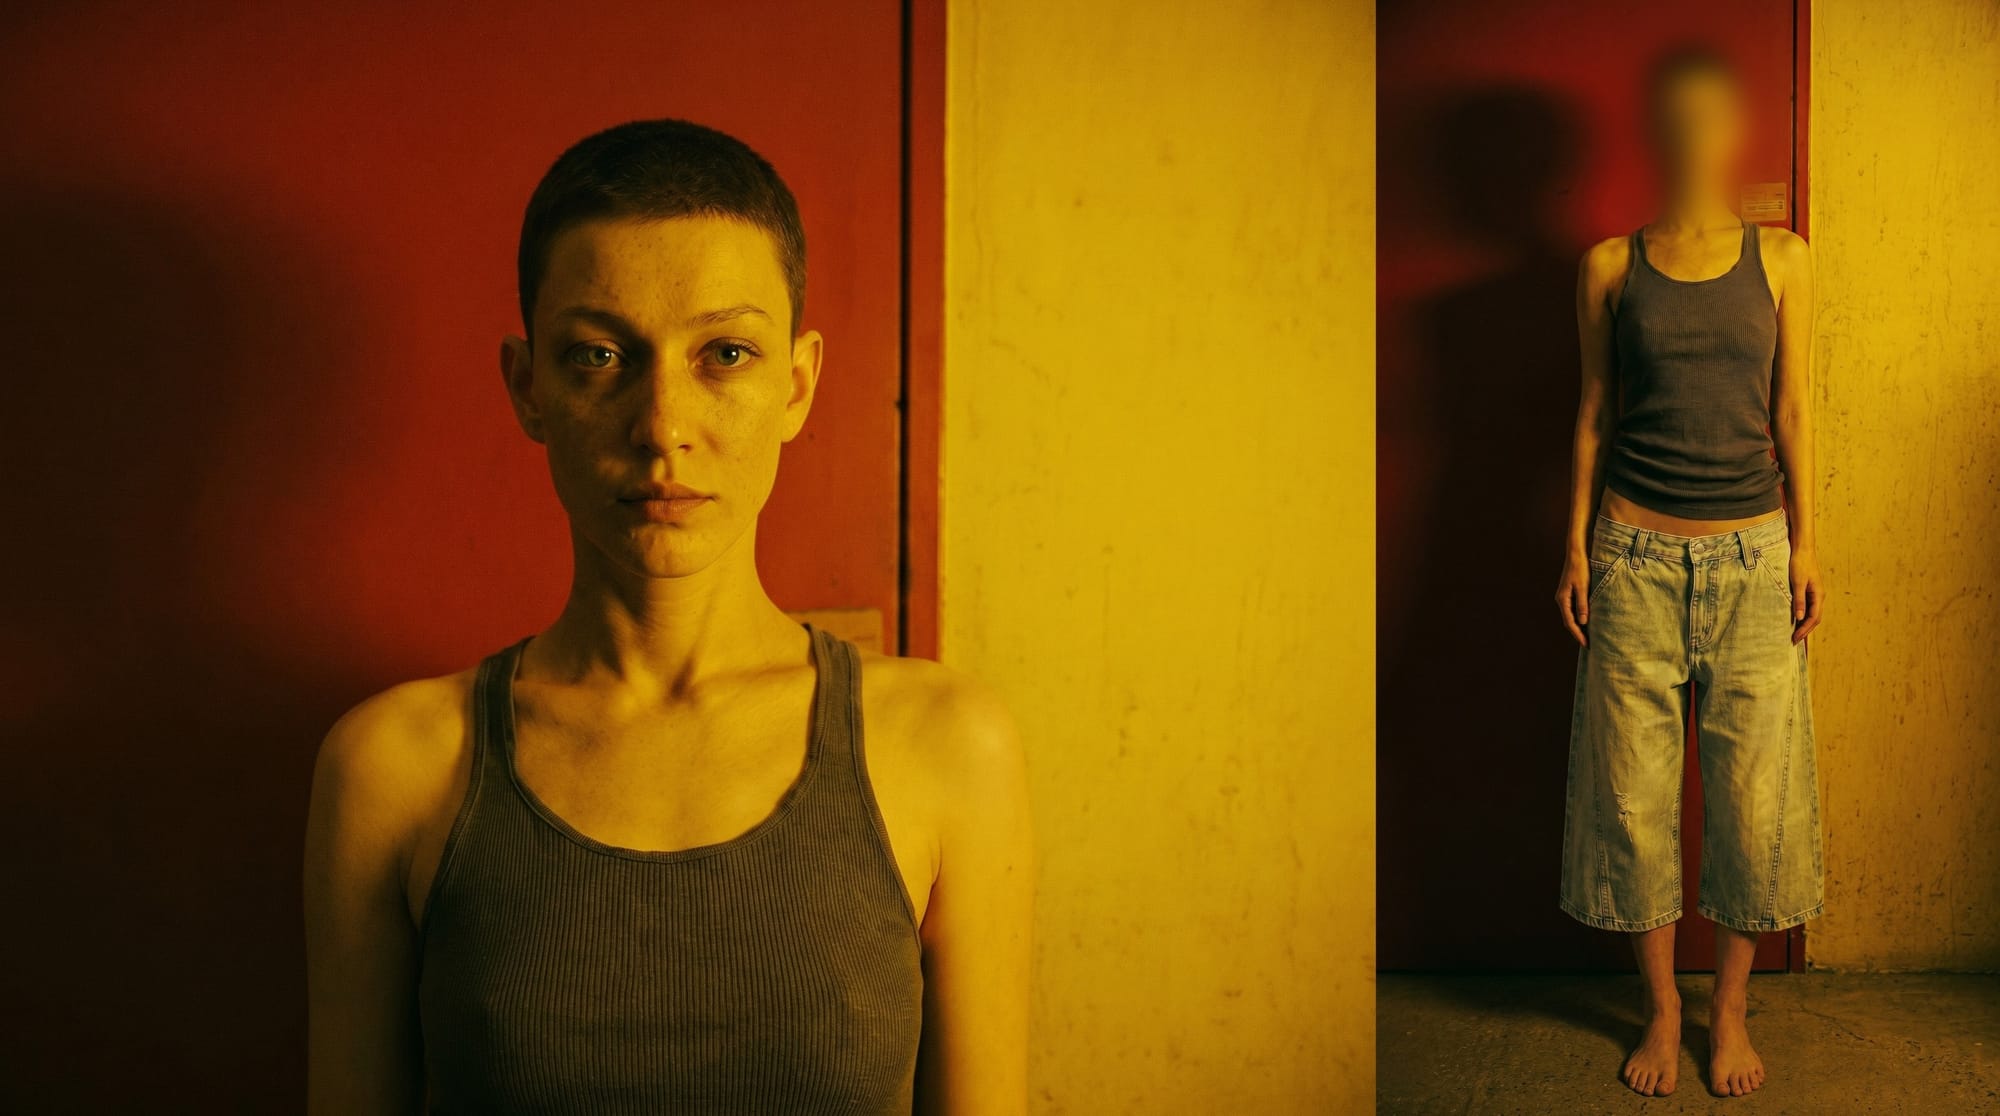
Finally, I asked for two black cables that snake along the floor and up to the woman's hand.

The edits are good, but if you look closely at the images, they get progressively ugly. In the final image, the contrast and colors have been diminished, and the features of the man's face and the objects in the scene are hazy. It looks a bit like over-compression, but also like the image devolved from photography to painting.
Because the image quality degrades with each generation, an alternative strategy is to try all the edits in a single prompt. This would mean giving NBP the scene reference and the two character references all at once, and writing a long, detailed prompt describing exactly how I wanted them positioned in the frame. This is possible in theory, but the more complicated the prompt, the more room there is for NBP to (mis)interpret it, and the less likely it is that I'll get exactly what I want.
But, I'm getting ahead of myself. Where did those character references come from?
Character Sheets
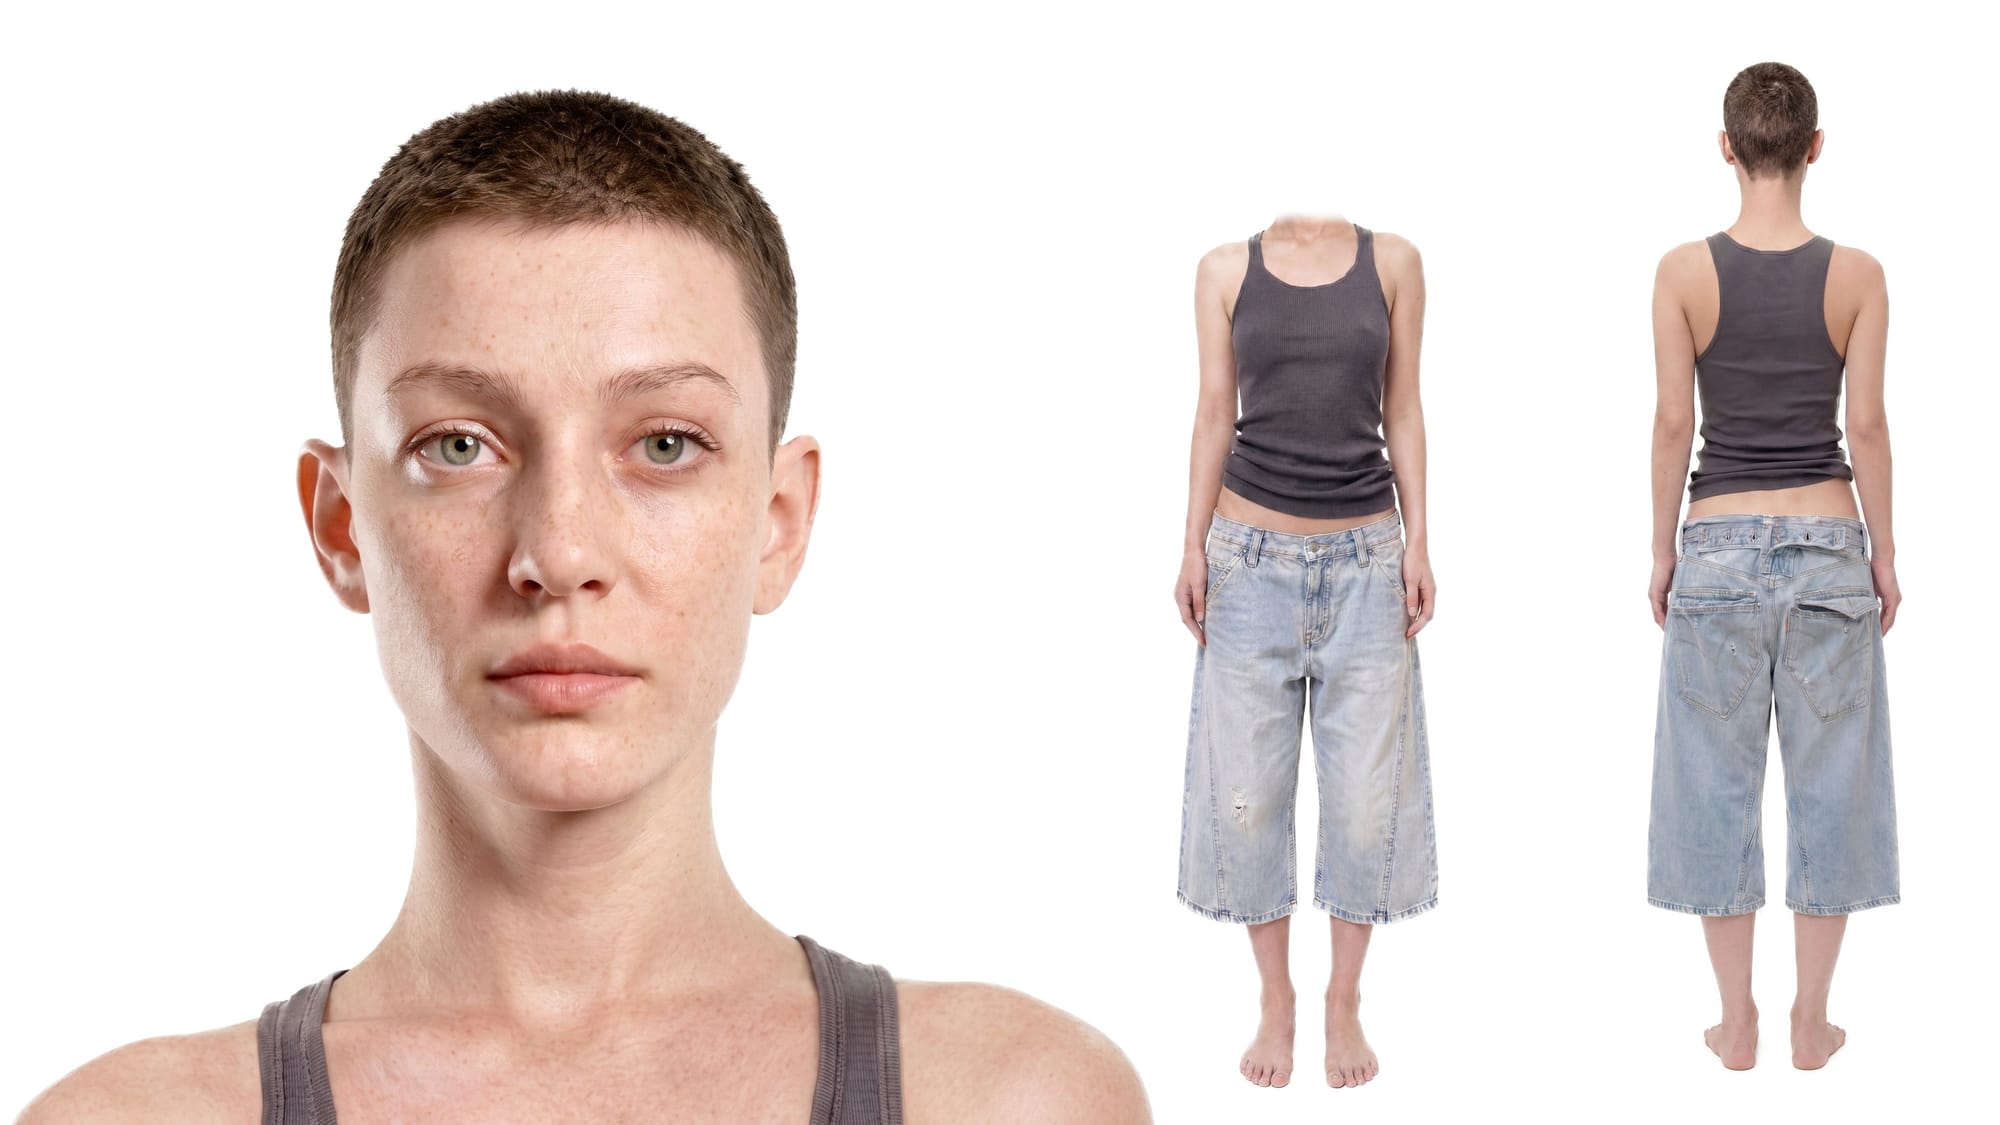
Gen-AI video tools are prompted in essentially the same way as image tools. There is the option to describe the video you want with text alone, or you can attach images and/or videos for the AI model to reference. In most cases a picture is worth a thousand words, and users often provide reference images for the characters they want added to their videos. Here are a few examples of "character sheets" made by other creators:
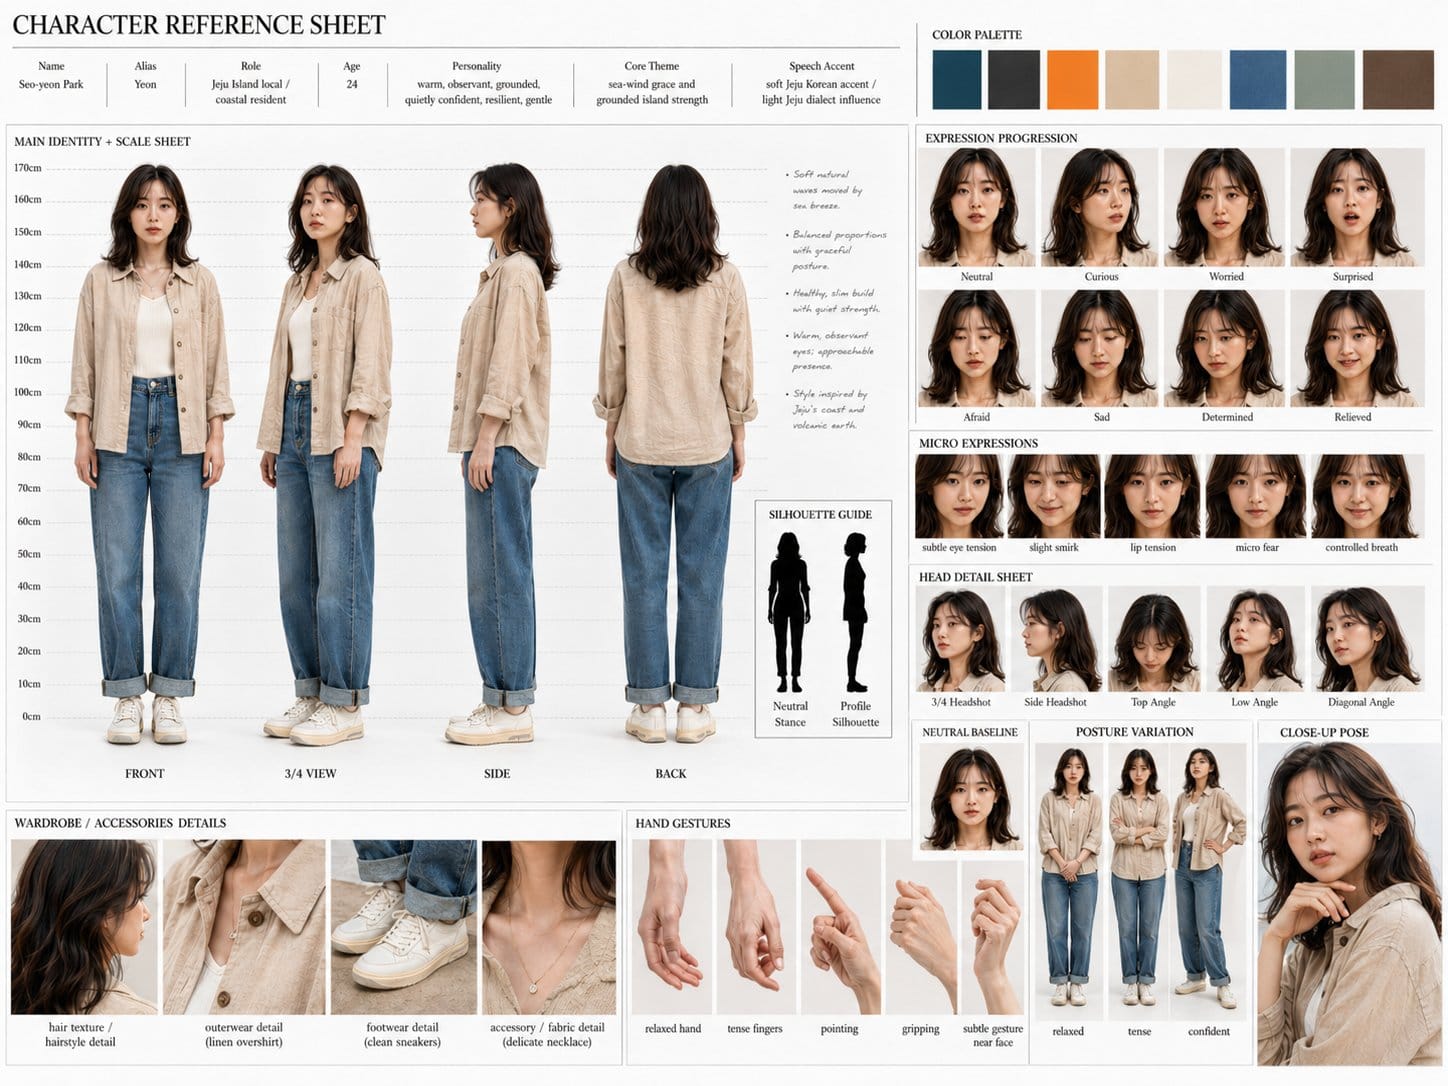


My intuition with character sheets is that simpler is better. I don't think there's any strong evidence that providing numerous angles, poses, or other trivia help the video model render the character more accurately. I think some people just get a kick out of making pretty character sheets to share on social media. To them, the character sheet itself is the product, rather than a means to creating better videos. It's not easy to be scientific with AI tools, and it's never clear what techniques produce better outputs, but of the above examples, I think number three is closest to ideal.
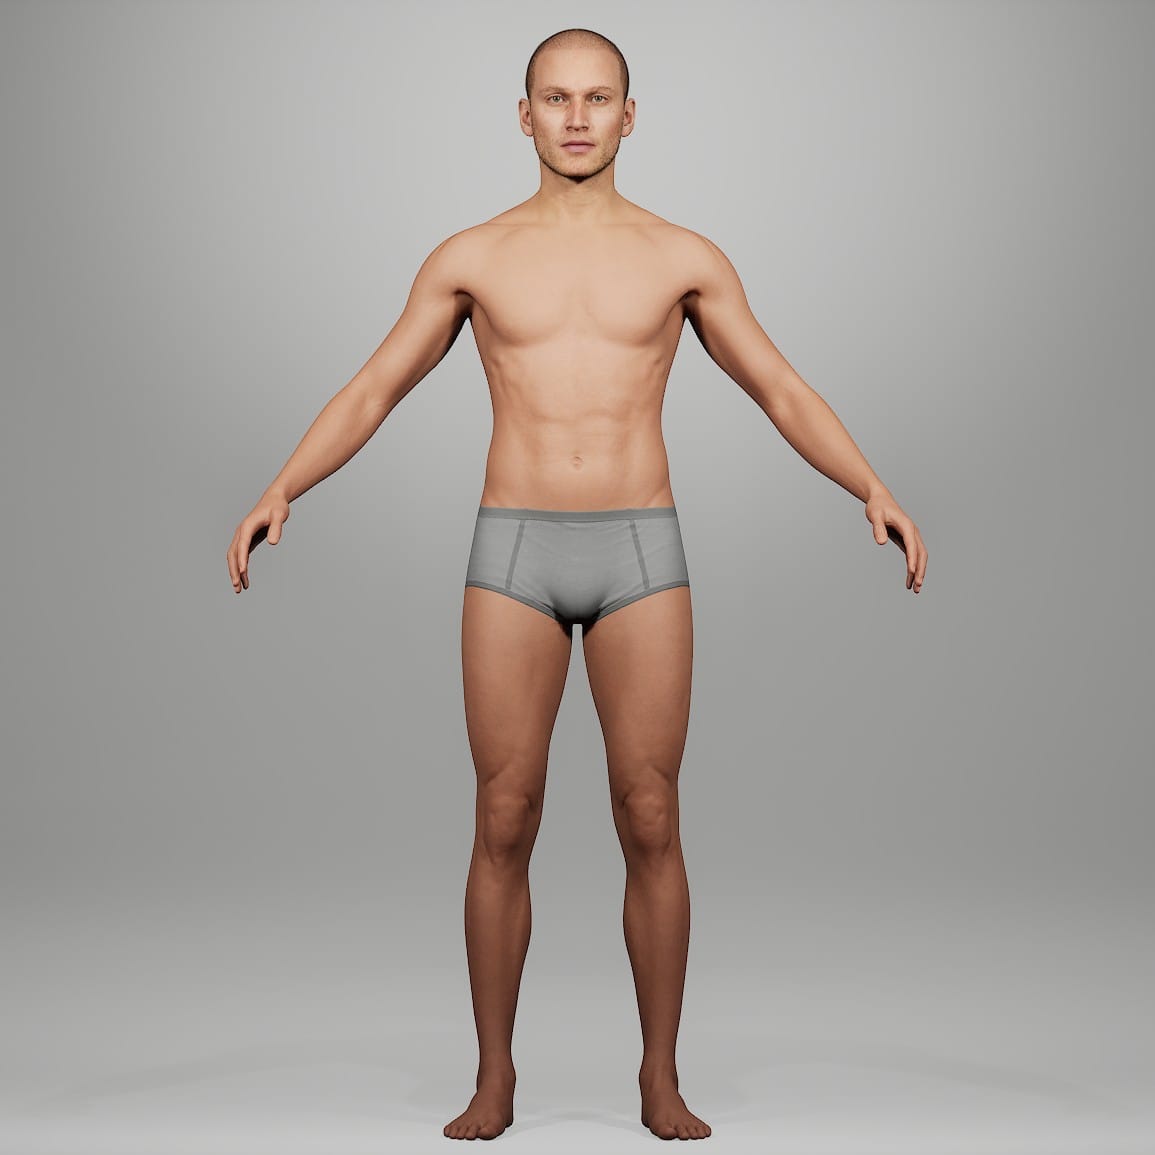
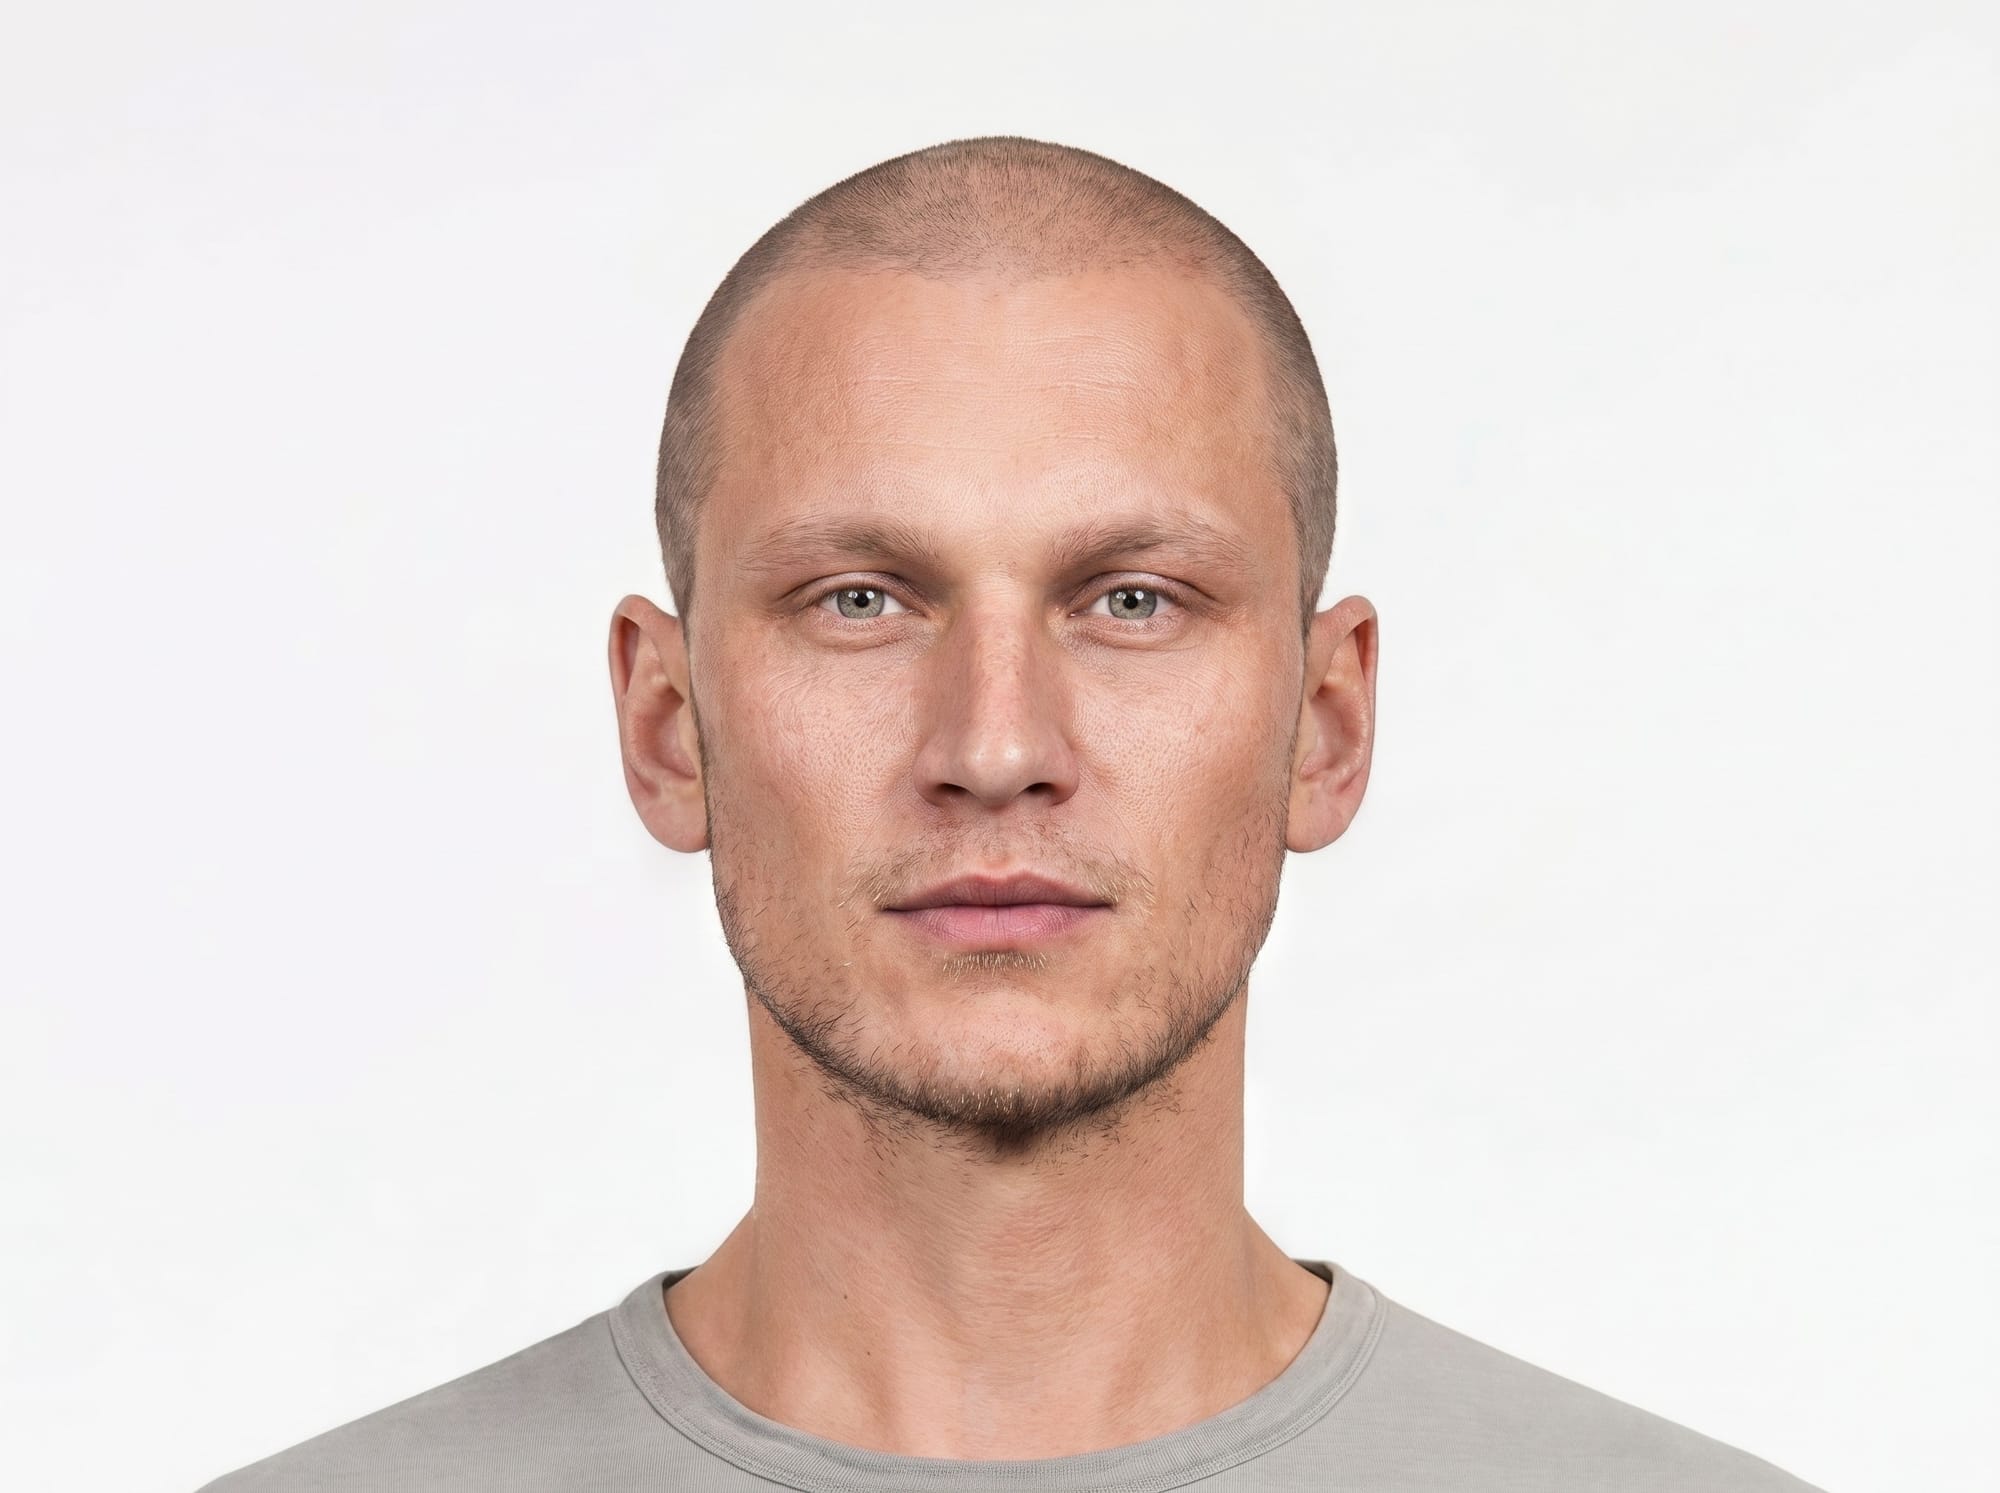
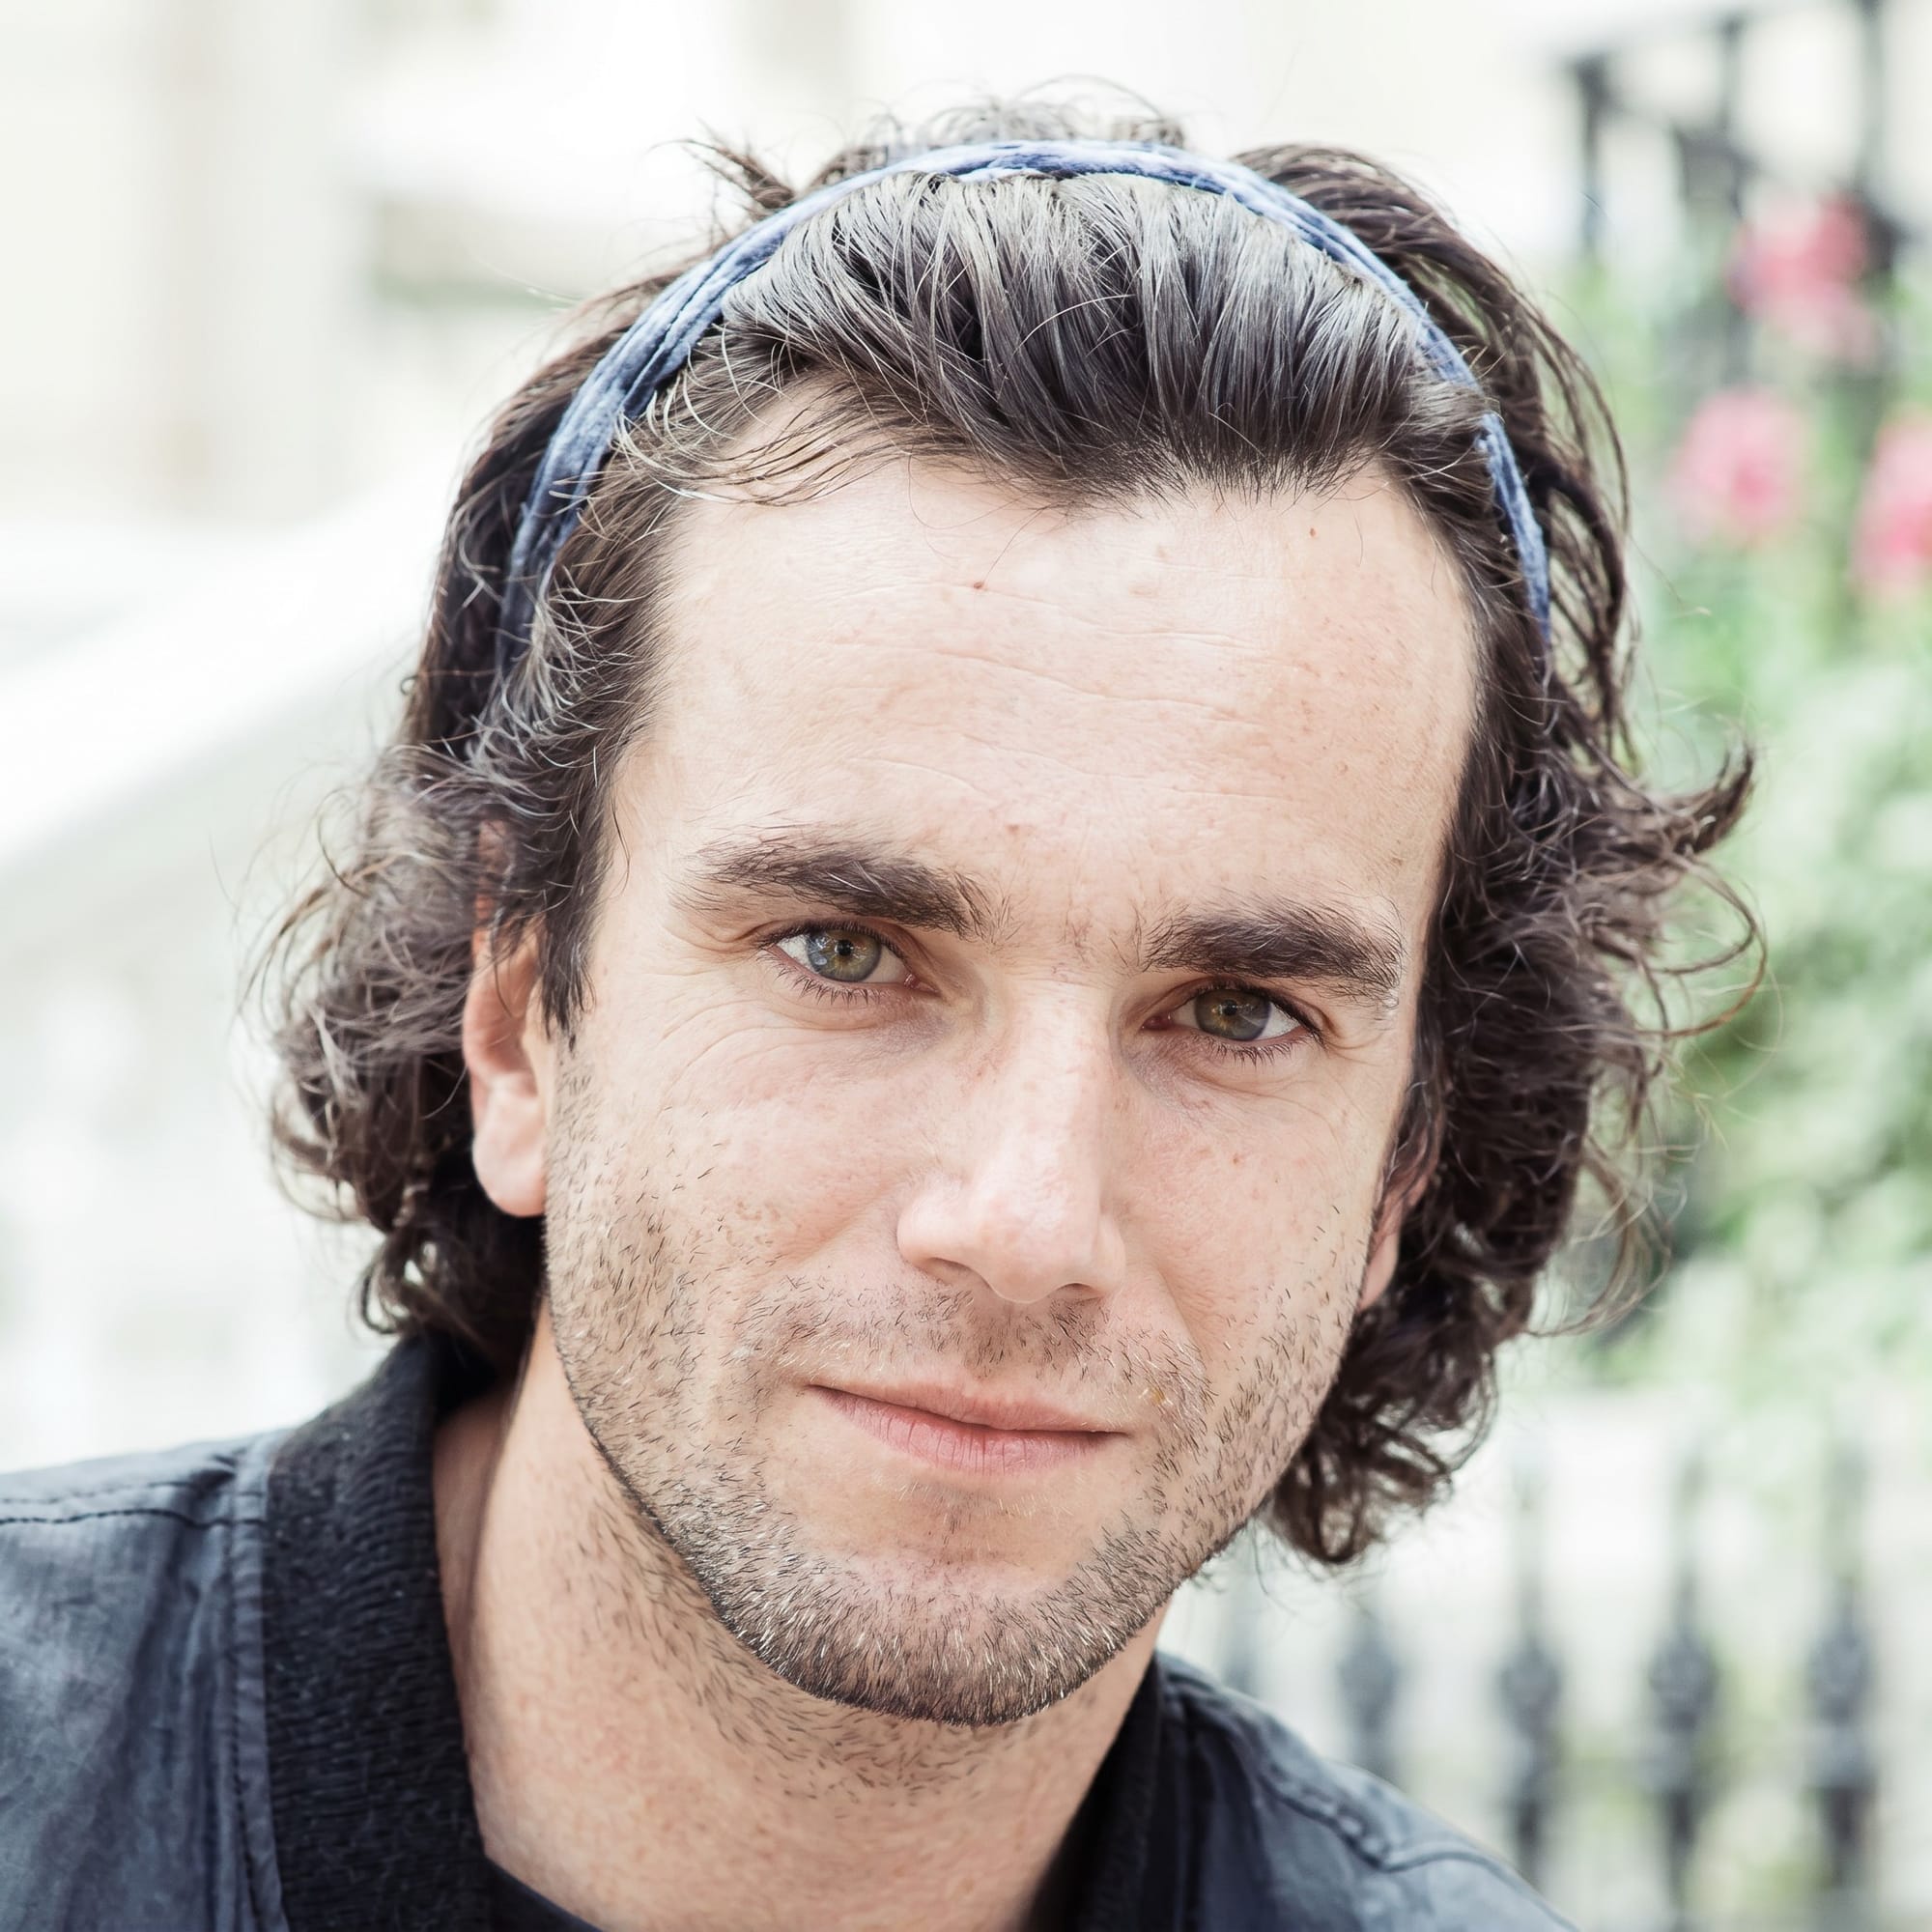
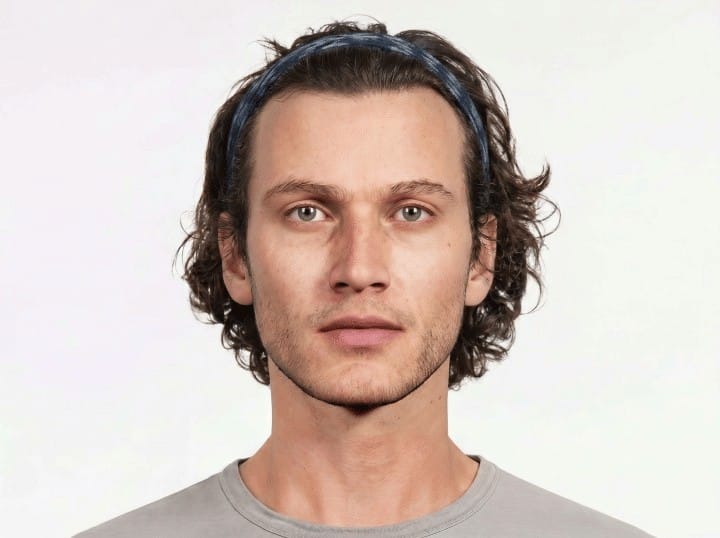
In my case, I already had the two MetaHumans that I made for the Unreal Engine production of Sub/Object, back before I had considered trying AI.

My grand plan was to create clean, studio photographs of the two characters, Anders and Aneta, from four sides: front, back, left, right, and from three distances: Full-body, waist-up, and shoulders-up. That would be twelve images per character, and when it came time to generate the actual shots for the movie, I would be armed with beautiful character references for every possible angle.
In hindsight, this plan was probably over-complicated and unnecessary. I think I fell into the same trap as the people who made those elaborate character sheets. These characters are special to me, and I wanted to create a perfect, comprehensive set of images. But, I have yet to use most of those twelve angles, and I often find myself improvising and making one-off character references based on the needs of a particular shot.
But, I'm going to cover my learning process, and include some of the wrong turns that lead to valuable insights.
I started with the full-body images. I searched for real-world pictures of a person with an outfit that fit the character, posed them in front of a white studio background, and then swapped on the face of the MetaHuman, all with AI tools.
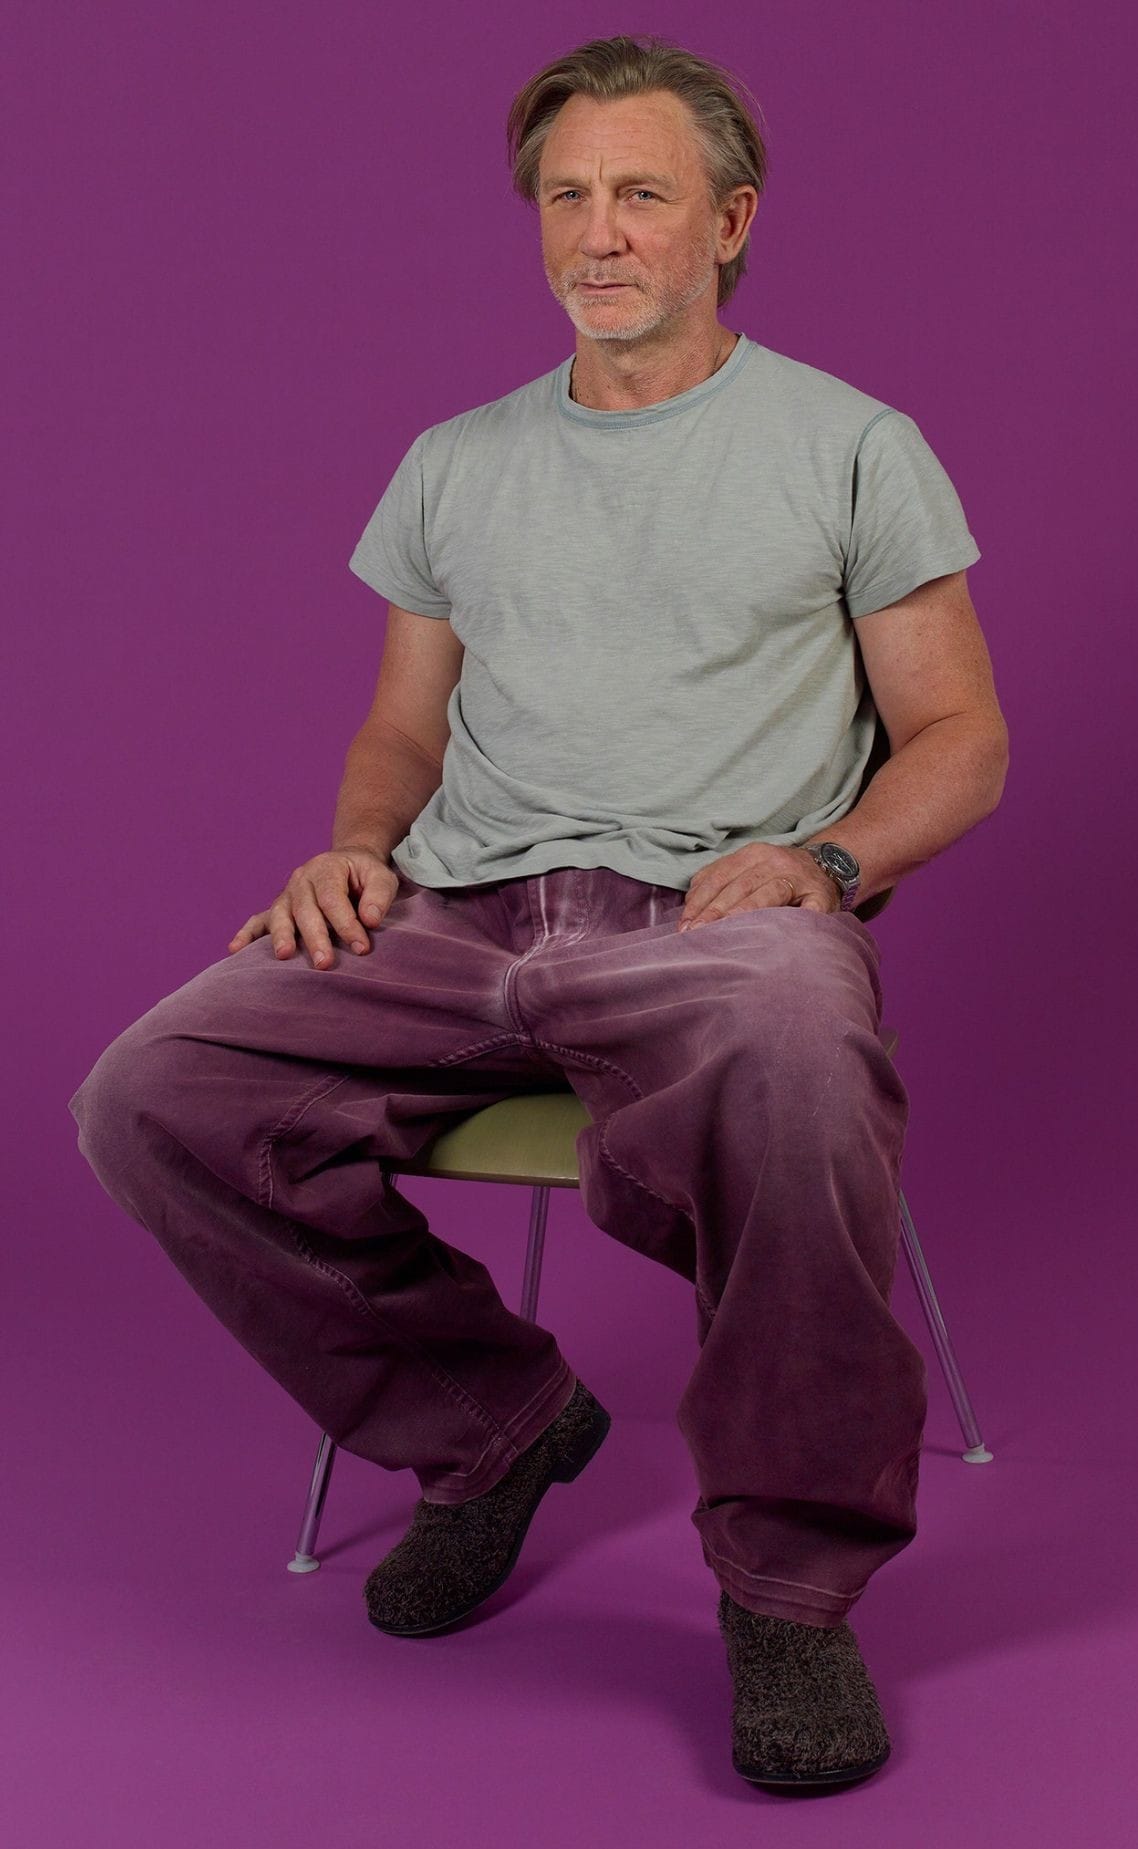
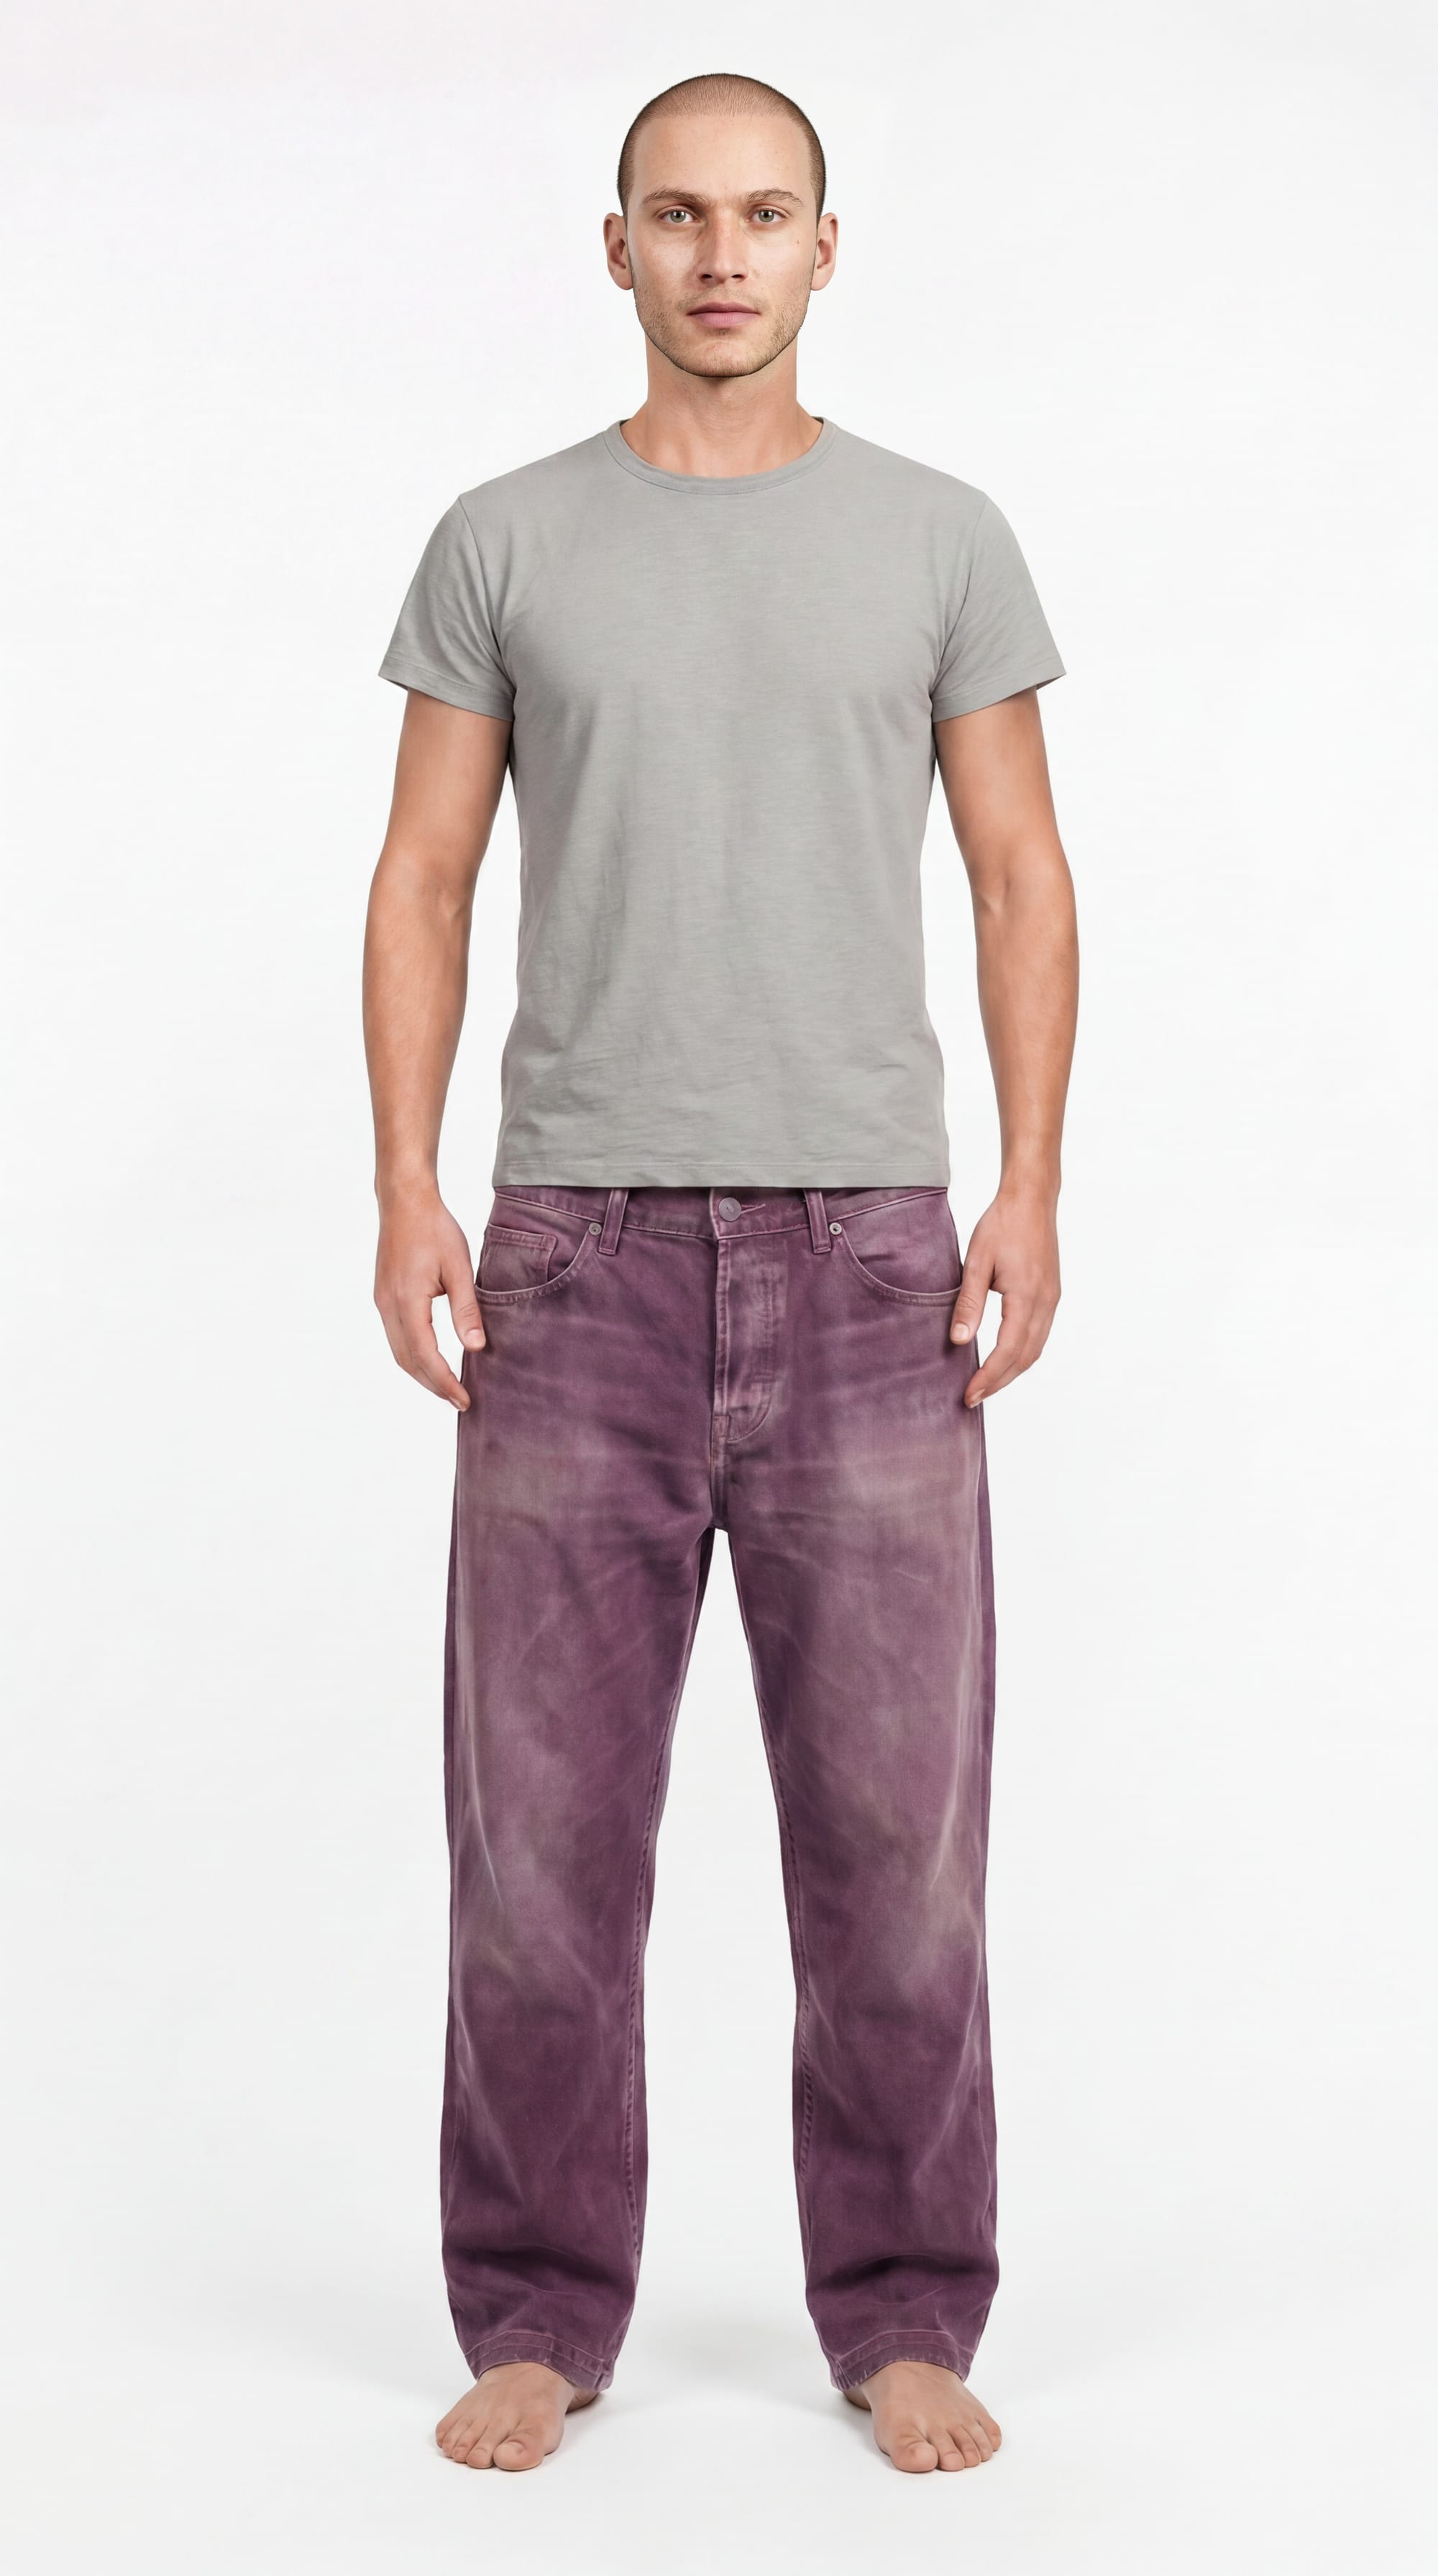
Since these characters are wholly focused on their work, rather than their appearance, I wanted simple outfits that they would wear around the house at all hours of the day. For Anders, that was just a T-shirt and pants, but I wanted the pants to have some kind of flare, so I decided on these purple, faded jeans worn by Daniel Craig. I also had a full-body image of Anders, taken from Unreal Engine:
I gave these two images to NBP and GPT Image 2.0 along with this prompt:
Create a professional studio photograph of the man in image 1. He is standing upright with his arms by his side, facing the camera directly. Center his entire body in the photograph, include his entire body from head to foot. He is in front of a pure white background, lit with diffuse light. The style is professional studio photography.
He is wearing the t-shirt and pants from image 2. Image 2 is a reference for the clothing, only.
Important details:
-Use only the t-shirt and pants from image 2. Do not give the man shoes or accessories.
-Make the entire body visible. Do not crop the top of his head or his feet.
-Match ONLY the clothing details of the pants and t-shirt in image 2. Do not use the face, hairstyle, or body proportions of the man in image 2.
-Identity preservation of the man in image 1 is crucial. Match the face, body proportions, hairstyle, and skin tone of the man in image 1.
That prompt reflects a lot of trial and error and a bit of searching online for the right way to instruct these AI models.
I sent the same request five times to both NBP and GPT Image 2.0, and most of the outputs were decent. Sometimes, AI models produce ridiculous results, like this one from NBP:
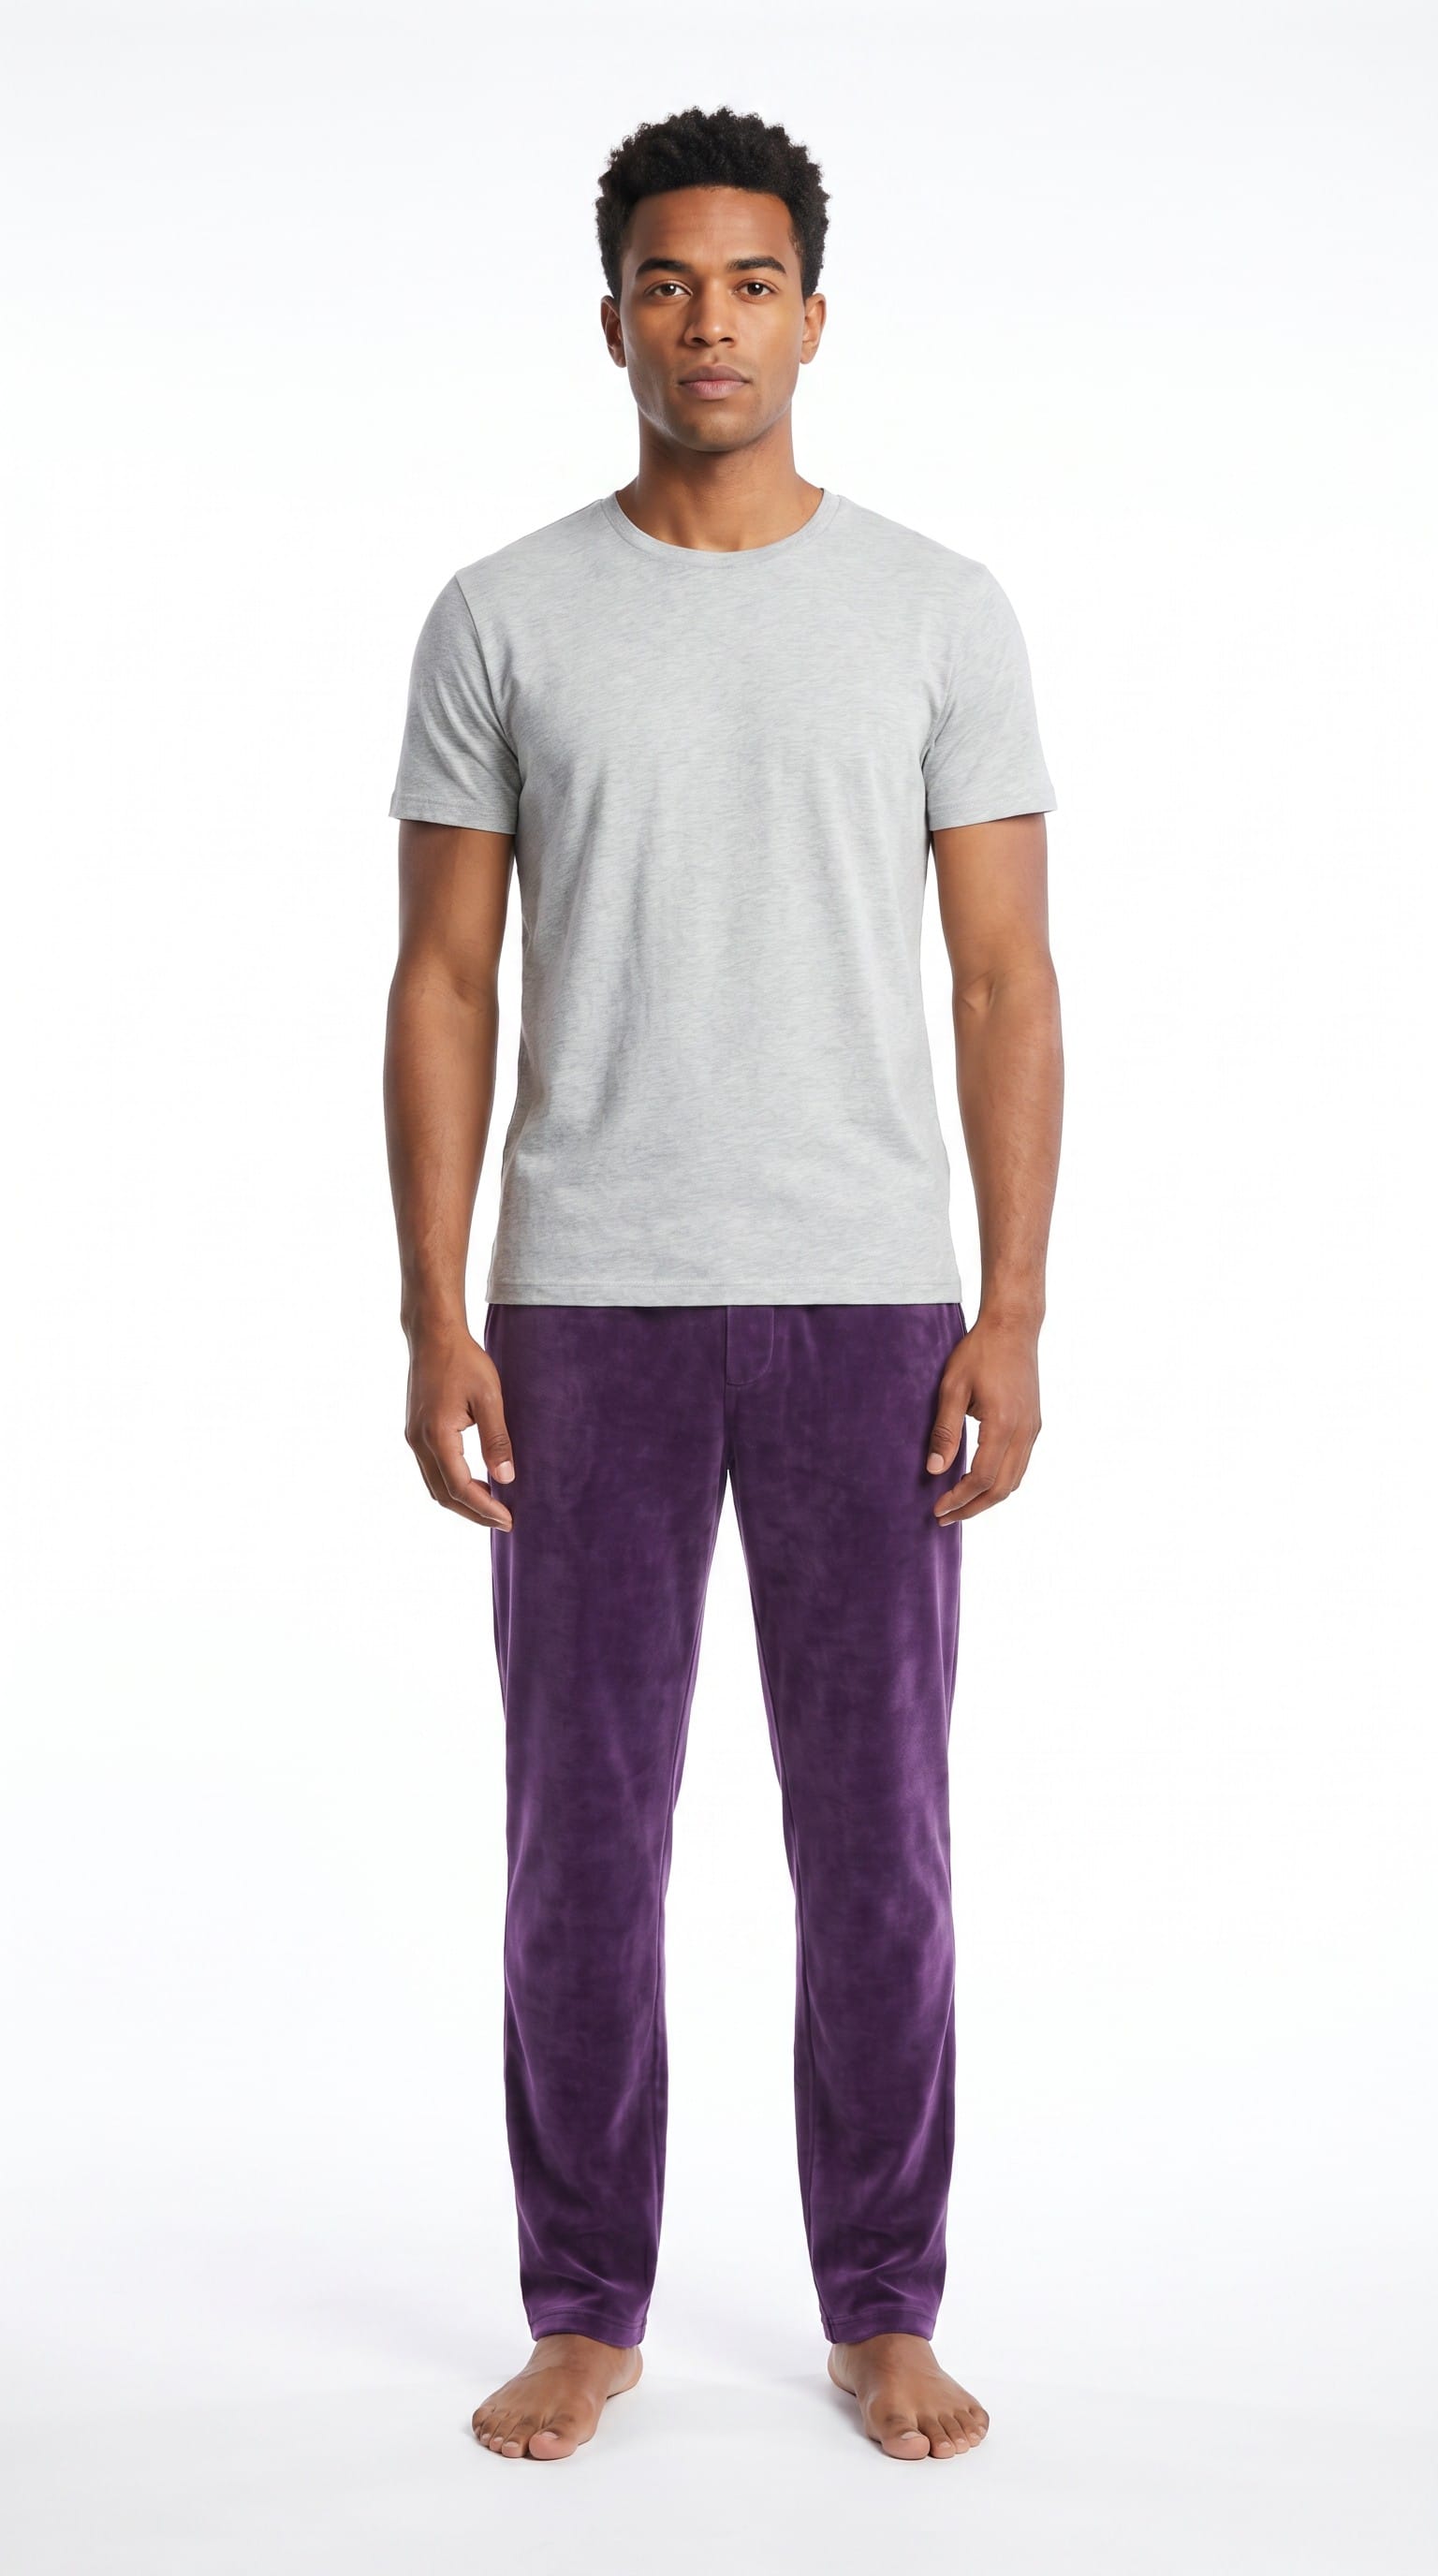
These were my top choices from both NBP and GPT:
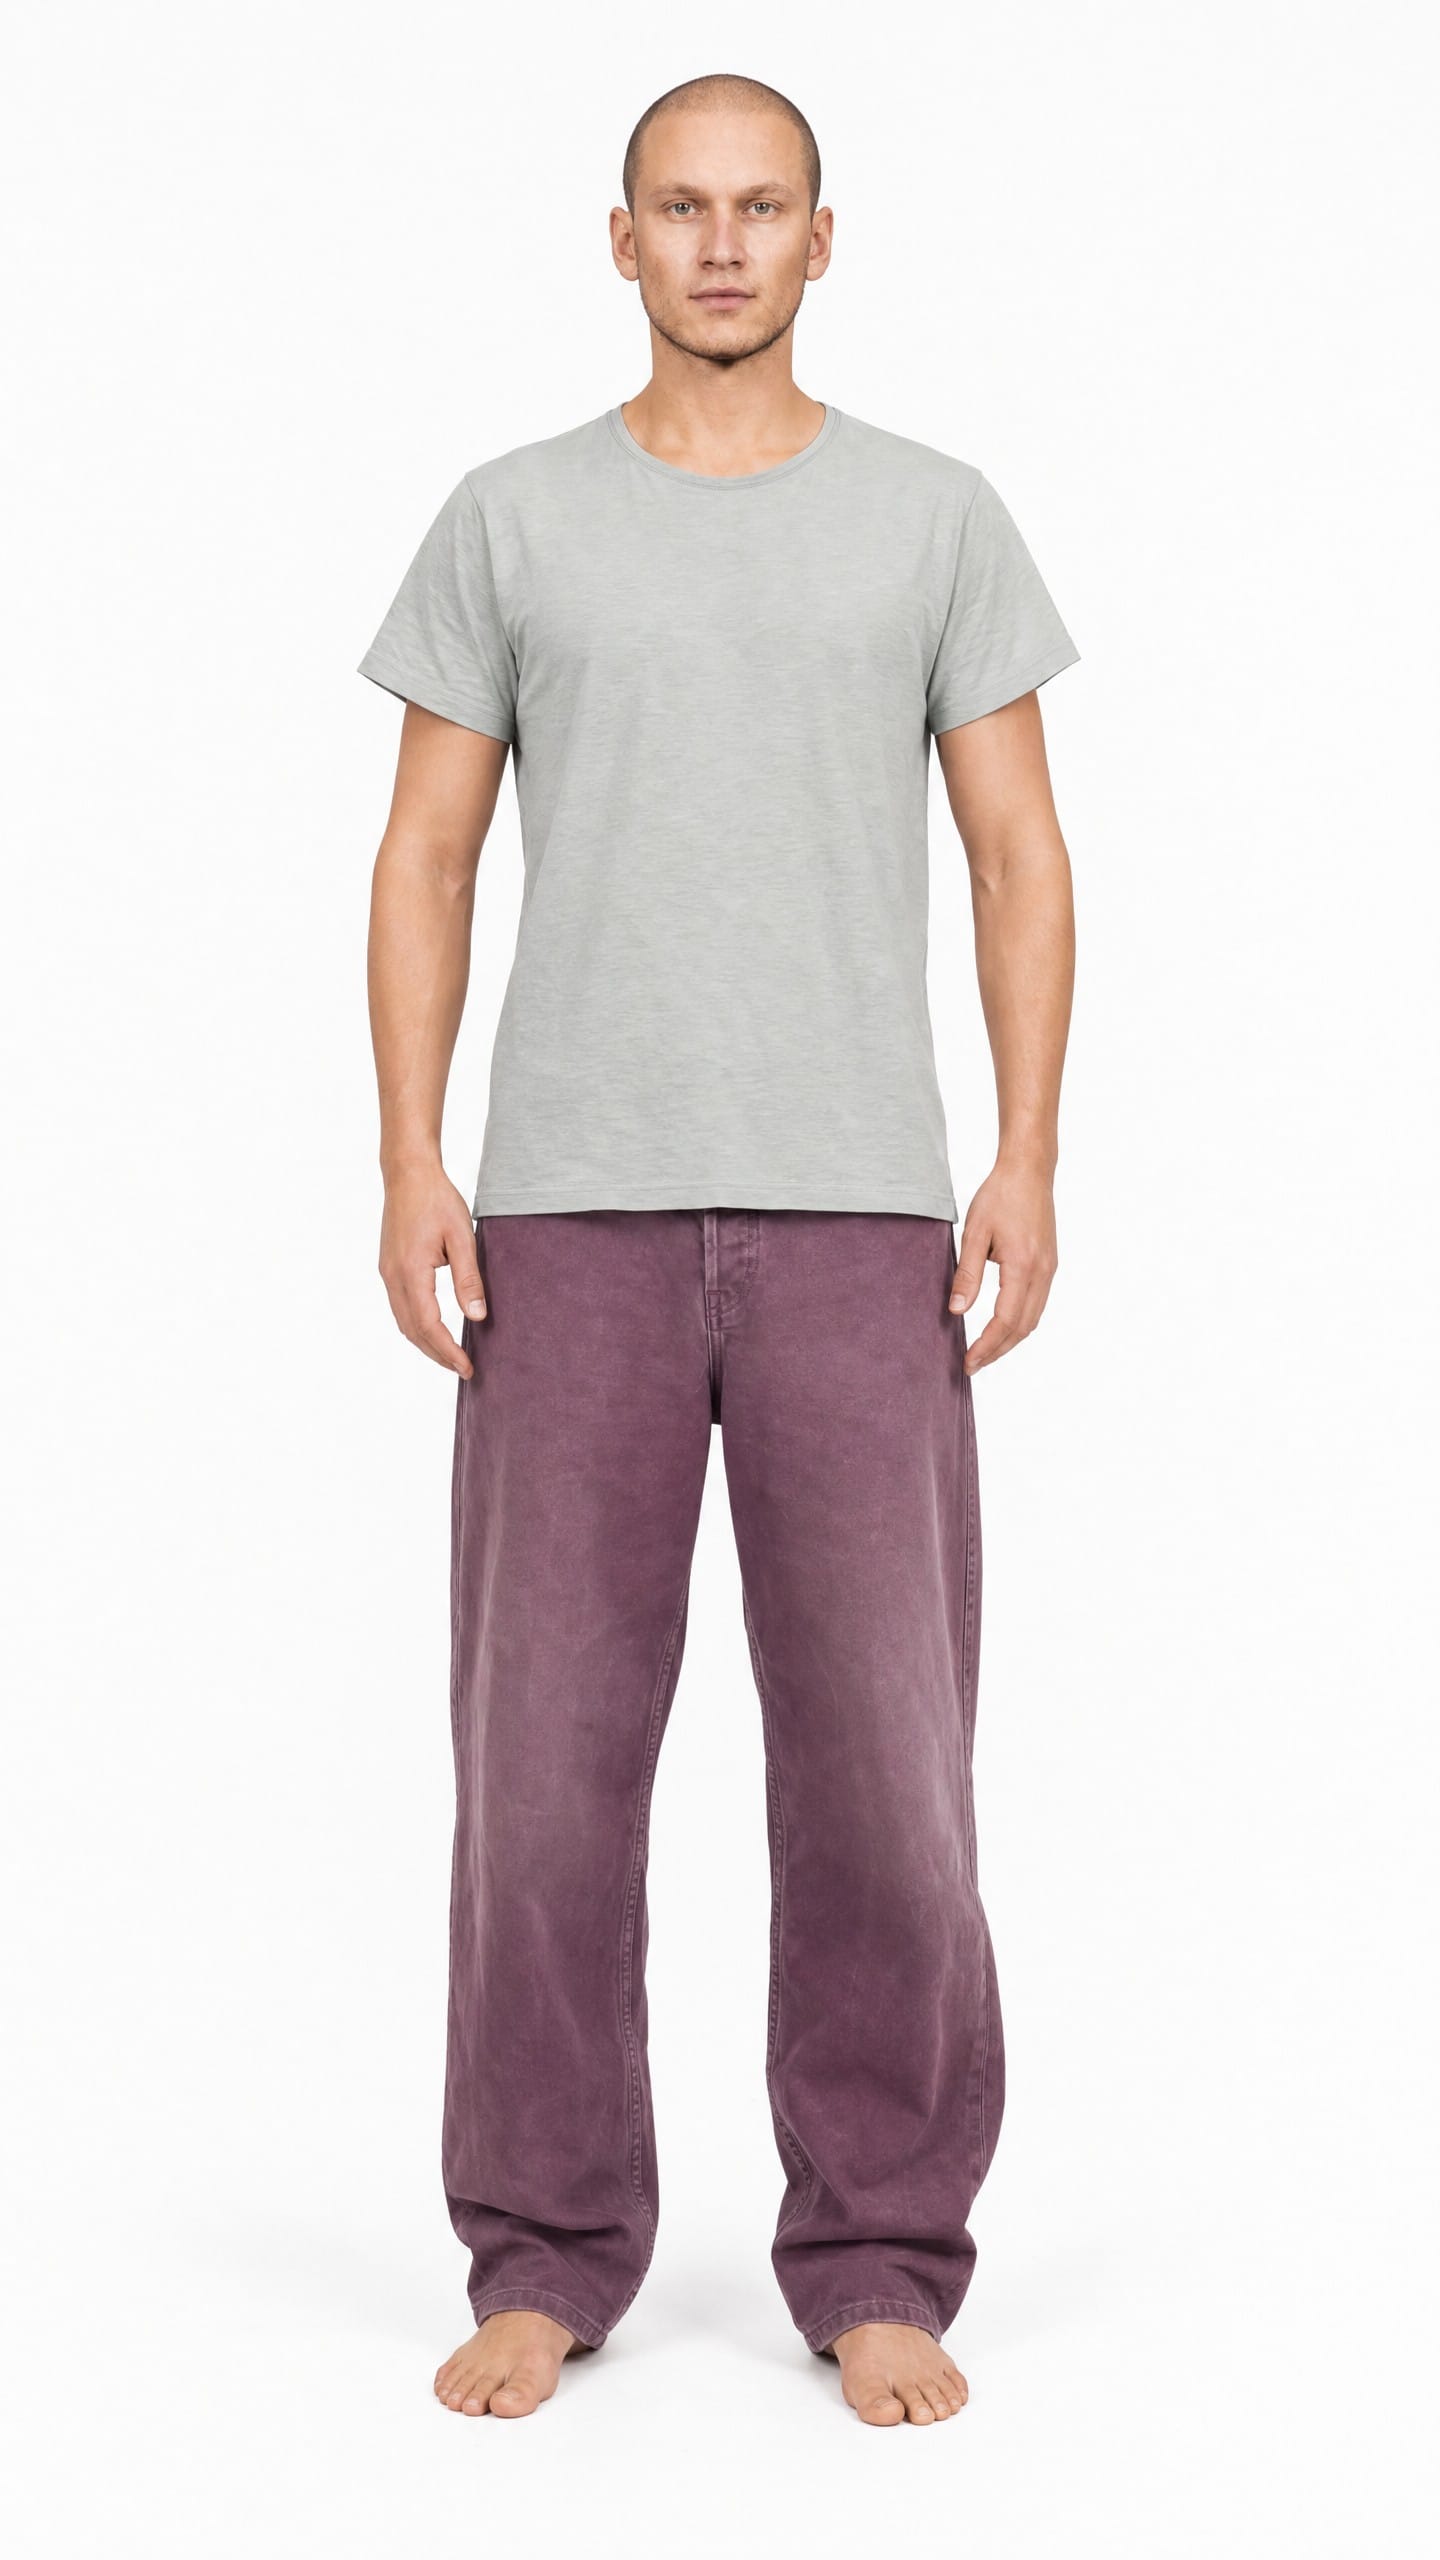
Left: Nano Banana Pro, Right: GPT Image 2.0
First of all, neither of them really look like Anders. AI tools have trouble reproducing a person's face if either the reference image or the output image is too small. In wider shots where the face takes up only a small portion of the image, the model has too few pixels to work with. It needs to reference a high-resolution closeup and needs to output a high-resolution closeup in order to accurately render the facial features. So, I would have to redo the face later.
Other notes:
- GPT did better on the face, but NBP did better on the clothes.
- GPT made the head a little too small.
- I prefer the flatter lighting from GPT. For some reason, NBP always added a fairly strong shadow to one side.
- I also prefer the body proportions (aside from the head) of the GPT output.
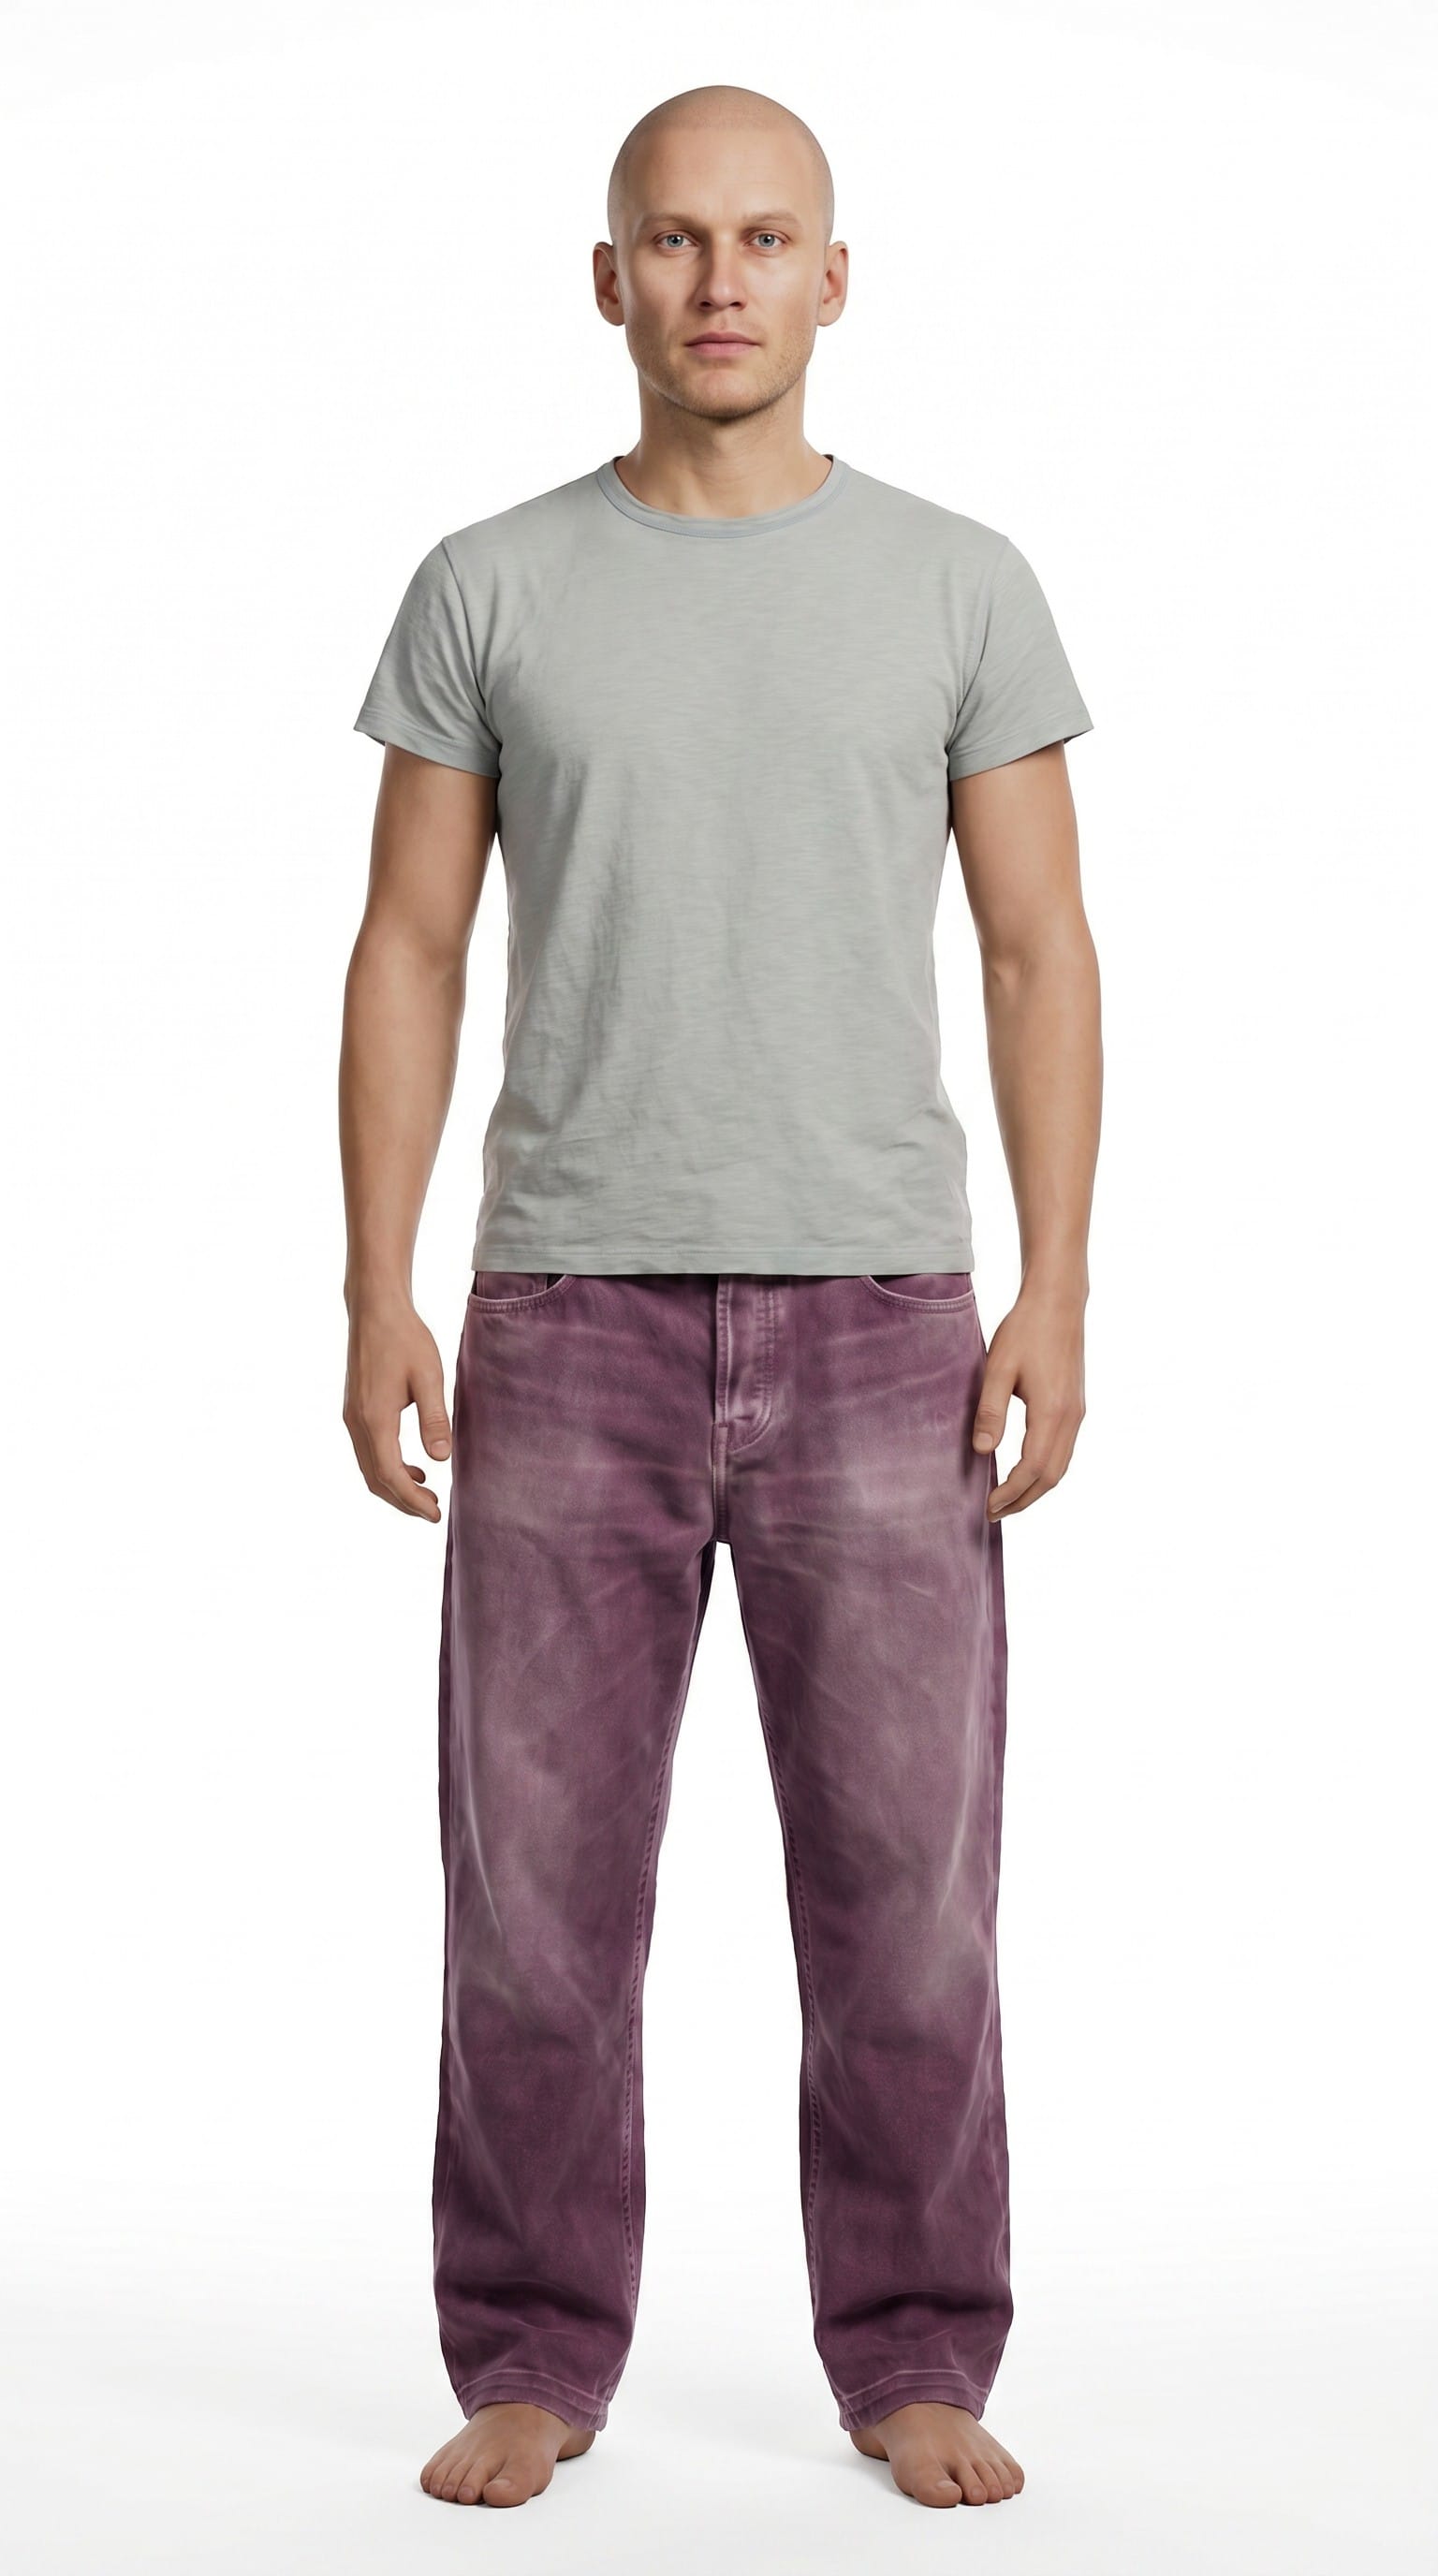
I went with the GPT version mainly for the last two reasons, which meant I needed to fix the head size and the clothes. GPT is far more expensive than NBP, so I first tried asking NBP for both edits. For whatever reason, it did fine on the clothes but couldn't adjust the head's size in a way that looked natural, so I asked GPT for that edit.
Here is the end result of both edits:
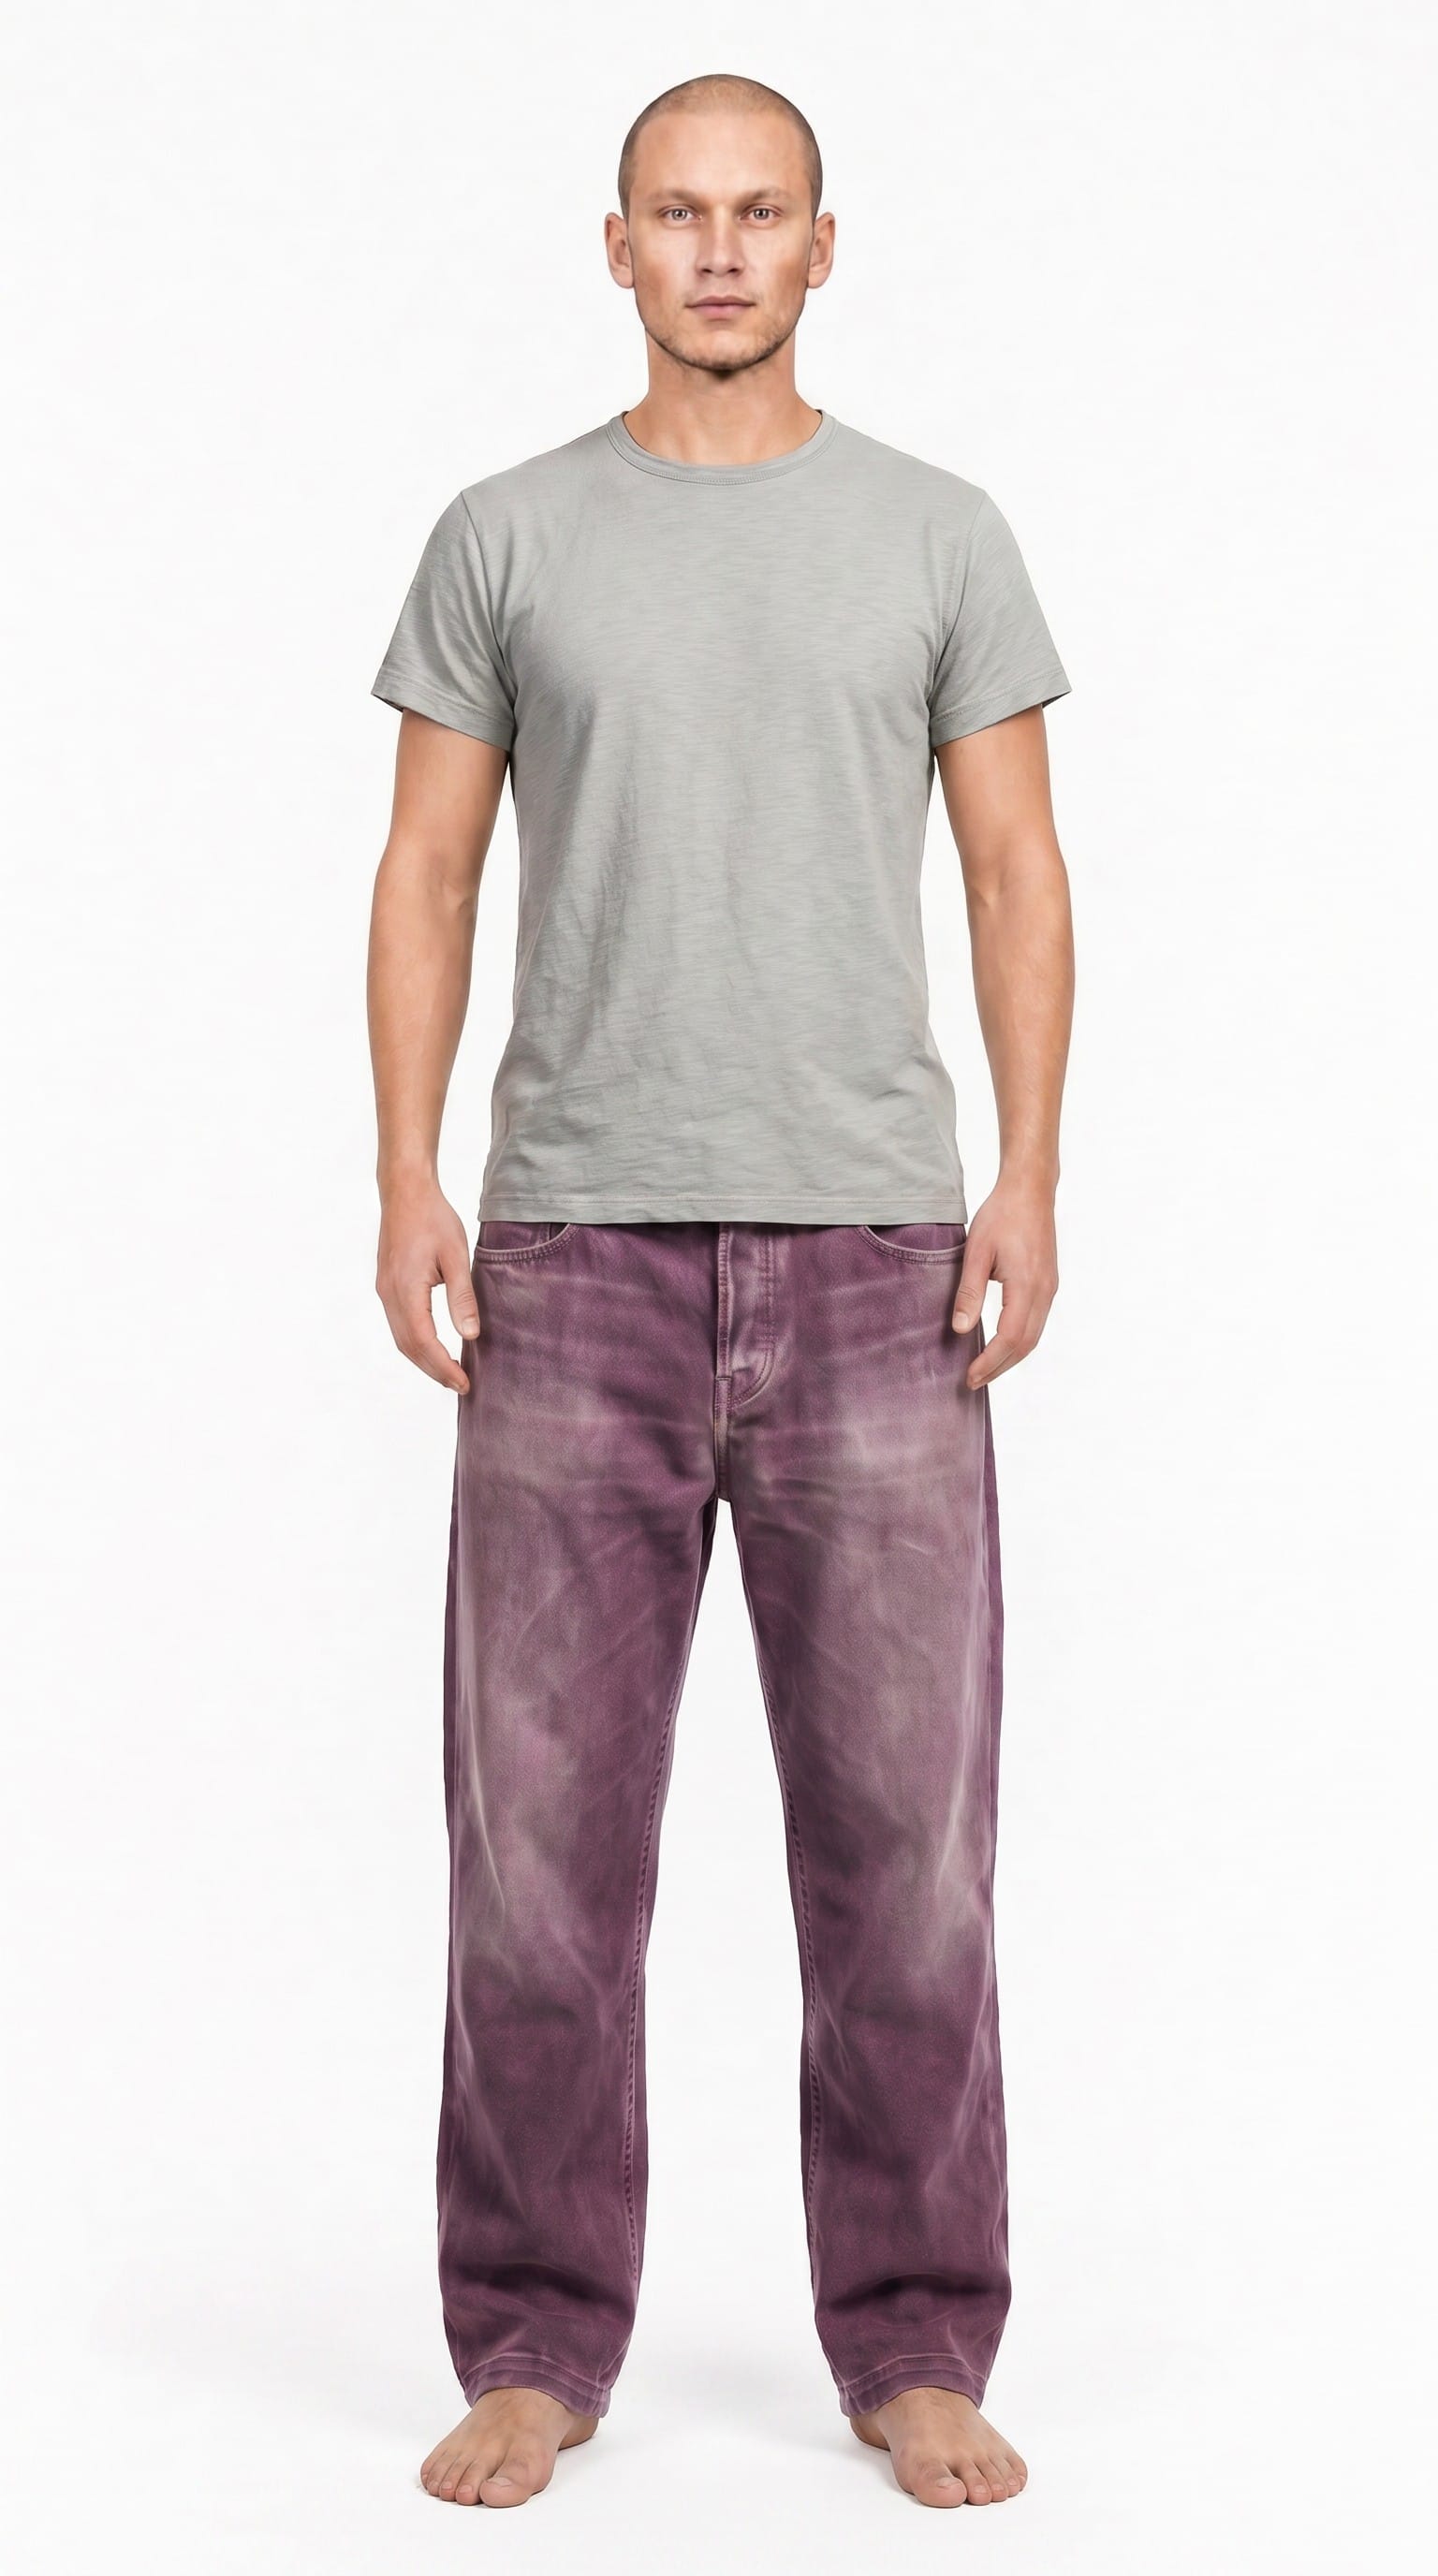
If you look closely at the face, you might notice a strange, splotchy pattern. This is another downside to GPT, aside from the price. It introduces this type of noise far more often than NBP. Sometimes it's subtle enough to ignore, but sometimes it makes the image unusable. So, I almost entirely use NBP and only try GPT when NBP fails repeatedly.
Up-scaling, In-painting, and Face-Swapping
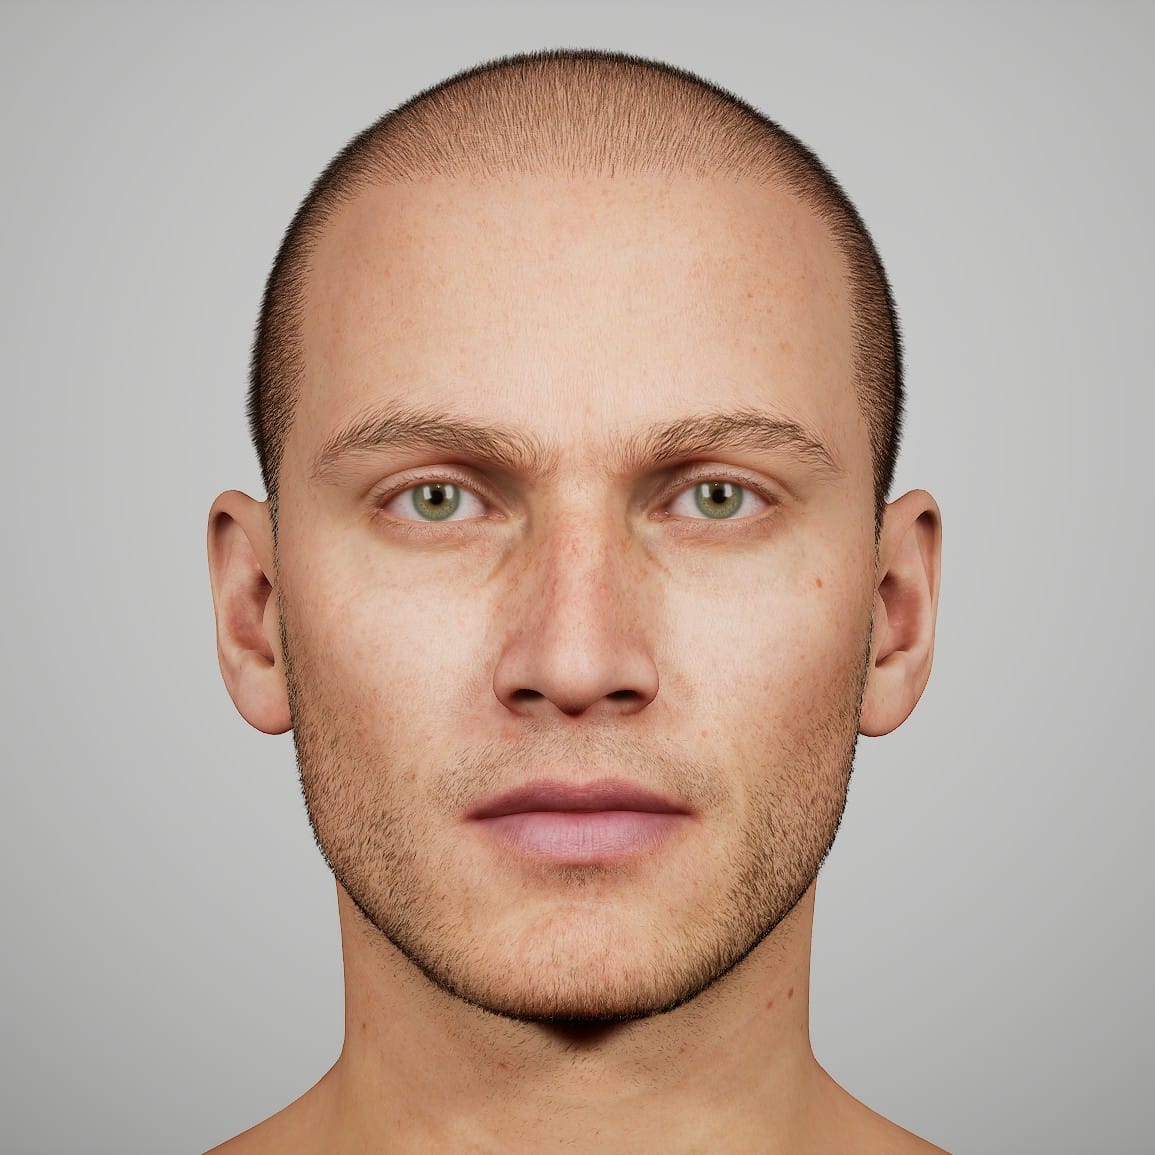
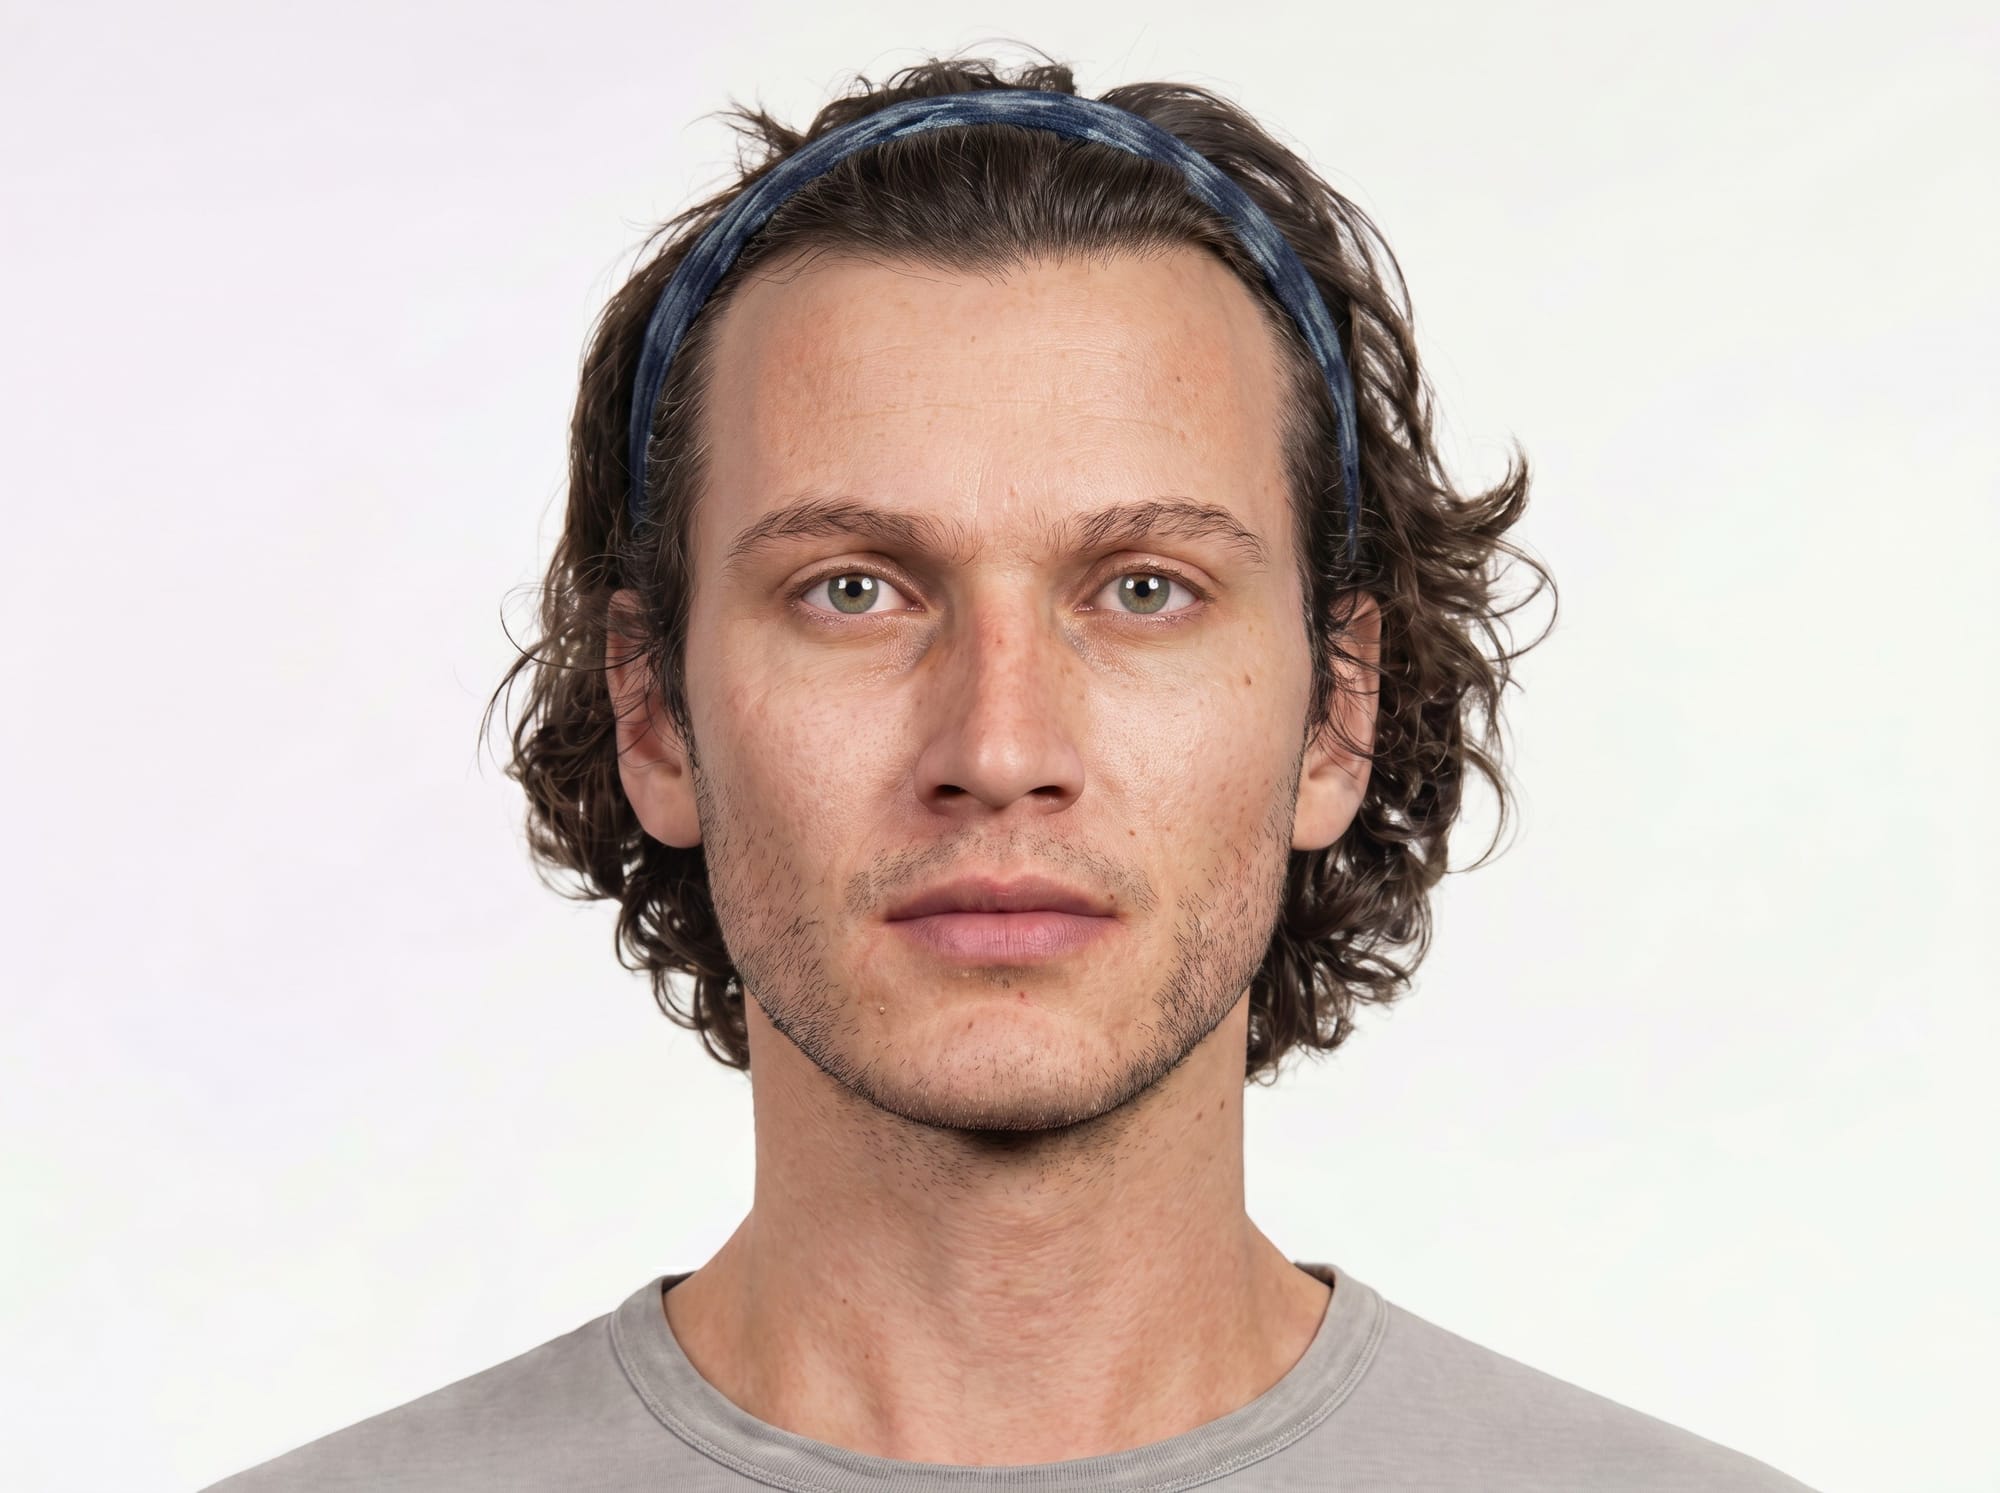
The next job was to change the face. Since AI tools have trouble with small-resolution faces, I needed a high-quality closeup for the face-swap. I cropped the full-body image up to the shoulders and then up-scaled that image from roughly 1K to 2K, again with NBP, using a simple prompt:
upscale this image. refine details. retain composition. refine textures, skin, and materials.
Here is a side-by-side comparison:
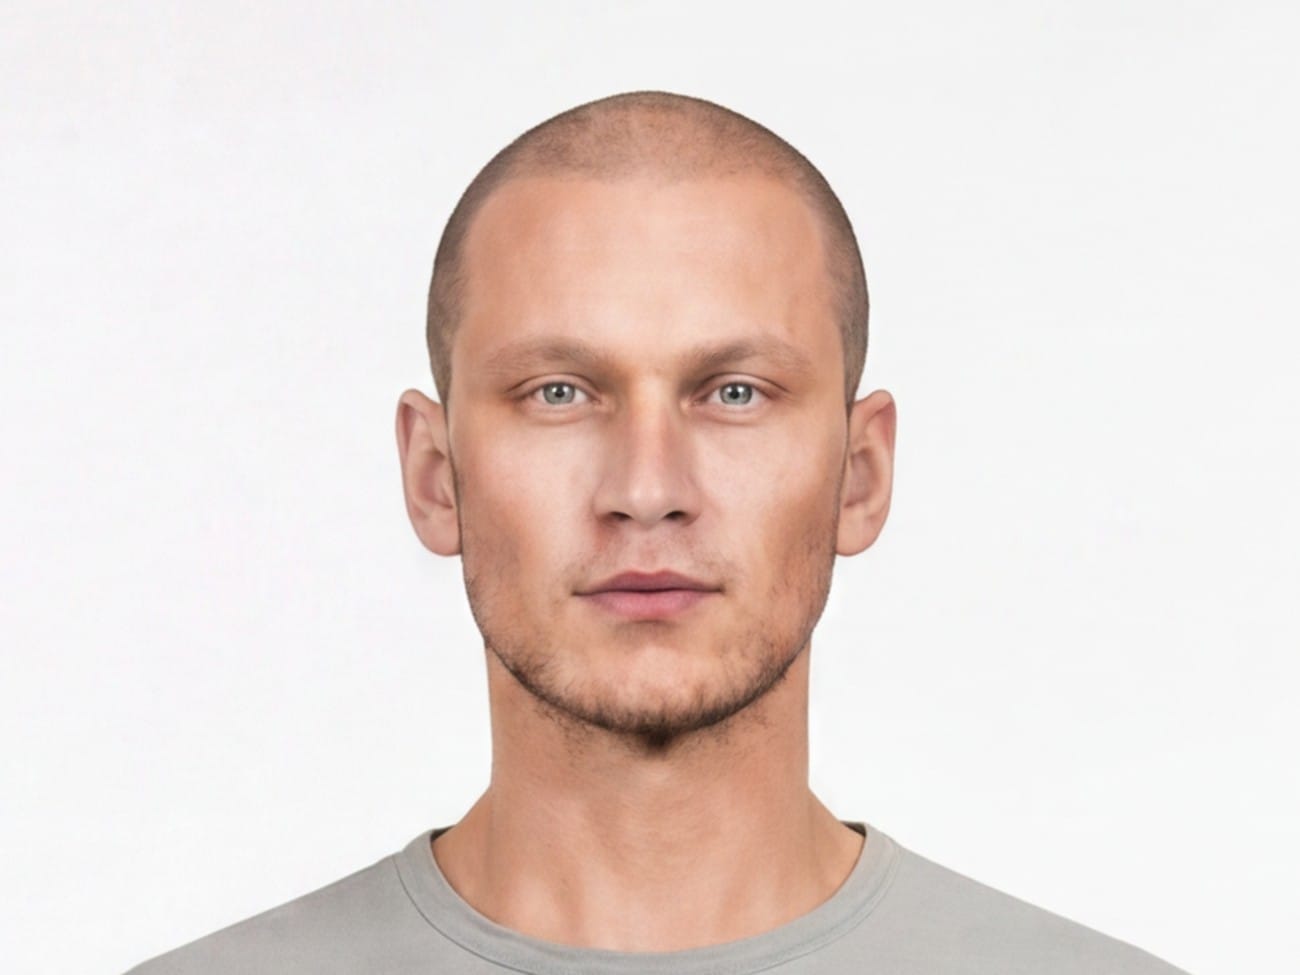

Not bad! But this face wasn't important. I would be replacing it with the MetaHuman head.
I would use AI to swap Anders's face onto the shoulders-up image and then simply Photoshop that onto the full-body image. That way I would have complete consistency between the two shots.
This lead to a new problem: to make the Photoshopping easier, I wanted the neck and shoulders in the both the shoulders-up and full-body images to match exactly. But, when you prompt NBP for a specific change, it recreates the whole image. Even if it follows your instructions and makes only the requested edit, all the pixels in the image will subtly change, as we saw with the image-degradation examples in the first section.
Platforms like Flora AI include an "Inpaint" tool that works along with NBP.
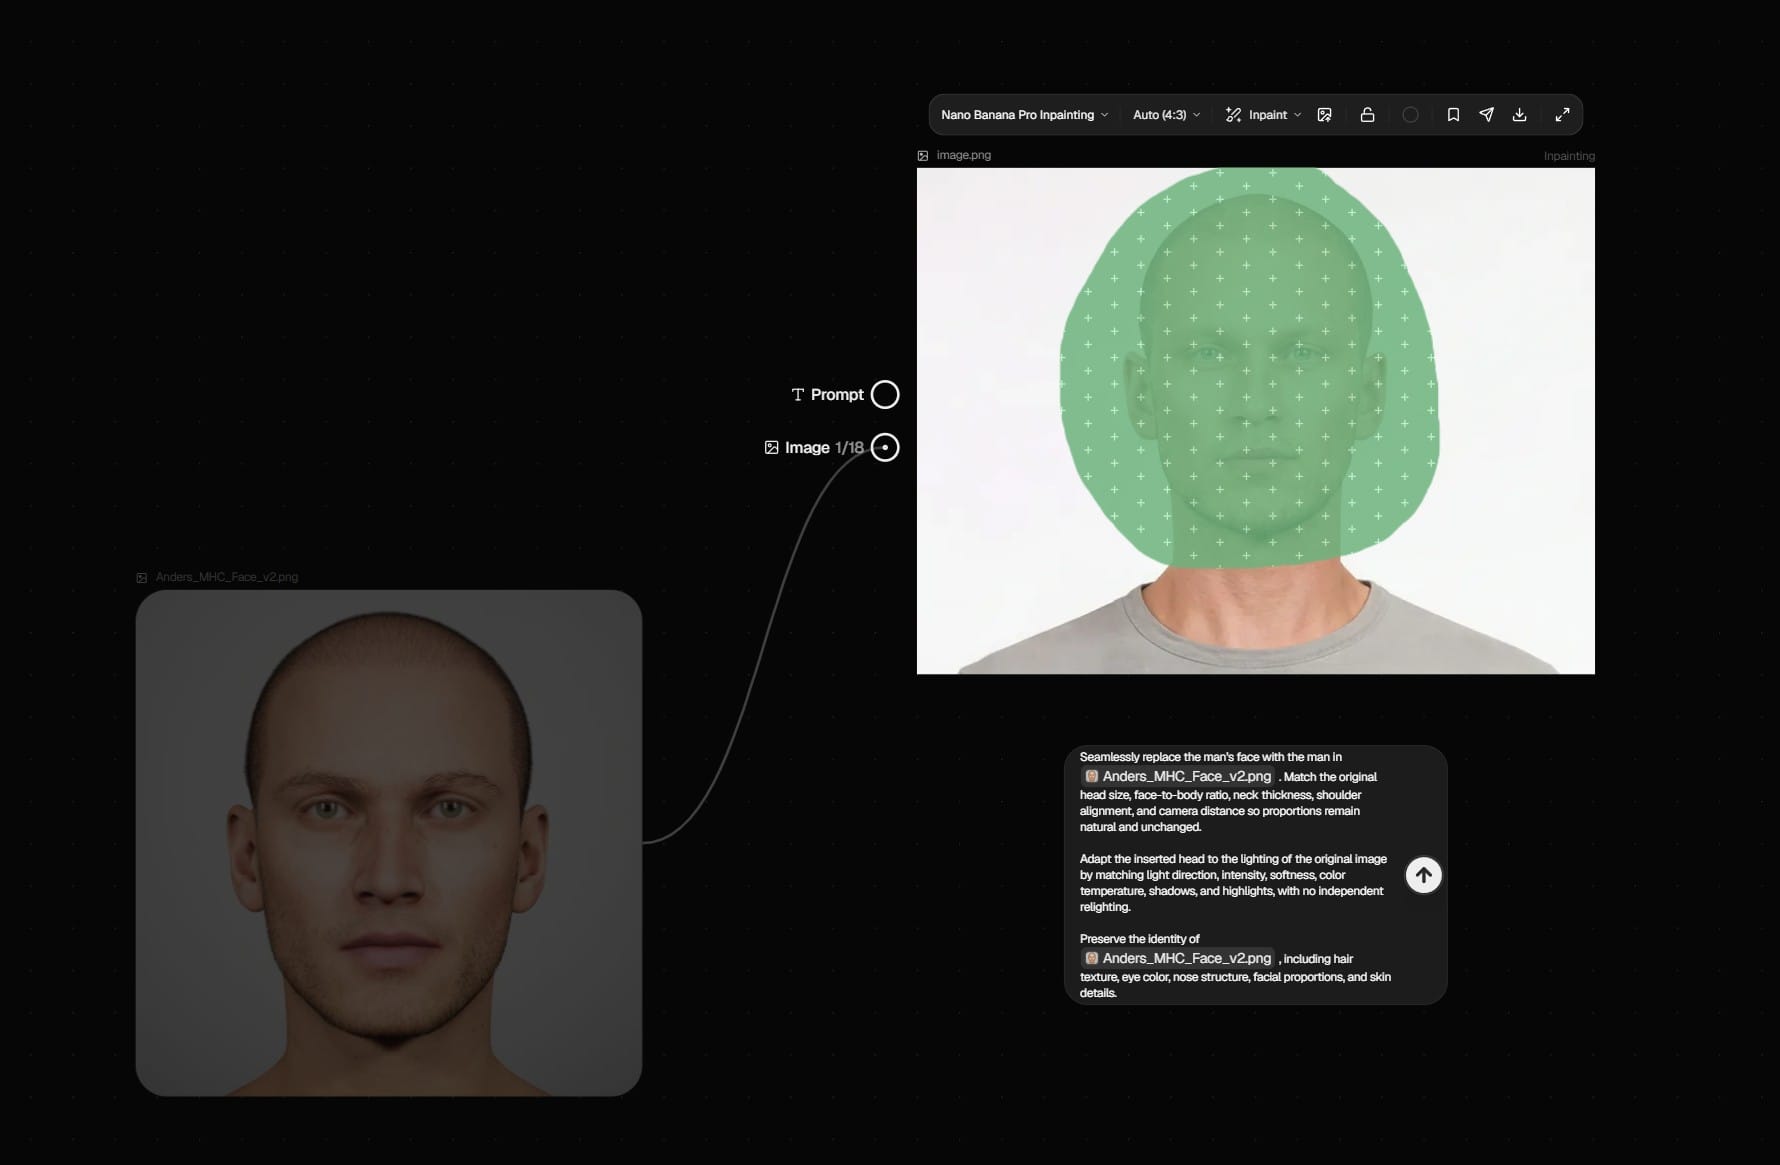
With this tool, I can paint a green mask on the image to specify the area I want edited. Unfortunately, this only seems to work as a loose guide for where to make the edit. NBP still makes slight changes to the entire image.
I wanted "true" inpainting, and found it in a ComfyUI workflow. This video has links to the workflow as well as the image model (Flux 2 Klein) and the LoRA that the workflow requires. For more about ComfyUI, there are links to some helpful guides in my last article.
Flux 2 Klein is a weaker model than NBP, but for a relatively easy face-swap like this one (a high resolution closeup, facing the camera directly, with a white background and nothing obscuring the face), it worked well. The workflow includes a node to mask a portion of the image, and unlike the NBP inpainting, this mask is actually respected. It performs the edit within the masked area and leaves the other pixels untouched:
The matching neck and shoulders made it easy to paste the head onto the full-body image.
However, I still needed to change his hair, which would require another trip through NBP. The ComfyUI face-swap workflow was built around a LoRA trained to do faces, so I couldn't use it for a hair-swap only. NBP was up to the task, but this meant accepting NBP's image-wide changes, with no way to protect the neck and shoulders. Technically, I could retry the ComfyUI face-swap after adding the hair, but...
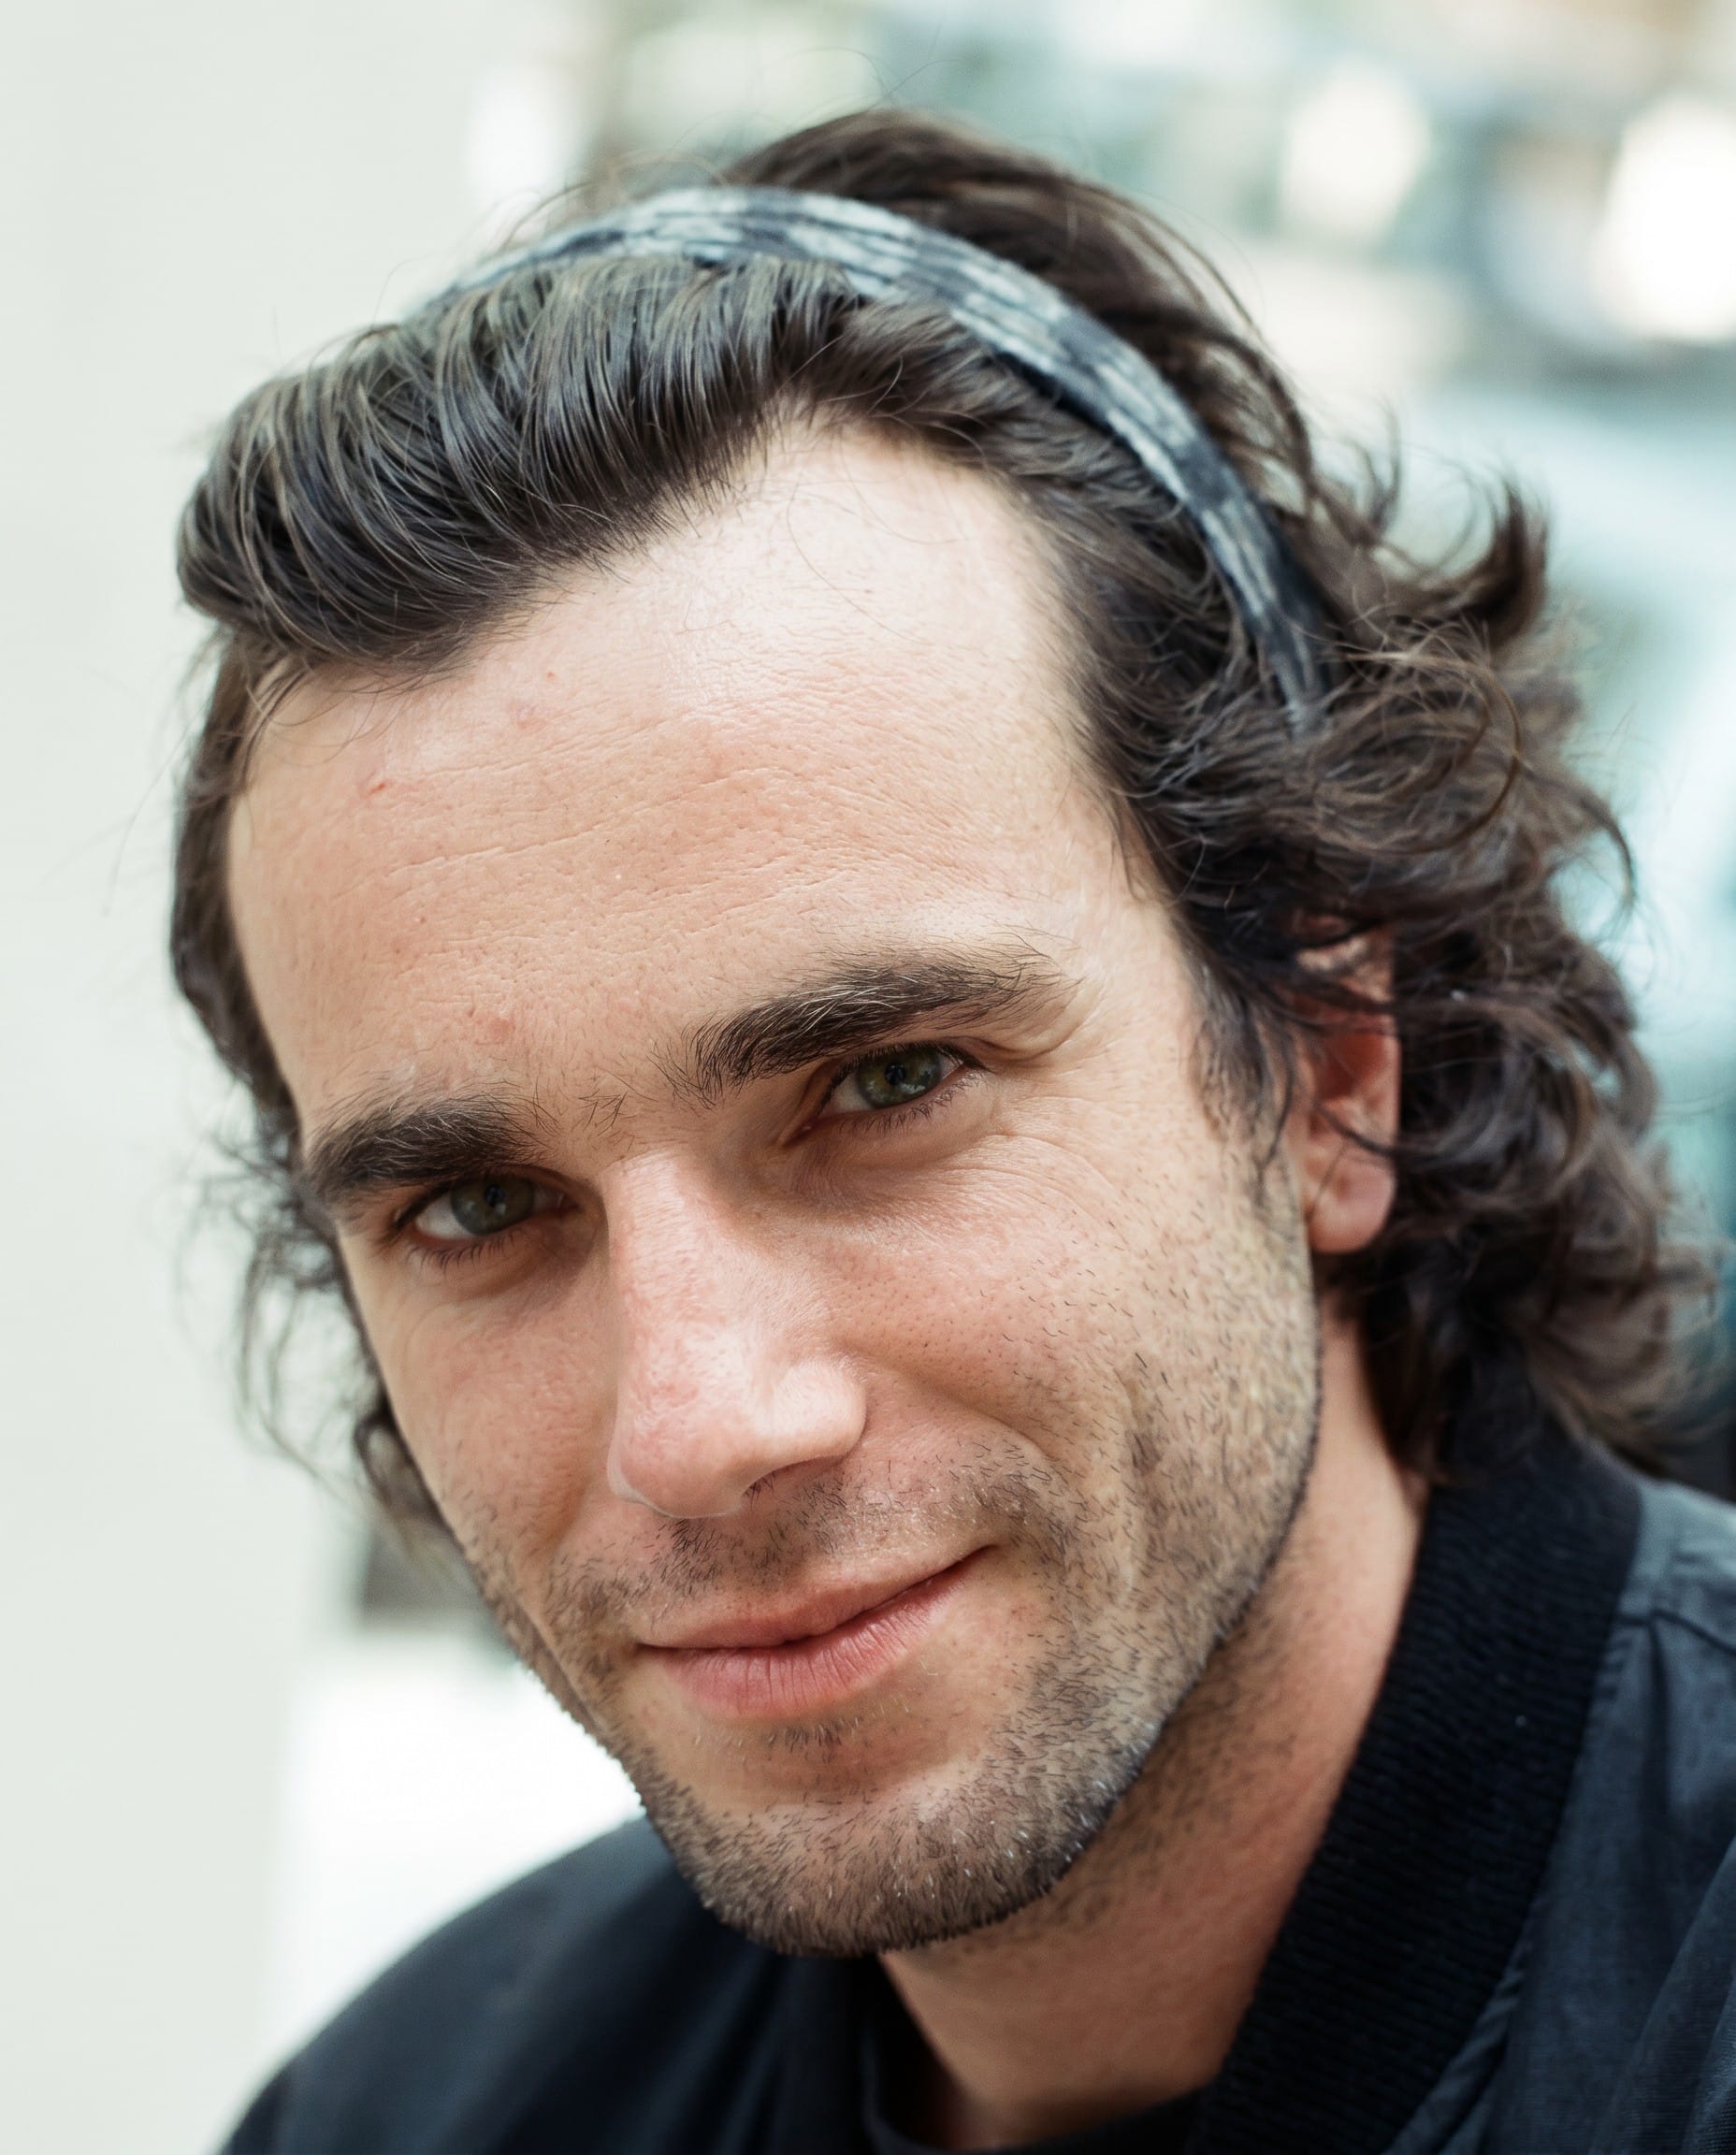
It was around this time that I noticed people blurring out the face on the full-body images in their character sheets. This is such a simple solution that it never occurred to me. I had been obsessed with perfectly matching the faces between the shoulders-up and full-body images, but if AI models have trouble with small faces anyway, why not lose the face on the full-body image and force the model to pull the facial detail from the closeup?
So, I would focus on the closeup. Working again with NBP, I gave it the following images:

And prompt:
Keep everything in image 1 the same, but replace the hair of the man in image 1 with the hair of the man in the other reference images.
Match the length and style of the hair in image 2 exactly.
Identity preservation is crucial. Match the facial features of the man in image 1.
I tried seven outputs total. One time NBP got confused and gave me this:
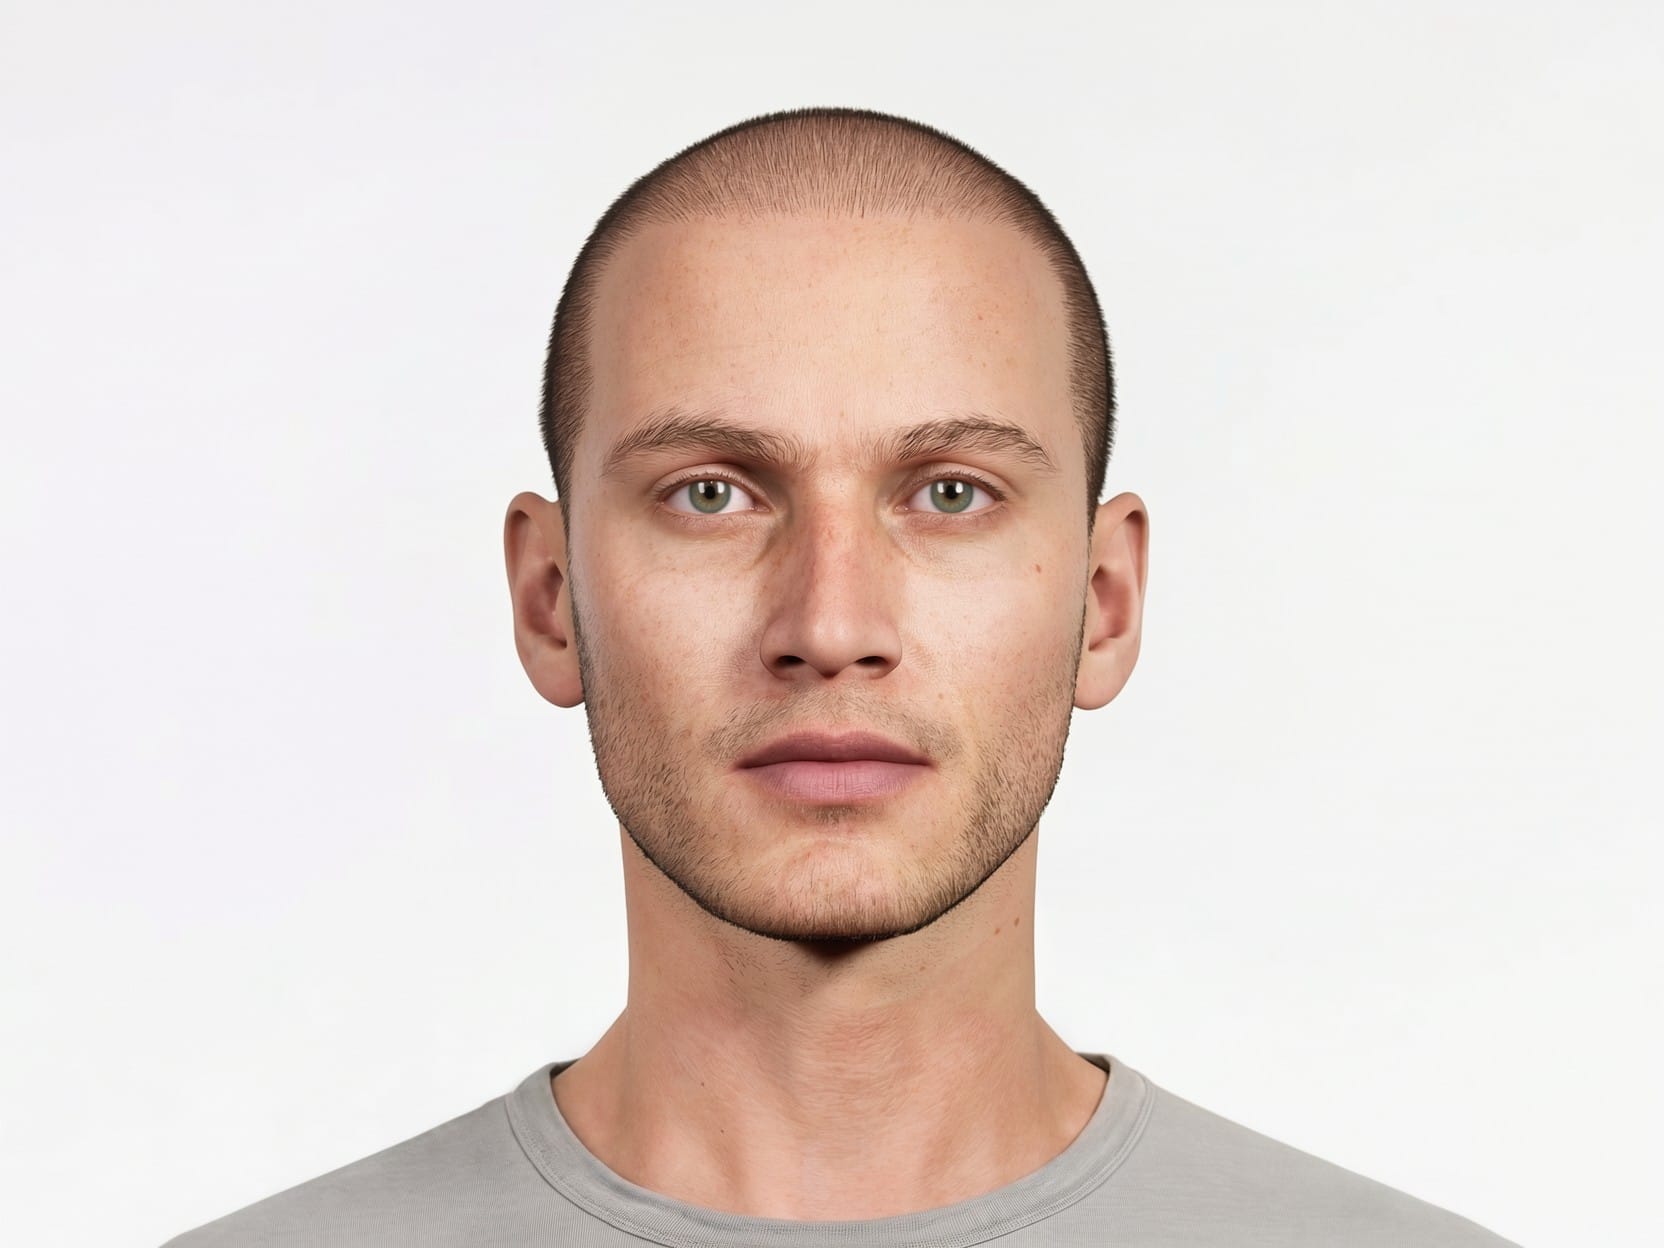
Tempting, but I chose the third output of the seven:
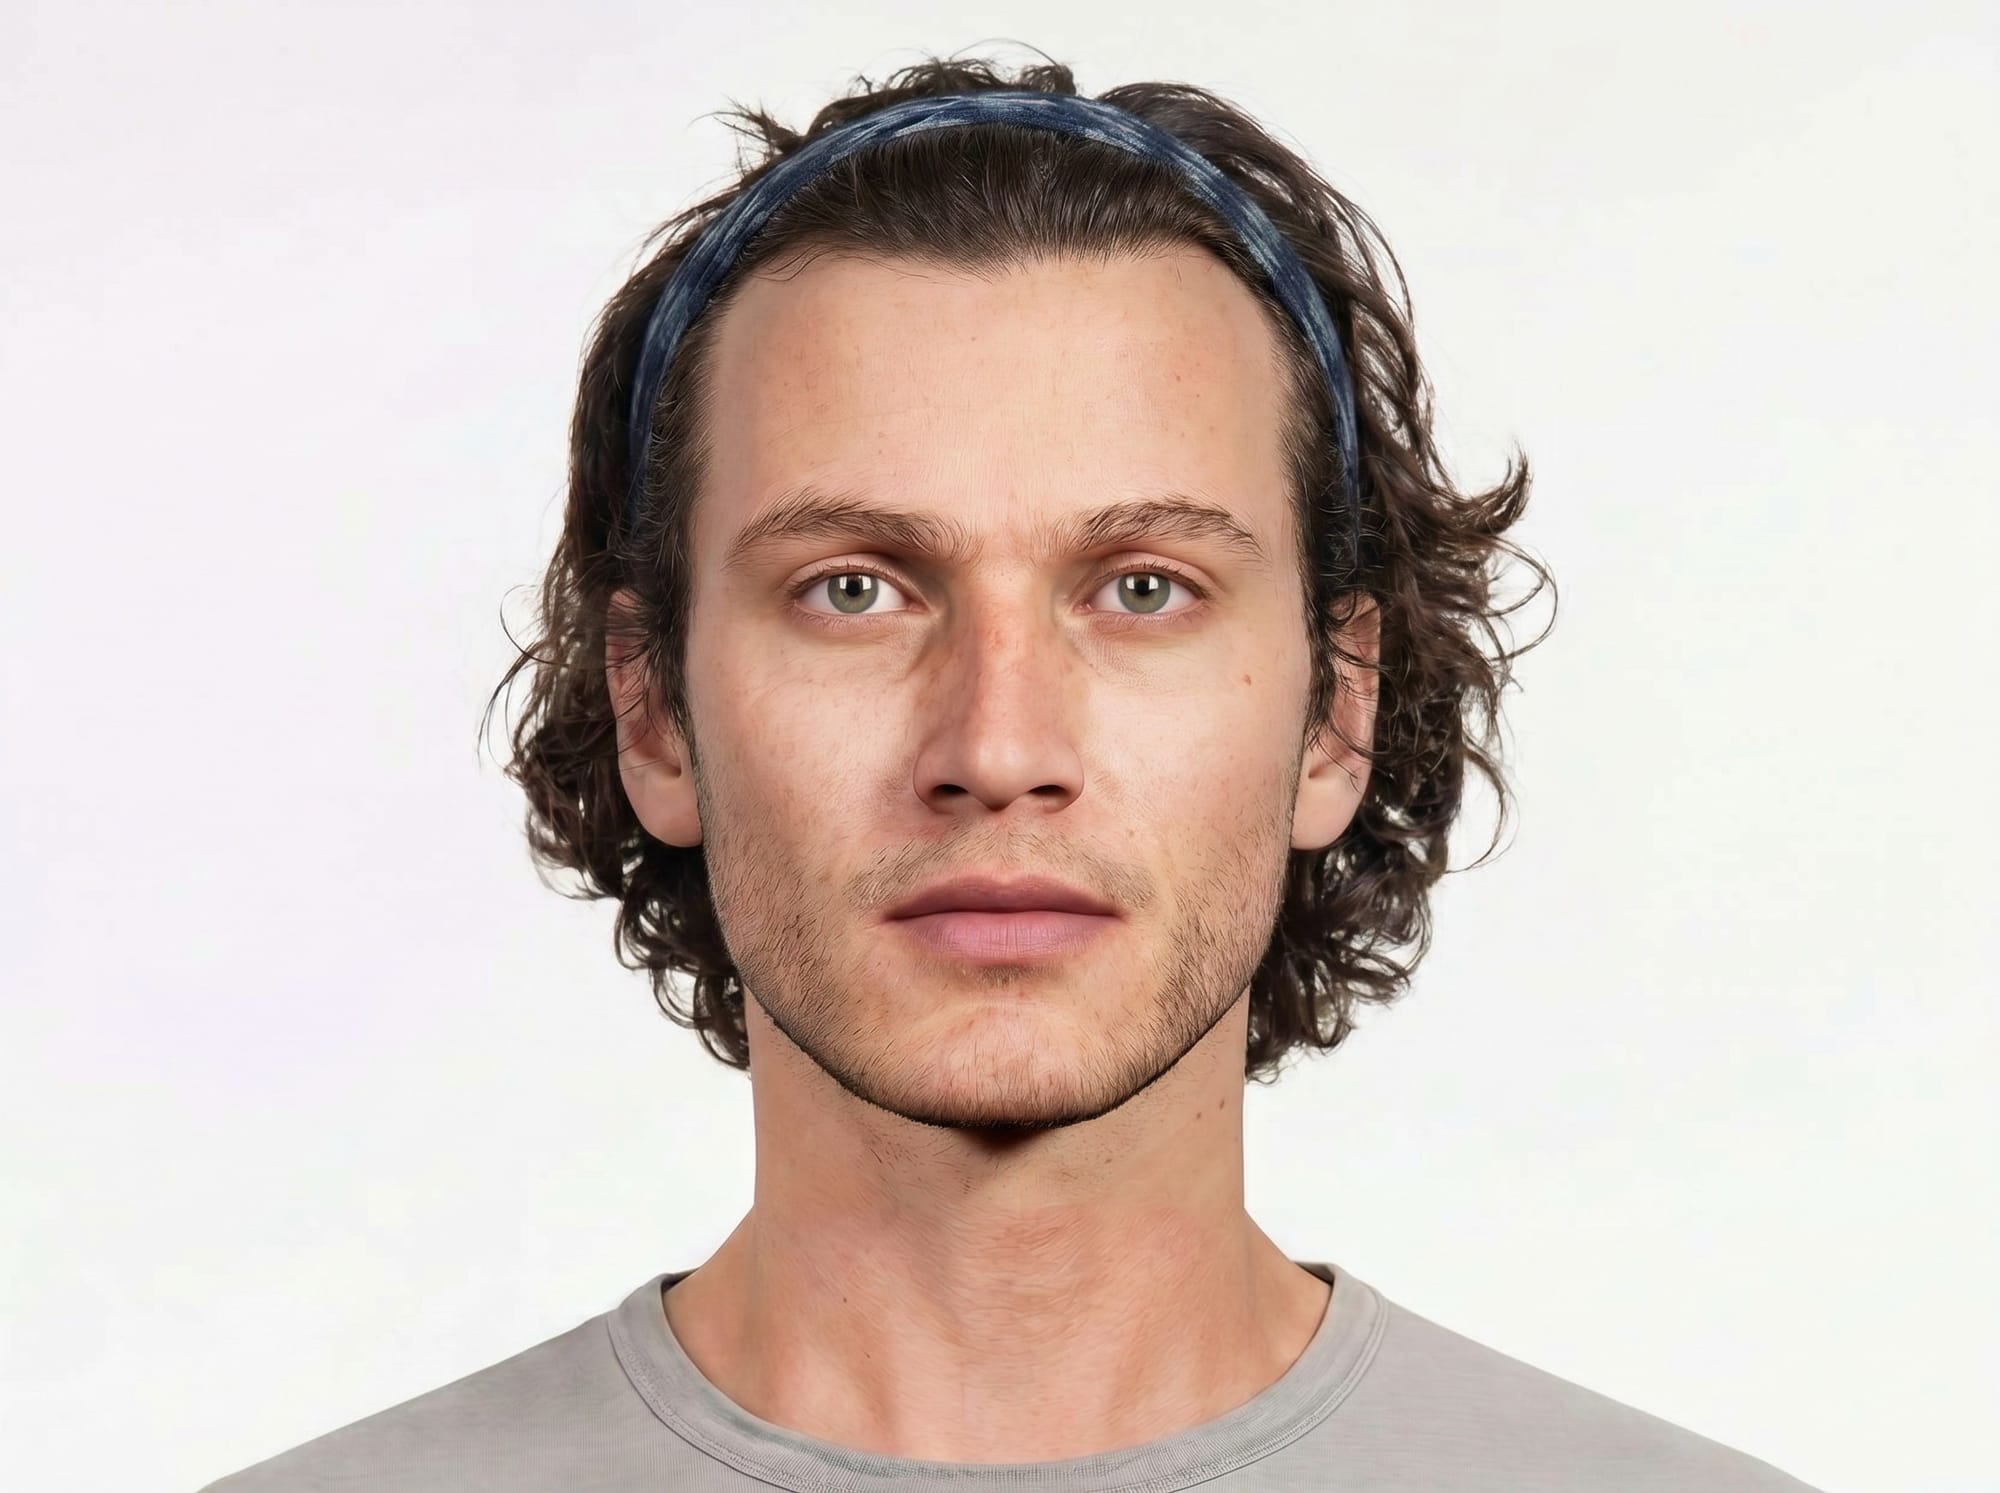
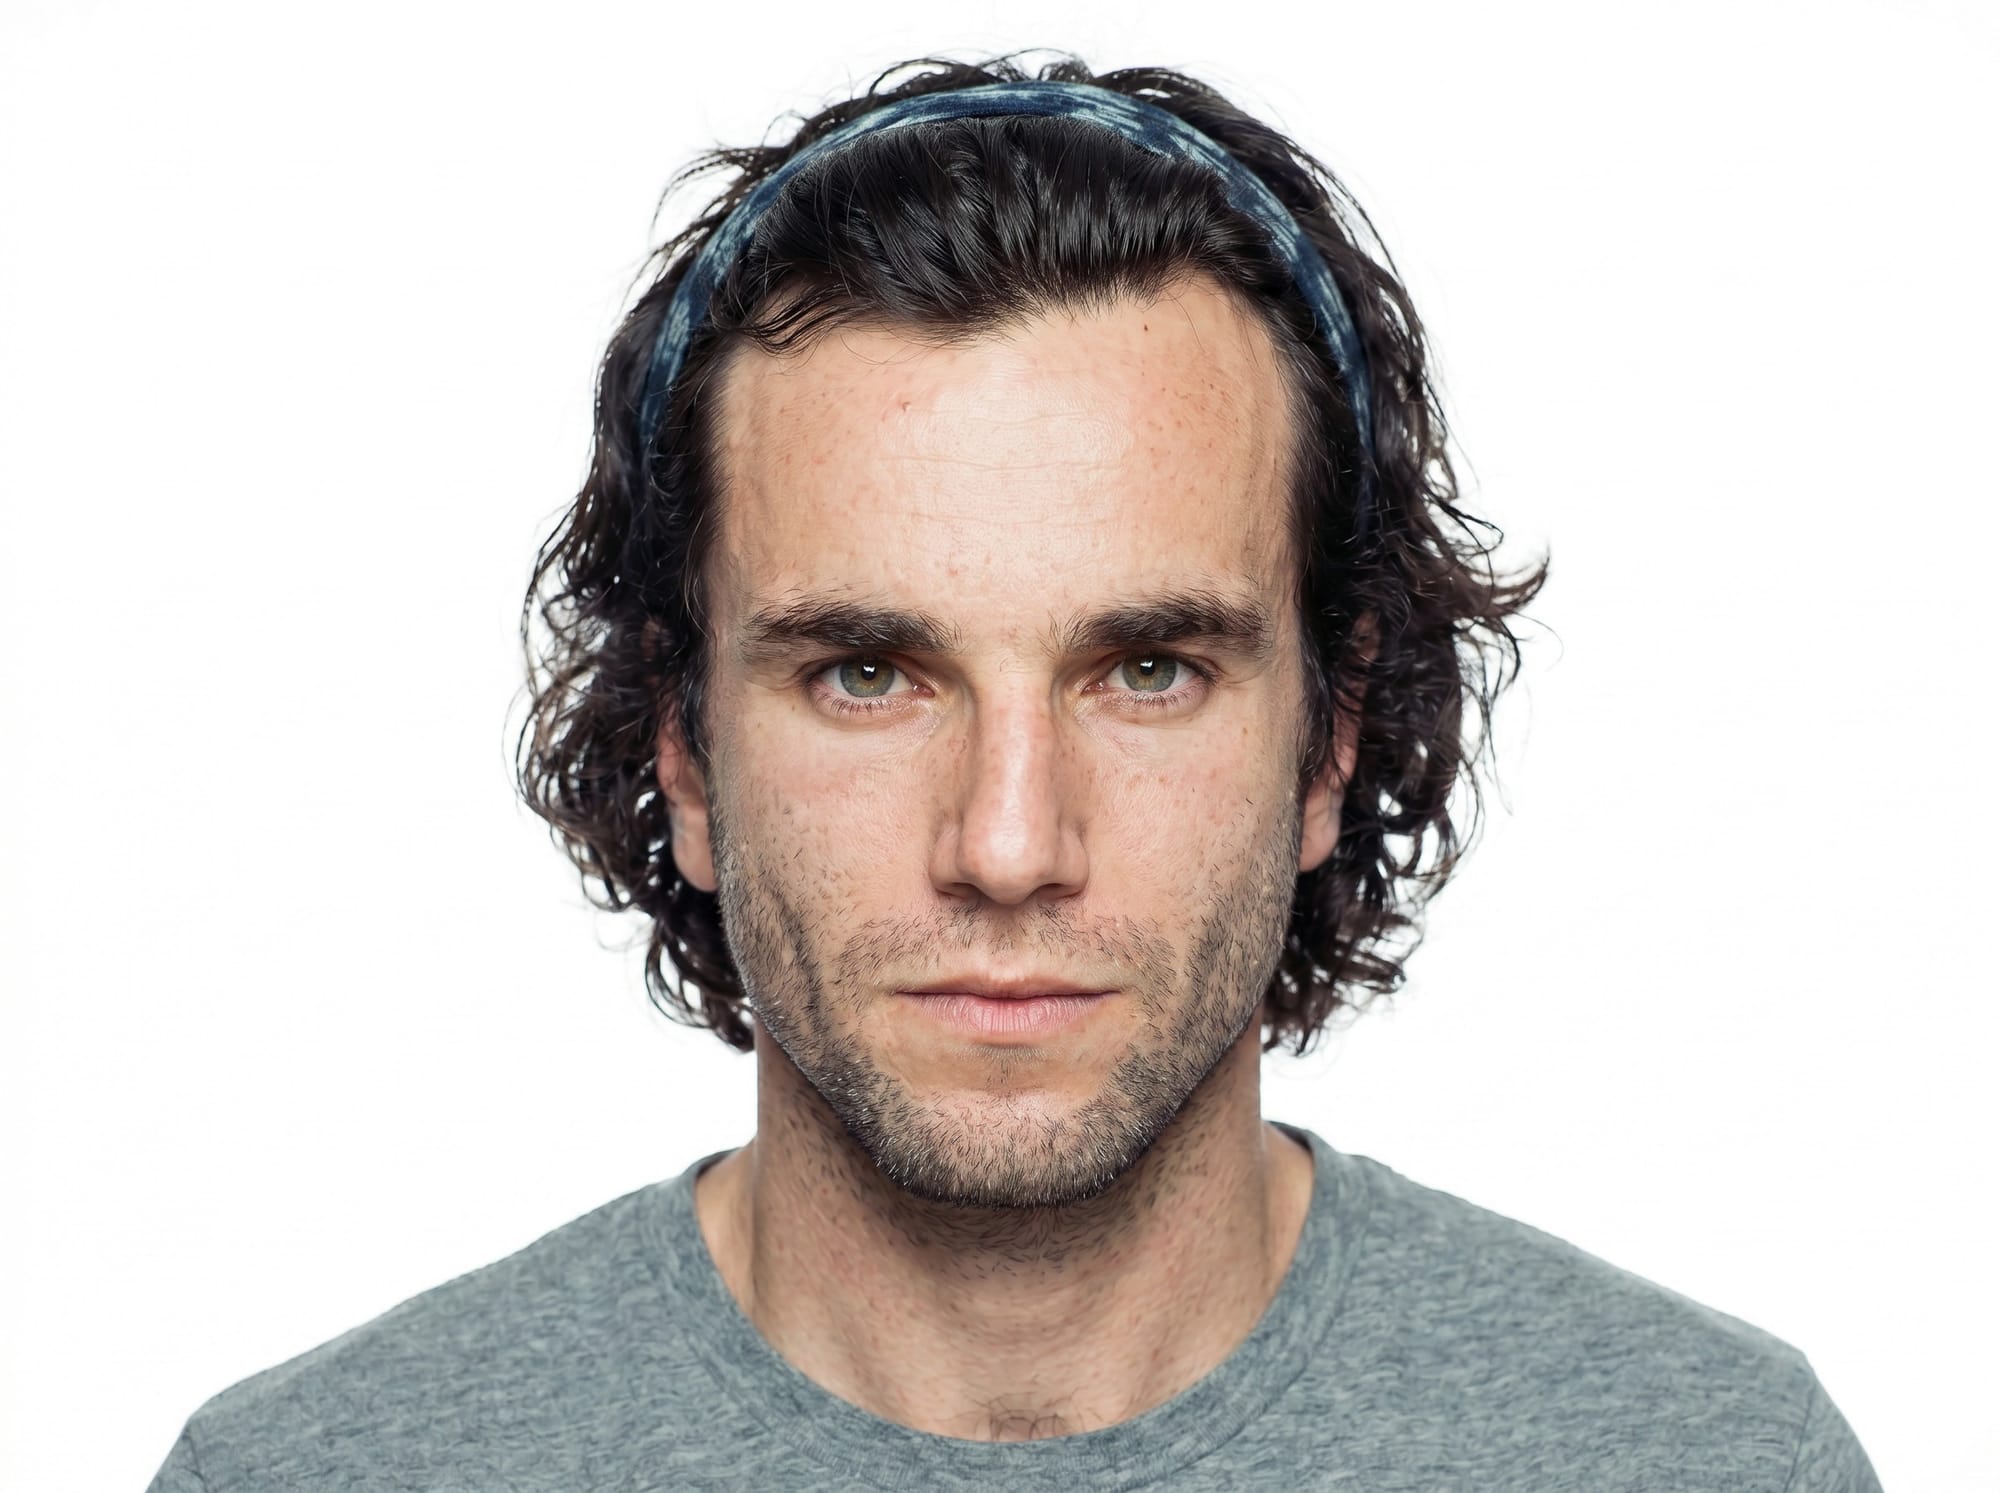
His face still looked flat to me, so I returned to NBP to enhance the details. A good trick is to manually reduce the size of the image and ask NBP to upscale the low-res version. This gives the model a bit more room to be creative. So, instead of giving NBP a 2K image and asking for a more detailed 2K image output, I shrank the image down to 720 x 538 and upscaled it with the same prompt as always:
upscale this image. refine details. retain composition. refine textures, skin, and materials.
Here is the low-res input and the 2K output, for comparison:
I repeated the face-swap process until I had all four angles from all three distances, twenty-four images total between Aneta and Anders. But, in the end, the character references I used the most were an imitation of character sheet #3 from above:

Re-Lighting
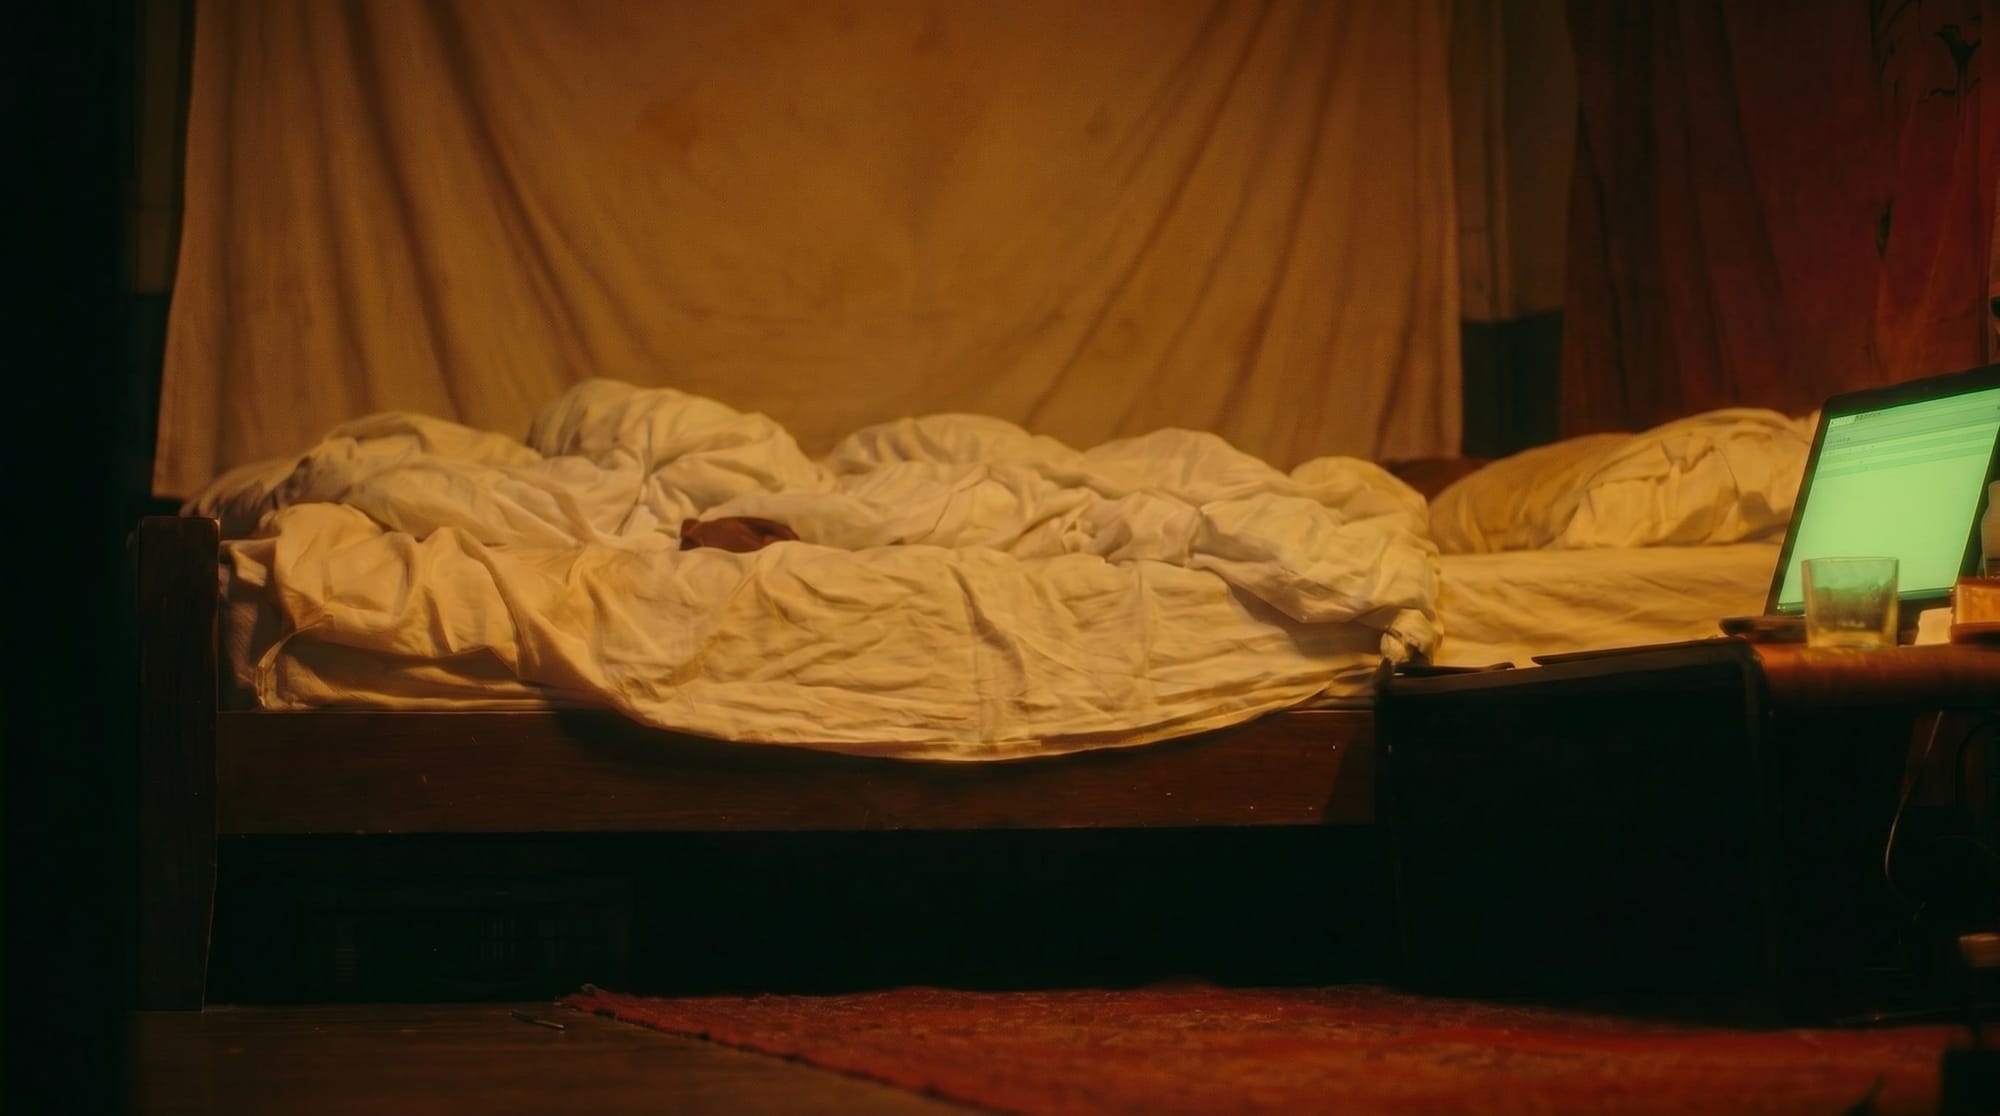
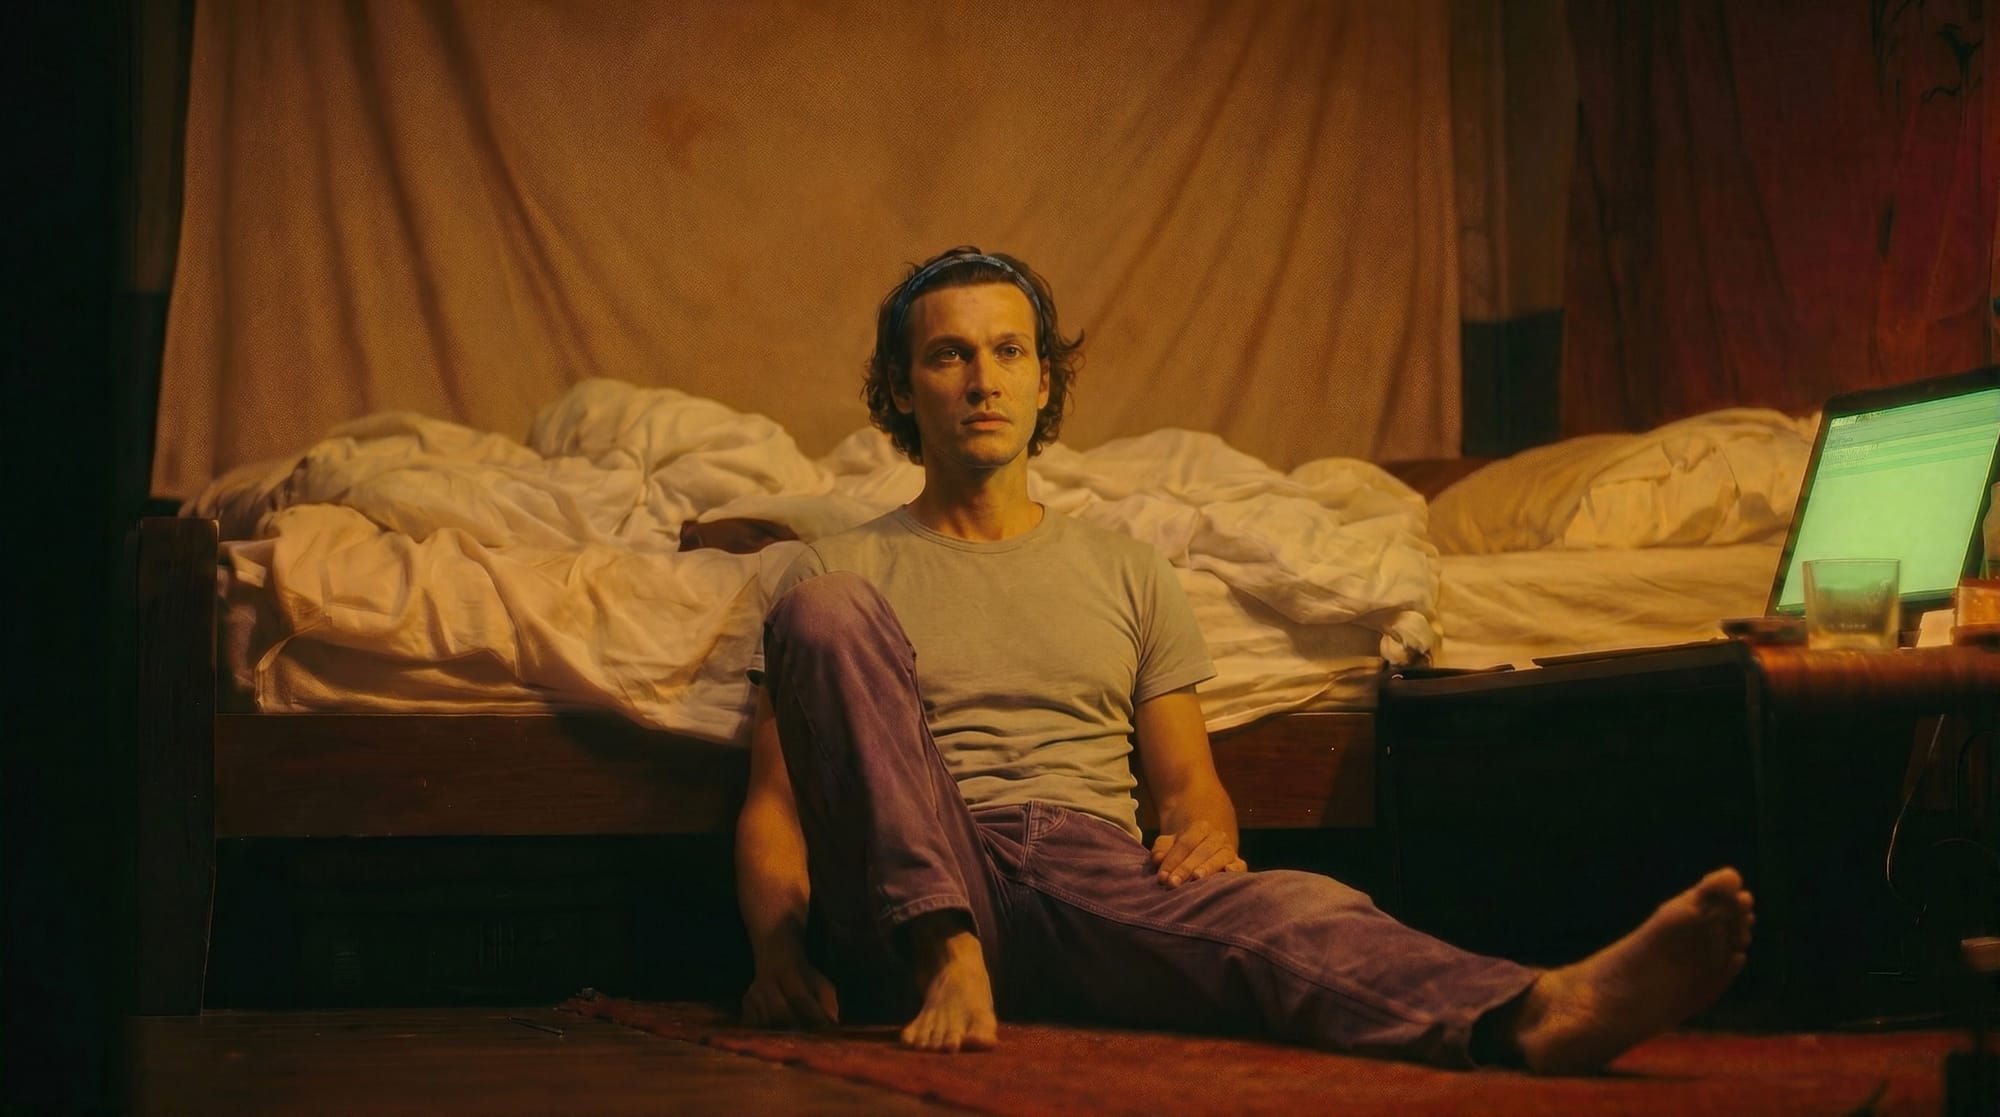
The next problem I encountered was when I tried to add Aneta and Anders to scenes with lighting drastically different from the white, diffuse studio lighting of these reference images. For example, here is one frame I was experimenting with:
Despite repeated attempts with NBP to insert Aneta and match her to the environment, the best I could get was something like this:
Not completely terrible, but not quite the mood I was going for. It seems like it's trying to preserve some of the flat lighting from Aneta's reference image.
It finally occurred to me that it might help to use a dramatically-lit character reference instead. And, I had the perfect ingredient:
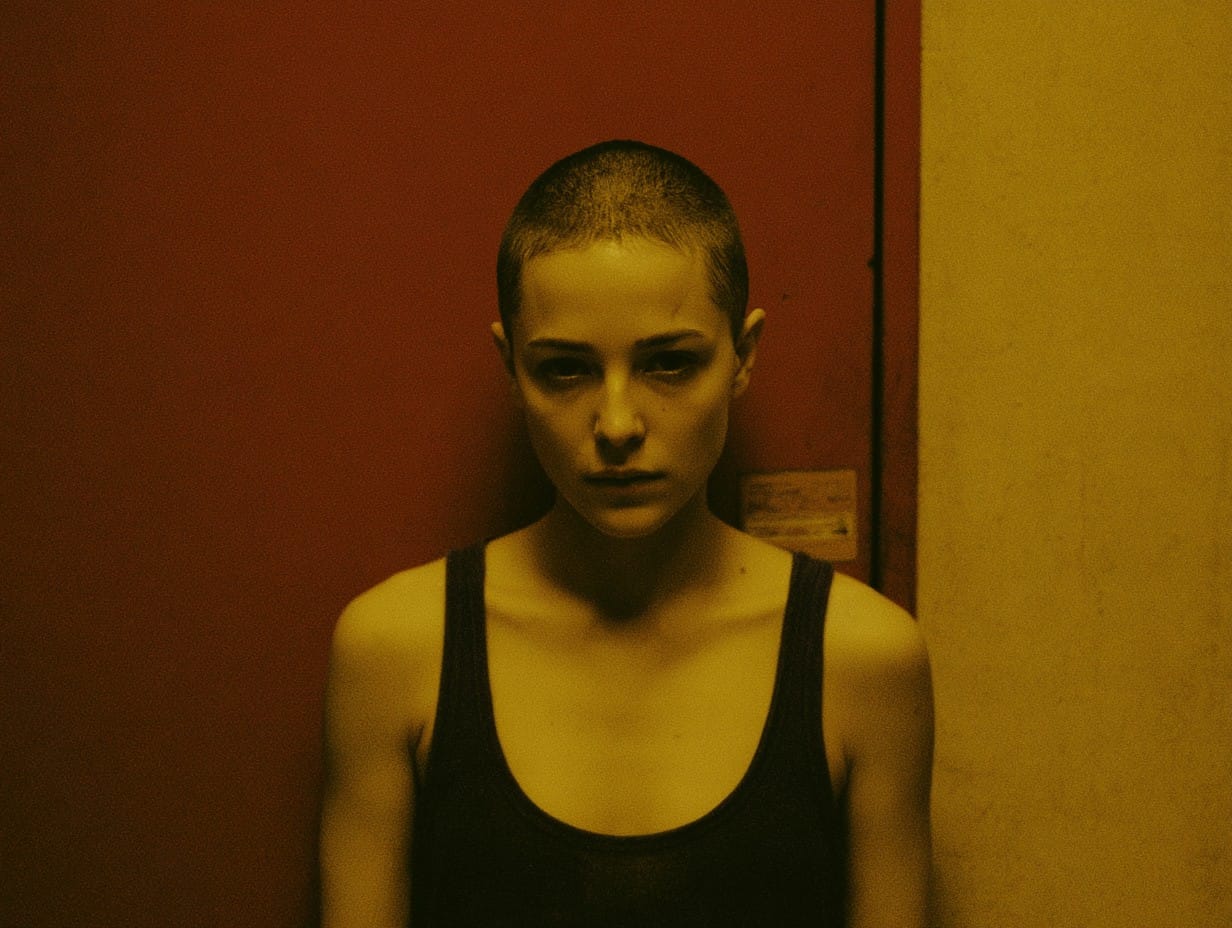
This is an image I got when I was playing around with Midjourney. The reason I haven't mentioned Midjourney yet in this article is because, as I've written previously, it isn't useful for a job like creating character sheets. Midjourney can't make specific edits or preserve a character or scene across multiple generations. You can give it reference images and specific instructions, but it will reinterpret them on every output. For example, I used the same prompt dozens of times, asking for a woman in a tank top with a buzz-cut and dark eyes, and this particular woman only came up once.
Anyway, first I tried asking NBP to relight Aneta's bright studio images to match the Midjourney image. That strategy didn't work, but in typical NBP fashion, on one attempt it went completely off the map and made this:
Instead of giving me Aneta's scene with new lighting, it re-imagined the Midjourney scene in brilliant detail. My working hypothesis had been that NBP will unavoidably dilute an image's beauty, so this output surprised me. Maybe the Midjourney image was so aesthetically potent that straining it once through NBP hit the sweet spot.
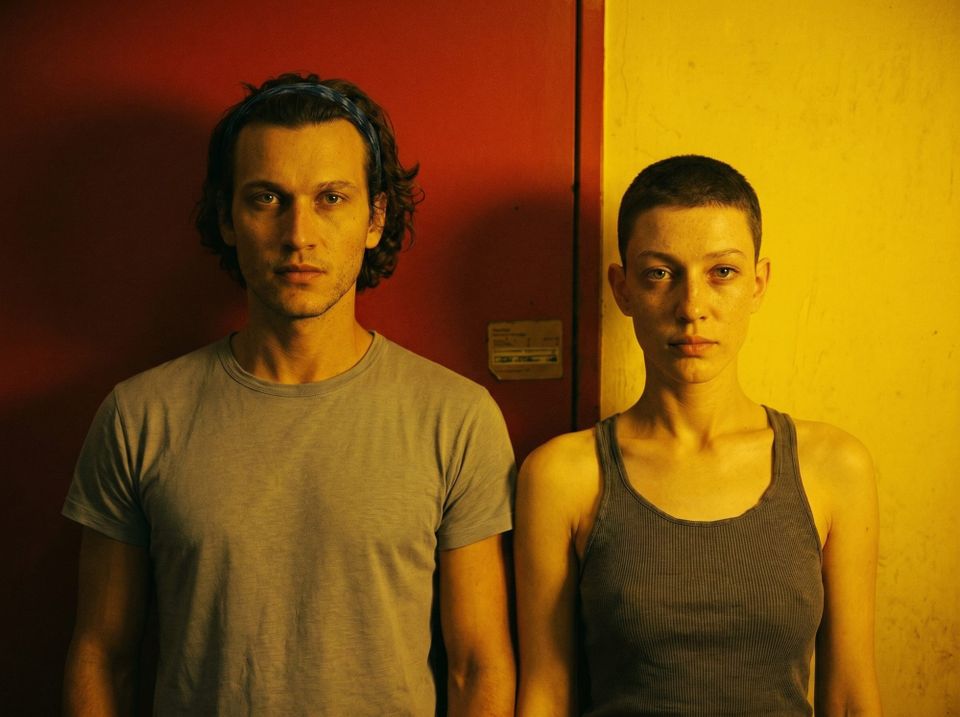
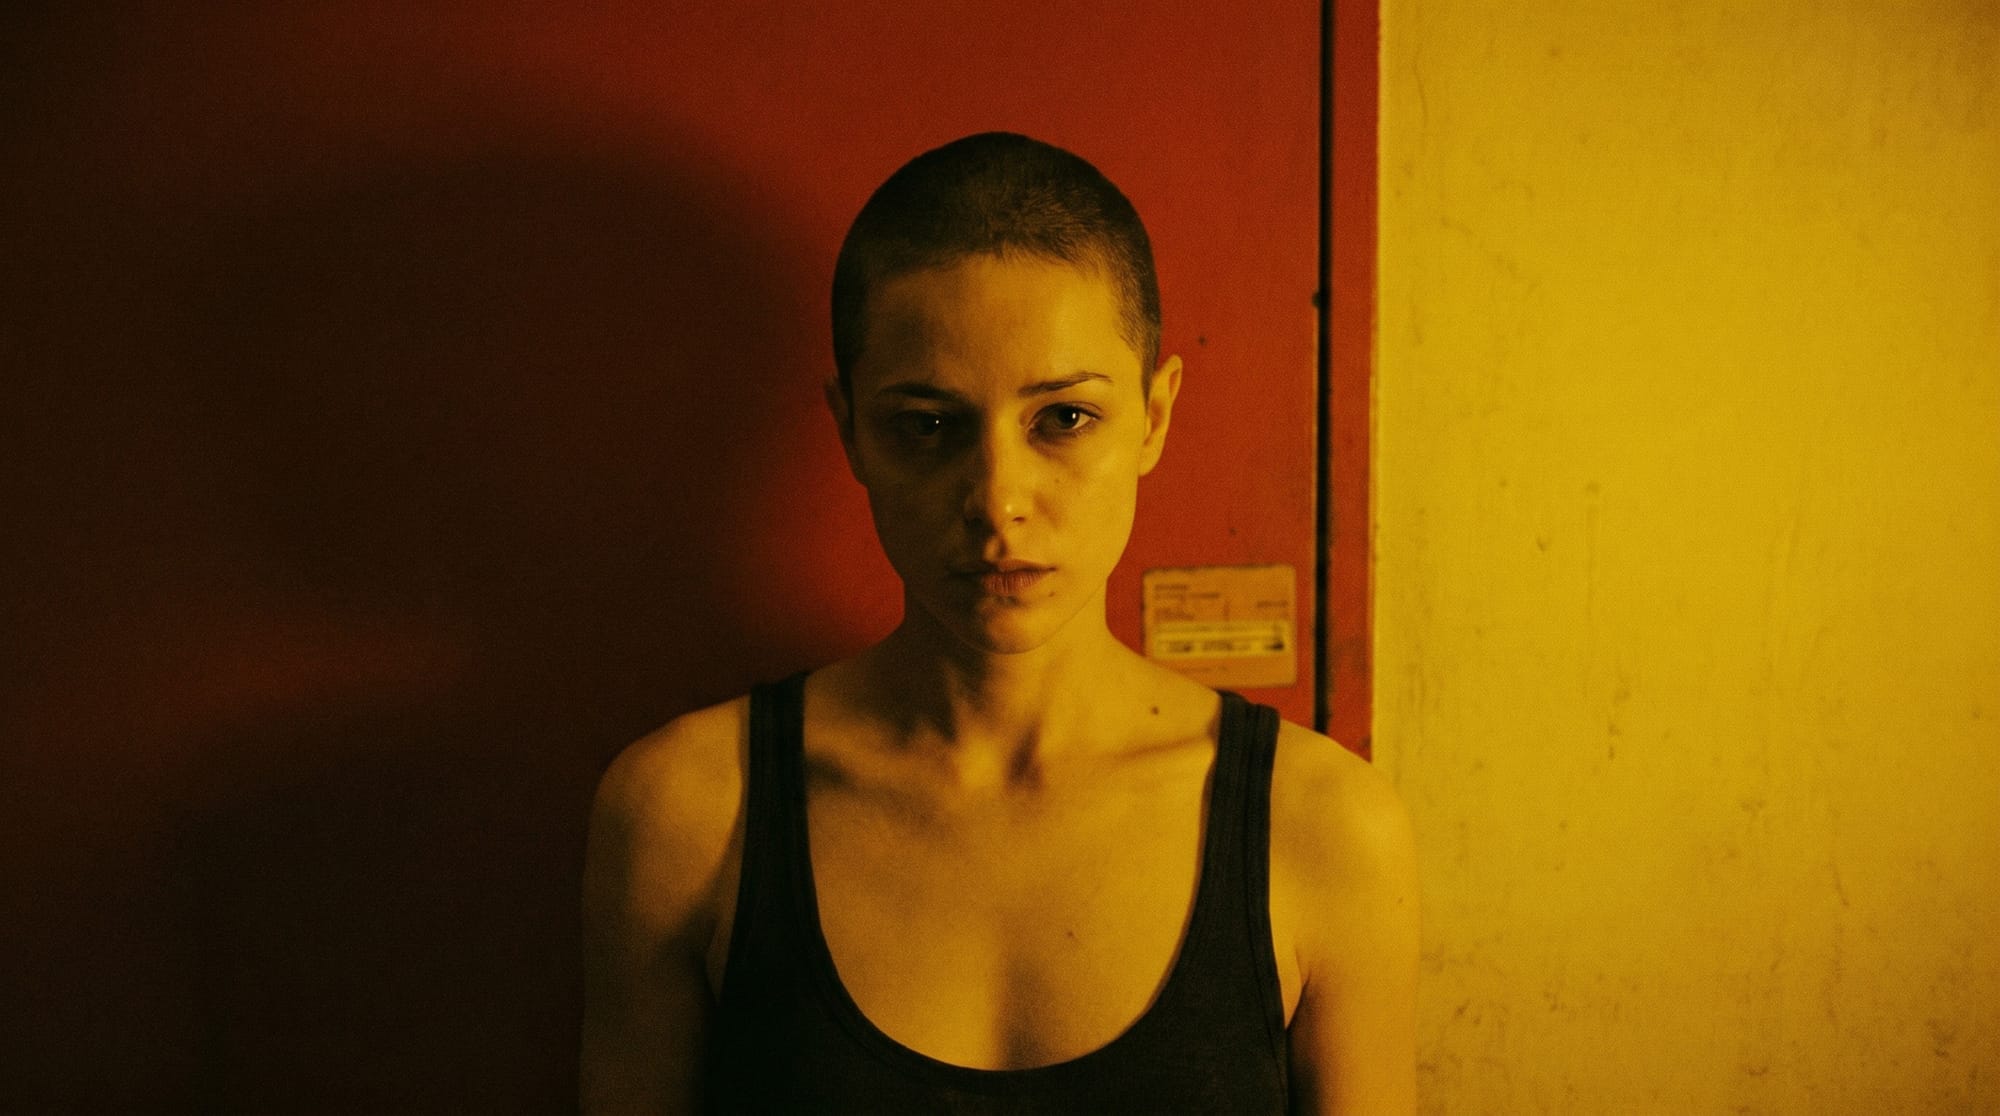
This time, I got an idea. Rather than trying to relight Aneta's studio images to be more like the red and yellow scene, I would just ask NBP to put Aneta inside it.
The fact that NBP was able to swap Aneta into this scene but not the previous one suggests that it helped to have a person already in the scene for NBP to reference. So, in theory, if the frame with the monitors and computer equipment had an appropriately-lit person in it from the start, I could have avoided this step.
Still, with this new character reference, NBP was able to do this:
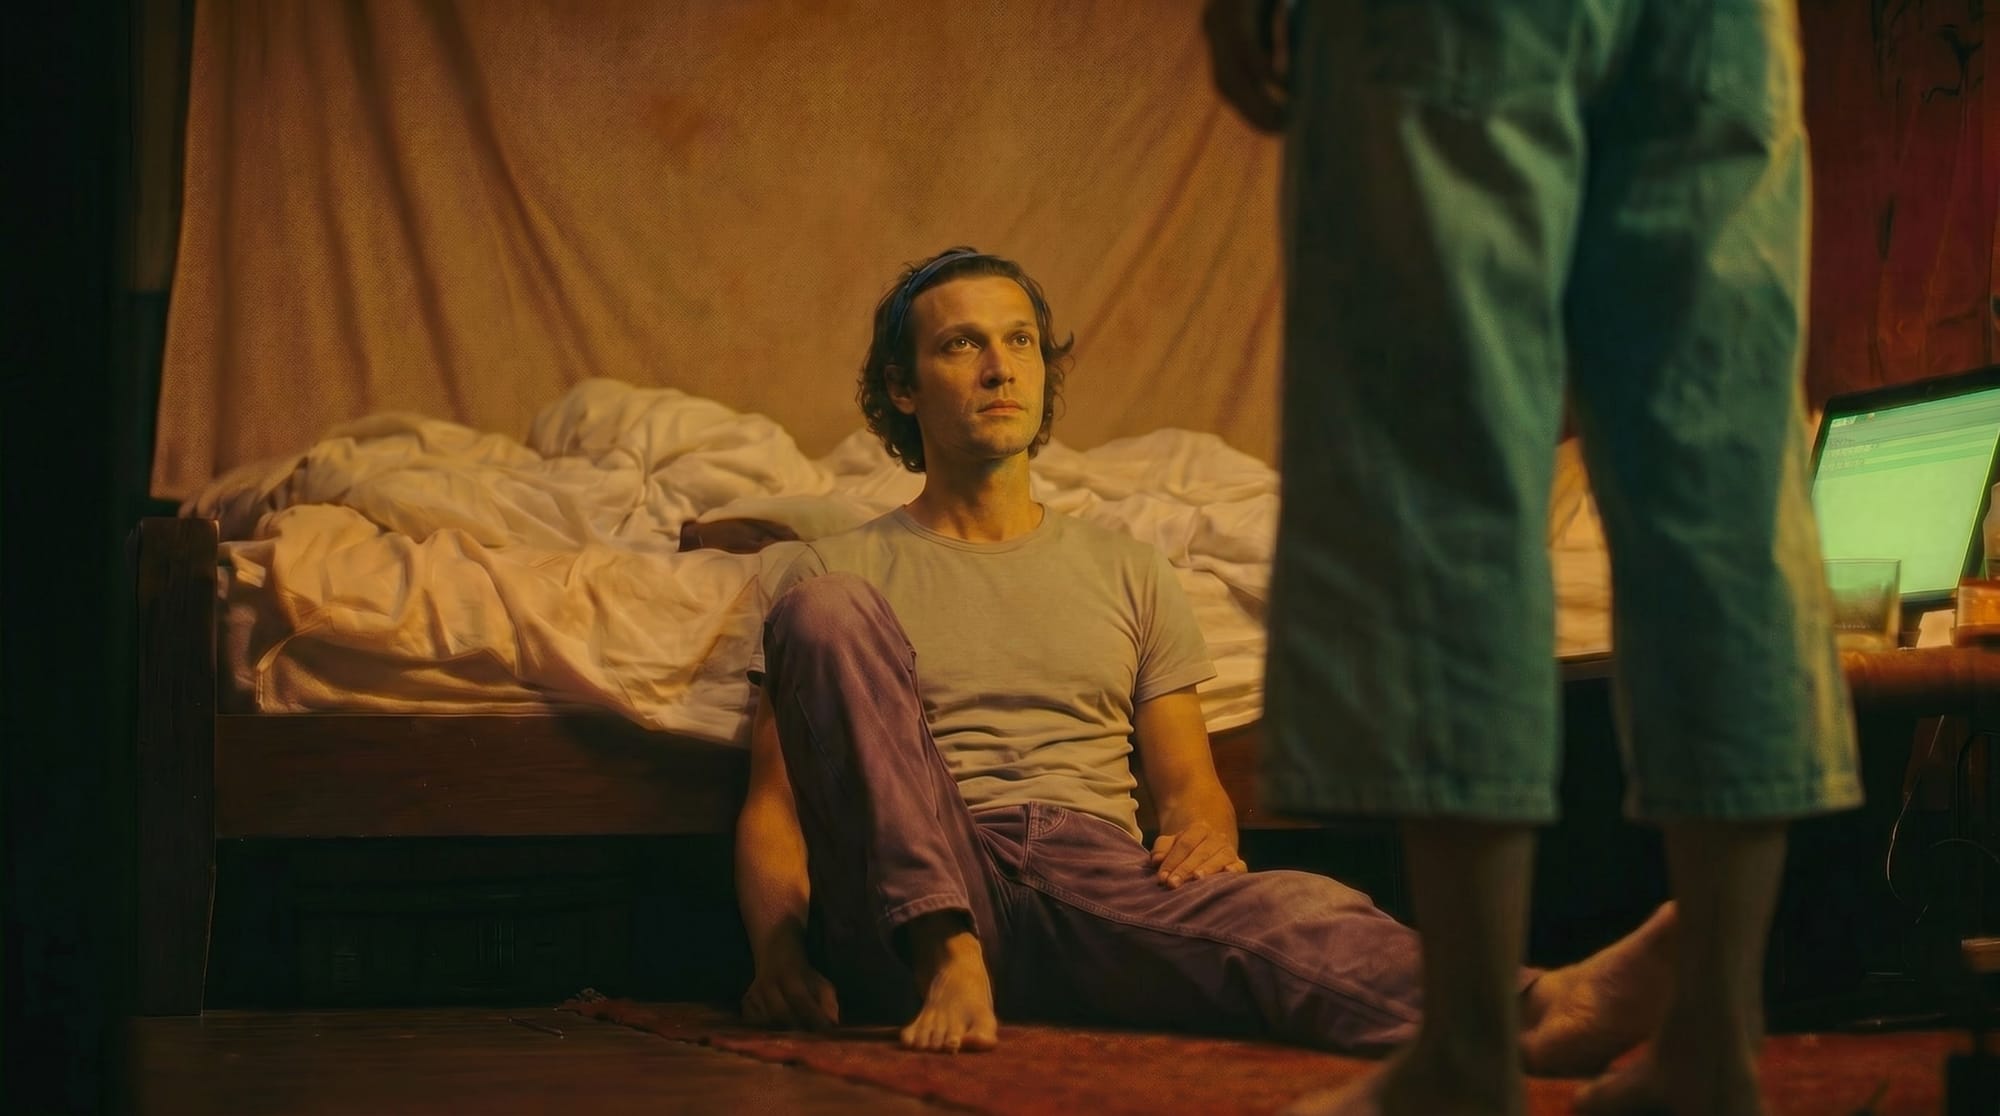
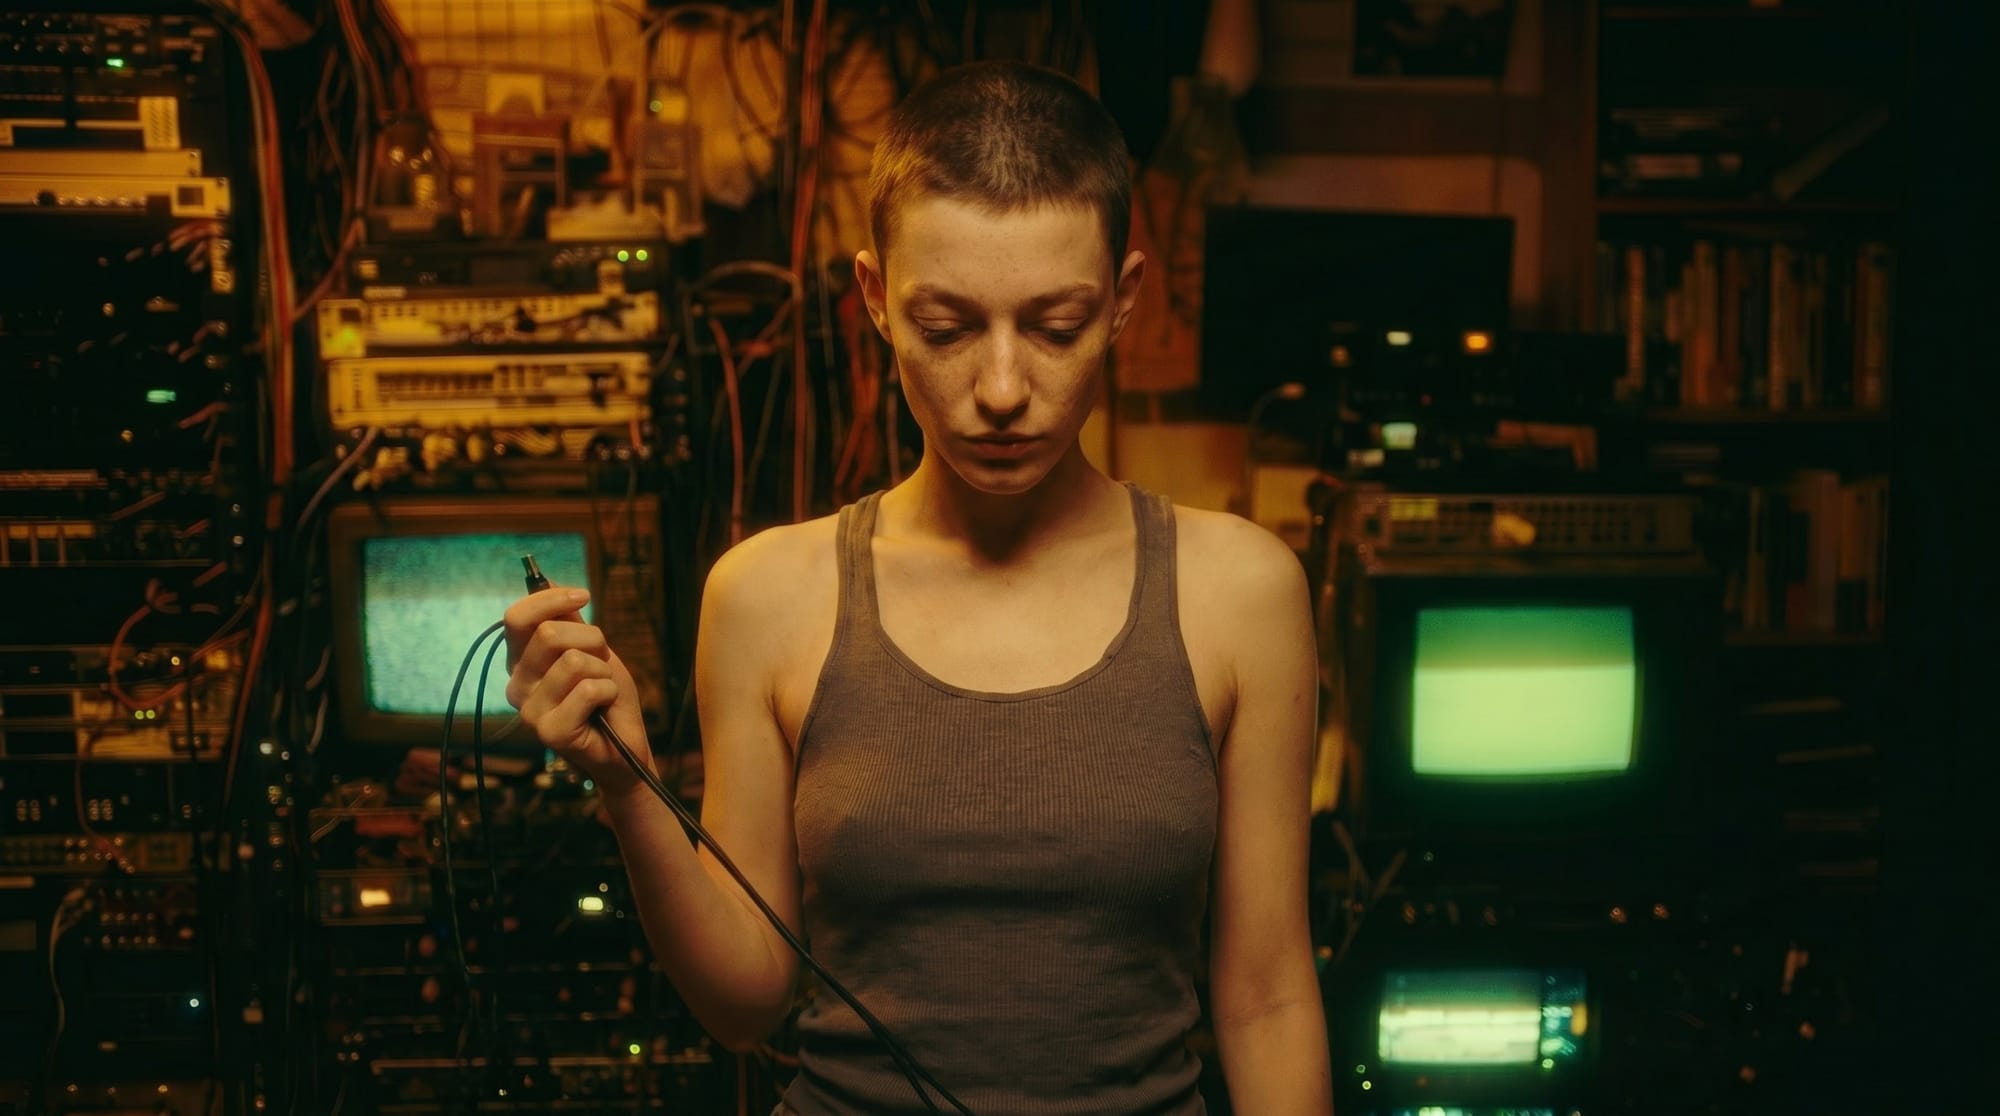
Finally, I was ready to try a video generation. Along with this image and the same re-lit Aneta character reference, I sent a prompt to Seedance.
Preserve the framing, lighting, and composition of image 1.
Action: The woman in image 2 steps into the frame from the screen right foreground. We can't see her hands yet, but she is pulling two cables along with her, and gives them a quick jerk to make sure they are slack. She is looking down at a person outside the frame, like in image 1. She holds up the two cables in her right hand, like in image 1.
The camera does not move. Keep the exact framing of image 1.
Preserve the style and lighting of image 1 exactly.
Preserve the facial features, hairstyle, body proportions, clothing, and skin tone of the woman in image 2. Match them to the lighting and style of image 1.
This was my favorite of the six outputs:
Relinquishing Control
Building these character references was a worthwhile experience, but to me, the most exciting moment was when NBP went off-script and enhanced the Midjourney image. This experiment changed my mindset. I need to work in the space that produced that shot.
As long as AI tools drain the life out of images with every edit, I probably can't make the Sub/Object short movie exactly as I imagine it. But, if I'm open to exploring entirely different styles and formats, there are avenues available to me. I'd have to let Midjourney and NBP do what they're good at. I could harvest raw material from Midjourney and step on it only once or twice with NBP, then make do with the results.
This could mean shorter-form videos, and a new look for Aneta and Anders.